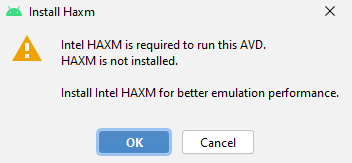
My PC is: Intel(R) Core(TM) i5-10400 with UHD Graphics 630, and motherboard is MSI H510M-A PRO (MS-7D22) (U3E1)
I spent a couple of days working on this problem since none of the solutions provided here (and other placed) worked for me. I was able to find a solution following this clue from the actual haxm GitHub repository.
There we read:
HAXM was created to bring Intel Virtualization Technology to Windows and macOS users. Today both Microsoft Hyper-V and macOS HVF have added support for Intel Virtual Machine Extensions. We have therefore decided to retire the HAXM project. HAXM v7.8.0 is our last release and we will not accept pull requests or respond to issues after this.
ANSWER: What this is basically saying is that we need to fully enable Hyper-V to make this work, since the HAXM technology, as far as 2023, has been FULLY INTEGRATED into Windows. And the intel/haxm repository is archived.
MORE ON THIS
1) The error
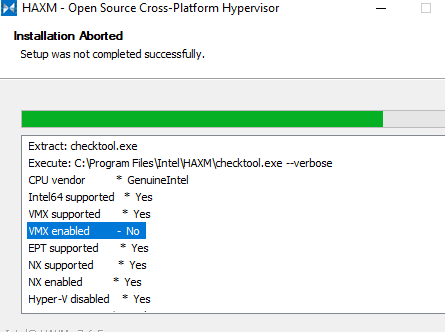
I was reading the following log while trying to install unsuccessfully Intel x86 Emulator Accelerator (HAXM installer) from Android's SDK Manager:
Version: 7.6.5
Output folder: C:\Program Files\Intel\HAXM
Extract: checktool.exe... 100%
Execute: C:\Program Files\Intel\HAXM\checktool.exe --verbose
CPU vendor          *  GenuineIntel
Intel64 supported   *  Yes
VMX supported       *  Yes
VMX enabled         -  No
EPT supported       *  Yes
NX supported        *  Yes
NX enabled          *  Yes
Hyper-V disabled    *  Yes
OS version          *  Windows 10.0.22621
OS architecture     *  x86_64
Guest unoccupied    *  Yes. 0 guest(s)
The system requirements are not satisfied.
Same log as the main question.
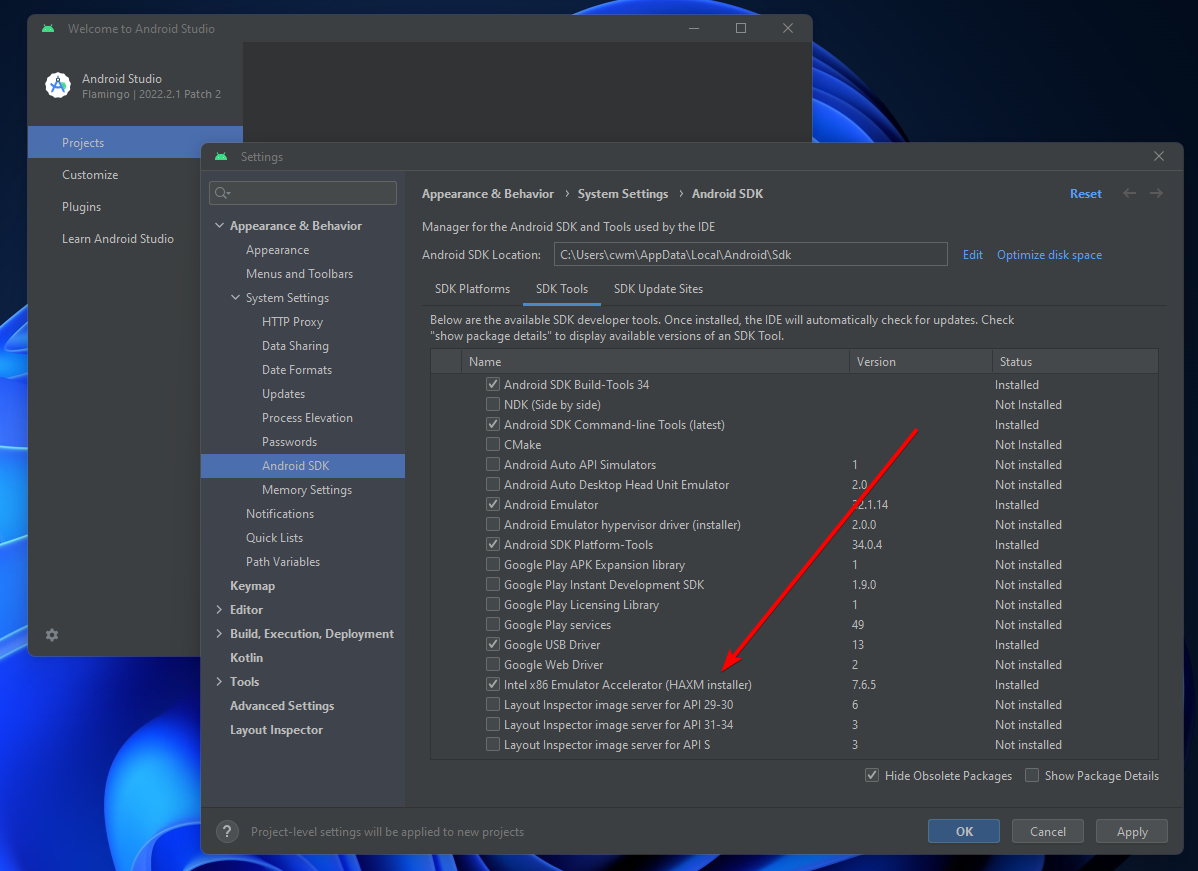
This is the SDK window, by the way.
![enter image description here]()
NOTE: As you can see, it is installed in my computer.
2) Get the Hyper-V
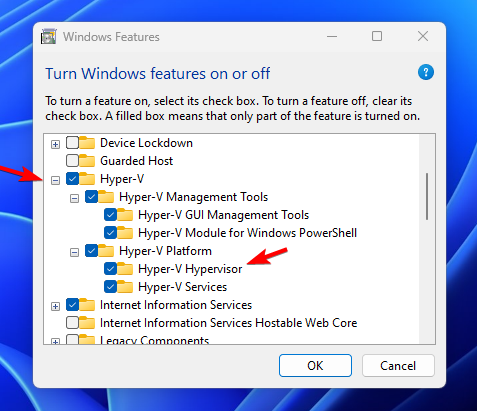
In my Windows 11 system, I searched for Turn Windows feature on or off, and enabled all related Hyper-V technologies:
![enter image description here]()
Keep in mind that I was not able to turn on Hyper-V Hypervisor until after I enabled the other Hyper-V technologies and I restarted the system.
3) Check the BIOS
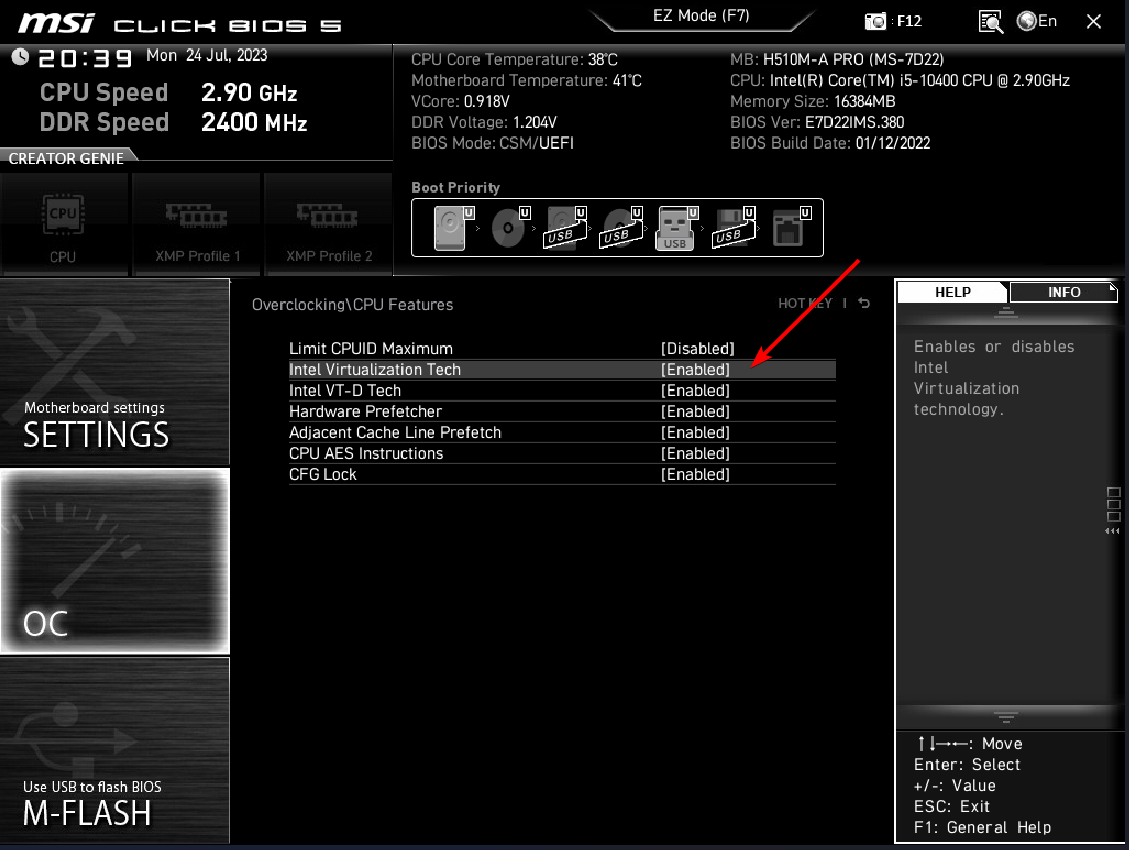
Also, you'll need to enable this technologies at firmware level, this is, the BIOS.
![enter image description here]()
You may also need to enable Execute Disable Bit (also know in some systems as either: XD, Excute Disable, No Execute, or Hardware DEP. I read about that somewhere, but I don't even how to do it in my system, and I don't remember doing it. Just keep this paragraph as a side note.
![enter image description here]()
4) Result
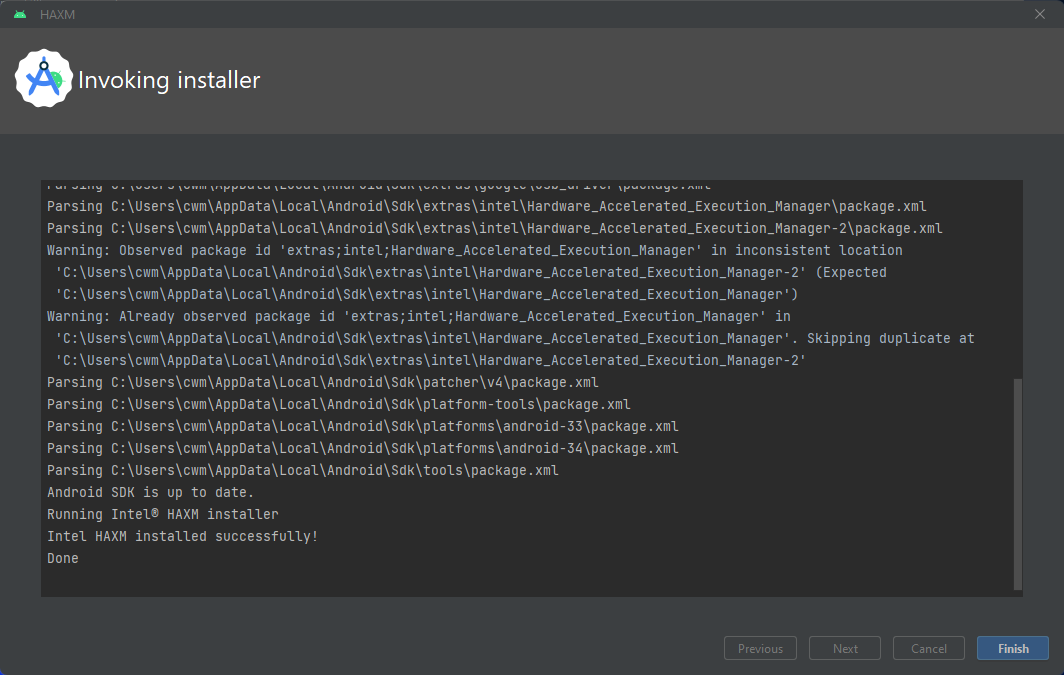
Finally, I was able to install it from the SDK:
![enter image description here]()
5) Final thoughts
I don't know why this Intel x86 Emulator Accelerator (HAXM installer) installation is still required. One would assume that enabling Hyper-V would be enough. But that's not the case. I think that this may be related to some additional settings required by the SDK.
Preparing "Install Intel x86 Emulator Accelerator (HAXM installer) (revision: 7.6.5)".
Warning: Package "Intel x86 Emulator Accelerator (HAXM installer)" (extras;intel;Hardware_Accelerated_Execution_Manager) should be installed in
"C:\Users\cwm\AppData\Local\Android\Sdk\extras\intel\Hardware_Accelerated_Execution_Manager" but
it already exists.
Installing in "C:\Users\cwm\AppData\Local\Android\Sdk\extras\intel\Hardware_Accelerated_Execution_Manager-2" instead.
Downloading https://dl.google.com/android/repository/extras/intel/haxm-windows_v7_6_5.zip
"Install Intel x86 Emulator Accelerator (HAXM installer) (revision: 7.6.5)" ready.
Installing Intel x86 Emulator Accelerator (HAXM installer) in C:\Users\cwm\AppData\Local\Android\Sdk\extras\intel\Hardware_Accelerated_Execution_Manager-2
"Install Intel x86 Emulator Accelerator (HAXM installer) (revision: 7.6.5)" complete.
"Install Intel x86 Emulator Accelerator (HAXM installer) (revision: 7.6.5)" finished.
Parsing C:\Users\cwm\AppData\Local\Android\Sdk\build-tools\30.0.3\package.xml
Parsing C:\Users\cwm\AppData\Local\Android\Sdk\build-tools\34.0.0\package.xml
Parsing C:\Users\cwm\AppData\Local\Android\Sdk\cmdline-tools\latest\package.xml
Parsing C:\Users\cwm\AppData\Local\Android\Sdk\emulator\package.xml
Parsing C:\Users\cwm\AppData\Local\Android\Sdk\extras\google\usb_driver\package.xml
Parsing C:\Users\cwm\AppData\Local\Android\Sdk\extras\intel\Hardware_Accelerated_Execution_Manager\package.xml
Parsing C:\Users\cwm\AppData\Local\Android\Sdk\extras\intel\Hardware_Accelerated_Execution_Manager-2\package.xml
Warning: Observed package id 'extras;intel;Hardware_Accelerated_Execution_Manager' in inconsistent location 'C:\Users\cwm\AppData\Local\Android\Sdk\extras\intel\Hardware_Accelerated_Execution_Manager-2' (Expected 'C:\Users\cwm\AppData\Local\Android\Sdk\extras\intel\Hardware_Accelerated_Execution_Manager')
Warning: Already observed package id 'extras;intel;Hardware_Accelerated_Execution_Manager' in 'C:\Users\cwm\AppData\Local\Android\Sdk\extras\intel\Hardware_Accelerated_Execution_Manager'. Skipping duplicate at 'C:\Users\cwm\AppData\Local\Android\Sdk\extras\intel\Hardware_Accelerated_Execution_Manager-2'
Parsing C:\Users\cwm\AppData\Local\Android\Sdk\patcher\v4\package.xml
Parsing C:\Users\cwm\AppData\Local\Android\Sdk\platform-tools\package.xml
Parsing C:\Users\cwm\AppData\Local\Android\Sdk\platforms\android-33\package.xml
Parsing C:\Users\cwm\AppData\Local\Android\Sdk\platforms\android-34\package.xml
Parsing C:\Users\cwm\AppData\Local\Android\Sdk\system-images\android-34\google_apis\x86_64\package.xml
Parsing C:\Users\cwm\AppData\Local\Android\Sdk\tools\package.xml
Android SDK is up to date.
Running Intel® HAXM installer
Intel HAXM installed successfully!
Done

