Matplotlib - unable to save image in same resolution as original image
Asked Answered
S

1

18

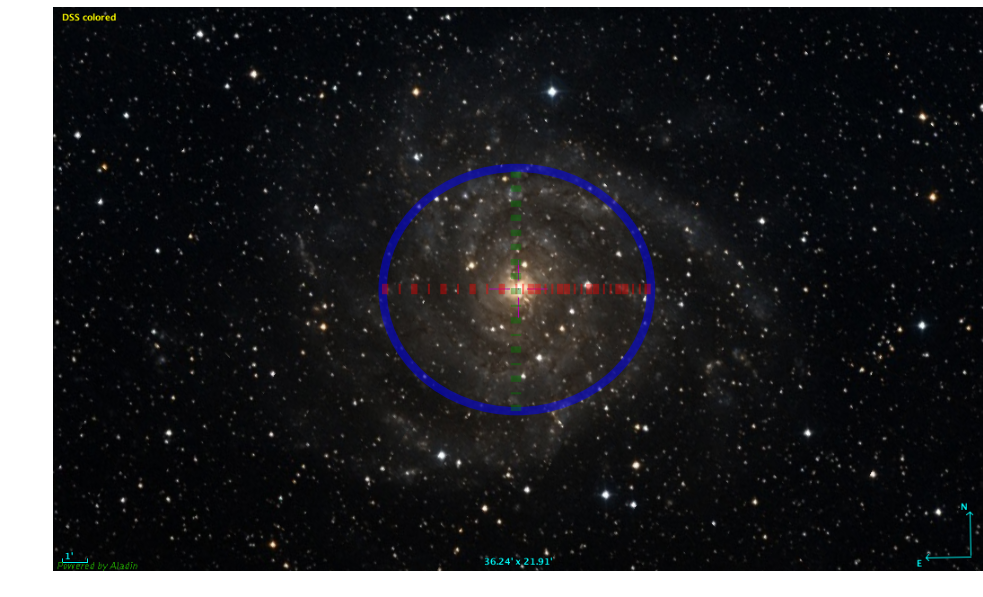
I am unable to save the image without the white borders and at the initial resolution (1037x627)

import numpy as np
import matplotlib.pyplot as plt
from matplotlib import pyplot, lines
import matplotlib.image as mpimg
from matplotlib.patches import Ellipse
x=[0,0,0,0,0]
y=[0,0,0,0,0]
a=10**1.3*15
inc=25
b=np.cos(np.radians(inc))*a
x[0],y[0]=516.667,313.021
x[1],y[1]=x[0]-a,y[0]
x[2],y[2]=x[0]+a,y[0]
x[3],y[3]=x[0],y[0]+b
x[4],y[4]=x[0],y[0]-b
for pa in range(0,10,5):
    fig, ax = plt.subplots()
    img=mpimg.imread('IC342.png')
    imgplot = plt.imshow(img)
    x[1],y[1]=x[0]-a/2*np.cos(np.radians(pa)),y[0]-a/2*np.sin(np.radians(pa))
    x[2],y[2]=x[0]+a/2*np.cos(np.radians(pa)),y[0]+a/2*np.sin(np.radians(pa))
    x[3],y[3]=x[0]+b/2*np.cos(np.radians(pa+90)),y[0]+b/2*np.sin(np.radians(pa+90))
    x[4],y[4]=x[0]-b/2*np.cos(np.radians(pa+90)),y[0]-b/2*np.sin(np.radians(pa+90))
    ell = Ellipse(xy=[516.667,313.021], width=a, height=b, angle=pa, edgecolor='b',lw=4, alpha=0.5, facecolor='none')
    name='plt'+str(pa)+'.png'
    leg='PA='+str(pa)
    #ax.text(10, 10, leg, fontsize=15,color='white')
    ax.add_artist(ell)
    xn=[x[1],x[2],x[0]]
    yn=[y[1],y[2],y[0]]
    xnw=[x[3],x[4],x[0]]
    ynw=[y[3],y[4],y[0]]
    line = lines.Line2D(xn, yn, linestyle='-.',lw=5., color='r', alpha=0.4)
    line1 = lines.Line2D(xnw, ynw, linestyle='-.',lw=5., color='g', alpha=0.4)
    ax.add_line(line)
    ax.add_line(line1)
    plt.axis('off')
    fig.savefig(name, transparent=True, bbox_inches='tight', pad_inches=0,dpi=150 )

initial image

Initial img

Result

Resulting img

Also I need the white text PA=something to be on the image without changing the resolution. From what I understand adding another figure like text might automatically change the resolution.

Thank you for your time!

Sami answered 13/1, 2016 at 14:3 Comment(0)
J
39

There are two factors at play here:

  1. An Axes doesn't take up the entire Figure by default
  2. In matplotlib, the Figure's size is fixed, and the contents are stretched/squeezed/interpolated to fit the figure. You want the Figure's size to be defined by its contents.

To do what you want to do, there are three steps:

  1. Create a figure based on the size of the image and a set DPI
  2. Add a subplot/axes that takes up the entire figure
  3. Save the figure with the DPI you used to calculate figure's size

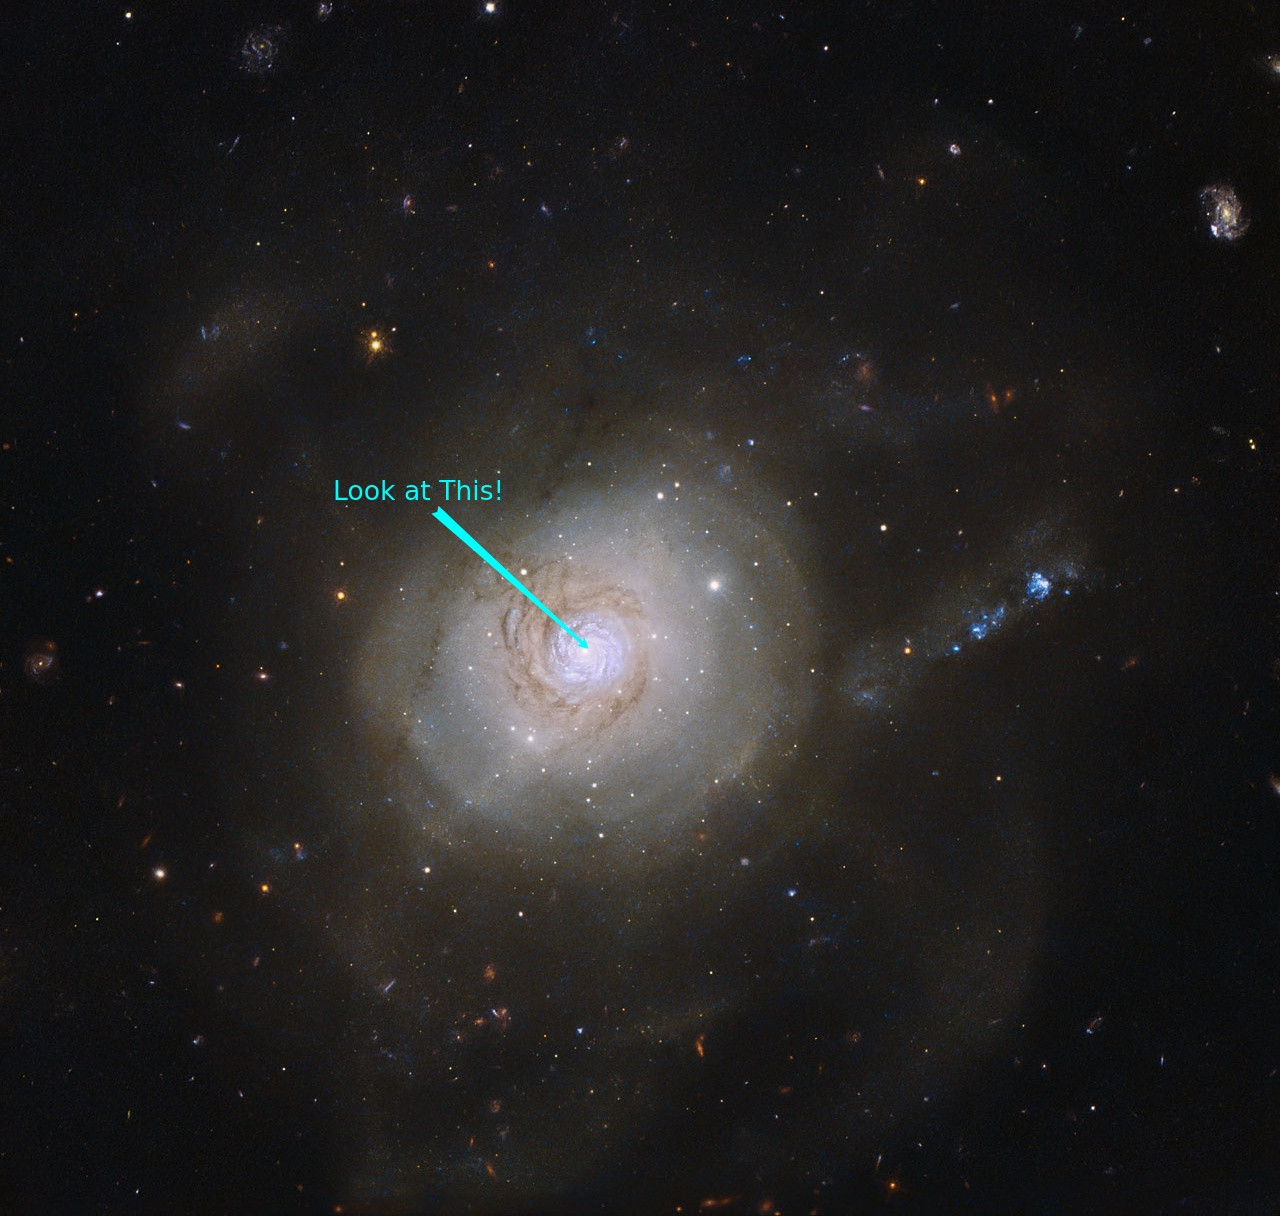
Let's use a random Hubble image from Nasa http://www.nasa.gov/sites/default/files/thumbnails/image/hubble_friday_12102015.jpg. It's a 1280x1216 pixel image.

Here's a heavily commented example to walk you through it:

import matplotlib.pyplot as plt

# On-screen, things will be displayed at 80dpi regardless of what we set here
# This is effectively the dpi for the saved figure. We need to specify it,
# otherwise `savefig` will pick a default dpi based on your local configuration
dpi = 80

im_data = plt.imread('hubble_friday_12102015.jpg')
height, width, nbands = im_data.shape

# What size does the figure need to be in inches to fit the image?
figsize = width / float(dpi), height / float(dpi)

# Create a figure of the right size with one axes that takes up the full figure
fig = plt.figure(figsize=figsize)
ax = fig.add_axes([0, 0, 1, 1])

# Hide spines, ticks, etc.
ax.axis('off')

# Display the image.
ax.imshow(im_data, interpolation='nearest')

# Add something...
ax.annotate('Look at This!', xy=(590, 650), xytext=(500, 500),
            color='cyan', size=24, ha='right',
            arrowprops=dict(arrowstyle='fancy', fc='cyan', ec='none'))

# Ensure we're displaying with square pixels and the right extent.
# This is optional if you haven't called `plot` or anything else that might
# change the limits/aspect.  We don't need this step in this case.
ax.set(xlim=[-0.5, width - 0.5], ylim=[height - 0.5, -0.5], aspect=1)

fig.savefig('test.jpg', dpi=dpi, transparent=True)
plt.show()

enter image description here

The saved test.jpg will be exactly 1280x1216 pixels. Of course, because we're using a lossy compressed format for both input and output, you won't get a perfect pixel match due to compression artifacts. If you used lossless input and output formats you should, though.

Jarrettjarrid answered 13/1, 2016 at 14:56 Comment(3)
Oh my god, thank you so much!!! The explanation is just what I needed, it's not enough to just fix the problem, I really want to know what to avoid in the future. I've never used annotations, but just plain text, this is super useful and I can't be any more grateful!Sami
@Sami - Happy to help!Jarrettjarrid
They said here https://mcmap.net/q/482347/-displaying-different-images-with-actual-size-in-matplotlib-subplot that it changed from 80dpi to 100dpi, so use dpi = matplotlib.rcParams['figure.dpi'] instead of fixed number.Armillda

© 2022 - 2024 — McMap. All rights reserved.