I was asked to set up HTTPS with a self-signed cert on Apache on localhost, but how do I actually do that? I have no idea at all.
I've just attempted this - I needed to test some development code on my localhost Apache on Windows. This was WAAAY more difficult than it should be. But here are the steps that managed to work after much hairpulling...
I found that my Apache install comes with openssl.exe which is helpful. If you don't have a copy, you'll need to download it. My copy was in Apache2\bin folder which is how I reference it below.
Steps:
- Ensure you have write permissions to your Apache conf folder
- Open a command prompt in
Apache2\conffolder - Type
..\bin\openssl req -config openssl.cnf -new -out blarg.csr -keyout blarg.pem You can leave all questions blank except:
- PEM Passphrase: a temporary password such as "password"
- Common Name: the hostname of your server
![]()
When that completes, type
..\bin\openssl rsa -in blarg.pem -out blarg.keyGenerate your self-signed certificate by typing:
..\bin\openssl x509 -in blarg.csr -out blarg.cert -req -signkey blarg.key -days 365![]()
Open Apache's
conf\httpd.conffile and ensure SSL module is enabled - there should be no hash at the start of this line:
LoadModule ssl_module modules/mod_ssl.so![]()
Some Apache installations place the SSL config in a separate file. If so, ensure that the SSL conf file is being included. In my case I had to uncomment this line:
Include conf/extra/httpd-ssl.confIn the SSL config
httpd-ssl.confI had to update the following lines:- Update
SSLSessionCache "shmcb:C:\Program Files (x86)\Zend\Apache2/logs/ssl_scache(512000)"
to
SSLSessionCache "shmcb:C:/Progra\~2/Zend/Apache2/logs/ssl_scache(512000)"
(The brackets in the path confuse the module, so we need to escape them) DocumentRoot- set this to the folder for your web filesServerName- the server's hostnameSSLCertificateFile "conf/blarg.cert"SSLCertificateKeyFile "conf/blarg.key"
![]()
![]()
- Update
Restart Apache.
- Try loading
https://localhost/in your browser.
Hopefully you made it this far. Feel free to update this post with any other helpful info.
(Screenshots courtesy of Neil Obremski and his helpful article - although now quite out-of-date.)
openssl.cnf (which is located at C:\xampp\apache\conf on Windows) in your xampp root folder (C:\xampp or your equivalent). –
Scrope <Directory> block with the necessary permissions or some other IP or security rule is in place. –
Goa c:\bin\ssl. When I use the command in #3 ..\bin\openssl req -config openssl.cnf -new -out blarg.csr -keyout blarg.pem the console shows a WARNING: can't open config file: c:/openssl-1.0.2p-win64/ssl/openssl.cnf -- is that a critical warning ? –
Albumen I use ngrok (https://ngrok.com/) for this. ngrok is a command line tool and create a tunnel for localhost. It creates both http and https connection. After downloading it, following command needs to be run :
ngrok http 80
( In version 2, the syntax is : ngrok http 80 . In version 2, any port can be tunneled. )
After few seconds, it will give two urls :
http://a_hexadecimal_number.ngrok.com
https://a_hexadecimal_number.ngrok.com
Now, both the urls point to the localhost.
here is simplest way to do this
first copy these server.crt & server.key files (find in attachment ) into your apache/conf/ssl directory
then open httpd.conf file & add following line
Listen 80
Listen 443

NameVirtualHost *:80
NameVirtualHost *:443

<VirtualHost *:443>
    DocumentRoot "d:/wamp/www"  #your wamp www root dir
    ServerName localhost
    SSLEngine on
    SSLCertificateFile "d:/wamp/bin/apache/Apache2.4.4/conf/ssl/server.crt"
    SSLCertificateKeyFile "d:/wamp/bin/apache/Apache2.4.4/conf/ssl/server.key"
</VirtualHost>
.crt , .key files in gist.github.com. So that brave guys like us can quickly make it up and running first before doing all alone and waste time. –
Chuckhole In order to protect the security of information being sent to and from your web server, it's a good idea to enable encryption of the communication between clients and the server. This is often called SSL.
So let's set up HTTPS with a self-signed certificate on Apache2. I am going to list the steps which you should follow:
- Install apache2 web-server on your machine. For linux machine open the terminal and type
sudo apt-get install apache2
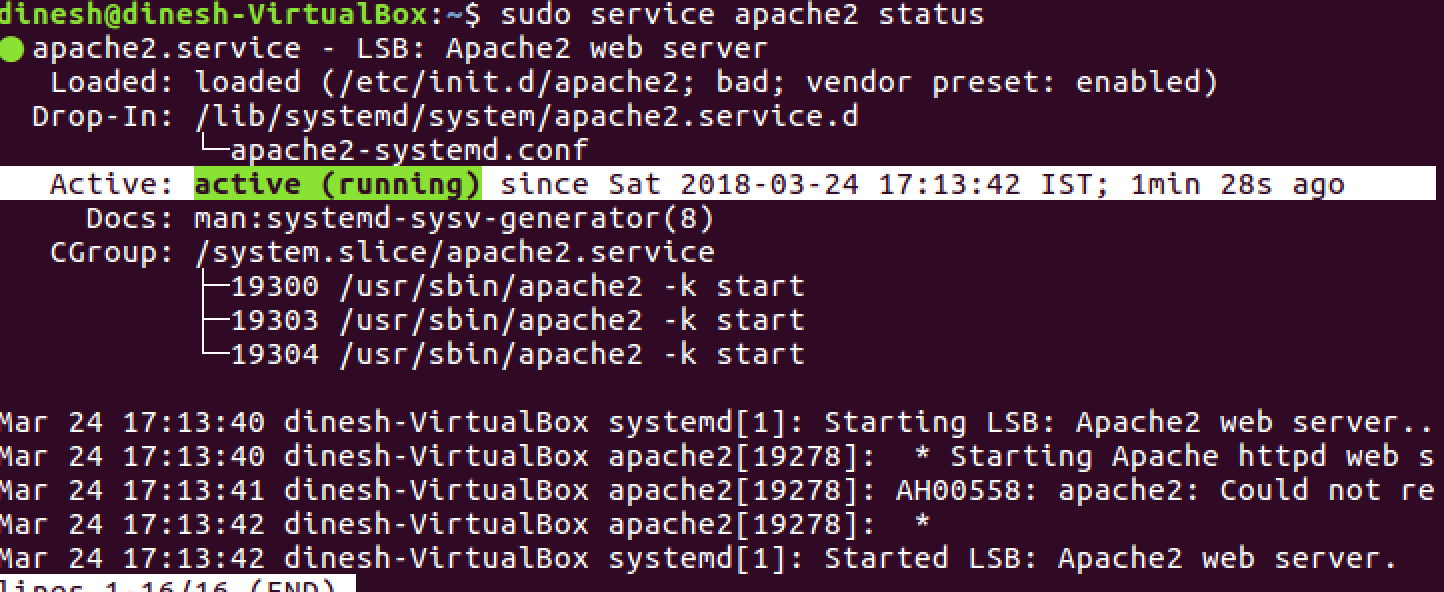
- After successful installation check the status of apache2 service by executing command
sudo service apache2 status
It should output
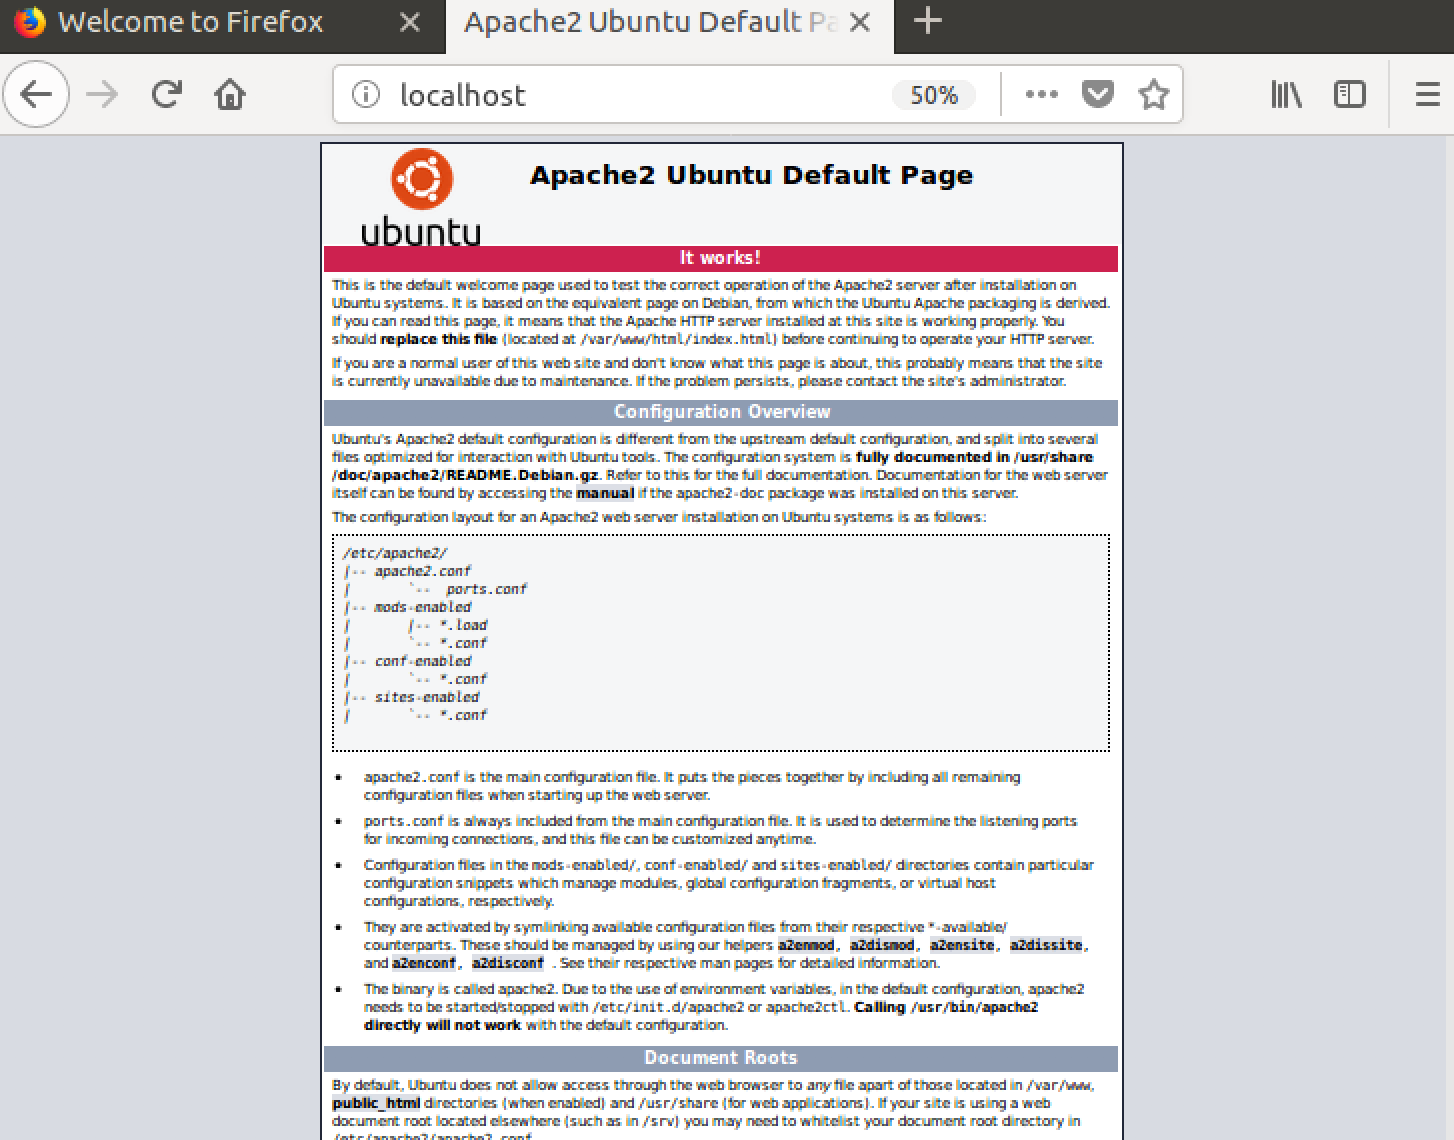
- Navigate to browser and type
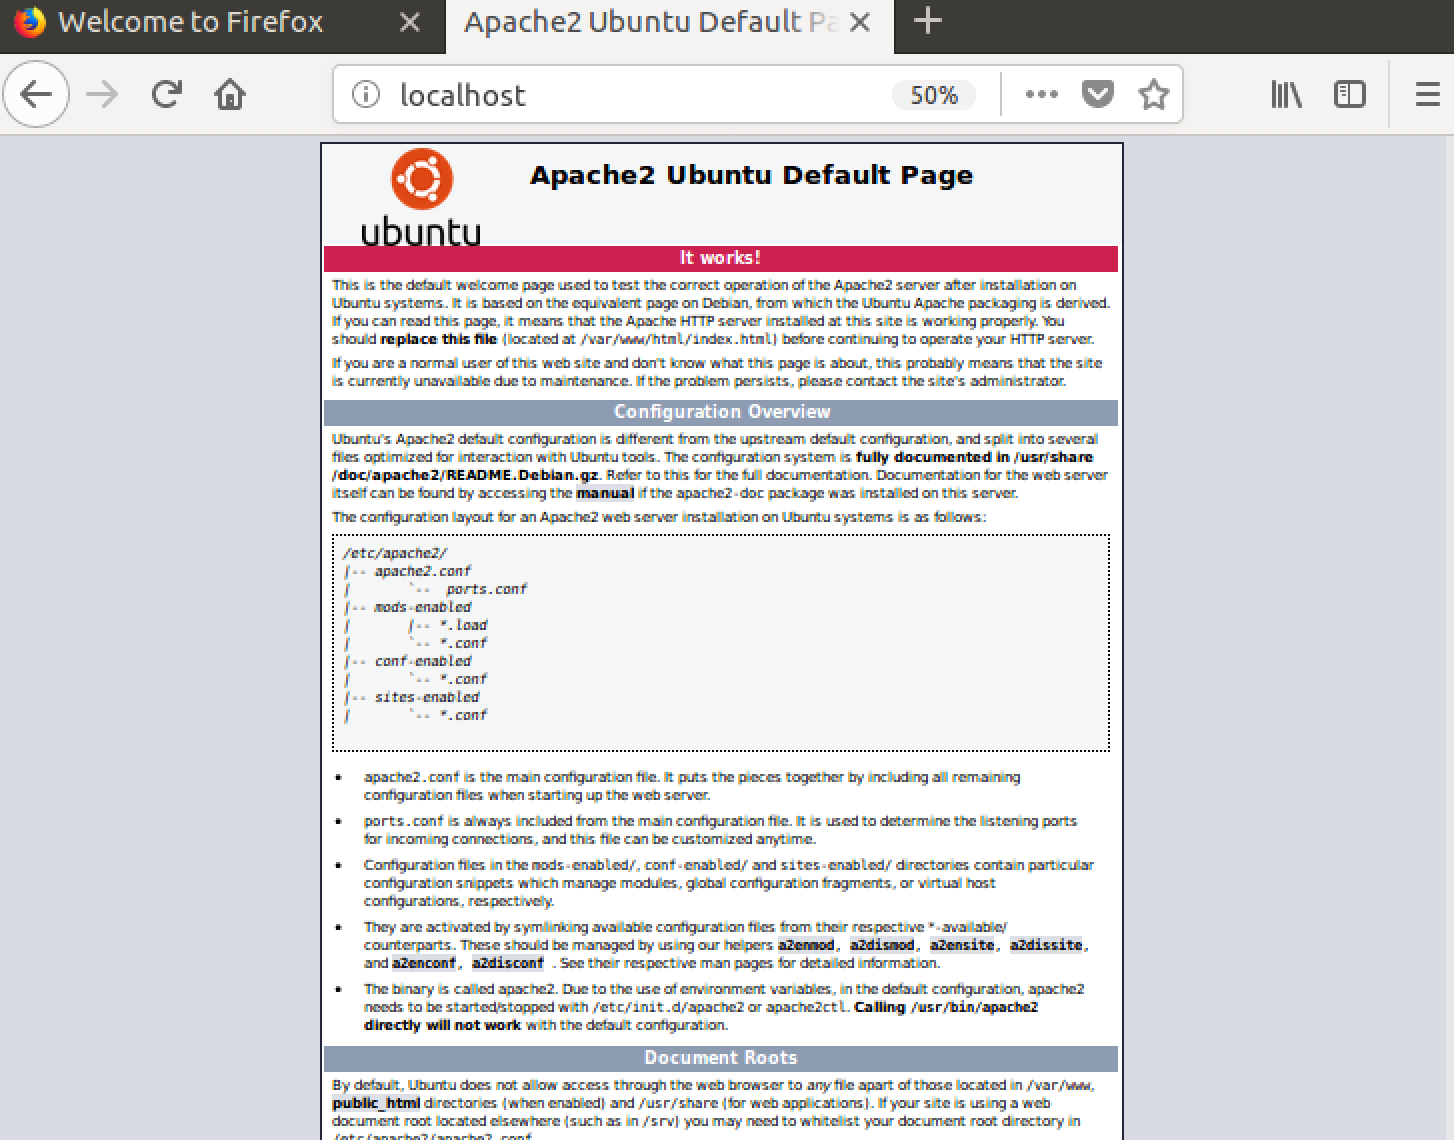
http://localhost:80
Verify that you get default page for apache2 like this.
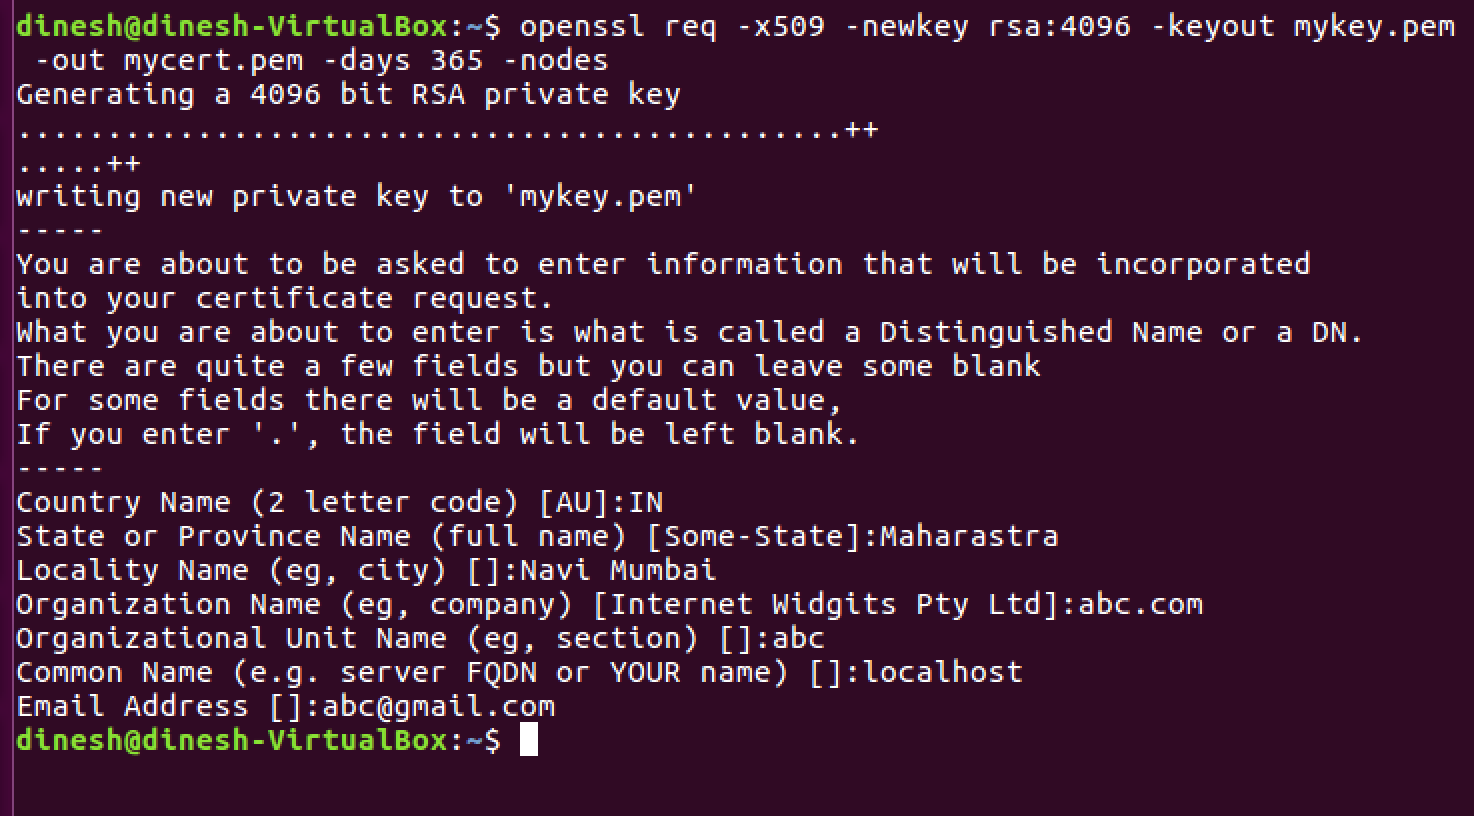
- For encrypting a web connection we need certificate from CA (certificate authority) or we can use self signed certificates. Let's create a self signed certificate using the following command.
openssl req -x509 -newkey rsa:2048 -keyout mykey.key -out mycert.pem -days 365 -nodes
Please fill the information accordingly as shown below.
mykey.key and mycert.pem should be created in your present working directory.
- It would be nice we if move certificates and keys at a common place and it will be easy for apache2 web server to find them. So let's execute the following commands
sudo cp mycert.pem /etc/ssl/certs
sudo cp mykey.key /etc/ssl/private
- Let's enable the SSL mode on your server
sudo a2enmod ssl
It should output like this
- Let's configure apache2 to use self signed certificate and key which we have generated above.
sudo vi /etc/apache2/sites-available/default-ssl.conf
Please find these two lines and replace them with your cert and key paths.
Initial
Final
- Enable the site
cd /etc/apache2/sites-available/
sudo a2ensite default-ssl.conf
- Restart the apache2 service
sudo service apache2 restart
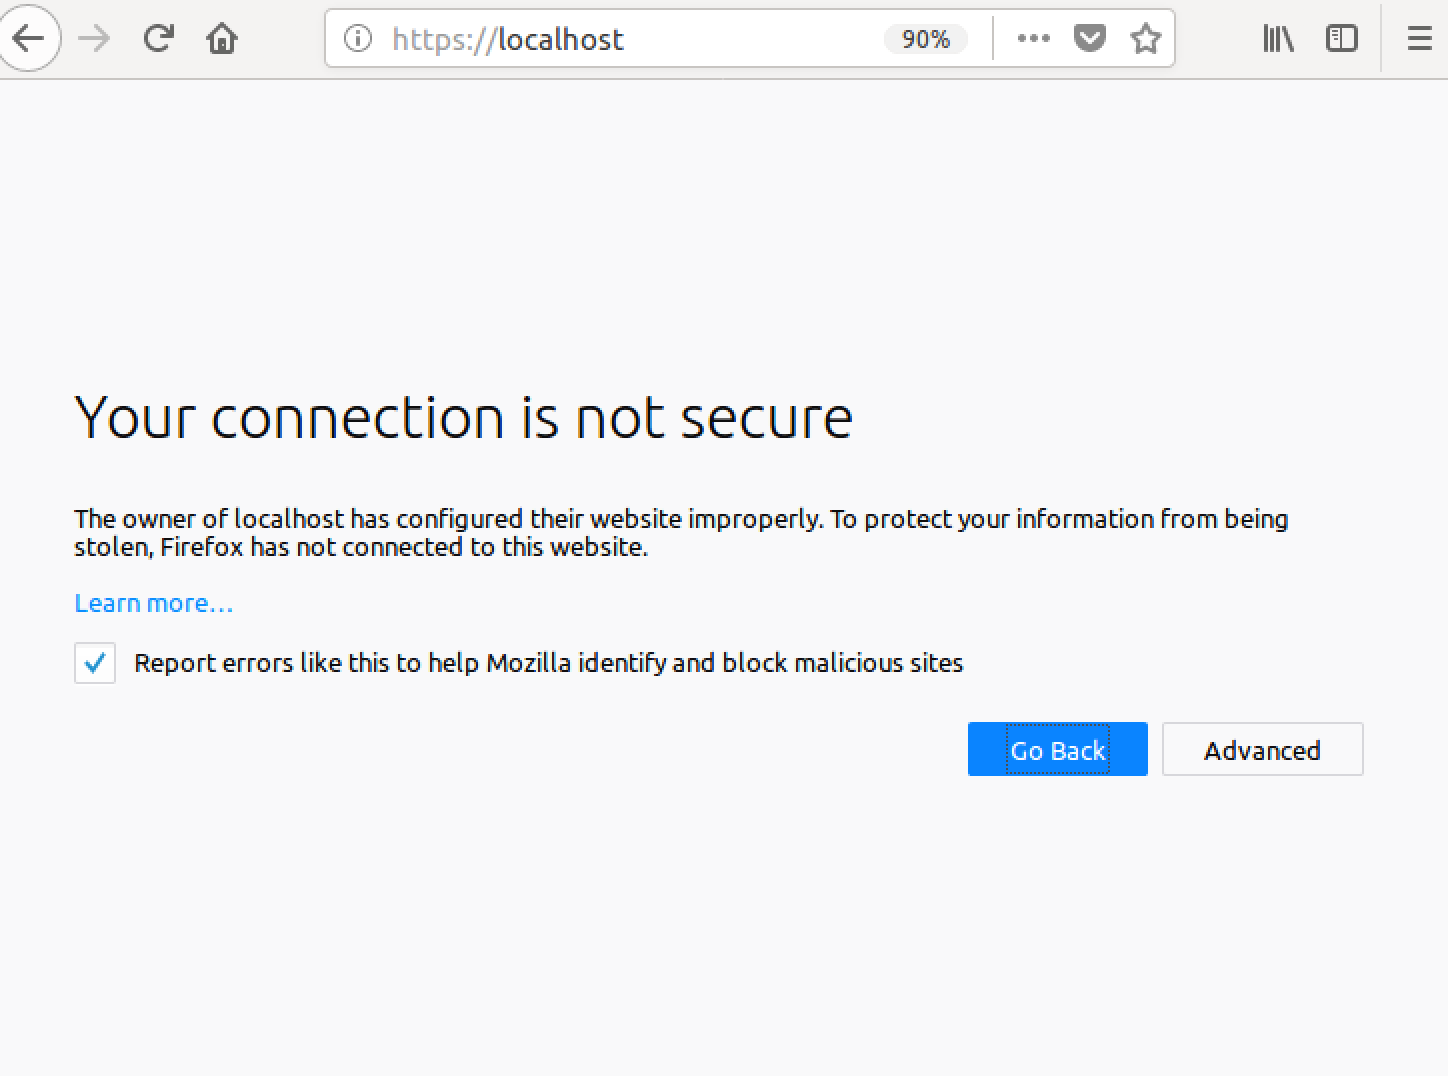
- Verify the apache2 web-server on HTTPS. Open your browser again and type
https://localhost:443
It should output something like this with a warning that page you are about to view is not secure because we have configured the server with self-signed certificate.
- Congratulations you have configured your apache2 with HTTPS endpoint, now click on advanced --> add exception --> confirm security exception, you will see the default page again.
default-ssl.conf as it is. I was about to rename mycert to ssl-cert-snakeoil but this file already exists so I just used that! So I was able to safely skip two steps on Debian. –
Mccormick Windows + Apache 2.4, for example:
uncomment ssl_module in your
httpd.conffile.LoadModule ssl_module modules/mod_ssl.solisten 443 port just like 80 port in your
httpd.conffile.Listen 80 Listen 443uncomment Include Virtual hosts in your
httpd.conffile.# Virtual hosts Include conf/extra/httpd-vhosts.confadd VirtualHost in your
conf/extra/httpd-vhosts.conf<VirtualHost _default_:443> DocumentRoot "D:/www" #your site directory path ServerName localhost #ServerAlias localhost.com localhost2.com SSLEngine on SSLCertificateFile "${SRVROOT}/conf/ssl/server.crt" SSLCertificateKeyFile "${SRVROOT}/conf/ssl/server.key" <Directory "D:/www"> Options -Indexes +FollowSymLinks +ExecCGI AllowOverride All Require all granted </Directory> </VirtualHost>
only the port number 443 and SSL...... lines are different from normal http config.
save you config file and restart apache service. then you can visit https://localhost/
The web browser will warn you that it's unsafe at the first time, just choose go on.
It's actually quite easy, assuming you have an openssl installation handy. (What platform are you on?)
Assuming you're on linux/solaris/mac os/x, Van's Apache SSL/TLS mini-HOWTO has an excellent walkthrough that I won't reproduce here.
However, the executive summary is that you have to create a self-signed certificate. Since you're running apache for localhost presumably for development (i.e. not a public web server), you'll know that you can trust the self-signed certificate and can ignore the warnings that your browser will throw at you.
Running Apache on Windows 10 here. I couldn't get Chrome to trust the certificate made in the top answer by Simon. What I ended up doing was using PowerShell to generate a self signed certificate.
Step 1 - Generate Self-Signed certificate
In PowerShell
New-SelfSignedCertificate -DnsName "localhost" -CertStoreLocation "cert:\LocalMachine\My" 1
Step 2 - Configure and Export Certificate
Type Certificate into the Windows search bar, click the Manage Computer Certificates control panel item that is suggested.
From the Certificate Management program that comes up (certlm), you should now see a localhost key under Personal >> Certificates.
I copied this certificate into Trusted Root Certification Authorities. I'll be honest in that I'm not sure if that's necessary.
Selecting the newly copied certificate, double click on it (the localhost certificate). From the Certificate modal, click the Details tab, then the Copy to File... button.
This will bring up and Export Wizard, I chose to export the private key, click next. I also chose to Export all extended properties (again, I'm not certain if that was necessary). I chose to use a simple password (pass) and the default encryption.
Choose a folder to export to and name the file. You can always move and rename the file if necessary. For simplicity's sake let's copy it to your conf folder under your Apache installation (In my case: C:\apache\conf) and name the file myCert (the resulting file will be a .pfx file)
Step 3 - Convert .pfx file for use with Apache
From here I basically followed the tutorial here, but I'll add instructions here (tweaked for our settings) in case that site goes down.
Open your Command Prompt in the /apache/conf/ folder
Run the following commands: Note: This assumes you have openssl.exe in the bin folder in the apache root folder (this should be standard/default)
..\bin\openssl pkcs12 -in myCert.pfx -nocerts -out privateKey.pem
This will prompt you for a password, enter what you input for Step 2 when you exported the .pfx file. In my case, this is pass. I entered the same password for the PEM phrase and again to verify. This will create a new file called privateKey.pem in your conf folder.
Then, run
..\bin\openssl rsa -in privateKey.pem -out private.pem
Again you will be prompted for a password (Enter pass phrase for privateKey.pem:), use the password you set for privateKey.pem. (In my case, pass)
You should see a message that says writing RSA key and a new file called private.pem in your conf/ folder. This will be your SSLCertificateKeyFile.
Now to generate the corresponding Server Certificate. Run:
..\bin\openssl pkcs12 -in myCert.pfx -clcerts -nokeys -out EntrustCert.pem
This will prompt you for a password, enter what you input for Step 2 when you exported the .pfx file. Enter it and you will now have a file called EntrustCert.pem in your conf folder. This is your SSLCertificateFile
Step 4 - Configure httpd.conf
Use the new files created as you server's key and certificate. Be sure to change your document root to where your files are!
ServerName localhost:80
Protocols h2 h2c http/1.1
<Directory />
    Options FollowSymLinks
    AllowOverride All
</Directory>

<VirtualHost _default_:443>
  ServerName localhost:443
  DocumentRoot ${SRVROOT}/htdocs/MYSITE
  SSLEngine on
  SSLCertificateFile "${SRVROOT}/conf/EntrustCert.pem"
  SSLCertificateKeyFile "${SRVROOT}/conf/private.pem"
</VirtualHost>
Also in httpd.conf:
- Make sure
LoadModule ssl_module modules/mod_ssl.sois uncommented (no#in front) - Uncomment
LoadModule socache_shmcb_module modules/mod_socache_shmcb.so - Uncomment
LoadModule http2_module modules/mod_http2.so - Uncomment
Include conf/extra/httpd-ssl.conf(NOTE: Ensure that's where the file is!)
I also have curl and open ssl libraries included:
# load curl and open ssl libraries
LoadFile "C:\php\libeay32.dll"
LoadFile "C:\php\ssleay32.dll"
LoadFile "C:\php\libssh2.dll"
These modules shouldn't be necessary, but I'll note that I have them enabled:
LoadModule rewrite_module modules/mod_rewrite.so
LoadModule filter_module modules/mod_filter.so
LoadModule deflate_module modules/mod_deflate.so
Step 5 - Config httpd-ssl.conf
In the extra/ folder in the conf/ folder you should see a file called httpd-ssl.conf.
5a. Change the DocumentRoot -
Change the DocumentRoot from the default to the directory where your files are.
5b. Change the ServerName -
Change the ServerName from the default (something like www.example.com:443) to localhost:443
5c. Change the SSLCertificateFile
Change the SSLCertificateFile from the default (${SRVROOT}/conf/server.crt) to ${SRVROOT}/conf/EntrustCert.pem
5c. Change the SSLCertificateKeyFile
Change the SSLCertificateKeyFile from the default (${SRVROOT}/conf/server.key) to ${SRVROOT}/conf/private.pem
All together, in the <VirtualHost _default_:443> tag.
#   General setup for the virtual host
DocumentRoot "${SRVROOT}/htdocs/MYSITE"
ServerName localhost:443
ServerAdmin [email protected]
ErrorLog "${SRVROOT}/logs/error.log"
TransferLog "${SRVROOT}/logs/access.log"

#   SSL Engine Switch:
#   Enable/Disable SSL for this virtual host.
SSLEngine on

#   Server Certificate:
#   Point SSLCertificateFile at a PEM encoded certificate.  If
#   the certificate is encrypted, then you will be prompted for a
#   pass phrase.  Note that a kill -HUP will prompt again.  Keep
#   in mind that if you have both an RSA and a DSA certificate you
#   can configure both in parallel (to also allow the use of DSA
#   ciphers, etc.)
#   Some ECC cipher suites (http://www.ietf.org/rfc/rfc4492.txt)
#   require an ECC certificate which can also be configured in
#   parallel.
SSLCertificateFile "${SRVROOT}/conf/EntrustCert.pem"
#SSLCertificateFile "${SRVROOT}/conf/server-dsa.crt"
#SSLCertificateFile "${SRVROOT}/conf/server-ecc.crt"

#   Server Private Key:
#   If the key is not combined with the certificate, use this
#   directive to point at the key file.  Keep in mind that if
#   you've both a RSA and a DSA private key you can configure
#   both in parallel (to also allow the use of DSA ciphers, etc.)
#   ECC keys, when in use, can also be configured in parallel
SSLCertificateKeyFile "${SRVROOT}/conf/private.pem"
#SSLCertificateKeyFile "${SRVROOT}/conf/server-dsa.key"
#SSLCertificateKeyFile "${SRVROOT}/conf/server-ecc.key"
Restart Apache
After making these changes you should be able to restart Apache and navigate to https://localhost without a security warning and a little padlock!
I hope this helps someone! 😊
Sources:
1.) Auri Rahimzadeh's answer on creating a self-signed certificate
2.) Entrust Datacard - How do I convert a .pfx to be used with an Apache server?
2021 Update
I’m posting this answer since I struggled with this myself and Chrome updated their security with requiring Subject Alternative Name which a lot of posts do not have as it was not required when they were posted as an answer. I’m assuming that WAMP is already installed.
STEP 1
Download OpenSSL Light and install
**STEP 2 (Optional)**
Although this part is optional, but it makes it easier later to execute commands. If you skip this step, you’ll have to provide full path to openssl.exe where you will execute the command. If you prefer to set it then update the openssl.exe path in Environment Variables.
Environment Variables -> System Variables -> Path -> Edit -> New -> c:\Program Files\OpenSSL-Win64\bin
**STEP 3**
Create a folder named “key” in the c:/wamp64/bin/apache/apache2.4.27(your version number)/conf/ directory.
Create configuration file for your CA MyCompanyCA.cnf with contents (you can change it to your needs):
[ req ]
distinguished_name  = req_distinguished_name
x509_extensions     = root_ca

[ req_distinguished_name ]
countryName             = Country Name (2 letter code)
countryName_min         = 2
countryName_max         = 2
stateOrProvinceName     = State or Province Name (full name)
localityName            = Locality Name (eg, city)
0.organizationName      = Organization Name (eg, company)
organizationalUnitName  = Organizational Unit Name (eg, section)
commonName              = Common Name (eg, fully qualified host name)
commonName_max          = 64
emailAddress            = Email Address
emailAddress_max        = 64

[ root_ca ]
basicConstraints            = critical, CA:true
Create the extensions configuration file MyCompanyLocalhost.ext for your web server certificate:
subjectAltName = @alt_names
extendedKeyUsage = serverAuth

[alt_names]
DNS.1   = localhost
DNS.2   = mycy.mycompany.com
**STEP 4**
Execute these commands in the given order to generate the key and certificates:
openssl req -x509 -newkey rsa:2048 -out MyCompanyCA.cer -outform PEM -keyout MyCompanyCA.pvk -days 10000 -verbose -config MyCompanyCA.cnf -nodes -sha256 -subj "/CN=MyCompany CA"
openssl req -newkey rsa:2048 -keyout MyCompanyLocalhost.pvk -out MyCompanyLocalhost.req -subj /CN=localhost -sha256 -nodes
openssl x509 -req -CA MyCompanyCA.cer -CAkey MyCompanyCA.pvk -in MyCompanyLocalhost.req -out MyCompanyLocalhost.cer -days 10000 -extfile MyCompanyLocalhost.ext -sha256 -set_serial 0x1111
As a result, you will have MyCompanyCA.cer, MyCompanyLocalhost.cer and MyCompanyLocalhost.pvk files.
**STEP 5**
Install MyCompanyCA.cer under
Control Panel -> Manage User Certificates -> Trusted Root Certification Authorities -> Certificates
To install MyCompanyLocalhost.cer just double click it.
**STEP 6**
Open c:/wamp64/bin/apache/apache2.4.27(your version number)/conf/httpd.conf and un-comment (remove the #) the following 3 lines:
LoadModule ssl_module modules/mod_ssl.so
Include conf/extra/httpd-ssl.conf
LoadModule socache_shmcb_module modules/mod_socache_shmcb.so
**STEP 7**
Open c:/wamp64/bin/apache/apache2.4.37/conf/extra/httpd-ssl.conf and change all the parameters to the ones shown below:
Directory "c:/wamp64/www"
DocumentRoot "c:/wamp64/www"
ServerName localhost:443
ServerAdmin [email protected]
ErrorLog "c:/wamp64/bin/apache/apache2.4.27/logs/error.log"
TransferLog "c:/wamp64/bin/apache/apache2.4.27/logs/access.log"
SSLCertificateFile "c:/wamp64/bin/apache/apache2.4.27/conf/key/MyCompanyLocalhost.cer"
SSLCertificateKeyFile "c:/wamp64/bin/apache/apache2.4.27/conf/key/MyCompanyLocalhost.pvk"
SSLSessionCache "shmcb:c:/wamp64/bin/apache/apache2.4.27/logs/ssl_scache(512000)"
CustomLog "c:/wamp64/bin/apache/apache2.4.27/logs/ssl_request.log" \
          "%t %h %{SSL_PROTOCOL}x %{SSL_CIPHER}x \"%r\" %b"
Note: This is the tricky part. If you make any small mistake while editing this file, SSL won’t work. Make a copy of it before you edit it.
**STEP 8**
Restart Wamp and Chrome. Localhost is now secure: https://localhost
unable to find 'distinguished_name' in config problems making Certificate Request 18140:error:0E06D06C:configuration file routines:NCONF_get_string:no value:crypto\conf\conf_lib.c:273:group=req name=distinguished_name –
Lepage This should be work Ubuntu, Mint similar with Apache2
It is a nice guide, so following this
and leaving your ssl.conf like this or similar similar
<VirtualHost _default_:443>
        ServerAdmin [email protected]
        ServerName localhost
        ServerAlias www.localhost.com

        DocumentRoot /var/www


    SSLEngine on
    SSLCertificateFile /etc/apache2/ssl/apache.crt
    SSLCertificateKeyFile /etc/apache2/ssl/apache.key
you can get it.
Hope this help for linuxer
It's very simple,
just run the following commands
sudo a2enmod ssl

sudo service apache2 restart

sudo a2ensite default-ssl.conf
That's it, you are done.
If you want to force SSL (to use https always), edit the file:
sudo nano /etc/apache2/sites-available/000-default.conf
and add this one line
<VirtualHost *:80>
        . . .

        Redirect "/" "https://your_domain_or_IP/"

        . . .
</VirtualHost>
then restart again
sudo service apache2 restart
systemctl reload apache2 after sudo a2ensite default-ssl.conf. –
Imbecility This worked on Windows 10 with Apache24:
1 - Add this at the bottom of C:/Apache24/conf/httpd.conf
Listen 443
<VirtualHost *:443>
    DocumentRoot "C:/Apache24/htdocs"
    ServerName localhost
    SSLEngine on
    SSLCertificateFile "C:/Apache24/conf/ssl/server.crt"
    SSLCertificateKeyFile "C:/Apache24/conf/ssl/server.key"
</VirtualHost>
2 - Add the server.crt and server.key files in the C:/Apache24/conf/ssl folder. See other answers on this page to find those 2 files.
That's it!
httpd.conf, what file do I put it in? Here's what happens when I put this text inside apache2.conf:Invalid command 'SSLEngine', perhaps misspelled or defined by a module not included in the server configuration –
Generatrix This HowTo for CentOS was easy to follow and only took about 5 minutes: https://wiki.centos.org/HowTos/Https
I won't detail each step here, but the main steps are:
1.) Install the openssl module for apache, if not already installed
2.) Generate a self-signed certificate
--At this point, you should be able to visit https://localhost successfully
3.) Set up a virtual host if needed
tl;dr
ssh -R youruniquesubdomain:80:localhost:3000 serveo.net
And your local environment can be accessed from https://youruniquesubdomain.serveo.net
Serveo is the best
- No signup.
- No install.
- Has HTTPS.
- Accessible world-wide.
- You can specify a custom fix, subdomain.
- You can self host it, so you can use your own domain, and be future proof, even if the service goes down.
I couldn't believe when I found this service. It offers everything and it is the easiest to use. If there would be such an easy and painless tool for every problem...
I'd like to add something to the very good answer of @CodeWarrior, that works perfectly on Chrome, but for Firefox needs an additional step.
Since Firefox does not thrust CA Certificates that Windows does by default, you need to go on about:config, scroll down to security.enterprise_roots.enabled and change it to true.
Now your certificate should be seen as valid also on Firefox.
Of course this is only for development purposes, since ssl trust is a critical security concern and change this settings only if you know the implications.
Another simple method is using Python Server in Ubuntu.
Generate server.xml with the following command in terminal:
openssl req -new -x509 -keyout server.pem -out server.pem -days 365 -nodesNote: Assuming you have openssl installed.
Save below code in a file named
simple-https-server.pyin any directory you want to run the server.import BaseHTTPServer, SimpleHTTPServer import ssl httpd = BaseHTTPServer.HTTPServer(('localhost', 4443), SimpleHTTPServer.SimpleHTTPRequestHandler) httpd.socket = ssl.wrap_socket (httpd.socket, certfile='./server.pem', server_side=True) httpd.serve_forever()Run the server from terminal:
python simple-https-server.pyVisit the page at:
https://localhost:4443
Extra notes::
You can change the port in
simple-https-server.pyfile in linehttpd = BaseHTTPServer.HTTPServer(('localhost', 4443), SimpleHTTPServer.SimpleHTTPRequestHandler)You can change
localhostto your IP in the same line above:httpd = BaseHTTPServer.HTTPServer(('10.7.1.3', 4443), SimpleHTTPServer.SimpleHTTPRequestHandler)and access the page on any device your network connected. This is very handy in cases like "you have to test HTML5 GeoLocation API in a mobile, and Chrome restricts the API in secure connections only".
Gist: https://gist.github.com/dergachev/7028596
http://www.piware.de/2011/01/creating-an-https-server-in-python/
For those using macOS this is a great guide https://getgrav.org/blog/macos-sierra-apache-multiple-php-versions to set up your local web dev environment. In its 3rd part https://getgrav.org/blog/macos-sierra-apache-ssl Andy Miller explains how to set up apache with a self-signed certificate:
This is the key command:
openssl req -x509 -nodes -days 365 -newkey rsa:2048 -keyout server.key -out server.crt
But there are a few steps you need to follow, so check that out and good luck! ;)
© 2022 - 2024 — McMap. All rights reserved.





ssh -R youruniquesubdomain:80:localhost:3000 serveo.netSlap in your subdomain and port number and you ready to go onhttps://youruniquesubdomain.serveo.net– Guelphssh -R 80:localhost:8080 ssh.localhost.run– Guelph