How to remove a watermark from a document image?
Asked Answered
V

2

9

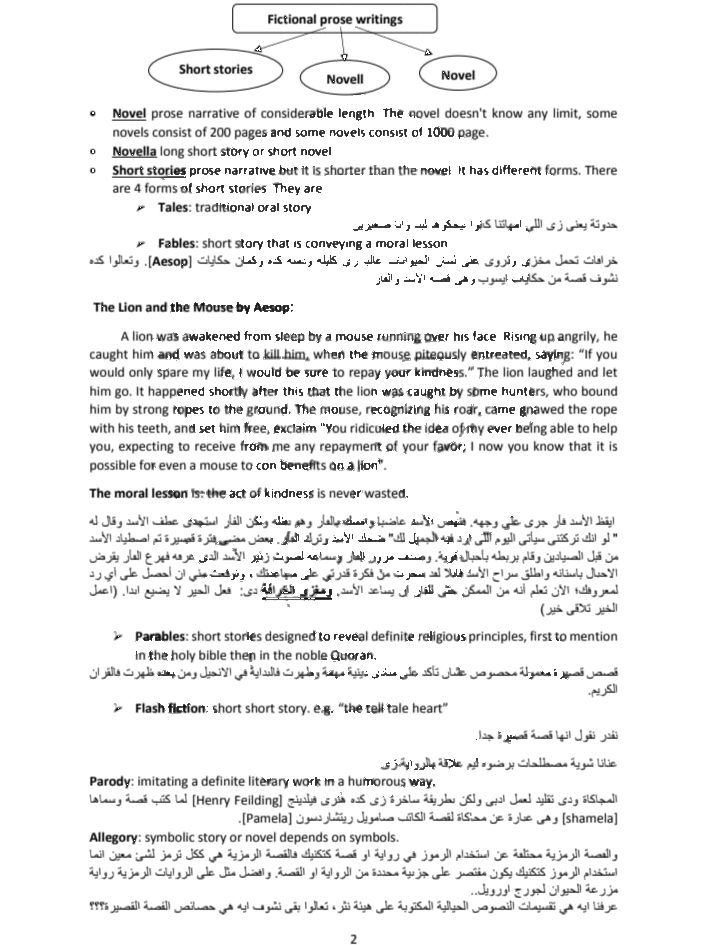
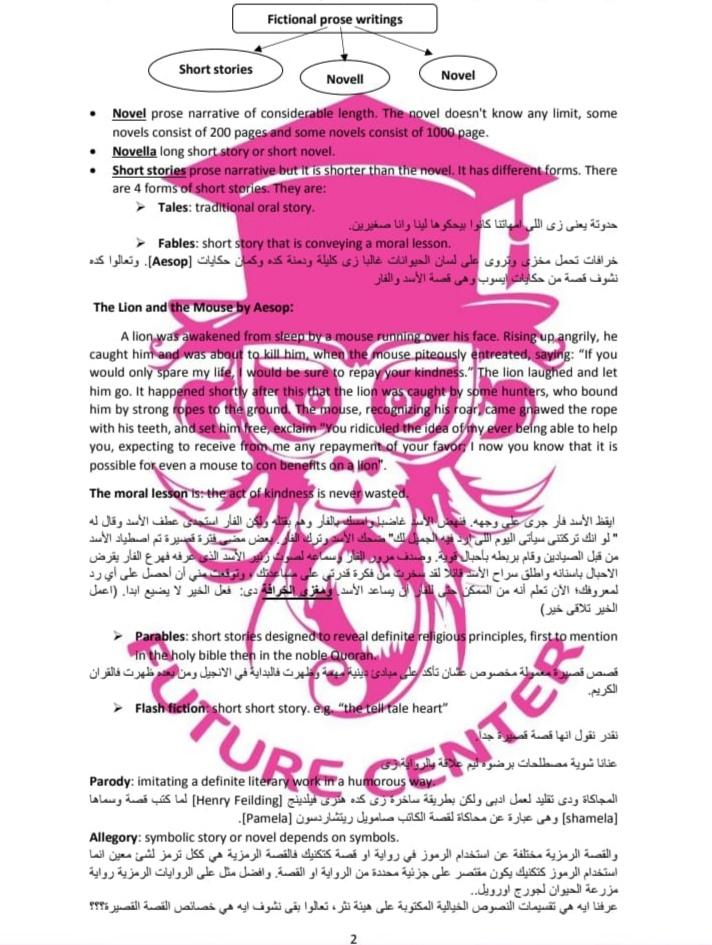
I have the following images

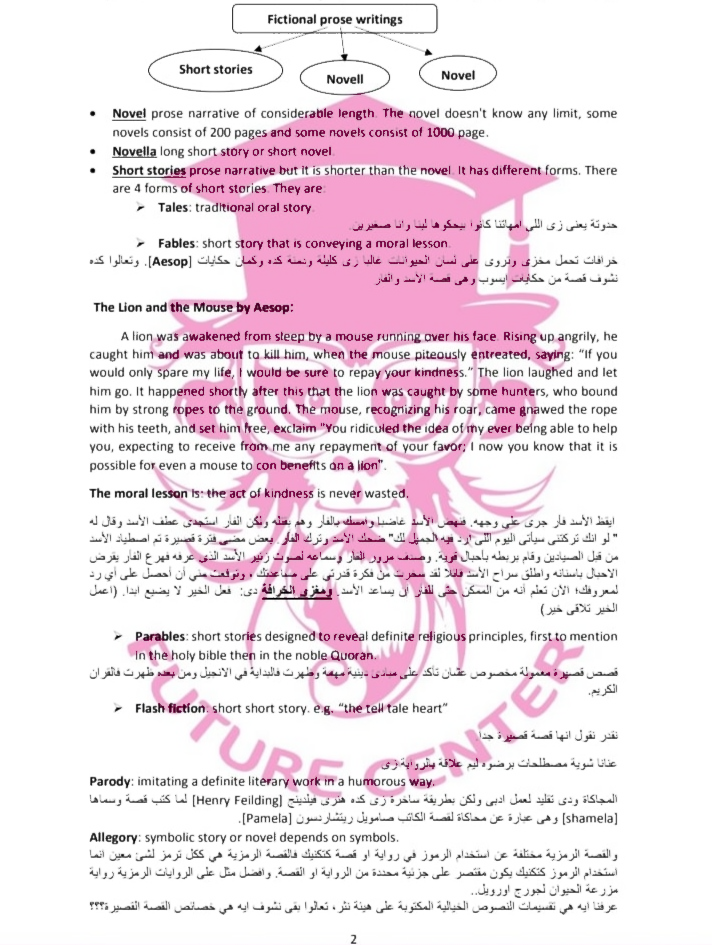
and another variant of it with the exact same logo

where I'm trying to get rid of the logo itself while preserving the underlying text. Using the following code segment

import skimage.filters as filters
import cv2

image = cv2.imread('ingrained.jpeg')

gray = cv2.cvtColor(image,cv2.COLOR_BGR2GRAY)
smooth1 = cv2.GaussianBlur(gray, (5,5), 0)
division1 = cv2.divide(gray, smooth1, scale=255)

sharpened = filters.unsharp_mask(division1, radius=3, amount=7, preserve_range=False)
sharpened = (255*sharpened).clip(0,255).astype(np.uint8)

# line segments
components, output, stats, centroids = cv2.connectedComponentsWithStats(sharpened, connectivity=8)
sizes = stats[1:, -1]; components = components - 1
size = 100
result = np.zeros((output.shape))
for i in range(0, components):
    if sizes[i] >= size:
        result[output == i + 1] = 255

cv2.imwrite('image-after.jpeg',result)

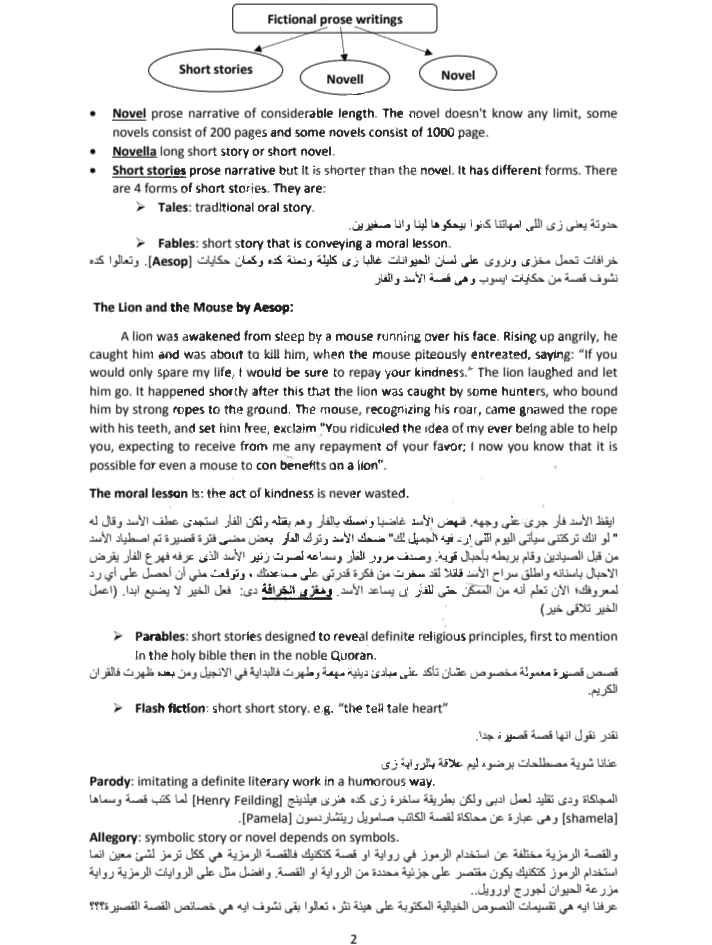
I've got these results

But as shown, the resulting images are respectively inconsistent as for the watermark contours' remains and the letters washed out. Is there a better solution that can be added? An ideal solution would be the removal of the watermark borders without affecting the text lying beneath it.

Veilleux answered 28/3, 2022 at 23:23 Comment(0)
K
9

Since we know the watermark is pink colored, we can use a two pass HSV color threshold approach. The first pass is to remove the majority of the watermark while keeping letters intact, the second is to filter out even more pink. Here's a potential solution:

  1. 1st pass HSV color threshold. Load the image, convert to HSV format, then HSV color threshold for binary image.

  2. Dilate to repair contours. Because any type of thresholding will cause the letters to become washed out, we need to repair contours by dilating to reconstruct some of the characters.

  3. 2nd pass HSV color threshold. Now we bitwise-and the original image with the 1st pass HSV mask to get an intermediate result but there are still pink artifacts. To remove them, we perform a 2nd pass HSV threshold to remove pink around characters by generating a new mask.

  4. Convert image to grayscale then remove pink contours. We convert the result of the 1st HSV color threshold to gray then switch the background from black to white. Finally we apply the result of the 2nd pass HSV mask to get our final result.


Input image -> 1st HSV mask + dilation -> bitwise-and

Notice how the background pink is gone but there are still pink artifacts around letters. So now we generate a 2nd mask for the remaining pink.

2nd mask -> convert to grayscale + invert -> applied 2nd mask to get result

Enlarged result

enter image description here

Code

import numpy as np
import cv2

# Load image, convert to HSV, then HSV color threshold
image = cv2.imread('1.jpg')
original = image.copy()
hsv = cv2.cvtColor(image, cv2.COLOR_BGR2HSV)
lower = np.array([0, 0, 0])
upper = np.array([179, 255, 163])
mask = cv2.inRange(hsv, lower, upper)

# Dilate to repair
kernel = cv2.getStructuringElement(cv2.MORPH_RECT, (3,3))
dilate = cv2.dilate(mask, kernel, iterations=1)

# Second pass of HSV to remove pink
colored = cv2.bitwise_and(original, original, mask=dilate)
colored_hsv = cv2.cvtColor(colored, cv2.COLOR_BGR2HSV)
lower_two = np.array([96, 89, 161])
upper_two = np.array([179, 255, 255])
mask_two = cv2.inRange(colored_hsv, lower_two, upper_two)

# Convert to grayscale then remove pink contours
result = cv2.cvtColor(colored, cv2.COLOR_BGR2GRAY)
result[result <= 10] = 255
cv2.imshow('result before removal', result)
result[mask_two==255] = 255

cv2.imshow('dilate', dilate)
cv2.imshow('colored', colored)
cv2.imshow('mask_two', mask_two)
cv2.imshow('result after removal', result)
cv2.waitKey()

Depending on the image, you may need to adjust the lower/upper HSV ranges. To determine the HSV lower/upper ranges, you can use this HSV thresholder script with sliders so you don't need to guess and check. Just change the image path

import cv2
import numpy as np

def nothing(x):
    pass

# Load image
image = cv2.imread('1.jpg')

# Create a window
cv2.namedWindow('image')

# Create trackbars for color change
# Hue is from 0-179 for Opencv
cv2.createTrackbar('HMin', 'image', 0, 179, nothing)
cv2.createTrackbar('SMin', 'image', 0, 255, nothing)
cv2.createTrackbar('VMin', 'image', 0, 255, nothing)
cv2.createTrackbar('HMax', 'image', 0, 179, nothing)
cv2.createTrackbar('SMax', 'image', 0, 255, nothing)
cv2.createTrackbar('VMax', 'image', 0, 255, nothing)

# Set default value for Max HSV trackbars
cv2.setTrackbarPos('HMax', 'image', 179)
cv2.setTrackbarPos('SMax', 'image', 255)
cv2.setTrackbarPos('VMax', 'image', 255)

# Initialize HSV min/max values
hMin = sMin = vMin = hMax = sMax = vMax = 0
phMin = psMin = pvMin = phMax = psMax = pvMax = 0

while(1):
    # Get current positions of all trackbars
    hMin = cv2.getTrackbarPos('HMin', 'image')
    sMin = cv2.getTrackbarPos('SMin', 'image')
    vMin = cv2.getTrackbarPos('VMin', 'image')
    hMax = cv2.getTrackbarPos('HMax', 'image')
    sMax = cv2.getTrackbarPos('SMax', 'image')
    vMax = cv2.getTrackbarPos('VMax', 'image')

    # Set minimum and maximum HSV values to display
    lower = np.array([hMin, sMin, vMin])
    upper = np.array([hMax, sMax, vMax])

    # Convert to HSV format and color threshold
    hsv = cv2.cvtColor(image, cv2.COLOR_BGR2HSV)
    mask = cv2.inRange(hsv, lower, upper)
    result = cv2.bitwise_and(image, image, mask=mask)

    # Print if there is a change in HSV value
    if((phMin != hMin) | (psMin != sMin) | (pvMin != vMin) | (phMax != hMax) | (psMax != sMax) | (pvMax != vMax) ):
        print("(hMin = %d , sMin = %d, vMin = %d), (hMax = %d , sMax = %d, vMax = %d)" % (hMin , sMin , vMin, hMax, sMax , vMax))
        phMin = hMin
        psMin = sMin
        pvMin = vMin
        phMax = hMax
        psMax = sMax
        pvMax = vMax

    # Display result image
    cv2.imshow('image', result)
    if cv2.waitKey(10) & 0xFF == ord('q'):
        break

cv2.destroyAllWindows()
Killdeer answered 29/3, 2022 at 3:50 Comment(15)
The watermark color range can be sometimes variable, as i have another instances of the same image with another variant of the watermark but with a black -can also vary- headlined text. Is there a more dynamic approach that can handle such inconsistencies. So far Image sharpening is more consistent and the resulting underlying text is much more readable, but the remaining contours are the only drawback. If remaining connected lines can be alternate starting point irrespective of color palette.Veilleux
Trying to remove contours after sharpening is quite difficult since there's no unique trait to isolate the unwanted contours. If you insist on going with that route, another approach off the top my head would be to try separate characters by rows with dilation but I still don't see any easy way to remove the extra contoursKilldeer
I've reverted back to that as the current one yielded similarly washed out letters and moreover got drastically clobbered results with other induced colors added i.e. headlines was in black rather than pink. The ultimate objective is mere refinement not optimal clear-cut results, so i guess removal of contours or their unconnected distorted lines of any length higher than plain letter length would suffice. The current one i'v added , as displayed at the first images doesn't seem to do always fulfill the job.Veilleux
Any updates in a way to alternatively utilize this? I've tried houghlines but it didn't work out as the lines were on anglesVeilleux
I don't see a way to remove contours without using color as the method since any thresholding will damage the text. Once you sharpen the image, it destroys text and makes the watermark outline contours indistinguishable from the text contours. To prevent the text from getting damaged, the only method I see is using a bitwise approach with some mask to remove the watermark contours and to do that, color is the way to generate that mask. Your problem involves 1) removing colors and 2) keeping text undamaged. I can't think of another method to do both. Maybe someone else has another approachKilldeer
I've been trying out many different solutions for the past few days, and an old solution of yours was the most viable one with contours detection on the plain sharpened . Can it be further employed for this usecaseVeilleux
Hmm I forgot about that question. You could try, but once you sharpen the image, detail is still lost. Lets ask for more help! I'm interested in knowing how to solve this tooKilldeer
As a beginner with cv, i've inpainting but I can't get the contours mask. Can you please provide a way to tweak your aforementioned answer to get something similar to this mask or outright adjusted for this case i.e. remains of a whole object non-straight linesVeilleux
To get that mask you can HSV threshold then skeletonize to get the outlinesKilldeer
I'm also thinking of a way where it detects any non-white segment beyond a specific length threshold (threshold > longest character length) then remove all the consecutive linear pixels (i.e. all but characters). If you can mention cv concepts i can look up for this, because google can't apparently make sense what i'm trying to look up in hereVeilleux
update: attempting to skelectonize the image didn't play out wellVeilleux
Ripperoni pepperoniKilldeer
I'm genuinely clueless of how can this be used at this case.Veilleux
@yusif As you can see, the linked post detects gray pixels, and the texts you are trying to preserve in the documents here are gray.Donaghue
@AnnZen and so is the left contours, given that any work would start off with the binary image itself.Veilleux
D
7

The Concept

For this, I used two simple HSV masks; one to fade out the logo (using a simple formula), and one to finish off the masking by completely removing the logo.

Here is the original image, the pre-masked image, and the completely-masked image, in that order:

Here is what the two masks look like:

The Output

enter image description here

The Code

import cv2
import numpy as np

def HSV_mask(img_hsv, lower):
    lower = np.array(lower)
    upper = np.array([255, 255, 255])
    return cv2.inRange(img_hsv, lower, upper)
    
img = cv2.imread("image.jpg")
img_hsv = cv2.cvtColor(img, cv2.COLOR_BGR2HSV)
img_gray = cv2.cvtColor(img, cv2.COLOR_BGR2GRAY)
img_gray[img_gray >= 235] = 255
mask1 = HSV_mask(img_hsv, [0, 0, 155])[..., None].astype(np.float32)
mask2 = HSV_mask(img_hsv, [0, 20, 0])
masked = np.uint8((img + mask1) / (1 + mask1 / 255))
gray = cv2.cvtColor(masked, cv2.COLOR_BGR2GRAY)
gray[gray >= 180] = 255
gray[mask2 == 0] = img_gray[mask2 == 0]

cv2.imshow("result", gray)
cv2.waitKey(0)

The Explanation

  1. Import the necessary libraries:
import cv2
import numpy as np
  1. Define a function, HSV_mask, that will take in an image (that has been converted to HSV color space), and the lower range for the HSV mask (the upper range will be 255, 255, 255), and return the HSV mask:
def HSV_mask(img_hsv, lower):
    lower = np.array(lower)
    upper = np.array([255, 255, 255])
    return cv2.inRange(img_hsv, lower, upper)
  1. Read in the image, image.jpg, and define two more variables that will hold the image converted to HSV and grayscale. For the grayscale image, replace all pixels of it that is greater or equal to 235 with 255; this will remove some noise from the white parts of the image:
img = cv2.imread("image.jpg")
img_hsv = cv2.cvtColor(img, cv2.COLOR_BGR2HSV)
img_gray = cv2.cvtColor(img, cv2.COLOR_BGR2GRAY)
img_gray[img_gray >= 235] = 255
  1. Define 2 variables, mask1 and mask2, using the HSV_mask function defined before. mask1 will mask out everything but the text, and mask2 will mask out everything but the logo:
mask1 = HSV_mask(img_hsv, [0, 0, 155])[..., None].astype(np.float32)
mask2 = HSV_mask(img_hsv, [0, 20, 0])
  1. Mask the original image with mask1 and a formula that will fade out (but not remove) the logo. This is just a preprocessing step so that we can remove the logo cleanly later:
masked = np.uint8((img + mask1) / (1 + mask1 / 255))
  1. Convert the image with the faded logo to grayscale, and apply mask2 so that all pixels masked out by the mask will be converted back to the original image:
gray = cv2.cvtColor(masked, cv2.COLOR_BGR2GRAY)
gray[gray >= 180] = 255
gray[mask2 == 0] = img_gray[mask2 == 0]
  1. Finally, show the result:
cv2.imshow("result", gray)
cv2.waitKey(0)
Donaghue answered 5/4, 2022 at 20:20 Comment(9)
Unfortunately it's suffering from the same inconsistency that got me a washed out result in my second image and also not accepting the first answer. The watermark hovering headline colors are quite varying, and therefor get messed up results like 1, 2 and also initially 3Veilleux
Ahh another HSV color threshold approach, see @yusif, It's really difficult to remove the pink color without using color as the unique identifier. Finding a dynamic solution is gonna be really difficult, usually when it comes to image processing tasks, they are case-by-case basis especially if the colors are varyingKilldeer
I understand this now, but even with a per-case approach, i don't think hsv color will work out with these induced colors e.g. black headline appended to the watermark .Veilleux
@yusif "but even with a per-case approach, i don't think hsv color will work out with these induced colors" That's not that true; you'll just need to fine tune the parameters. Anyway, is it possible that your use for the processed images doesn't necessarily require the watermark to be removed? I wouldn't know, as you didn't specify, but if you do, we might be able to find a solution that doesn't remove the watermark whilst fulfilling the same task.Donaghue
@AnnZen It was initially about mere mere text extraction, but since the watermark is imposed, ocr usually have a hard time processing text. you'll just need to fine tune the parameters. can you please update the code with a comment on it for this varying black headline caseVeilleux
@yusif What black headline?Donaghue
@AnnZen The first "headline colors" link in this comments threadVeilleux
@yusif I'm a bit confused as to which part of that image is its headlines. But here's another idea: Use the trackbars from this very well written answer to get the upper and lower HSV range on numerous different colors from your images. Then, for each image, use an algorithm to detect the color needed, and use the corresponding ranges on them.Donaghue
to which part the headline watermark right in the center of this image. for each image, use an algorithm to detect the color needed once i hsv for one color is employed while having another watermark of a different color, the resulting image gets clobbered drastically.Veilleux

© 2022 - 2024 — McMap. All rights reserved.