How to make a tkinter canvas background transparent?
Asked Answered
A

5

11

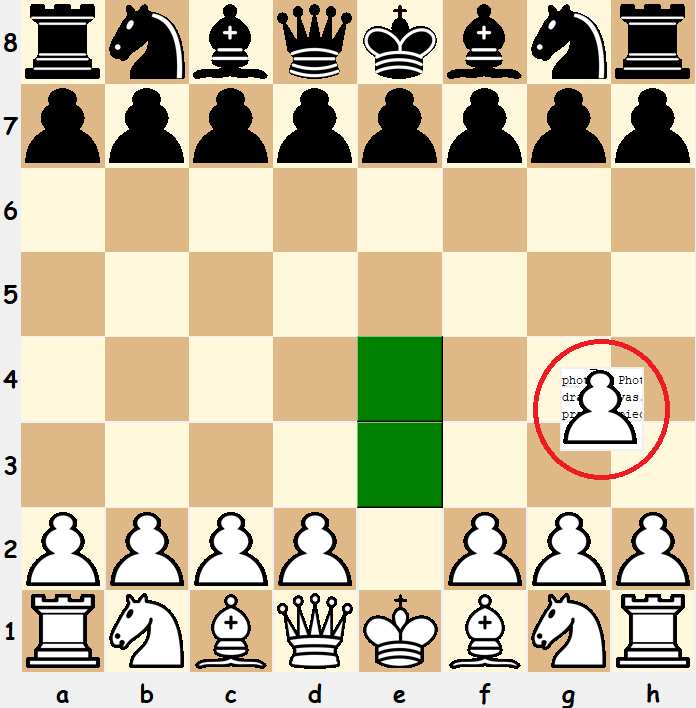
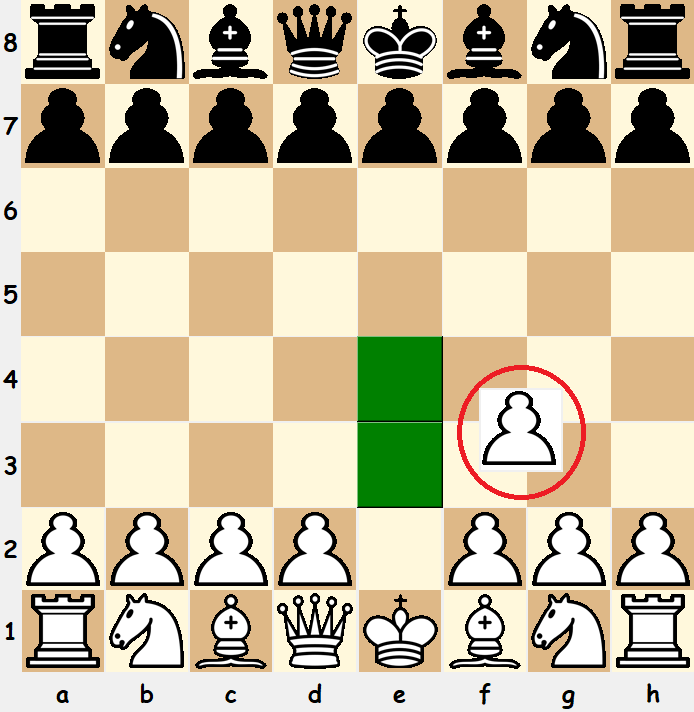
I am making a chess program and I want to be able to drag the pieces. In order to do this, I put the image of the piece on a Canvas so it can be dragged (I can also use a Label if I want). However, when I drag the piece there is a white square that surrounds the image of the piece.

enter image description here

When I researched the problem, many people gave this solution:

drag_canvas = Canvas(self, height=80, width=80, bg="yellow")
root.wm_attributes("-transparentcolor", "yellow")

This caused the background to be transparent but it was not the chessboard that was visible, it was the program behind the GUI

enter image description here.

Is there any way I can have the background be transparent and show the chessboard behind rather than the program behind the tkinter window?

Note: I do not mind using any other widget (e.g. a Label) but they must use modules that come default with Python (so no PIL) as this program needs to be used in an environment where I cannot download other modules.

Arthromere answered 27/10, 2018 at 11:47 Comment(5)
Read this updating-tkinter-label-with-an-imageSimmons
@Simmons That uses PILArthromere
Your pices are allready transparent, why do you want to use a .Canvas(...? Edit your Question and add info about the image format.Simmons
@Simmons Yes, they are transparent but in order to be dragged around the board, I need to put them on some sort of widget. This widget has a background which is not transparent so I needed to make the background transparent. I just used a Canvas because I thought that this would be the best way judging by similar posts on stackoverflow. So, if there is a way to accomplish this without a Canvas then I am more than happy to use it.Arthromere
@Anonymous Coder. Where can I get black and white images?Cottrell
S
6

Question: How to make a tkinter canvas background transparent?

The only possible config(... option, to set the background to nothing

c.config(bg='')

results with: _tkinter.TclError: unknown color name ""


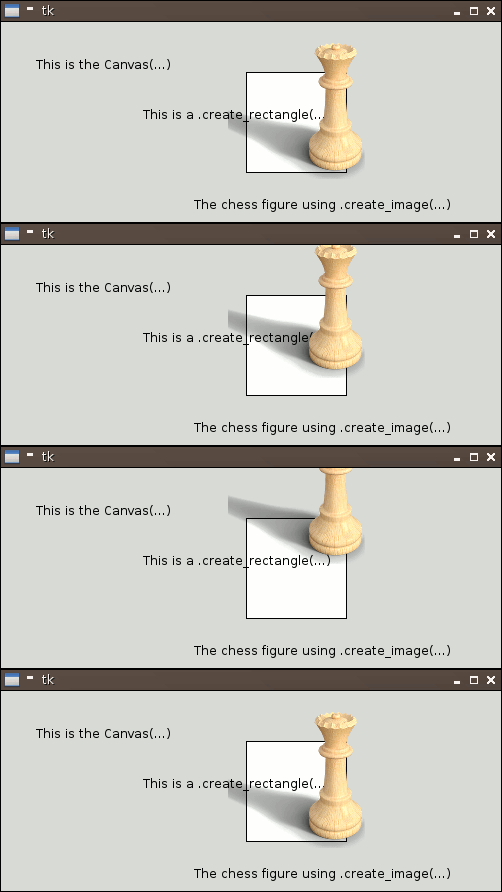
To get this result:

enter image description here

you have to hold the chess board and figures within the same .Canvas(....

    self.canvas = Canvas(self, width=500, height=200, bd=0, highlightthickness=0)
    self.canvas.create_rectangle(245,50,345,150, fill='white')

    self.image = tk.PhotoImage(file='chess.png')
    self.image_id = self.canvas.create_image(50,50, image=self.image)

    self.canvas.move(self.image_id, 245, 100)

Tested with Python: 3.5 - TkVersion: 8.6

Simmons answered 29/10, 2018 at 13:57 Comment(2)
Sorry, but the question is how to get a transparent canvas. You gave a work around, telling to put the image on the same canvas. How does this answer the question? In my case, I need to put my image and background on different canvases.Venetis
The questioner said "I do not mind using any other widget" and a tk PhotoImage should be close enough for pieces on a chestboard. Pillow can be used to get a transparent backgroundQuartile
S
5

A windows only solution is to use the pywin32 module that can be installed with:

pip install pywin32

With pywin32 you can alter the window exstyle and set the canvas to a layered window. A layered window can have a transparent colorkey and is done in the example below:

import tkinter as tk
import win32gui
import win32con
import win32api
        

root = tk.Tk()
root.configure(bg='yellow')
canvas = tk.Canvas(root,bg='#000000')#full black
hwnd = canvas.winfo_id()
colorkey = win32api.RGB(0,0,0) #full black in COLORREF structure
wnd_exstyle = win32gui.GetWindowLong(hwnd, win32con.GWL_EXSTYLE)
new_exstyle = wnd_exstyle | win32con.WS_EX_LAYERED
win32gui.SetWindowLong(hwnd,win32con.GWL_EXSTYLE,new_exstyle)
win32gui.SetLayeredWindowAttributes(hwnd,colorkey,255,win32con.LWA_COLORKEY)
canvas.create_rectangle(50,50,100,100,fill='blue')
canvas.pack()

Explanation:

First we need the handle of the window which is called hwnd and we can get it in tkinter by .winfo_id().

Next we get the actual extended window style by GetWindowLong and ask specific for extended style information with win32con.GWL_EXSTYLE.

After that we do a bitwise operation in hexadecimal to alter the style with wnd_exstyle | win32con.WS_EX_LAYERED the result is our new_style.

Now we can set the extended style to the window with SetWindowLong. Finally we have our LayeredWindow which has additional Attributes we can work with. A transparent ColorKey can be set with SetLayeredWindowAttributes while we just use LWA_COLORKEY the alpha parameter has no use to us.

Important note: After defining a transparent colorkey, everything in that canvas with that color will be transparent.

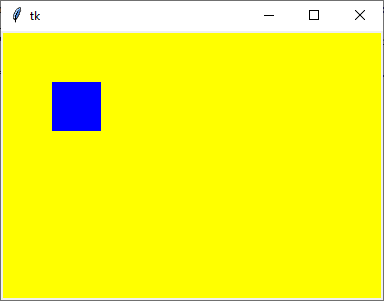
enter image description here

Scathe answered 29/11, 2021 at 5:55 Comment(0)
A
1

It is just not possible with Tkinter.

Ackley answered 30/4, 2023 at 1:27 Comment(1)
this answer could be improved with additional facts and references to back it up. Also, I edited out your badmouthing of this platform. We don't appreciate your lack of etiquette. If you don't like something about what you see, be the change.Anarthrous
R
1

The windows only solution from @thingamabobs works also via windll which comes standard with python (3.11 on surface pro 8, win11),

I converted it into a function:

import tkinter as tk
from ctypes import windll

def maketransparent(w):
    # the translated windll part...
    # a COLORREF structure is a reverse RGB order int!
    # see https://www.pinvoke.net/search.aspx?search=COLORREF&namespace=[All]
    # here we chose nearly black so real black (#000000) still shows up
    colorkey = 0x00030201
    hwnd = w.winfo_id()
    wnd_exstyle = windll.user32.GetWindowLongA(hwnd, -20)  # GWL_EXSTYLE
    new_exstyle = wnd_exstyle | 0x00080000  # WS_EX_LAYERED
    windll.user32.SetWindowLongA(hwnd, -20, new_exstyle)  # GWL_EXSTYLE
    windll.user32.SetLayeredWindowAttributes(hwnd, colorkey, 255, 0x00000001)  # LWA_COLORKEY = 0x00000001


win=tk.Tk()
win.geometry('400x200')
win.grid_rowconfigure(0,weight=1)
win.grid_columnconfigure(0,weight=1)

cvs_lower=tk.Canvas(win, background='lightgreen')
cvs_lower.create_rectangle(50, 50, 350, 150, fill='blue')
cvs_lower.grid(row=0, column=0, sticky='nesw')

cvs_upper=tk.Canvas(win, background='#010203') #dont use all black, screws up any black trext on your canvas...
cvs_upper.create_rectangle(325, 25, 375, 175, fill='red')
cvs_upper.grid(row=0, column=0, sticky='nesw')
btn=tk.Button(cvs_upper, text='plop', foreground='#010203', font='Arial 30')
btn.pack(side='right')


win.after(2000, lambda:maketransparent(cvs_upper))
win.mainloop()

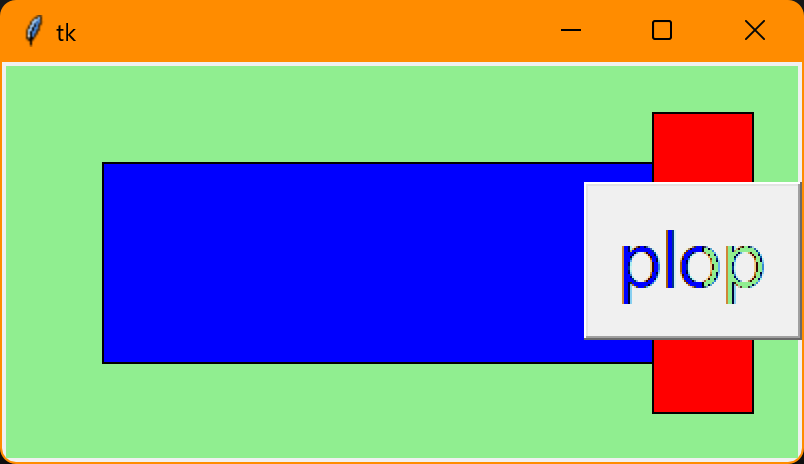
So for you, if the draggable canvas is made transparent, its white background will disapear. As in, When chess piece is a white (or black..) filled shape on a canvas with background=colorkey that back ground will disappear... as is demonstrated with the two canvasses here

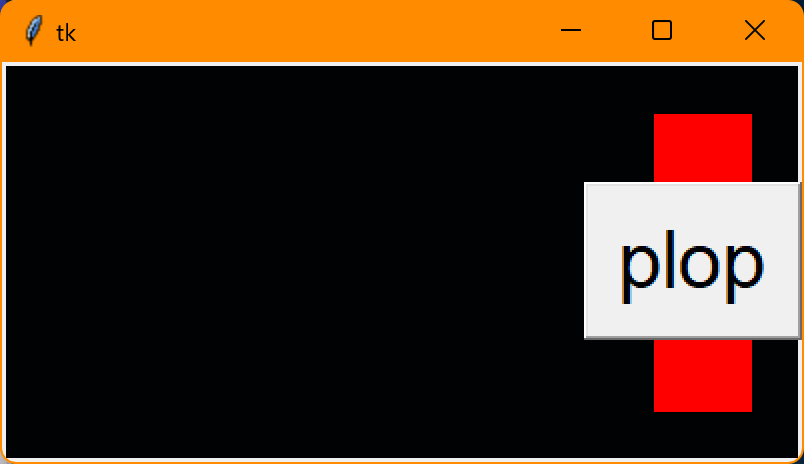
Just for completeness, I noticed that any portion of any child of the Canvas cvs_upper that has the transparency color colorkey will also be transparent even if the canvas itself may have a drawing on it and is not transparent (e.g. the red bar in the images below).

this is illustrated with a button on the second canvas with its text displayed in the colorkey color.

before the windows is made transparent we see this: before the upper canvas is transparent

The canvas is dark (#010203 is v dark!) and the button text is the same color. After a second the upper canvas becomes transparent:

After the upper canvas is made transparent

as you can see the canvas and the button text are now transparent, and we see the first canvas below it. We do not see the red bar below the button!

Recorder answered 30/8, 2023 at 2:6 Comment(1)
note for the inverse, to make the transparent canvas opaque again, use 'windll.user32.SetWindowLongA(hwnd, -20, 4)' #GWL_EXSTYLE =4 for opaqueRecorder
H
0

I mean to see that you have provided an answer to your own question already in your question itself, but it appears to me at the same time also that you are not aware of providing a solution to the experienced issue because you are focused on another way of solving the by you faced problem.

Sometimes the most obvious facts stay undetected buried deep below all of the other thoughts while searching for a solution to an experienced issue.

If what you describe in your question works as described (haven't tested it yet), the most straightforward solution which details you have already described in your question is to use two windows one above the other. The window in the background displays the same chessboard as the window above it.

Now if you move your piece having transparent background you will see through the transparent part of the piece the chessboard displayed by the window in background creating this way the illusion of moving only the visible part of the chess-piece over the chessboard displayed in the foreground window.

I would be glad if you could report if this worked out for you. It's a work-around, but should give you the expected behavior.

Now if you move your piece having transparent background you will see around the piece the chessboard displayed by the window in background creating the illusion that the image transparency lets you view the canvas background you move the piece around on.

Hydrophobia answered 16/3 at 16:38 Comment(3)
Sure, it would work. However, it requires another window to be created that the user must manually keep behind the main window at all times. This would cause problems if the user drags the main window around.Arthromere
@AnonymousCoder : in Tkinter you have control over window position, don't you? So as both windows belong to same application you can establish a callback function which syncs the background window position/size with the foreground one. But probably best will be to provide window geometry as a command line parameter for starting the game and generally forbid to reposition or resize the once opened window ... or even better to run it fullscreen only.Hydrophobia
@AnonymousCoder : by the way : in my version of Tkinter the approach described in my answer won't work as the image transparency is not handled as described in the question.Hydrophobia

© 2022 - 2024 — McMap. All rights reserved.