Is there a straightforward way to change the background of a View using SwiftUI?
Screen's Background Color
(As of Xcode Version 13)
I'm not sure if the original poster meant the background color of the entire screen or of individual views. So I'll just add this answer which is to set the entire screen's background color.
Using ZStack
var body: some View {
    ZStack {
            Color.purple
                .ignoresSafeArea()

            // Your other content here
            // Other layers will respect the safe area edges
    }
}
I added .ignoresSafeArea() otherwise, it will stop at safe area margins.
Using Overlay Modifier
var body: some View {
    Color.purple
        .ignoresSafeArea(.vertical) // Ignore just for the color
        .overlay(
            VStack(spacing: 20) {
                Text("Overlay").font(.largeTitle)
                Text("Example").font(.title).foregroundColor(.white)
        })
}
Note: It's important to keep the .ignoresSafeArea on just the color so your main content isn't ignoring the safe area edges too.
iOS 15
iOS 15/Xcode 13 has introduced some changes to the way Styles work with the edges of safe areas.
From my observation, the rule is: If the style touches the safe area edge, it will bleed into the safe area.
This gives you more options for setting a background color/style.
What is a Style?
A Style can be:
- Colors
- Materials (blur effects)
- Hierarchical views (.secondary, .tertiary, .quaternary)
- Gradients
Using Background
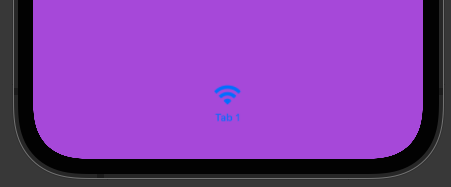
Because the background of the VStack touches the edge of the safe area, the purple color will bleed into the safe area.
var body: some View {
    VStack {
        Text("Hello, World!")
        Divider()
        Spacer()
    }
    .background(Color.purple)
}
TabView
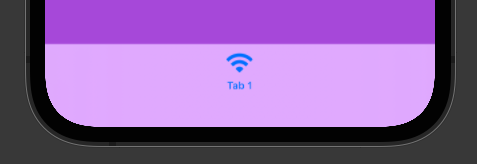
In iOS 15 the TabView is no longer translucent. Meaning the background color will bleed right into it.
If you want to provide a custom style for your TabView, you can add another Style that touches the bottom safe area edge so that bleeds into your TabView. For example:
var body: some View {
    TabView {
        VStack {
            Text("Hello, World!")
            Divider()
            Spacer()
            // Bleeds into TabView
            Rectangle()
                .frame(height: 0)
                .background(.thinMaterial)
        }
        .background(Color.purple)
        .tabItem {
            Text("Tab 1")
            Image(systemName: "wifi")
        }
    }
}
NavigationView
The same thing that happens to TabView will also happen with NavigationView.
To customize the NavigationView style, add a style that will touch the top safe area edge and it will bleed into the NavigationView:
var body: some View {
    NavigationView {
        VStack {
            // Bleeds into NavigationView
            Rectangle()
                .frame(height: 0)
                .background(.ultraThinMaterial)
            Text("Hello, World!")
            Divider()
            Spacer()
        }
        .background(Color.purple)
        .navigationTitle(Text("Style"))
    }
}
iOS 17
Using ContainerRelativeFrame
The containerRelativeFrame modifier will use the relative size of the container/device.
So if it is on the root view, it will use the size of the device.
VStack {
    Text("Container Relative Frame")
        .font(.title)
}
.containerRelativeFrame([.horizontal, .vertical])
.background(Gradient(colors: [.teal, .cyan, .green]).opacity(0.6))
I'm totally open to other ways of accomplishing this. Leave a comment or edit this answer if you know of other ways.
.edgesIgnoringSafeArea(.all) to just the color and not any of the other content. This should work better for you. –
Hyperthermia You can do something like:
.background(Color.black)
around your view.
eg. from the default template (I am encompassing it around a Group):
    var body: some View {
        VStack {
          Text("Hello SwiftUI!")
        }
       .background(Color.black)
    }
To add some opacity to it, you can add the .opacity method as well:
.background(Color.black.opacity(0.5))
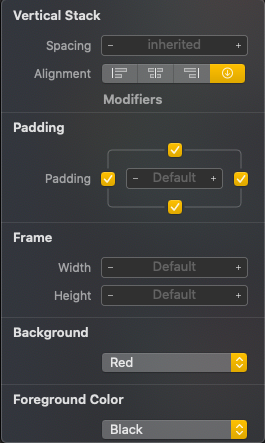
You can also make use of the inspect element of the view by CMD + click on the View and clicking Show SwiftUI Inspector > Background > Your Color
Color() directly into a view, because .background() will not alter the implicit size of the view (if you are applying it to a subview). –
Karimakarin Background Color
(tested on iOS 17.4 Xcode Simulator)
Note that foregroundColor(_:) modifier has been deprecated. Use foregroundStyle(_:) instead.
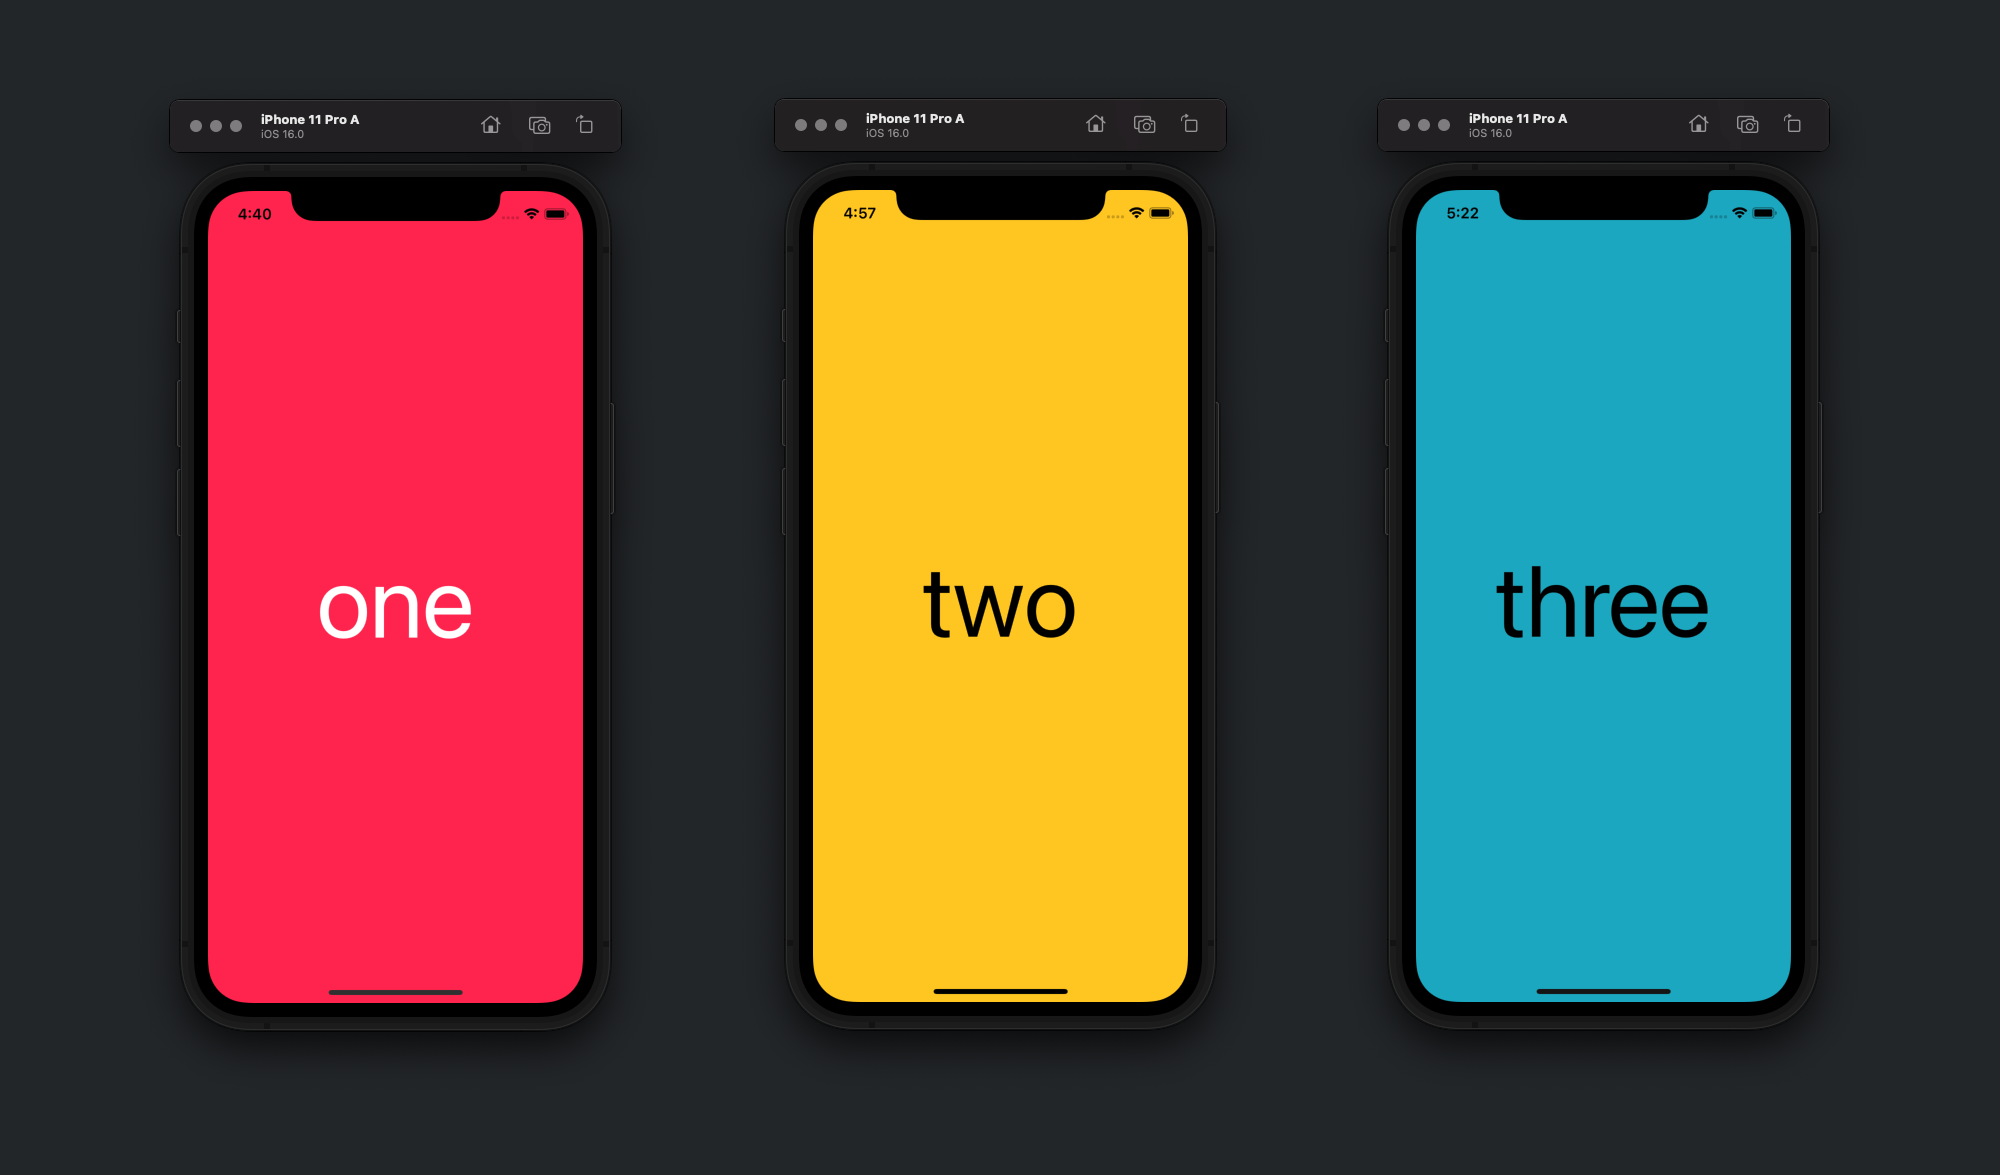
1. Text BG
To dilate a BG color on Text view, use maxWidth and maxHeight parameters of .frame() modifier.
var body: some View {             // PINK COLOR
    Text("one")
        .frame(maxWidth: .infinity, maxHeight: .infinity)
        .foregroundStyle(.white)
        .font(.system(size: 100))
        .background(.pink)
}
2. ZStack
To fill a ZStack view's background, use Color object as the base layer.
var body: some View {             // YELLOW COLOR
    ZStack {
        Color.yellow.ignoresSafeArea()
        Text("two").font(.system(size: 100))
    }
}
3. VStack | HStack
In case you want to assign a new BG color to VStack or HStack, apply modifiers to the stack itself.
var body: some View {             // TEAL COLOR
    VStack {
        Text("three").font(.system(size: 100))
    }
    .frame(maxWidth: .infinity, maxHeight: .infinity)
    .background(.teal)
}
4. Gradient
You're capable of using Rectangle that ignores screen's safe area and fills a screen with a gradient.
var body: some View {             // PURPLISH GRADIENT
    ZStack {
        Rectangle()
            .fill(Gradient(colors: [.indigo, .purple]))
            .ignoresSafeArea()
        Text("four").font(.system(size: 100))
            .foregroundStyle(.white)
    }
}
5. Color Scheme | Color Invert
Color inversion is a simple and smart solution.
var body: some View {             // INVERSION OF A COLOR
    ZStack {
        List {
            ForEach(1..<6) { version in
                HStack {
                    Image(systemName: "swift")
                    Text("Swift \(version).0")
                }
            }
        }
        Text("five").font(.system(size: 100))
    }
    .environment(\.colorScheme, .dark)
    // .colorInvert()
}
6. Image
An unindented image can contain a solid color or a gradient.
var body: some View {             // GREEN JPEG as BG COLOR
    ZStack {
        Image("green")
            .resizable()
            .ignoresSafeArea()
            .brightness(-0.2)
        Text("six").font(.system(size: 100))
            .foregroundStyle(.white)
    }
}
7. SceneView
A background color of SceneKit's scene.
import SwiftUI
import SceneKit

struct ContentView : View {       // PURPLE COLOR
    var scene = SCNScene()
    var options: SceneView.Options = [.allowsCameraControl]

    init() {
        scene.background.contents = UIColor.purple

        let model = SCNNode(geometry: SCNSphere(radius: 0.25))
        model.geometry?.materials[0].diffuse.contents = UIColor.systemMint
        scene.rootNode.addChildNode(model)
        options.insert(.autoenablesDefaultLighting)
    }

    var body: some View {
        SceneView(scene: scene, options: options).ignoresSafeArea()
    }
}
8. ARView for iOS
A background color of RealityKit's scene in non-AR mode.
import SwiftUI
import RealityKit

struct ContentView : View {       // DARK GRAY COLOR
    var body: some View {
        ARContainer().ignoresSafeArea()
    }
}

struct ARContainer : UIViewRepresentable {
    let arView = ARView(frame: .zero)
    let anchor = AnchorEntity()

    func makeUIView(context: Context) -> ARView {
        arView.environment.background = .color(.init(white: 0.2, alpha: 1))

        let model = ModelEntity(mesh: .generateSphere(radius: 0.25))
        model.setParent(anchor)
        arView.scene.anchors.append(anchor)
        return arView
    }
    func updateUIView(_ view: ARView, context: Context) { }
}
9. SpriteView
A background color of SpriteKit's scene.
import SwiftUI
import SpriteKit

struct ContentView : View {       // CHOCOLATE COLOR
    var scene = SKScene()

    init() {
        scene.backgroundColor = .init(Color(red: 0.2, green: 0.1, blue: 0))

        let node = SKShapeNode(circleOfRadius: 0.1)
        node.position = CGPoint(x: 0.5, y: 0.5)
        node.fillColor = .systemOrange
        node.lineWidth = 0
        scene.scaleMode = .aspectFill
        scene.addChild(node)
    }
    var body: some View {
        SpriteView(scene: scene).ignoresSafeArea()
    }
}
Blend Modes
In SwiftUI, there is also the compositing technique that affects background color and/or image color. Read about "photoshopic" blend modes HERE.
Fill the entire screen:
var body: some View {
    Color.green.edgesIgnoringSafeArea(.all)
}
| Code | Result |
|---|---|
 |
 |
like this
struct ContentView : View {
    @State var fullName: String = "yushuyi"
    var body: some View {
        VStack
            {
                TextField($fullName).background(SwiftUI.Color.red)
                Spacer()
        }.background(SwiftUI.Color.yellow.edgesIgnoringSafeArea(.all))
    }
}
.edgesIgnoringSafeArea() to the background color. Coming from UIKit this is bizarre, but it works! –
Ibby Spacer() is pushing the VStack to the height of the screen. –
Hyperthermia For List:
All SwiftUI's Lists are backed by a UITableViewin iOS. so you need to change the background color of the tableView. But since Color and UIColor values are slightly different, you can get rid of the UIColor.
struct ContentView : View {
    init(){
        UITableView.appearance().backgroundColor = .clear
    }

    var body: some View {
        List {
            Section(header: Text("First Section")) {
                Text("First Cell")
            }
            Section(header: Text("Second Section")) {
                Text("First Cell")
            }
        }
        .background(Color.yellow)
    }
}
Now you can use Any background (including all Colors) you want
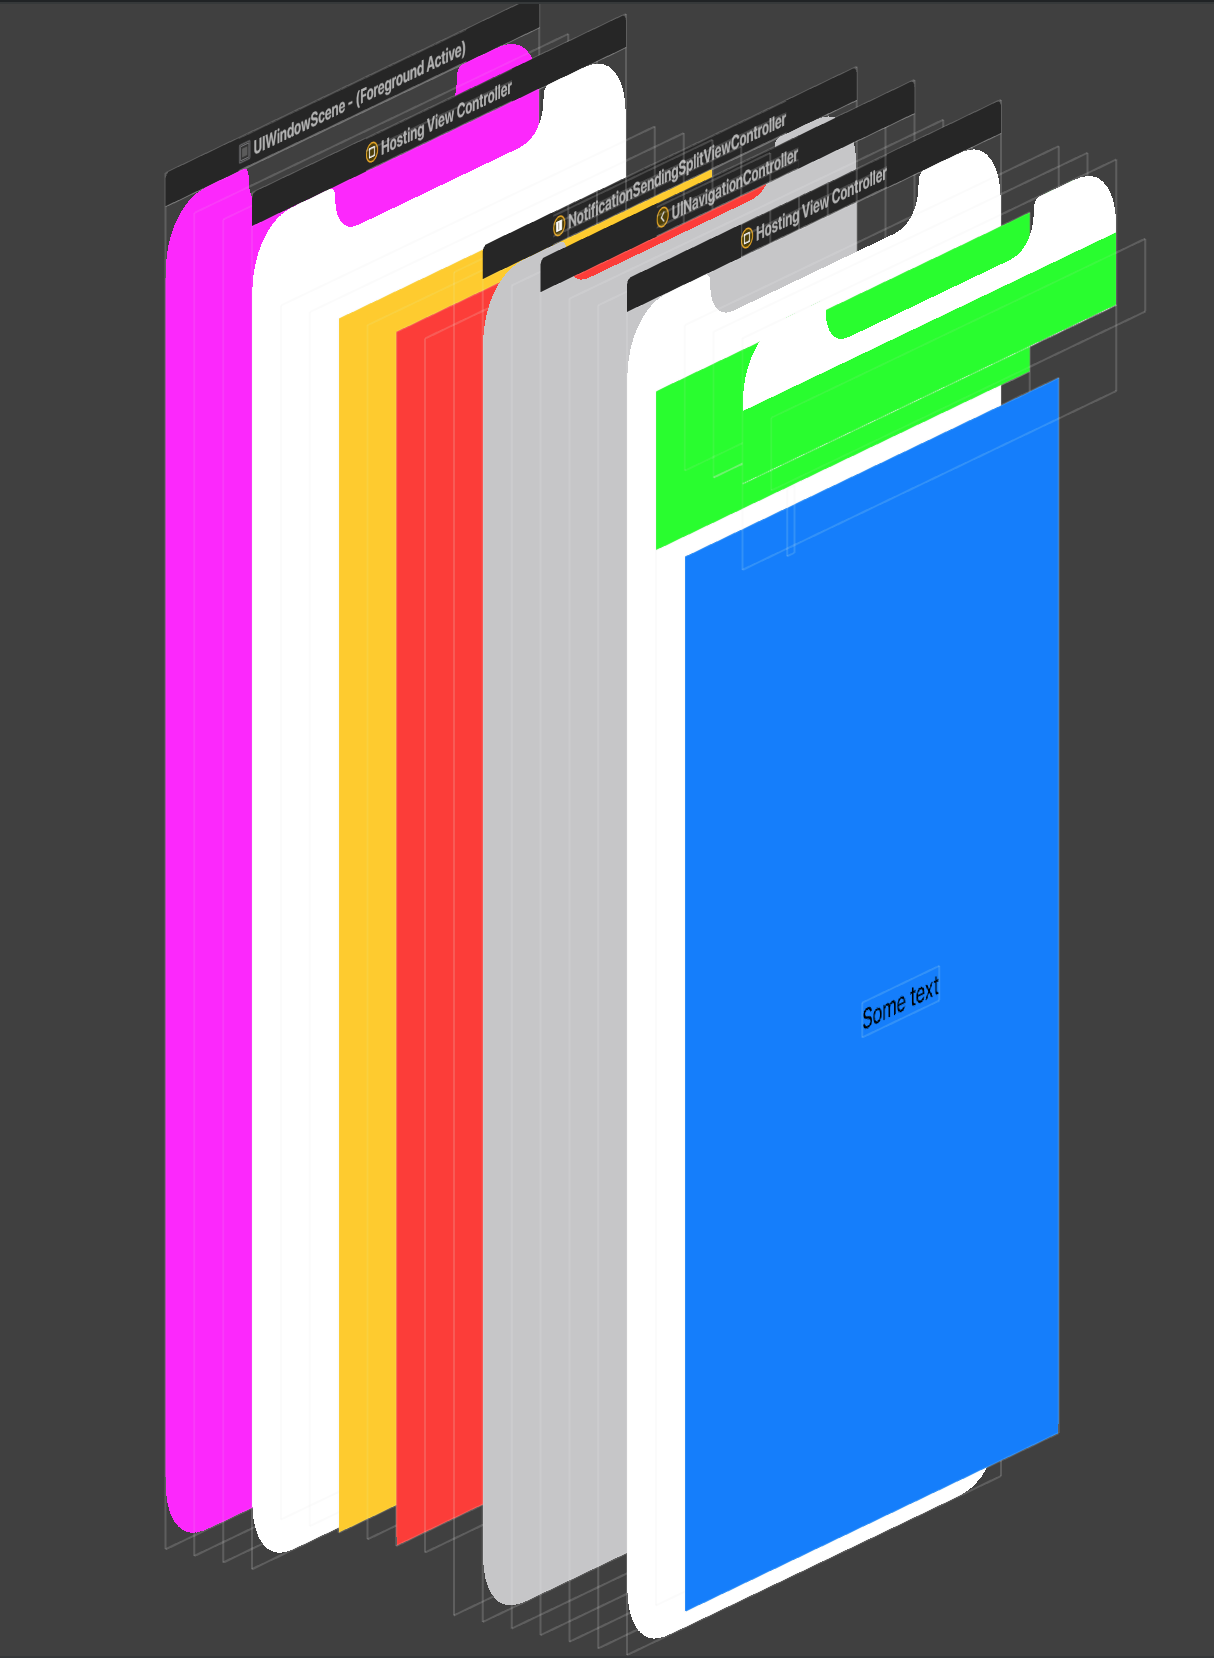
Also First look at this result:
As you can see, you can set the color of each element in the View hierarchy like this:
struct ContentView: View {

    init(){
        UINavigationBar.appearance().backgroundColor = .green
        //For other NavigationBar changes, look here:(https://mcmap.net/q/101329/-how-to-set-navigationview-background-colour-in-swiftui)
    }

    var body: some View {
        ZStack {
            Color.yellow
            NavigationView {
                ZStack {
                    Color.blue
                    Text("Some text")
                }
            }.background(Color.red)
        }
    }
}
And the first one is window:
window.backgroundColor = .magenta
The very common issue is we can not remove the background color of SwiftUI's HostingViewController (yet), so we can't see some of the views like navigationView through the views hierarchy. You should wait for the API or try to fake those views (not recommended).
ListCoreCellHost that stays white. pasteboard.co/JeWCgMV.png –
Eupatrid UITableViewCell.appearance().backgroundColor = .clear as well. :) –
Eupatrid struct Soview: View {
var body: some View {
VStack{
Text(/*@START_MENU_TOKEN@*/"Hello, World!"/*@END_MENU_TOKEN@*/)
.frame(maxWidth:.infinity,maxHeight: .infinity)
}.background(Color.yellow).ignoresSafeArea(.all)
}
}
iOS Deployment Target 15 → Use the modifier .background(Color).
If your app needs to be compatible with older SwiftUI versions, e.g. that of iOS 14, you can follow Apple's advice and make a temporary ViewModifier:
Adopt the
ViewModifier protocolwhen you want to create a reusable modifier that you can apply to any view.You can apply
modifier(_:)directly to a view, but a more common and idiomatic approach usesmodifier(_:)to define an extension toViewitself that incorporates the view modifierSource: Developer Documentation > SwiftUI > View Fundamentals > ViewModifier
extension View {
  @available(iOS, deprecated: 15.0, message: "No longer needed, use the default background modifier instead")
  func backgroundColor(_ color: Color) -> some View {
    modifier(BackgroundColorModifier(color: color))
  }
}

struct BackgroundColorModifier: ViewModifier {
  var color: Color

  func body(content: Content) -> some View {
    if #available(iOS 15.0, *) {
      content
        .background(color)
    } else {
      ZStack {
        color // background
        content
      }
    }
  }
}
Then you can apply .backgroundColor(_:) on any View:
var body: some View {
  ScrollView() {
    …
  }
  .backgroundColor(.red)
}
When your app no longer supports the older iOS version, you will be warned that your custom view modifier is no longer required … 🧹 clean-up time!
.fixedSize(horizontal: true, vertical: true) to every view that use this. It's kind of ugly. Do you have a better solution or am I missing something? –
Zing Several possibilities : (SwiftUI / Xcode 11)
1 .background(Color.black) //for system colors
2 .background(Color("green")) //for colors you created in Assets.xcassets
- Otherwise you can do Command+Click on the element and change it from there.
Hope it help :)
You can Simply Change Background Color of a View:
var body : some View{


    VStack{

        Color.blue.edgesIgnoringSafeArea(.all)

    }


}
and You can also use ZStack :
var body : some View{


    ZStack{

        Color.blue.edgesIgnoringSafeArea(.all)

    }


}
I like to declare a modifier for changing the background color of a view.
extension View {
  func background(with color: Color) -> some View {
    background(GeometryReader { geometry in
      Rectangle().path(in: geometry.frame(in: .local)).foregroundColor(color)
    })
  }
}
Then I use the modifier by passing in a color to a view.
struct Content: View {

  var body: some View {
    Text("Foreground Label").foregroundColor(.green).background(with: .black)
  }

}
I don't know why nobody said this, but the background() modifier is intended to set background color and does support ignoresSafeArea():
var body: some View {
    Text("Da ba dee")
        .background(Color.blue.ignoresSafeArea())
}
Would this solution work?:
add following line to SceneDelegate: window.rootViewController?.view.backgroundColor = .black
func scene(_ scene: UIScene, willConnectTo session: UISceneSession, options connectionOptions: UIScene.ConnectionOptions) {
        if let windowScene = scene as? UIWindowScene {

                window.rootViewController?.view.backgroundColor = .black
}
Xcode 11.5
Simply use ZStack to add background color or images to your main view in SwiftUI
struct ContentView: View {
    var body: some View {
        ZStack {
            Color.black
        }
        .edgesIgnoringSafeArea(.vertical)
    }
}
Use Below Code for Navigation Bar Color Customization
struct ContentView: View {

@State var msg = "Hello SwiftUI😊"
init() {
    UINavigationBar.appearance().backgroundColor = .systemPink

     UINavigationBar.appearance().largeTitleTextAttributes = [
        .foregroundColor: UIColor.white,
               .font : UIFont(name:"Helvetica Neue", size: 40)!]

    // 3.
    UINavigationBar.appearance().titleTextAttributes = [
        .font : UIFont(name: "HelveticaNeue-Thin", size: 20)!]

}
var body: some View {
    NavigationView {
    Text(msg)
        .navigationBarTitle(Text("NAVIGATION BAR"))
    }
    }
}
Firstly you should use the
 ZStack {
      Color("Desired_color_name").ignoresSafeArea()
// if you create any color set then give that colour set name
// otherwise use Color.gray or as you want the colour name

     //Here you should start your design
    }
NavigationView Example:
var body: some View {
    var body: some View {
        NavigationView {
            ZStack {
                // Background
                Color.blue.edgesIgnoringSafeArea(.all)

                content
            }
            //.navigationTitle(Constants.navigationTitle)
            //.navigationBarItems(leading: cancelButton, trailing: doneButton)
            //.navigationViewStyle(StackNavigationViewStyle())
        }
    }
}

var content: some View {
    // your content here; List, VStack etc - whatever you want
    VStack {
       Text("Hello World")
    }
}
To make a central/reusable background widget, you can do something like this -
import SwiftUI
struct BgView<Content>: View where Content: View {
        private let content: Content

        public init(@ViewBuilder content: () -> Content) {
            self.content = content()
        }

        var body : some View {
            ZStack {
              Color.black.ignoresSafeArea()
                content
            }
          }
    }
And can easily use in all of your views like below -
import SwiftUI

struct TestView: View {
    var body: some View {
      BgView{
        Text("Hello, World!")
      }.foregroundColor(.white)
    }
}

struct TestView_Previews: PreviewProvider {
    static var previews: some View {
        TestView()
    }
}
Solution:
You can make a coloured view and set it as VStack background.
struct ColoredView: UIViewRepresentable {
    var color: Color
    func makeUIView(context: Context) -> UIView {
        let view = UIView()
        view.backgroundColor = UIColor(color)
        DispatchQueue.main.async {
            view.superview?.superview?.backgroundColor = .clear
        }
        return view
    }
    func updateUIView(_ uiView: UIView, context: Context) {}
}
Usage:
 VStack {
    Text("VStack with Red backgound")
    Text("VStack with Red backgound")
    Text("VStack with Red backgound")
    Text("VStack with Red backgound")
 }.background(ColoredView(color: .red))
You can use the .background() modifier on your View and pass in a color, gradient, image, or another view that you want to use as the background. Here's a simple example where the background of a Text view is set to a color:
Text("Hello, SwiftUI!")
.padding() // Add some padding around the text
.background(Color.blue) // Set the background color to blue
.foregroundColor(.white) // Set the text color to white
If you want to use an image as a background, you can use Image inside the .background() modifier like so:
Text("Hello, SwiftUI!")
.padding()
.background(
    Image("YourImageName") // Replace "YourImageName" with your actual image name
        .resizable() // Make the image resizable
        .aspectRatio(contentMode: .fill) // Fill the background area
)
.foregroundColor(.white)
For a more complex background, like a gradient, you can use LinearGradient, RadialGradient, or AngularGradient:
Text("Hello, SwiftUI!")
.padding()
.background(
    LinearGradient(gradient: Gradient(colors: [.blue, .purple]), startPoint: .top, endPoint: .bottom) // Create a linear gradient background
)
.foregroundColor(.white)
var body: some View {
    HStack {
        VStack {
            Spacer()
        }
        Spacer()
    }
    .background(.yellow)
}
Working for me in xcode 15
You can change the background color of a View in SwiftUI with using : ZStack{}
ZStack{} allows you to arrange your views in a pile and create distincts views as seen below 👇
struct ContentView: View {
    var body: some View {
        ZStack { // Using ZStack to organize views in a pile
            Color.pink // View 1
            VStack { // View 2
               Text("SwiftUI")
                  .font(.largeTitle)
                  .bold()
            }
        }
    }
    .accentColor(Color.black) // Color of the text displayed
}
Creating distinct views allows to modify each one as you like !
I recommend you to check ou this great article called - "How to set a screen's background color in SwiftUI"
© 2022 - 2025 — McMap. All rights reserved.

