This is the complete process that got it working for me:
YAML Approach
I haven't tried this, but this post by muddybeard210 on the GitHub post Blazor WASM ASP.NET Core Hosted Azure Devops Only Publishes Client/Shared folder gave me the clue as to how to get this working in the classic editor.
- task: DotNetCoreCLI@2
  displayName: Publish
  inputs:
    command: 'publish'
    publishWebProjects: false
    projects: '**/SkillBoard.Server.csproj'
    arguments: '--configuration $(BuildConfiguration) --output $(build.artifactstagingdirectory)'
It is important to note that publishWebProjects is set to false. This
is because "If true, the task will try to find the web projects in the
repository and run the publish command on them. Web projects are
identified by presence of either a web.config file or wwwroot folder
in the directory." - Azure devops info button
Due to this being true originally, it was selecting Client every time
because the CLIENT project has a wwwroot folder. With
publishWebProjects set to false, you can specify a particular project
with projects and use the traditional wild card characters.
Classic Editor approach
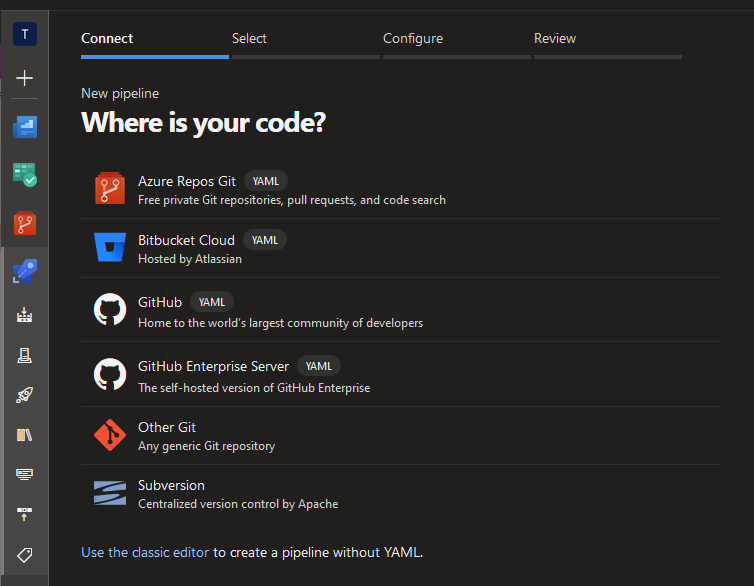
In the pipelines in VS, choose to add a new pipeline:
![New pipeline dialog]()
Click the 'Use the classic editor' link at the bottom
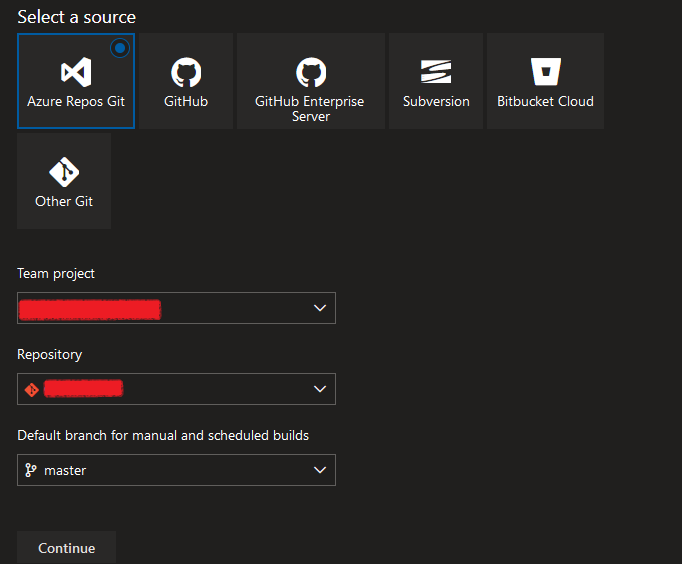
On the next page pick the repo
![Select a source dialog]()
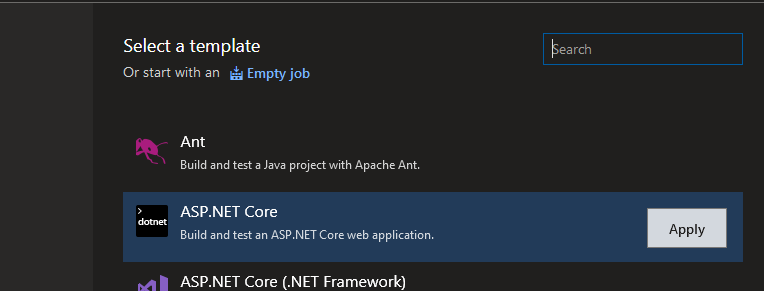
Choose the ASP.NET Core template:
![Select a template dialog]()
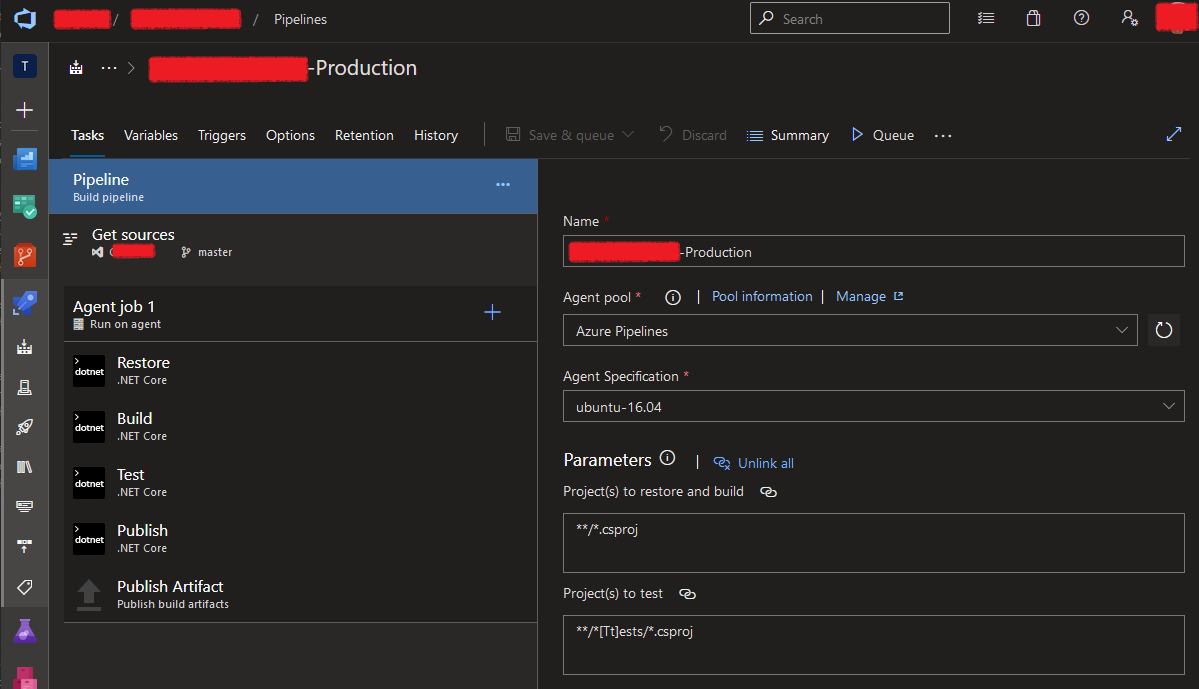
That gets you this:
![Pipeline edit page]()
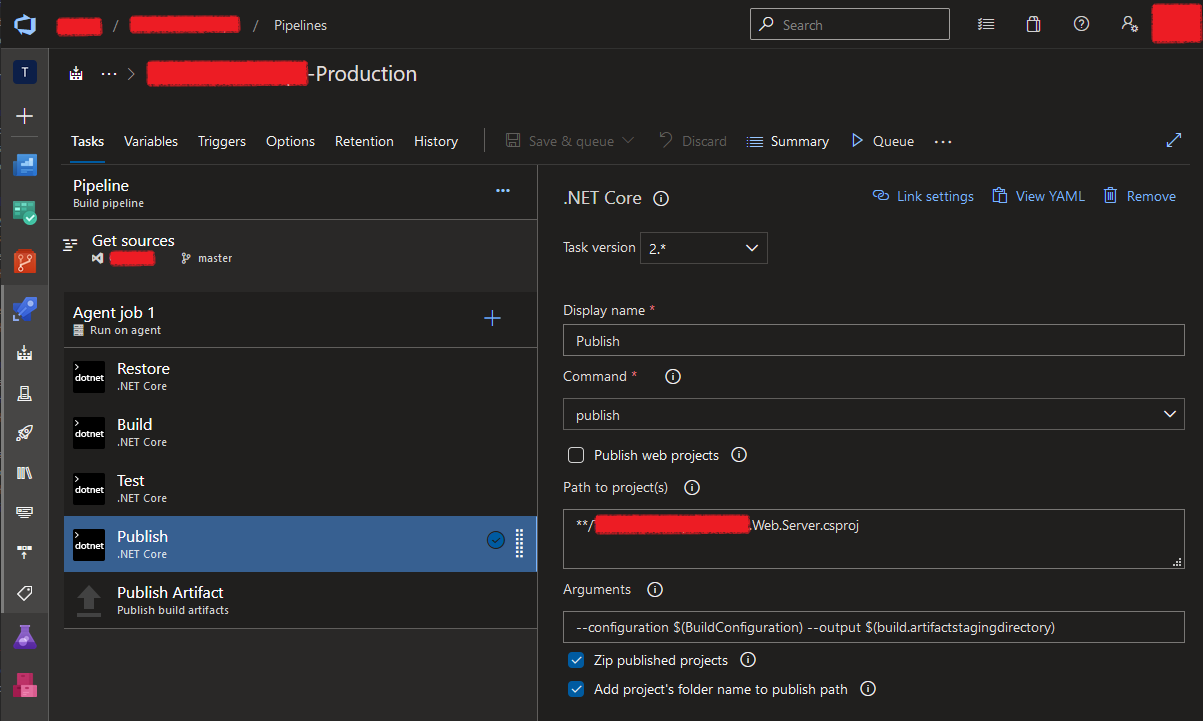
Then, you just need to change some of the settings on the Publish task:
![Pipeline edit page - Editing Publish task]()
On that task, untick 'Publish web projects' so the Path to project(s) box is shown:
![Path to project text box]()
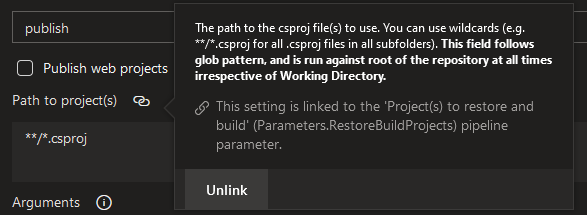
Then click the link icon and choose to Unlink:
![Unlinking]()
And finally enter a path to just your Server project in the format **/YourWebServerProject.csproj:
![Path to project]()
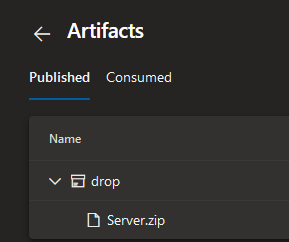
And that's it. When you run the pipeline your drop should now contain a file called Server.zip instead of Client.zip:
![Contents of Artifact drop]()

