Access Lightsail Instance's database with MySQL Workbench
Asked Answered
O

5

13

I have an Amazon Lightsail Ubuntu multi WordPress site set up with bitnami stack.

enter image description here

I'm looking for a way to access the Instance's database on Amazon Lightsail with MySQL Workbench remotely.

Please note that I do not have a seperate Lightsail database, as I'm trying to do things as cheaply as possible at the moment. So the following guide is not applicable to me.

Connecting to your MySQL database in Amazon Lightsail

According the wp-config.php MySQL database is using localhost:3306

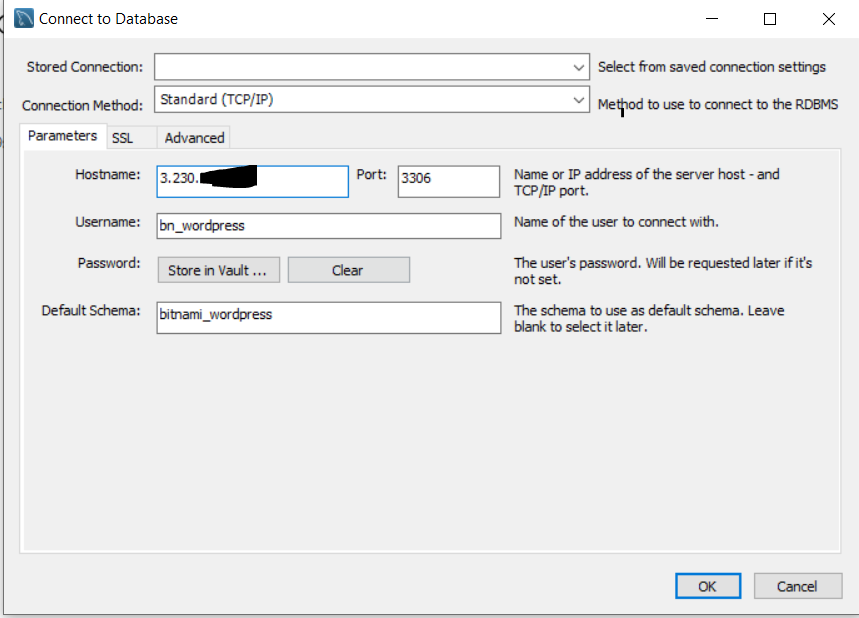
I have static IP address 3.230.xxx.xxx. I have taken the DB username and password from the wp_config.php file.

I've entered the details.

enter image description here

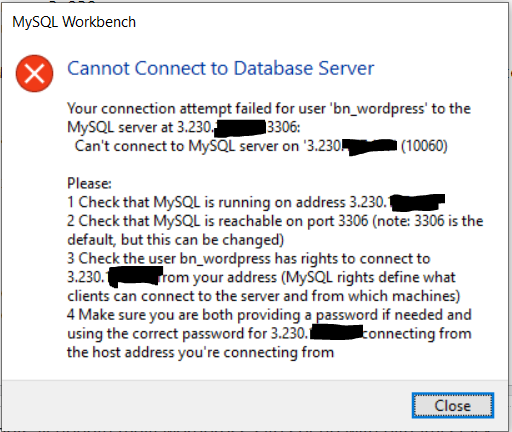
I wonder if anybody else has managed to connect to an Instance's database, rather than a seperate database.

enter image description here

If this is not possible I wonder if there are any suggestions as how to best access this Instance's database remotely.

Oaten answered 26/9, 2019 at 16:1 Comment(0)
O
16

Found the answer using a similar youtube video which is used to connect to phpMyAdmin.

https://www.youtube.com/watch?v=9VdcQLDmYII

Basically you need to use Putty SSH tunneling in order to connect to the MySQL instance

  • First I added a new connection in Putty, make sure port 22 is open on the LightSail firewall

enter image description here

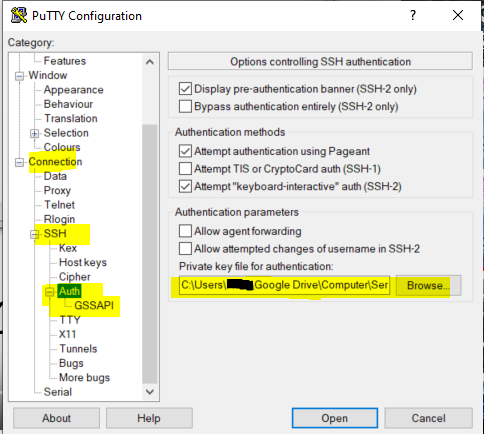
  • Go to the Connection -> SSH -> Auth tab on the right hand side menu Enter your SSH key which is downloaded from the Lightsail dashboard, it will need to be converted in the standard recognised by putty

enter image description here

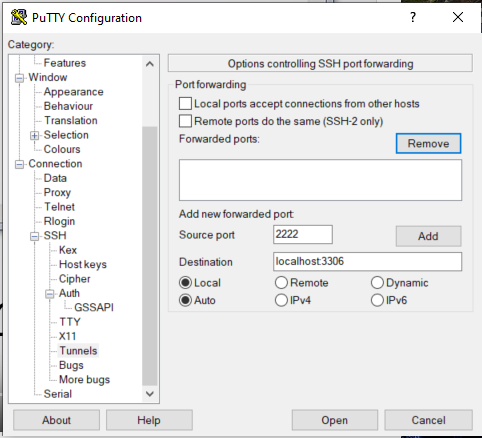
  • Go to Connections -> Data tab on the right hand side menu. Add a new forwarded port we are forwarding localhost:3306 on the server to a port on our machine 2222

enter image description here

  • Start the connection via Putty.
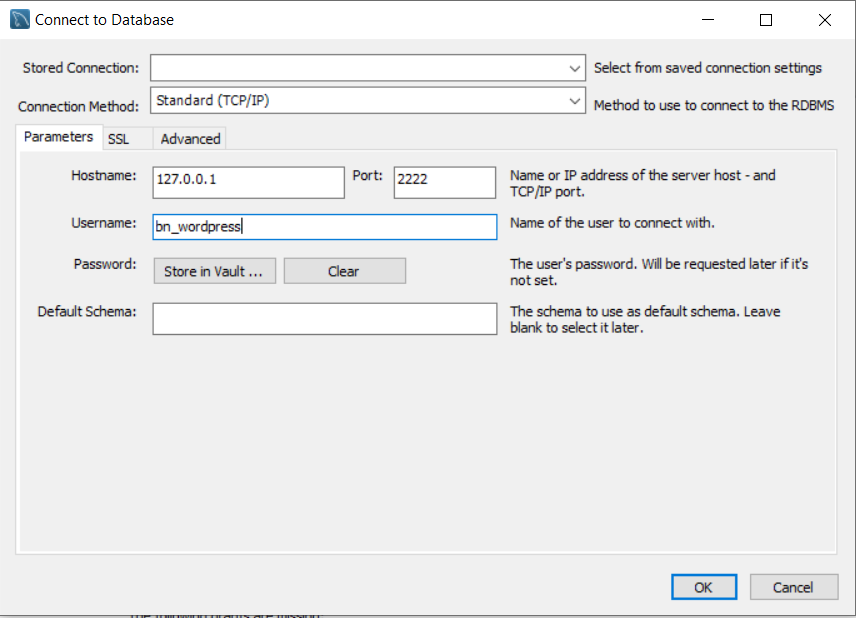
  • Now in MySQL WorkBench go to the connection to database windows. Enter the port 2222 I entered the DB user and Password from wp-config.php file and was able to successfully connect.

enter image description here

Also found a second method

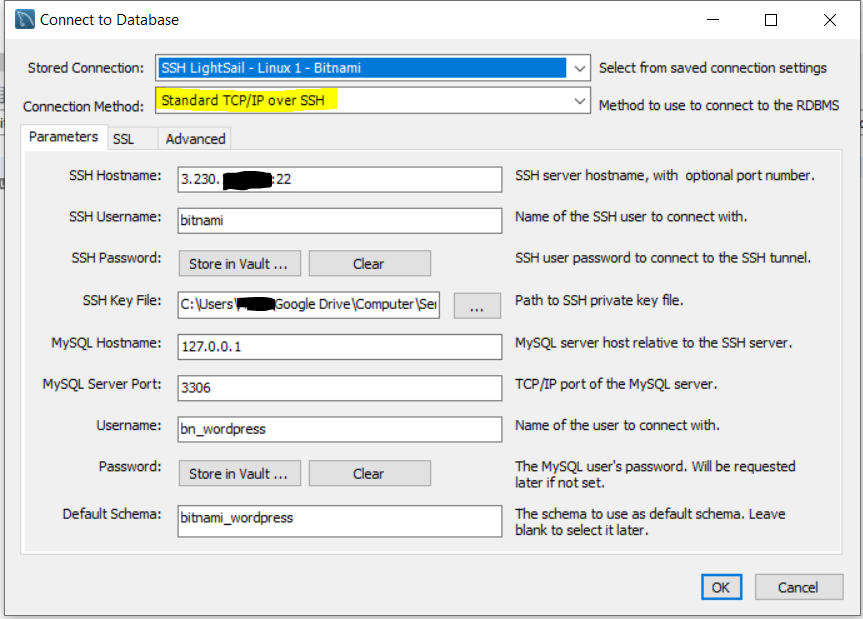
Within the MySQL Workbench you can change the connection method to `Standard TCP/IP over SSH'. Gave the SSH key and the relevant details on connection was accepted

enter image description here

Oaten answered 27/9, 2019 at 13:49 Comment(2)
Here is an alternative that worked for me: serverfault.com/questions/1014142/…Swaraj
Second method is what I was looking for and it worked like a charm. Thanks a ton.Credenza
A
1

Here is what you need to remotely connect MySQL on Lightsail. https://lightsail.aws.amazon.com/ls/docs/en_us/articles/amazon-lightsail-connecting-to-your-mysql-database There are 3 steps:

  1. get the endpoint link
  2. enable public mode
  3. configure MySQL workbench
Artilleryman answered 9/10, 2021 at 17:23 Comment(2)
Thanks for the answer. This answers the question when you use a full 'MySQL managed database' instance. I don't think it holds for a standard linux instance. When I orginially raised this question it was for a Bitami stack with MySQL install. I think you still have to SSH tunnel if you don't have a 'MySQL managed database' instance.Oaten
Thanks for the answer but I think this method is applicable when we have separate database instance running. Here in original question it is asked for when database is running locally on wordpress instance.Credenza
D
1

So the problem is it's a instance database, does not have external database IP you can directly connect to,so you need to ssh into the instance first, and then connect to the local db.

Many database management tools have the option to let you connect to database through ssh, in my case I'm using the free version of DBVisualizer. enter image description here

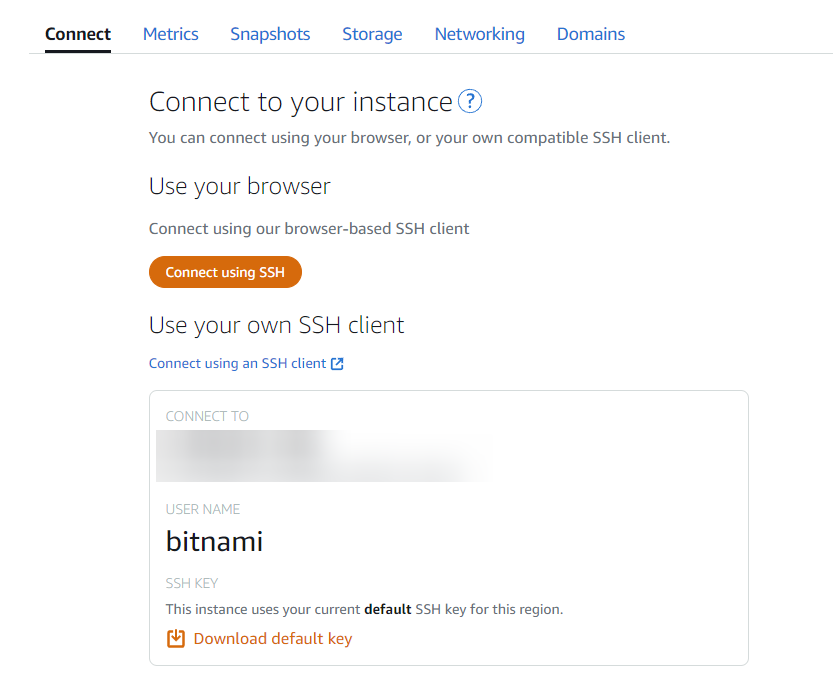
add a ssh configuration, fill in your host ip address, username, and ssh key, which can be found in your lightsail home page enter image description here

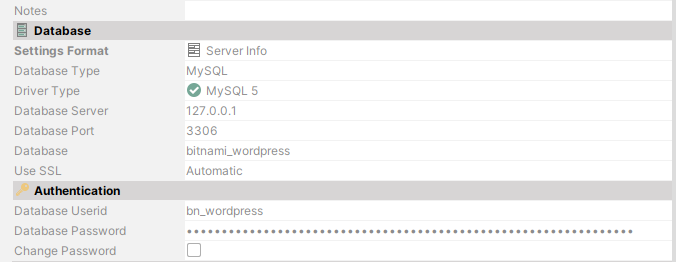
finally, find your db credentials in /bitnami/wordpress/wp-config.php and fill into the form enter image description here

you should be able to connect at this point.

reference : https://mead.io/2022/06/30/connect-to-a-wordpress-lightsail-database-from-a-gui/

Dees answered 20/7, 2023 at 22:48 Comment(0)
O
0

Yes I have - after a marathon tech support session with AWS :)

Although the Lightsail firewall may say port 3306 is open, the server instance itself may have its own firewall settings which close it. On my case teh AMI that was used to set up the instance was configured that way

I my case it was Ubuntu but here is the summary of the advice I got from AWS--

  1. We have connected to the instance via SSH using the user-name 'xxxxxx' from terminal. -- ssh -l xxxxx 34.xxx.xxx.221

  1. Checked and confirmed that mysql is running on the instance.

systemctl status mysql

  1. Confirmed the port on which mysql is running.

netstat -plnae | grep 'pid'

  1. Checked the 'ufw' firewall rules and noticed that 3306 is not allowed.

ufw status

  1. Opened the port 3306 on ufw firewall

ufw allow 3306

After performing these steps you were able to establish connection to your database

hth

Op answered 2/5, 2021 at 20:4 Comment(0)
V
0

If you are using aws lightsail first open the networking firewall ports 3306 for MariaDB like this

https://docs.aws.amazon.com/lightsail/latest/userguide/understanding-firewall-and-port-mappings-in-amazon-lightsail.html

Now on the lightsail instance of Bitnami MariaDB Virtual Machine – How To Enable Port 3306 for MariaDB

Info I got from these two sources.

https://www.thesqlreport.com/?p=1986

https://docs.bitnami.com/virtual-machine/infrastructure/lamp/administration/connect-remotely-mariadb/

  1. Get the default bitnami OS user account and the root user for the MariaDB, credentials found:

    cat /home/bitnami/bitnami_credentials

  2. Check netstat to see if the port is enabled for only the local server. If you see that port 3306 is enabled only for 127.0.0.1, then only connections on that server can be made using that port. sudo netstat -ntlup | grep MySQL

  3. The my.cnf file will need to be edited:

sudo vi /opt/bitnami/mariadb/conf/my.cnf

 Comment out this line by placing a hash (#) symbol at the 
 beginning, so that it looks like this:

#bind-address=127.0.0.1
  1. Set the firewall to allow connections on port 3306. first I had to install sudo apt install ufw

    sudo ufw allow 3306

  2. Next grant db access

    /opt/bitnami/mariadb/bin/mariadb -u root -p -e "grant all privileges on . to 'root'@'%' identified by 'PASSWORD' with grant option";

use the password you got from cat /home/bitnami/bitnami_credentials

6 sudo /opt/bitnami/ctlscript.sh restart mariadb

  1. sudo reboot
Vigilantism answered 1/4 at 5:29 Comment(0)

© 2022 - 2024 — McMap. All rights reserved.