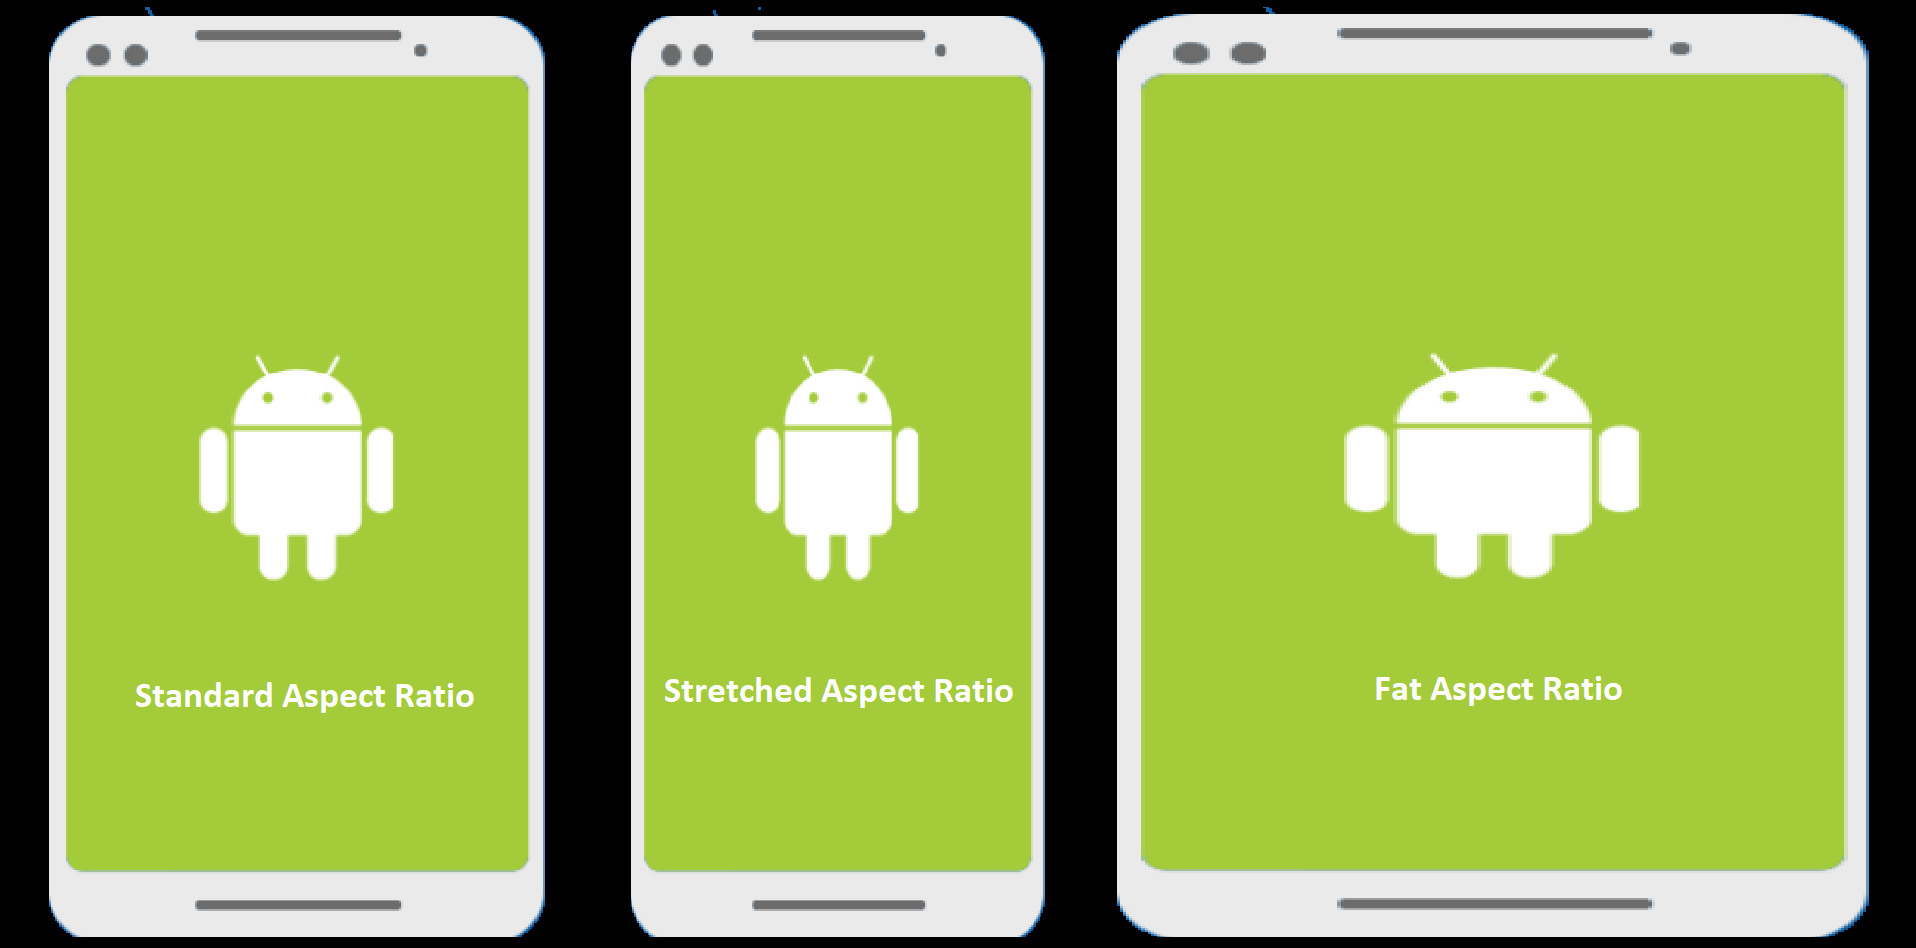
Solutions suggested in other posts may work for you if you use a plain color as the background of your splash screen, but if you use a complex image (like a gradient), here is what you need to know:
If you want a seamless transition between your splashscreen and your app, you need to install @capacitor/splash-screen as the Android <item name="android:background">@drawable/splash</item> will not allow you to fade out the splash screen, furthermore when the Android splash screen is replaced by your Ionic App, you will experience a brief empty screen while the WebView is rendered.
The @capacitor/splash-screen allows you to mitigate this by choosing yourself when the splash-screen should be hidden and how long the fade out should take.
@capacitor/splash-screen does NOT replace the native Android splash screen <item name="android:background">@drawable/splash</item>, instead it create an Android ImageView as soon as the Ionic App is open (after the native Splash Screen) and then fades out to the WebView.
You could hide the native Android splash screen to just use the @capacitor/splash-screen one by setting <item name="android:background">@null</item> for the native splash screen, but this is considered as a bad practice as it will give the illusion of hanging out for a few moment each time you launch your app (the time required for the Ionic App to be created and displayed on screen).
Finally, if you want the native Android splash screen to cover the entire screen and keep its aspect ratio, this is simply not possible (at least with Android 11 and earlier), you can only do this with an ImageView after the app as already booted.
So... Here is what you can do to mitigate this :
First, make sure the config for the native Android splash screen and the splash screen created by @capacitor/splash-screen are the same, so you don't get a "resize" when it goes from the first one to the second one.
Then, you'll have to split you splash screen in 2 layers, one for the background (that can be stretched to fill the viewport without keeping its aspect ratio), and one for your logo (or other element that sould be centered and keep its aspect ratio).
Then, create a custom drawable for your splash screen (i.e. drawable/launch_splash.xml), that will allow you to create a splash screen with as many layers as you want (in our case 2, one for the background, one for the logo).
And finally, use this custom drawable in place of the original splash screen.
Here is a full example of what I did:
capacitor.config.ts
const config: CapacitorConfig = {
  // ...
  plugins: {
    // ...
    SplashScreen: {
      launchAutoHide: false,
      androidSplashResourceName: 'launch_splash',
    },
  },
};
(Make sure you rebuild your app after you make any changes to the capacitor.config.ts or report the changes yourself to the capacitor.config.json file).
android/app/src/main/assets/capacitor.config.json
{
  // ...
  "plugins": {
    // ...
    "SplashScreen": {
      "launchAutoHide": false,
      "androidSplashResourceName": "launch_splash"
    }
  }
}
android/app/src/main/res/values/styles.xml
<?xml version="1.0" encoding="utf-8"?>
<resources>

  <style name="AppTheme" parent="Theme.AppCompat.Light.DarkActionBar">
    <item name="colorPrimary">@color/colorPrimary</item>
    <item name="colorPrimaryDark">@color/colorPrimaryDark</item>
    <item name="colorAccent">@color/colorAccent</item>
  </style>

  <style name="AppTheme.NoActionBar" parent="Theme.AppCompat.NoActionBar">
    <item name="windowActionBar">false</item>
    <item name="windowNoTitle">true</item>
    <item name="android:background">@null</item>
  </style>

  <style name="AppTheme.NoActionBarLaunch" parent="AppTheme.NoActionBar">
    <item name="android:background">@drawable/launch_splash</item> <!-- launch_splash -->
  </style>

</resources>
android/app/src/main/res/drawable/launch_splash.xml
<?xml version="1.0" encoding="utf-8"?>
<layer-list xmlns:android="http://schemas.android.com/apk/res/android">
  <!-- You can add as many layer as you want as long as they are drawable bitmaps or vectors -->
  <item android:drawable="@drawable/ic_launcher_background"/> <!-- will stretch to exactly match the viewport size -->
  <item android:drawable="@drawable/ic_launcher_foreground" android:gravity="center"/> <!-- will be centered in the viewport without stretching -->
</layer-list>
src/app/tabs/tabs.page.ts
export class TabsPage implements AfterViewInit {

  // ...

  public ngAfterViewInit(): void {
    // Do this in your app landing page
    // You may adjust the timing and wait for any promises or data required by your app,
    // so its fully ready before hiding the splash screen
    // I just added a 100ms delay to help the transition be smooth as it can be quite laggy when your app just finished being rendered
    setTimeout(() => {
      SplashScreen.hide({fadeOutDuration: 300});
    }, 100);
  }

}


SplashScreen.show()as well. – Arellano