I been trying for a while to draw smooth lines in Unity but with Line Renderer I obtained only jagged lines with the corners not rounded, in particular when the angle of curvature is really small . I incresed the value of antialiasing in quality settings and tried different materials but nothing changed. I also tried to instantiate a sphere every time the mouse move but it creates some gaps between the various spheres, in particular when the mouse go fast. I know there is a plugin called Vectrosity for this but there is a way to achieve this whitout it?
I obtained only jagged lines with the corners not rounded, in particular when the angle of curvature is really small .
This was a problem in Unity 5.4 and below. This problem has been fixed in Unity 5.5 and above after LineRenderer was completely re-designed.
All you have to do is update to Unity 5.5 or version above and this problem should go away.
There is a new variable called LineRenderer.numCornerVertices. You can use that to set how smooth you want the line to be. The value of 5 seems fine for this.
There is also another new variable called LineRenderer.numCapVertices that can be used to set how smooth the end of the line should be.
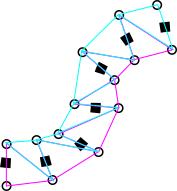
This is a screenshot that demonstrate between 5.4 and 5.5 the changes:
Unity 2017, same jaggy. Not fine and smooth as the original Graphic API of iOS, any way to approve this in Unity? –
Gaillard You can get some good results by generating a mesh from a set of points.
The algorithm for it is as follows:
- You have a set of points, could be generated with bezier curve.
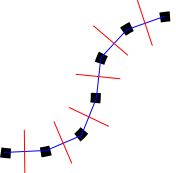
- For each point, take a directional vector to the next point
v = (p2 - p1)(marked in blue). Then rotate that vector by 90 degreesnormal = v.y, -v.xmarked in red.
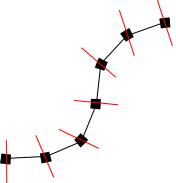
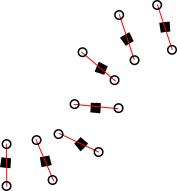
- This illustrates that we will use each normal from the point position. You can now multiply this vector in both directions by the desired width of the line.
- Create the vertices at those positions.
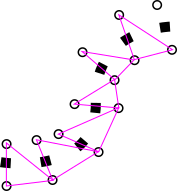
- Add indices to form triangles. It will be something like
[i, w/2 + i, w/2 + i + 1]whereiis the current index, andwis the total number of vertices.
- Create the other triangles. Again something like
[i, w/2 * i + 1, i + 1]
- And the final result. You can add more points to make the line smoother.
I obtained only jagged lines with the corners not rounded, in particular when the angle of curvature is really small .
This was a problem in Unity 5.4 and below. This problem has been fixed in Unity 5.5 and above after LineRenderer was completely re-designed.
All you have to do is update to Unity 5.5 or version above and this problem should go away.
There is a new variable called LineRenderer.numCornerVertices. You can use that to set how smooth you want the line to be. The value of 5 seems fine for this.
There is also another new variable called LineRenderer.numCapVertices that can be used to set how smooth the end of the line should be.
This is a screenshot that demonstrate between 5.4 and 5.5 the changes:
Unity 2017, same jaggy. Not fine and smooth as the original Graphic API of iOS, any way to approve this in Unity? –
Gaillard Thanks to @Iggy 's inspiration and tutorials on catlikecoding.com (where the spline code I'm using comes from), I created a component that will create a mesh based on a spline given a width and sample frequency. Higher sample frequency = smoother curve of course.
using UnityEngine;

[ExecuteInEditMode]
[RequireComponent(typeof(MeshFilter), typeof(MeshRenderer), typeof(BezierSpline))]
public class SplineMesh : MonoBehaviour {

  [Range(1, 20)]
  public int sampleFrequency = 5;

  [Range(0, 5f)]
  public float lineWidth = 0.3f;

  BezierSpline spline;
  Mesh mesh;

  private void Awake () {
    spline = GetComponent<BezierSpline>();
    mesh = GetComponent<Mesh>();
  }

  /*
  void Update()
  {
    for(int i = 0; i <= sampleFrequency; i++){
      float interval = i / (float)sampleFrequency;

      var point = spline.GetPoint(interval);
      var direction = spline.GetDirection(interval);

      var perpendicularLeftVec = PerpendicularLeft(direction) * lineWidth;
      var perpendicularRightVec = PerpendicularRight(direction) * lineWidth;

      Debug.DrawLine(point, point + (Vector3)perpendicularLeftVec, Color.magenta, 0.5f, false);
      Debug.DrawLine(point, point + (Vector3)perpendicularRightVec, Color.cyan, 0.5f, false);
    }
  }
  */

    Vector2 PerpendicularRight(Vector2 orig){
        var vec = new Vector2(orig.y, -orig.x);
        vec.Normalize();
        return vec;
    }
    Vector2 PerpendicularLeft(Vector2 orig){
        var vec = new Vector2(orig.y, -orig.x);
        vec.Normalize();
        return vec * -1;
    }

  private Vector3[] vertices;

  public void GenerateMesh(){
    vertices = new Vector3[(sampleFrequency + 1) * 2];

    //iterate over our samples adding two vertices for each one
    for(int s = 0, i = 0; s <= sampleFrequency; s++, i += 2){
      float interval = s / (float)sampleFrequency;

      //get point along spline, and translate to local coords from world
      var point = transform.InverseTransformPoint(spline.GetPoint(interval));
      var direction = spline.GetDirection(interval);

      var perpendicularLeftVec = PerpendicularLeft(direction) * lineWidth;
      var perpendicularRightVec = PerpendicularRight(direction) * lineWidth;
      // var perpendicularVec = turnLeft ? PerpendicularLeft(diffVector) : PerpendicularRight(diffVector);

      vertices[i] = point + (Vector3)perpendicularLeftVec;
      vertices[i + 1] = point + (Vector3)perpendicularRightVec;
    }

    GetComponent<MeshFilter>().mesh = mesh = new Mesh();
    mesh.name = "Spline Mesh";

    mesh.vertices = vertices;

    //now figure out our triangles
    int [] triangles = new int[sampleFrequency * 6];
    for(int s = 0, ti = 0, vi = 0; s < sampleFrequency; s++, ti += 6, vi += 2){
      //first tri
      triangles[ti] = vi;
      triangles[ti + 1] = vi + 3;
      triangles[ti + 2] = vi + 1;
      //second matching tri
      triangles[ti + 3] = vi;
      triangles[ti + 4] = vi + 2;
      triangles[ti + 5] = vi + 3;
    }

    mesh.triangles = triangles;
    mesh.RecalculateNormals();

    Debug.Log("Generated Spline Mesh");
  }


}
Update, you should comment out the whole Update method to avoid an unnecessary function call slowing things down. –
Dosia I had this issue with Unity 2017.2. I tried changing my AA settings to max to get rid of line render jaggies. Didn't work and it was frustrating.
My solution was resolving the problem that MSAA was turned off on the camera because rendering was deferred. The camera has a setting for "use graphics settings" which should have never messed up in the first place, but I'm a beginner - I don't know much. I changed the setting to "forward" and my jaggies disappeared into the mist.
If I was more industrious, I would post before and after images.
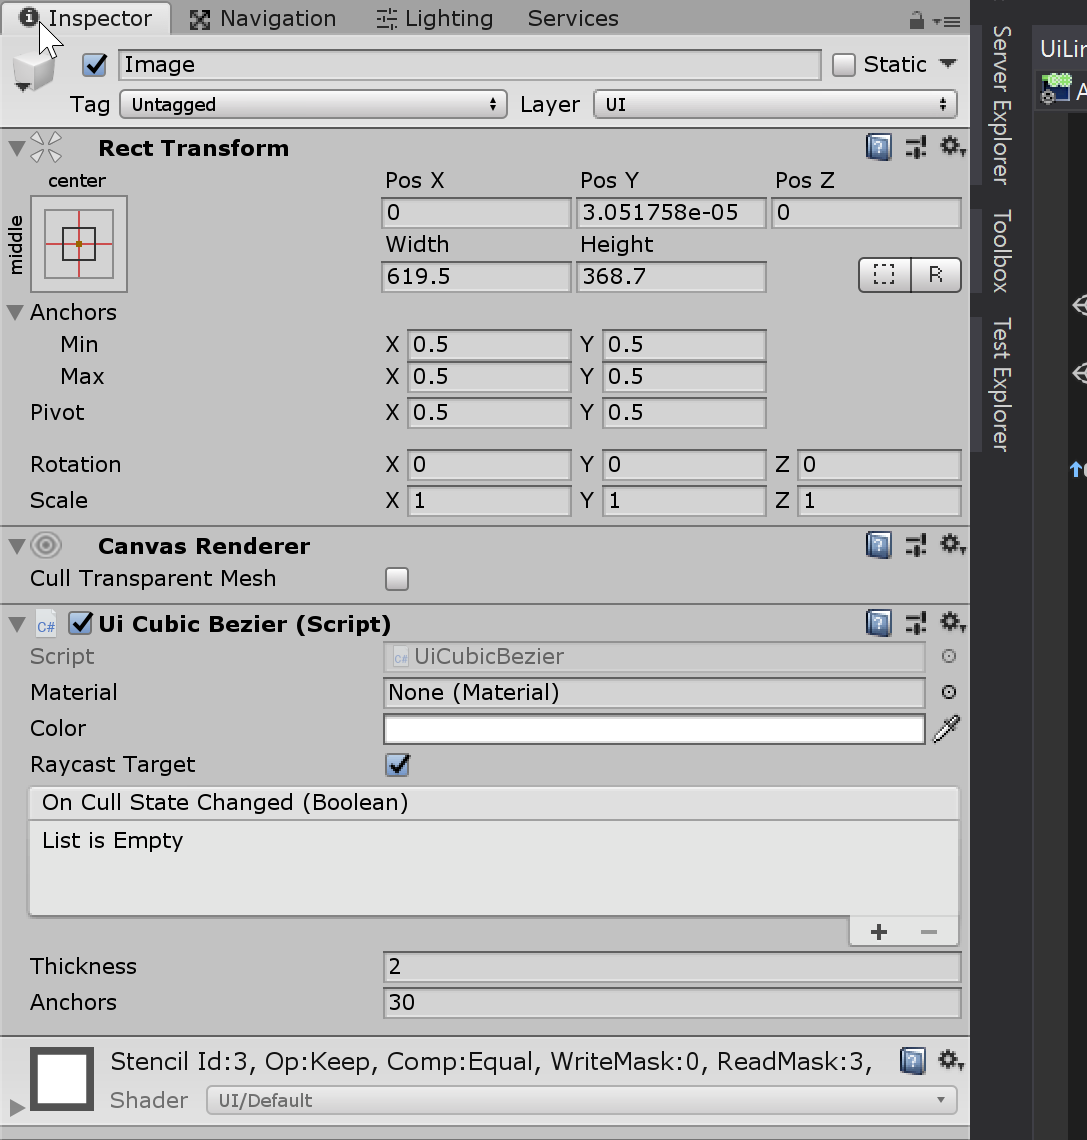
I finally got this working thanks to @Iggy's excellent answer.
Create a new Image on your canvas, delete the Image script and replace it with UICubicBezier.
To give:
using UnityEngine;
using UnityEngine.UI;

[ExecuteInEditMode]
public class UiCubicBezier : MaskableGraphic
{
    public float thickness = 2;

    public int anchors = 20;

    protected override void OnPopulateMesh(VertexHelper vh)
    {
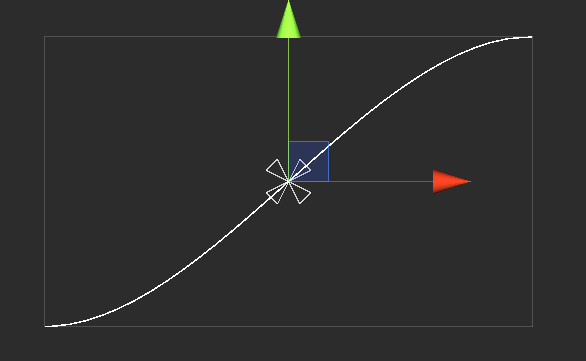
        // draws a cubic bezier curve from the lower left hand corner (start)
        // to the upper right hand corner (end).
        vh.Clear();

        var rt = this.rectTransform;
        var rect = rt.rect;

        var start = new Vector2(-rect.width / 2, -rect.height / 2);
        var cp1 = new Vector2(-rect.width / 6, -rect.height / 2);
        var cp2 = new Vector2(rect.width / 6, rect.height / 2);
        var end = new Vector2(rect.width / 2, rect.height / 2);
        var data = new BezierData(start, cp1, cp2, end);

        // all you need to know is that data.GetPoint generates a sequence of points
        // between the start and end points.
        var points = new Vector2[this.anchors];
        for (var anchor = 0; anchor < points.Length; anchor++)
        {
            var t = (float)anchor / this.anchors;
            points[anchor] = data.GetPoint(t);
        }

        // because the normals are at the mid-points between vertexes the start and end
        // points don't touch the bounding box. to fix this some vertexes are added to
        // the start and end that touch the bounding box.
        this.DrawStartVertexes(vh, start);

        for (var anchor = 0; anchor < points.Length - 1; anchor++)
        {
            this.DrawVertexes(vh, points[anchor], points[anchor + 1]);
        }

        this.DrawEndVertexes(vh, end);

        for (var v = 0; v + 2 < vh.currentVertCount; v += 2)
        {
            vh.AddTriangle(v, v + 1, v + 2);
        }

        for (var v = 0; v + 3 < vh.currentVertCount; v += 2)
        {
            vh.AddTriangle(v + 1, v + 2, v + 3);
        }
    }

    private void DrawStartVertexes(VertexHelper vh, Vector2 start)
    {
        // d = thickness * \sqrt{2}, so the distance between the vertexes
        // is equal to the thickness (https://en.wikipedia.org/wiki/Triangle#Right_triangles)
        var d = this.thickness * 0.70710678118f;

        var vertex = UIVertex.simpleVert;
        vertex.color = this.color;

        vertex.position = new Vector2(start.x, start.y + d);
        vh.AddVert(vertex);

        vertex.position = new Vector2(start.x + d, start.y);
        vh.AddVert(vertex);
    }

    private void DrawEndVertexes(VertexHelper vh, Vector2 end)
    {
        // d = thickness * \sqrt{2}, so the distance between the vertexes
        // is equal to the thickness (https://en.wikipedia.org/wiki/Triangle#Right_triangles)
        var d = this.thickness * 0.70710678118f;

        var vertex = UIVertex.simpleVert;
        vertex.color = this.color;

        vertex.position = new Vector2(end.x - d, end.y);
        vh.AddVert(vertex);

        vertex.position = new Vector2(end.x, end.y - d);
        vh.AddVert(vertex);
    }

    private void DrawVertexes(VertexHelper vh, Vector2 start, Vector2 end)
    {
        var v = end - start;
        var mid = start + v / 2; // the mid-point between start and end.
        var perp = Vector2.Perpendicular(v.normalized); // vector of length 1 perpendicular to v.

        var vertex = UIVertex.simpleVert;
        vertex.color = this.color;

        // move half the thickness away from the mid-point.
        vertex.position = mid + (perp * this.thickness / 2);
        vh.AddVert(vertex);

        // move half the thickness away from the mid-point in the opposite direction.
        vertex.position = mid - (perp * this.thickness / 2);
        vh.AddVert(vertex);
    }

    private struct BezierData
    {
        private readonly Vector2 start;
        private readonly float cx;
        private readonly float bx;
        private readonly float ax;
        private readonly float cy;
        private readonly float by;
        private readonly float ay;

        public BezierData(Vector2 start, Vector2 cp1, Vector2 cp2, Vector2 end)
        {
            // cribbed from here: https://www.codeproject.com/articles/25237/bezier-curves-made-simple

            this.start = start;
            this.cx = 3 * (cp1.x - start.x);
            this.bx = 3 * (cp2.x - cp1.x) - this.cx;
            this.ax = end.x - start.x - this.cx - this.bx;

            this.cy = 3 * (cp1.y - start.y);
            this.by = 3 * (cp2.y - cp1.y) - this.cy;
            this.ay = end.y - start.y - this.cy - this.by;
        }

        public Vector2 GetPoint(float t)
        {
            var tSquared = t * t;
            var tCubed = tSquared * t;

            return new Vector2(
                (this.ax * tCubed) + (this.bx * tSquared) + (this.cx * t) + this.start.x,
                (this.ay * tCubed) + (this.by * tSquared) + (this.cy * t) + this.start.y);
        }
    }
}
TLDR: Consider using Shapes by Freya Holmér
Disclaimer: I haven't tried it myself yet, but the results look amazing.
In the past I have created custom solutions where I'd create custom meshes (similar to other solutions described here), vertex shader that offset the verts in screen space and fragment shader with alpha blending to achieve nice AA. I never found the time to create a proper, re-usable package of it, but Freya's solution seem to be much more advanced.
If I were to need something like this again, I'd check out her library first.
© 2022 - 2024 — McMap. All rights reserved.


