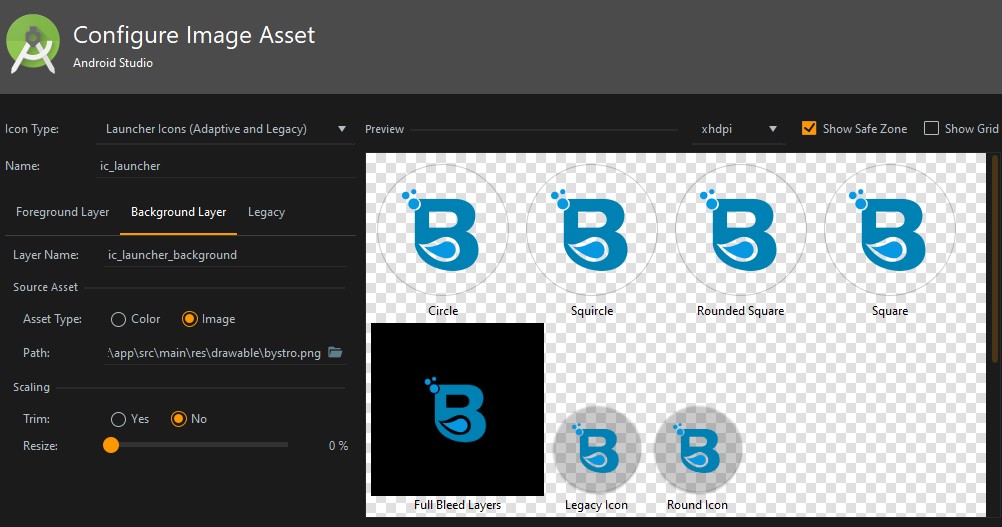
I have a .png logo for my app which doesn't have a background, when I add it to android studio as an Image Asset I am forced to have a background. The hex field doesn't accept 8 digit color codes, 6 digits only. Is there anyway to keep the background invisible?
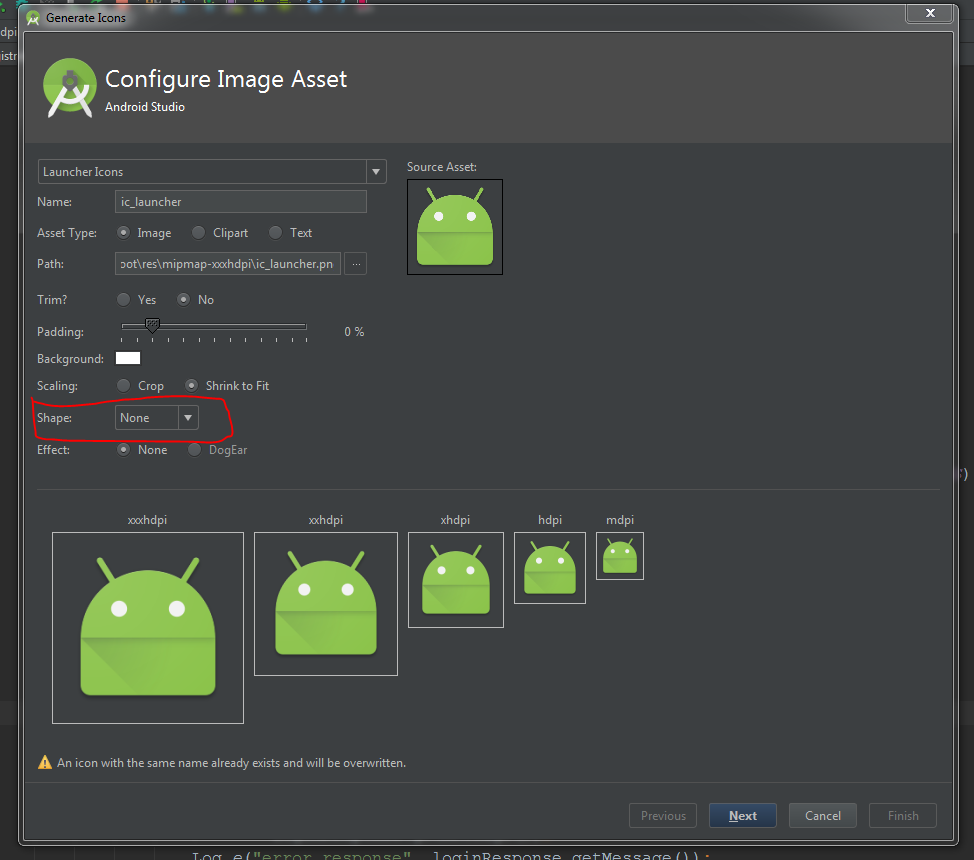
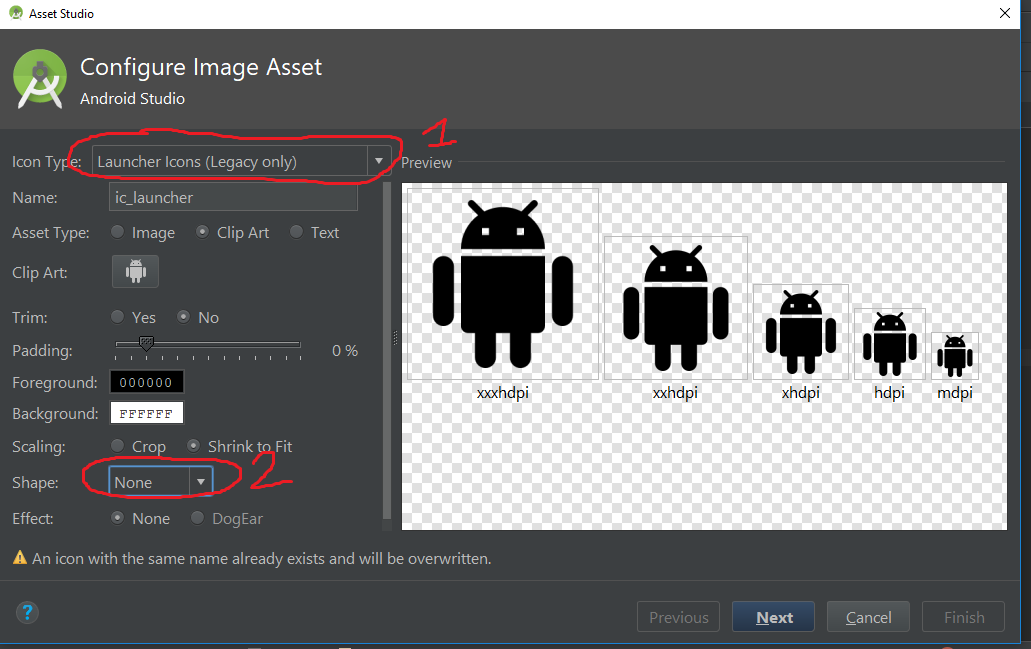
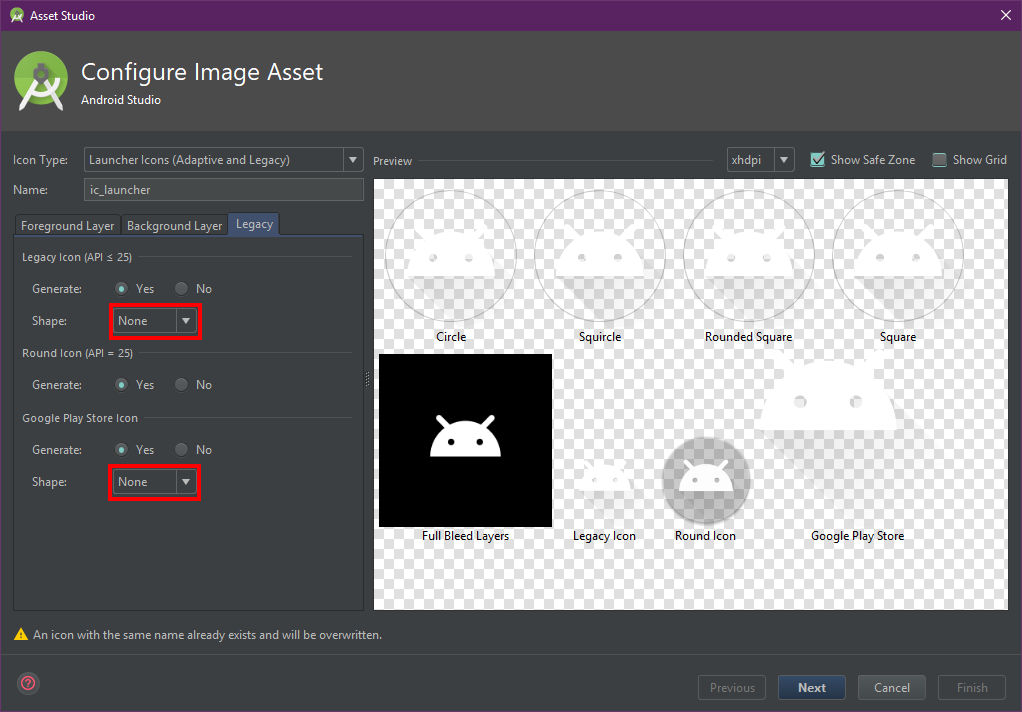
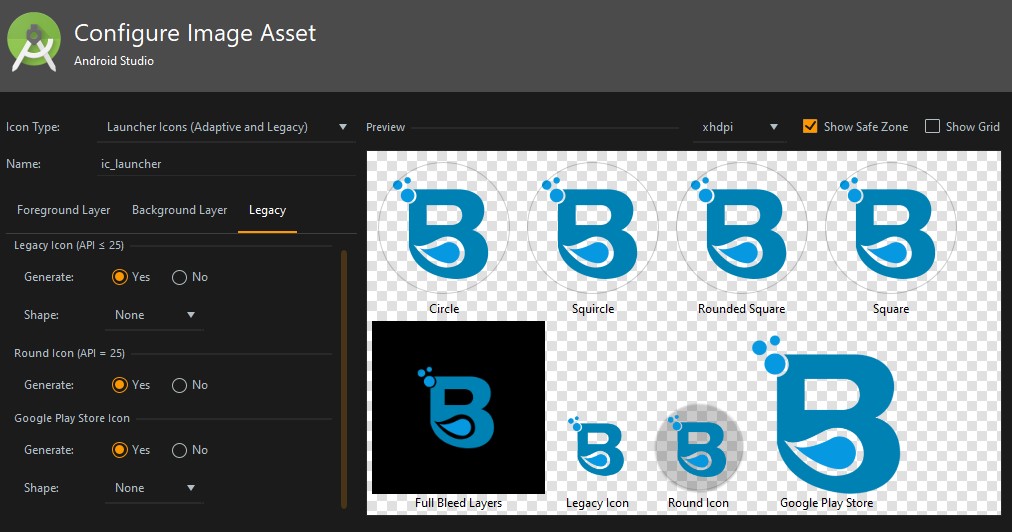
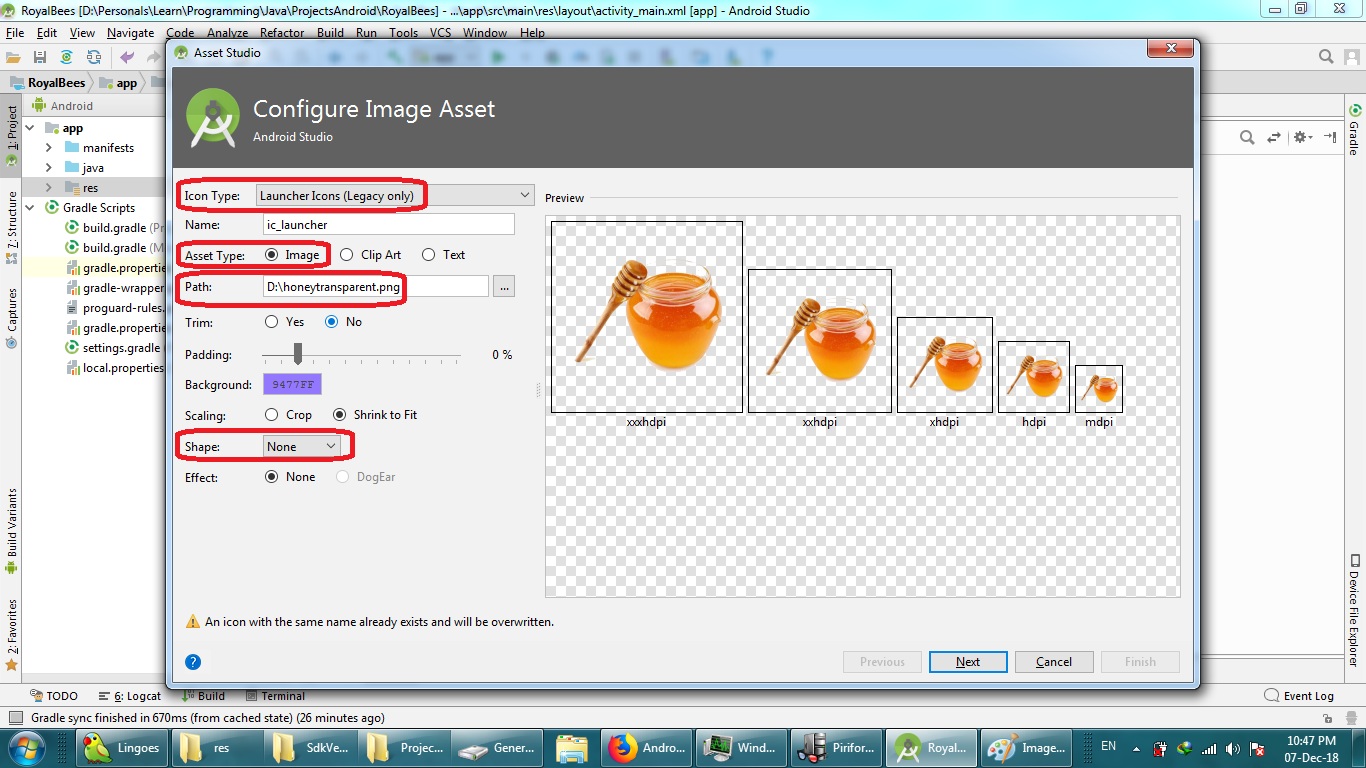
To make background transparent, set shape as None.
See the image below:
EDIT:
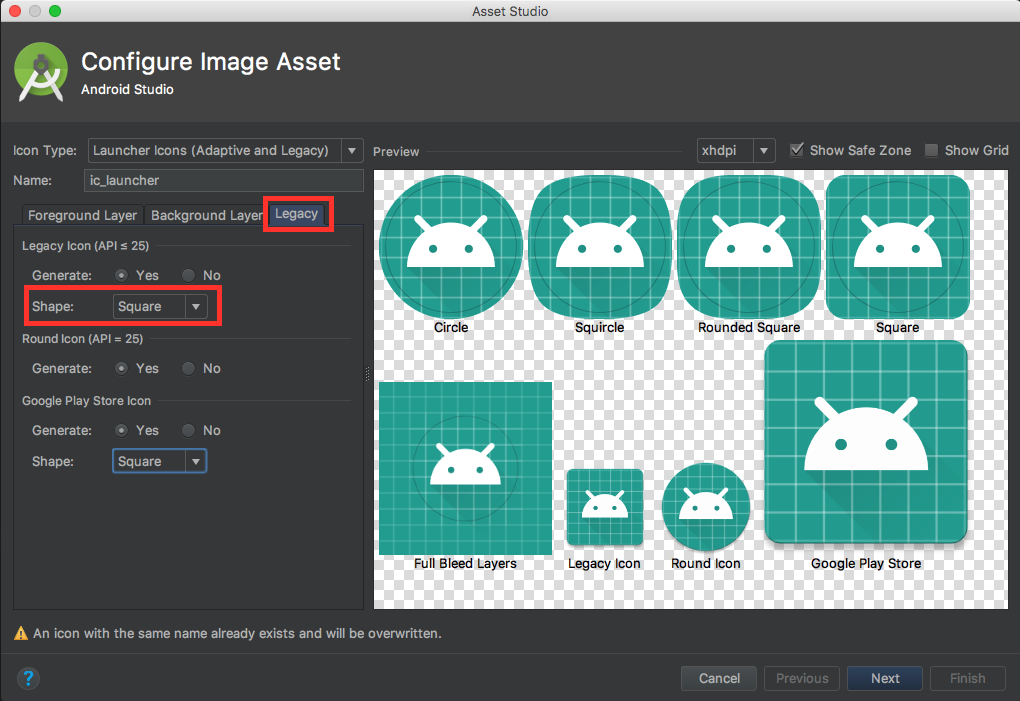
For Android Studio 3.0,
you can set it from Legacy Tab
Legacy option is not available in the latest Android Studio: Android Studio Dolphin | 2021.3.1 Patch 1 Build #AI-213.7172.25.2113.9123335, built on September 30, 2022 –
Nari I'm using Android Studio 3.0.1 and if the above answer doesn't work for you, try to change the icon type into Legacy and select Shape to None, the default one is Adaptive and Legacy.
Note: Some device has installed a launcher with automatically adding white background in icon, that's normal.
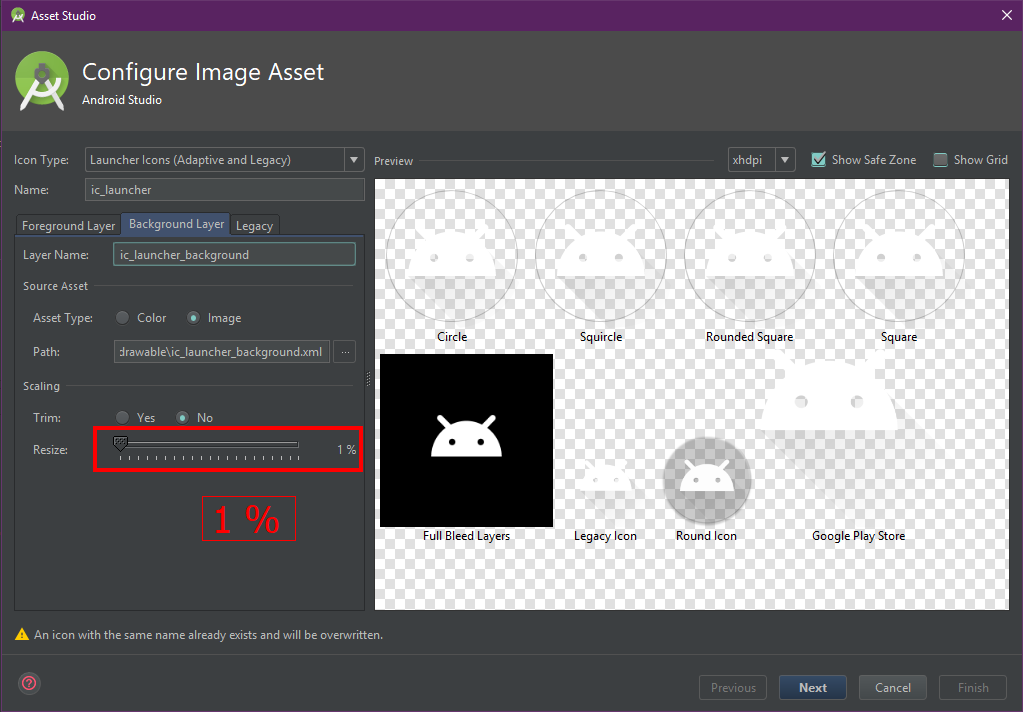
You have two ways:
1) In Background Layer > Scaling, reduce the Resize to 1
and then in Legacy > Legacy Icon set Shape as None
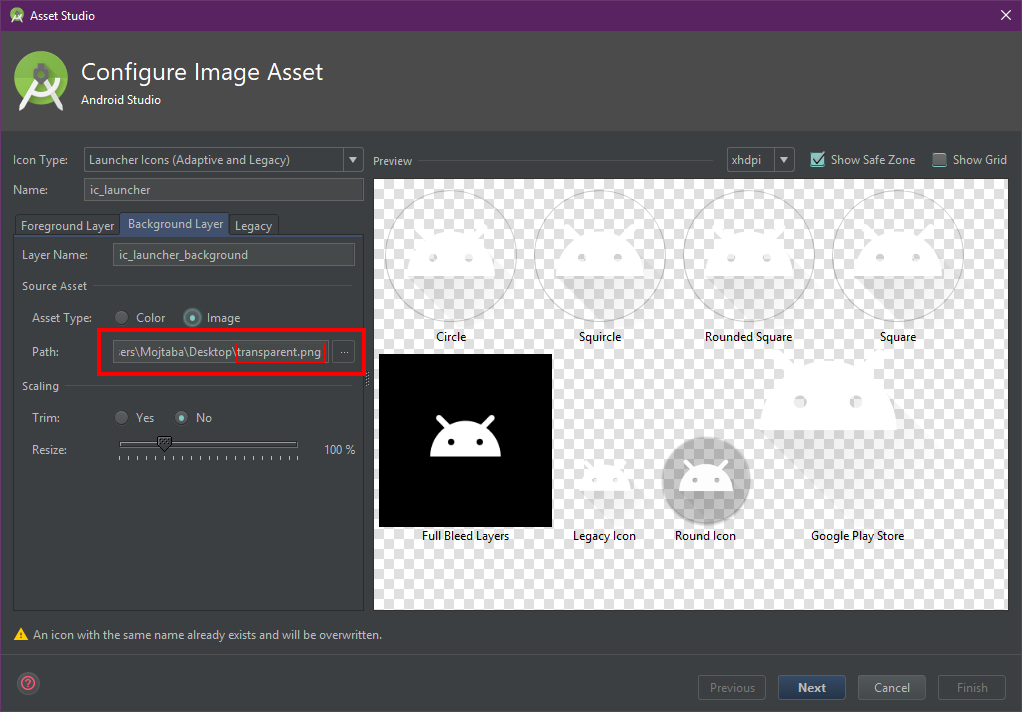
2) in Background Layer > Scaling > Source Asset, you can set an image as a 1x1 pixel (or any size) transparent.png image (you've already created).
and then in Legacy > Legacy Icon set Shape as None
Full Bleed Layers? –
Trident This is just another workaround.
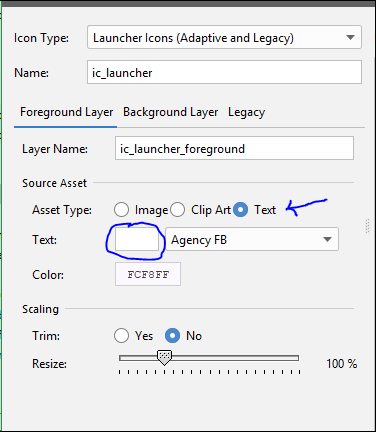
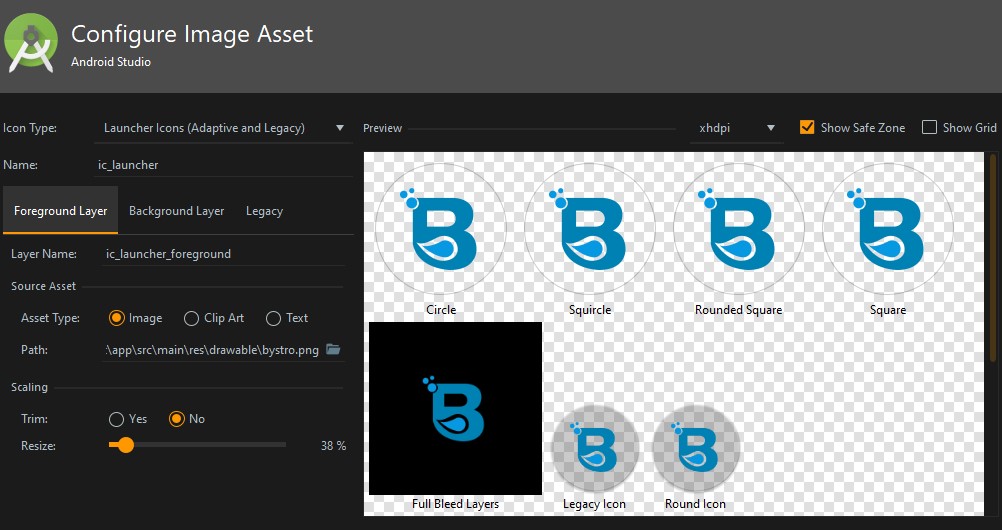
- For the 'Foreground Layer', select 'Asset type' as text and delete the default text in the text field.
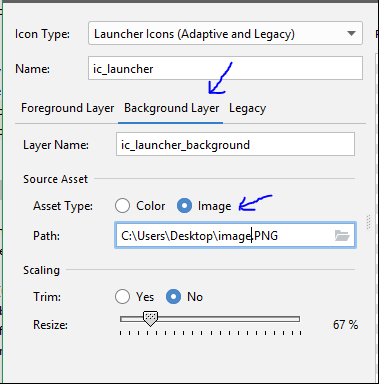
- For the 'Background Layer', select 'Asset type' as image and now choose the path of the image you want as an icon.
And you are good to go.
the above approach didn't work for me on Android Studio 3.0. It still shows the background. I just made an empty background file
<?xml version="1.0" encoding="utf-8"?>
<vector
android:height="108dp"
android:width="108dp"
android:viewportHeight="108"
android:viewportWidth="108"
xmlns:android="http://schemas.android.com/apk/res/android">
</vector>
This worked except the full bleed layers
I Just put my view background (color code) as ClipArt or Image background, and it looks like transparent or no background where both have the same color as background.
These are the steps I took to make an image transparent:
1- I used an online website which makes the image transparent, there are a lot of them. For me, I use this https://www241.lunapic.com/editor/?action=transparent and sometimes this https://www.online-image-editor.com/help/transparency
2- In Android Studio (I'm using version 3.1.3), open Image Asset from app > res (right click) > New > Image Asset
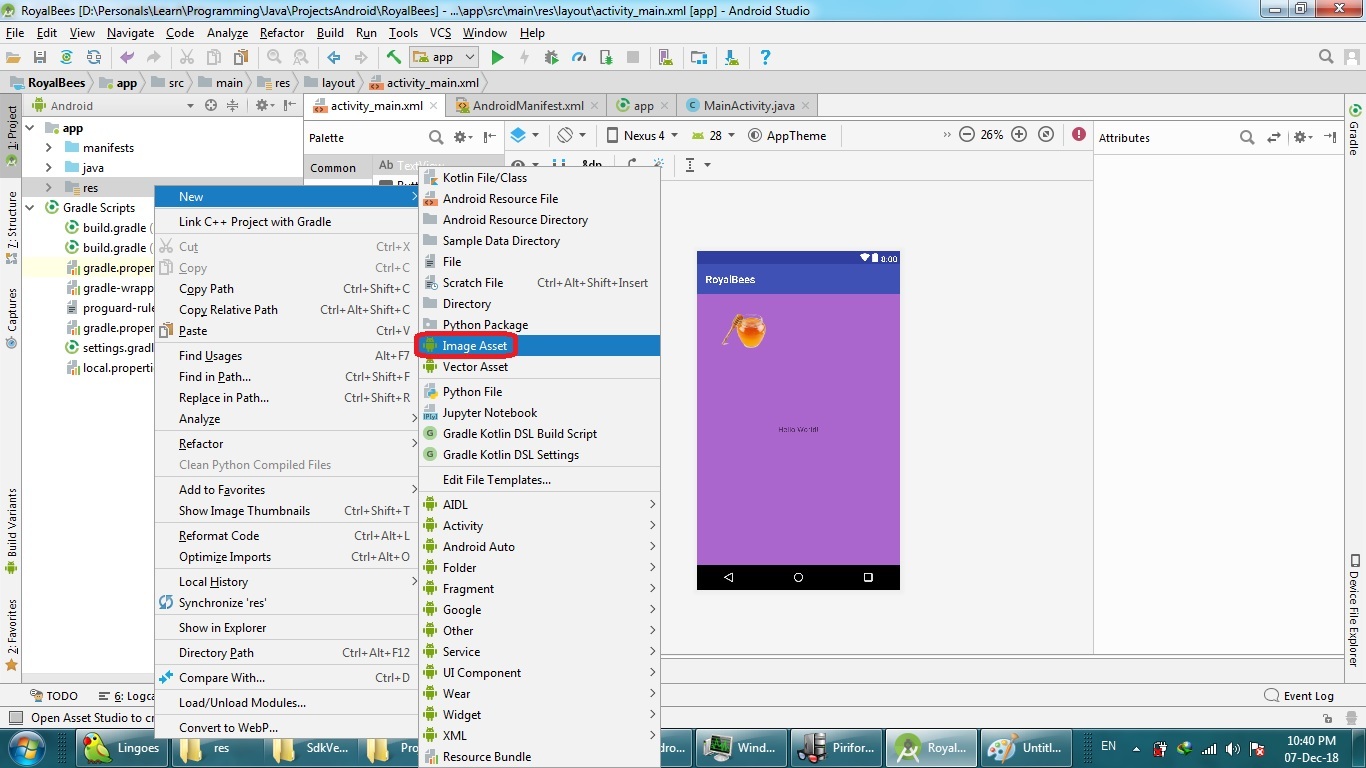
3- In the Path, choose the location of the transparent image which you downloaded from the online website, and make the other options as shown, then Next, then Finish. The five different sizes of image mdpi(48×48), hdpi(72×72), xhdpi(96×96), xxhdpi(144×144), and xxxhdpi(192×192) will be created in the res/mipmap-density folders.
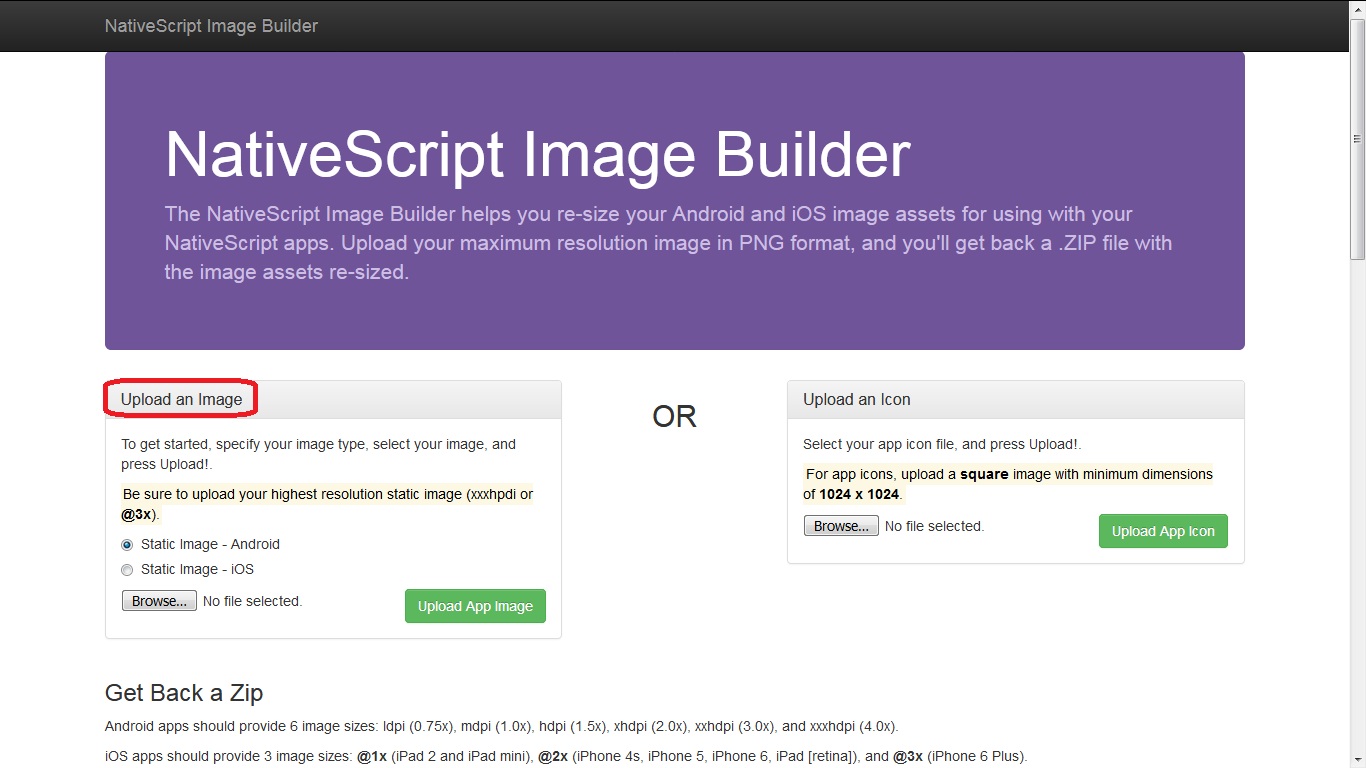
4- If you need sizes (dimensions) different from above, you can use this website https://nsimage.brosteins.com/ to upload your PNG image of biggest size that will be used in xxxhdpi. After uploading, you can download a zip file containing the five different sizes of image in the res/drawable-density folders.
First, create a launcher icon (Adaptive and Legacy) from Image Asset:
Select an image for background layer and resize it to 0% or 1% and
In legacy tab set shape to none.
Then, delete folder res/mipmap/ic_laucher_round in the project window and Open AndroidManifest.xml and remove attribute android:roundIcon="@mipmap/ic_launcher_round" from the application element.
In the end, delete ic_launcher.xml from mipmap-anydpi-v26.
Notice that: Some devices like Nexus 5X (Android 8.1) adding a white background automatically and can't do anything.
With "Asset Type" set to "Image", try setting the same image for the foreground and background layers, keeping the same "Resize" percentage.
I just added the icon as a normal icon: New -> Vector Asset
and then change the app icon in the Manifest file.
For Foreground Layer choose "Text" and then delete the content text Finaly choose the path of the image you want as an icon.
Using android 3.0.1 I noticed this weird behavior(solution), First: in background layer in the source_asset change the asset_type from image to color and than change it back to image. second: enable trim in scaling and then resize it to a small percentage and it will work perfectly. PS: If u didn't do the first step the scaling wont take affect. and if anyone have an explanation for this please provide. steps
© 2022 - 2024 — McMap. All rights reserved.

