How to make a button (or any other element) show SwiftUI's DatePicker popup on tap?
Asked Answered
P

6

18

I'm trying to achieve the simplest possible use case, but I can't figure it out. I have a picture of calendar. All I want is to show DatePicker popup when tapping the picture. I tried to put it inside ZStack, but by doing it I can't hide default data textfields:

ZStack {
    Image("icon-calendar")
    .zIndex(1)
    DatePicker("", selection: $date)
    .zIndex(2)
}

How to make this simple layout natively without ridiculous workarounds?

Parabola answered 19/1, 2021 at 18:33 Comment(2)
It's impossible to open the DatePicker programmatically. Same for the underlying UIDatePicker: Open UIDatePicker programmatically in iOS 14Caughey
You can do it using the accessibility API. https://mcmap.net/q/668962/-how-to-trigger-swiftui-datepicker-programmatically/77567Cuneal
M
25

For those still looking for a simple solution, I was looking for something similar and found a great example of how to do this in one of Kavasoft's tutorials on YouTube at 20:32 into the video.

This is what he used:

import SwiftUI

struct DatePickerView: View {

    @State private var birthday = Date()
    @State private var isChild = false
    @State private var ageFilter = ""

    var body: some View {

        Image(systemName: "calendar")
          .font(.title3)
          .overlay{ //MARK: Place the DatePicker in the overlay extension
             DatePicker(
                 "",
                 selection: $birthday,
                 displayedComponents: [.date]
             )
              .blendMode(.destinationOver) //MARK: use this extension to keep the clickable functionality
              .onChange(of: birthday, perform: { value in
                  isChild = checkAge(date:birthday)
               })
          }
    }

    //MARK: I added this function to show onChange functionality remains the same

    func checkAge(date: Date) -> Bool  {
        let today = Date()
        let diffs = Calendar.current.dateComponents([.year], from: date, to: today)
        let formatter = DateComponentsFormatter()
        let outputString = formatter.string(from: diffs)
        self.ageFilter = outputString!.filter("0123456789.".contains)
        let ageTest = Int(self.ageFilter) ?? 0
        if ageTest > 18 {
            return false
        }else{
            return true
        }
    }
}


The key is put the DatePicker in an overlay under the Image. Once done, the .blendmode extension needs to be set to .desintationOver for it to be clickable. I added a simple check age function to show onChange functionality remains the same when using it in this way.

I tested this code in Xcode 14 (SwiftUI 4.0 and IOS 16).

I hope this helps others!

Demo

Demo Image DatePicker

Maida answered 10/1, 2023 at 0:47 Comment(1)
Unfortunately the hidden date input field briefly shows up when the view navigates in/out :-(Vick
S
17

I have googled hundred times and finally, I found a way to achieve this. It's 1:50 AM in my timezone, I can sleep happily now. Credit goes to chase's answer here

Demo here: https://media.giphy.com/media/2ILs7PZbdriaTsxU0s/giphy.gif

The code that does the magic

struct ContentView: View {
    @State var date = Date()
    
    var body: some View {
        ZStack {
            DatePicker("label", selection: $date, displayedComponents: [.date])
                .datePickerStyle(CompactDatePickerStyle())
                .labelsHidden()
            Image(systemName: "calendar")
                .resizable()
                .frame(width: 32, height: 32, alignment: .center)
                .userInteractionDisabled()
        }
    }
}

struct NoHitTesting: ViewModifier {
    func body(content: Content) -> some View {
        SwiftUIWrapper { content }.allowsHitTesting(false)
    }
}

extension View {
    func userInteractionDisabled() -> some View {
        self.modifier(NoHitTesting())
    }
}

struct SwiftUIWrapper<T: View>: UIViewControllerRepresentable {
    let content: () -> T
    func makeUIViewController(context: Context) -> UIHostingController<T> {
        UIHostingController(rootView: content())
    }
    func updateUIViewController(_ uiViewController: UIHostingController<T>, context: Context) {}
}
Sangsanger answered 3/5, 2021 at 17:45 Comment(2)
This seems to break when inside a List or FormTherron
Also not working in navigation bar. Although It is the best approach I have found so far.Sparling
O
6

Tried using Hieu's solution in a navigation bar item but it was breaking. Modified it by directly using SwiftUIWrapper and allowsHitTesting on the component I want to display and it works like a charm.

Also works on List and Form

struct StealthDatePicker: View {
    @State private var date = Date()
    var body: some View {
        ZStack {
            DatePicker("", selection: $date, in: ...Date(), displayedComponents: .date)
                .datePickerStyle(.compact)
                .labelsHidden()
            SwiftUIWrapper {
                Image(systemName: "calendar")
                .resizable()
                .frame(width: 32, height: 32, alignment: .topLeading)
            }.allowsHitTesting(false)
        }
    }
}

struct SwiftUIWrapper<T: View>: UIViewControllerRepresentable {
    let content: () -> T
    func makeUIViewController(context: Context) -> UIHostingController<T> {
        UIHostingController(rootView: content())
    }
    func updateUIViewController(_ uiViewController: UIHostingController<T>, context: Context) {}
}
Oersted answered 9/4, 2022 at 12:10 Comment(0)
F
4

My answer to this was much simpler... just create a button with a popover that calls this struct I created...

struct DatePopover: View {

@Binding var dateIn: Date
@Binding var isShowing: Bool

    var body: some View {
        VStack {
            DatePicker("", selection: $dateIn, displayedComponents: [.date])
                .datePickerStyle(.graphical)
                .onChange(of: dateIn, perform: { value in
                 
                    isShowing.toggle()
                })
            .padding(.all, 20)
        }.frame(width: 400, height: 400, alignment: .center)
    }
    
}

Not sure why, but it didn't format my code like I wanted...

( Original asnwer had button, onChange is better solution)

Sample of my Button that calls it... it has my vars in it and may not make complete sense to you, but it should give you the idea and use in the popover...

    Button(item.dueDate == nil ? "" : dateValue(item.dueDate!)) {
        if item.dueDate != nil { isUpdatingDate = true }
        }
        .onAppear { tmpDueDate = item.dueDate ?? .now }
        .onChange(of: isUpdatingDate, perform: { value in
                if !value {
                        item.dueDate = tmpDueDate
                        try? moc.save()
                }
        })
        .popover(isPresented: $isUpdatingDate) {
           DatePopover(dateIn: $tmpDueDate, isShowing: $isUpdatingDate)
        }

FYI, dateValue() is a local func I created - it simply creates a string representation of the Date in my format

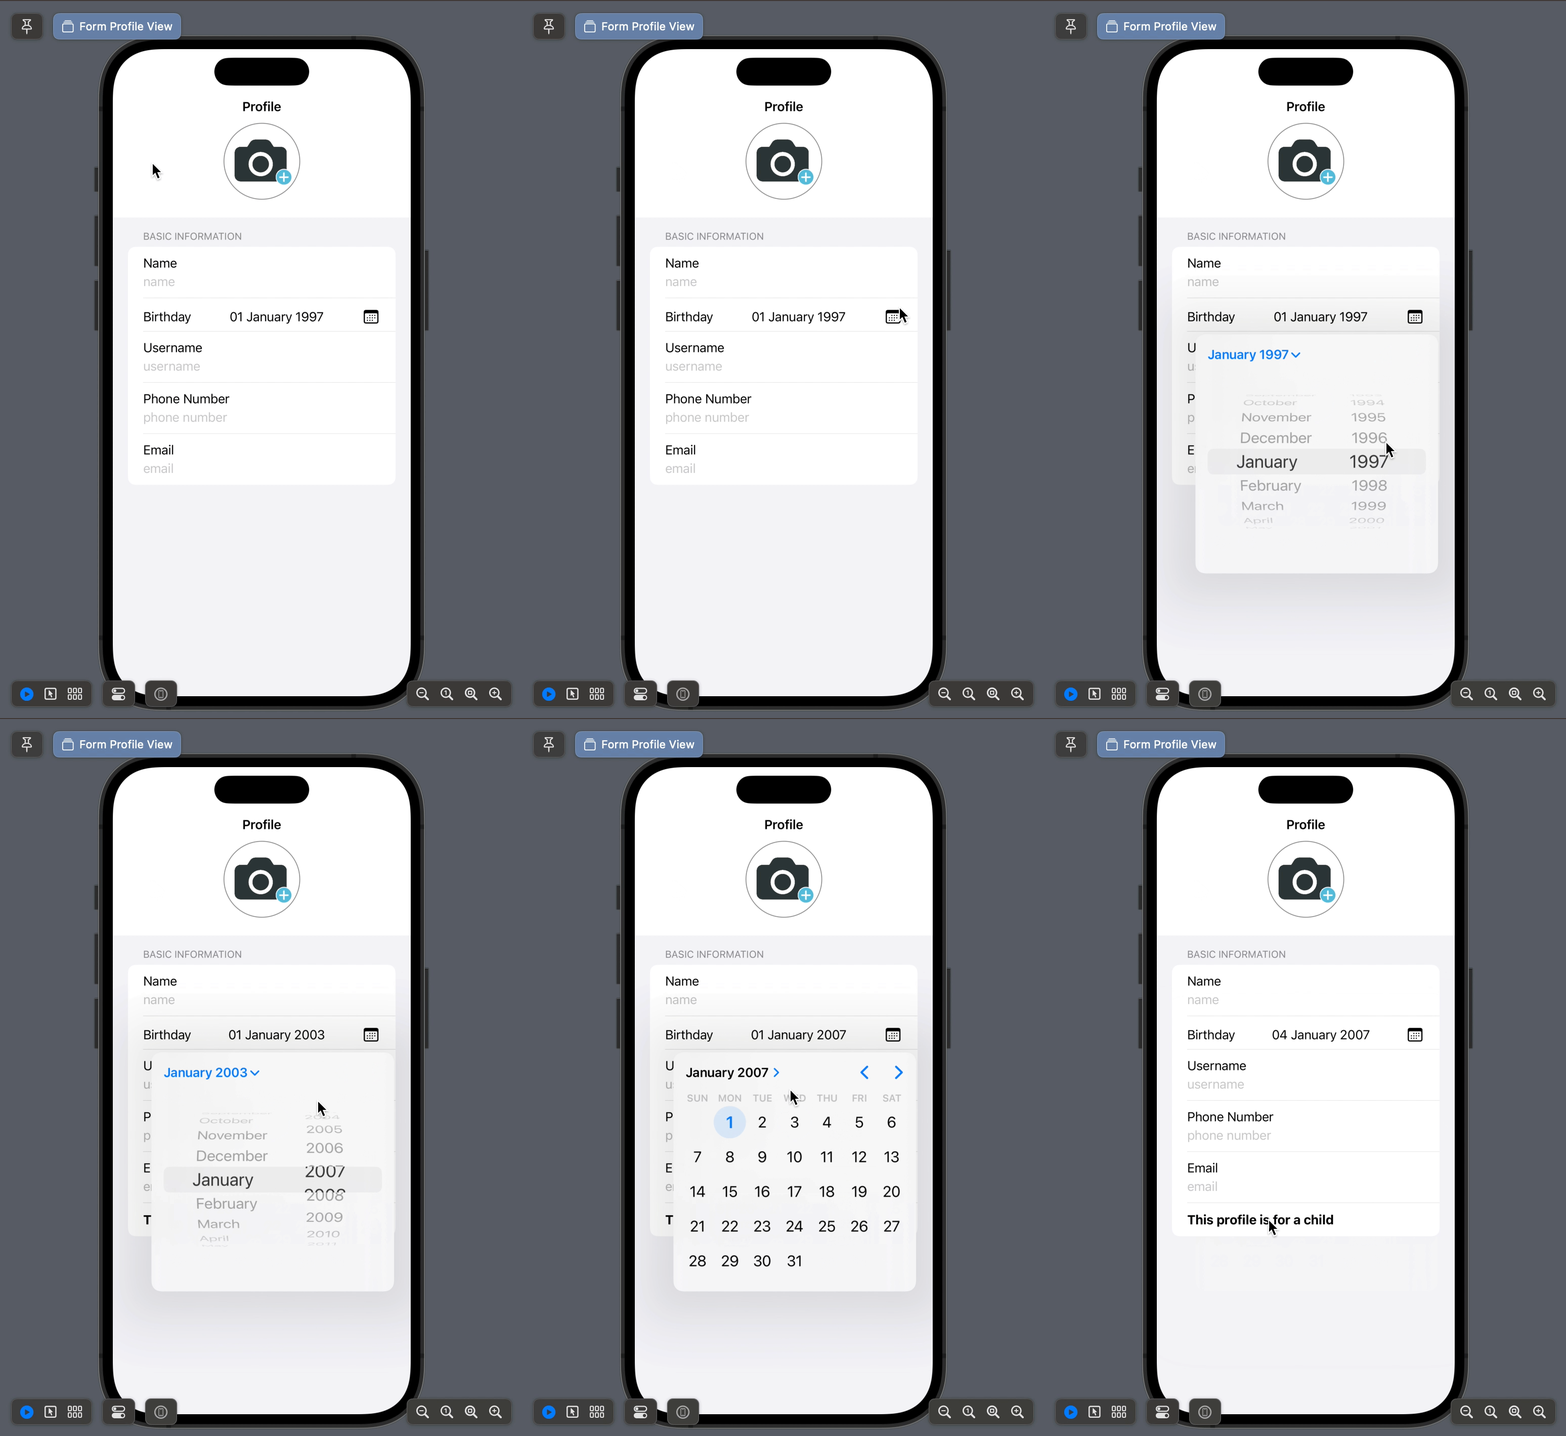
Falconer answered 7/7, 2022 at 18:13 Comment(0)
G
2
struct ZCalendar: View {
    @State var date = Date()
    @State var isPickerVisible = false
    var body: some View {
        ZStack {
            Button(action: {
                isPickerVisible = true
            }, label: {
                Image(systemName: "calendar")
            }).zIndex(1)
            if isPickerVisible{
                VStack{
                    Button("Done", action: {
                        isPickerVisible = false
                    }).padding()
                    DatePicker("", selection: $date).datePickerStyle(GraphicalDatePickerStyle())
                }.background(Color(UIColor.secondarySystemBackground))
                .zIndex(2)
            }
        }//Another way
        //.sheet(isPresented: $isPickerVisible, content: {DatePicker("", selection: $date).datePickerStyle(GraphicalDatePickerStyle())})
    }
}
Gobbet answered 19/1, 2021 at 21:6 Comment(0)
V
1

Please understand that my sentence is weird because I am not good at English.

In the code above, if you use .frame() & .clipped().
Clicks can be controlled exactly by the icon size.

In the code above, I modified it really a little bit. I found the answer. Thank you.

import SwiftUI

struct DatePickerView: View {
    @State private var date = Date()
    
    var body: some View {
        
        ZStack{
            DatePicker("", selection: $date, displayedComponents: .date)
                .labelsHidden()
                .datePickerStyle(.compact)
                .frame(width: 20, height: 20)
                .clipped()
 
            SwiftUIWrapper {
                Image(systemName: "calendar")
                    .resizable()
                    .frame(width: 20, height: 20, alignment: .topLeading)
            }.allowsHitTesting(false)
        }//ZStack
    }
}

struct DatePickerView_Previews: PreviewProvider {
    static var previews: some View {
        DatePickerView()
    }
}

struct SwiftUIWrapper<T: View>: UIViewControllerRepresentable {
    let content: () -> T
    func makeUIViewController(context: Context) -> UIHostingController<T> {
        UIHostingController(rootView: content())
    }
    func updateUIViewController(_ uiViewController: UIHostingController<T>, context: Context) {}
}
Vaal answered 5/6, 2022 at 8:22 Comment(0)

© 2022 - 2024 — McMap. All rights reserved.