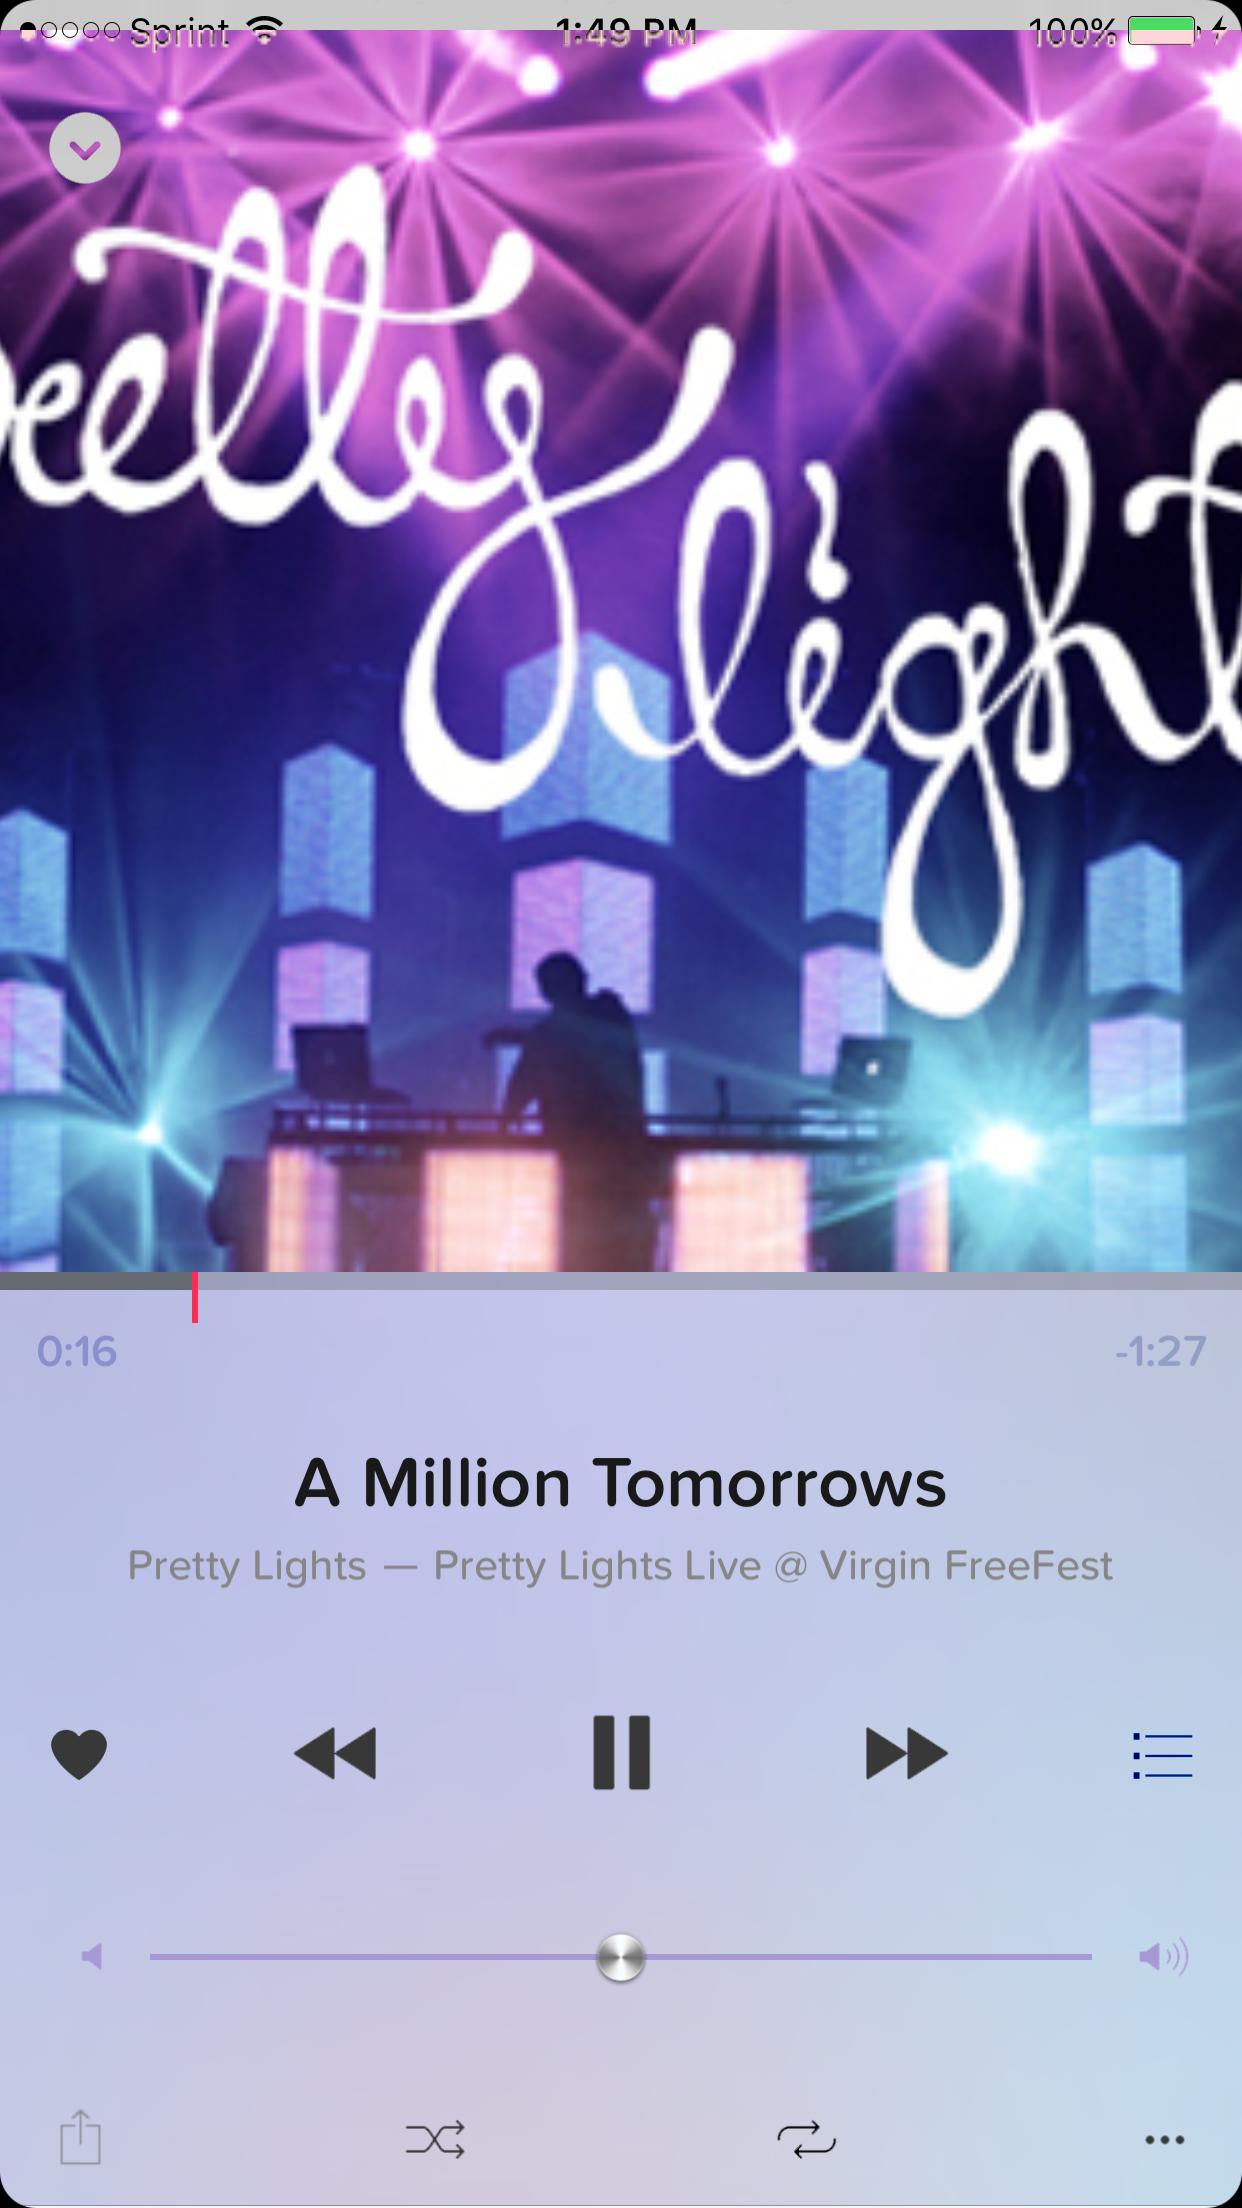
Iterating upon Jiri's answer, this will get you pretty close. Substitute MTStatusBarOverlay with CWStatusBarNotification. To handle the modal transition between view controllers, I'm using MusicPlayerTransition. We're assuming an imageView: "art" in self.view with frame:CGRect(0, 0, self.view.bounds.size.width, self.view.bounds.size.width). Needs a little massaging, but you get the gist. Note: Though we're not "live," the most we'll ever be off is one second, and battery color is not preserved. Also, you'll need to set the animation time in CWStatusBarNotification.m to zero. (notificationAnimationDuration property).
#import "CWStatusBarNotification.h"

#define kStatusTextOffset       5.4  // (rough guess of) space between window's origin.y and status bar label's origin.y

@interface M_Player () <UIGestureRecognizerDelegate>

@property (retain) UIView *fakeStatusBarView;
@property (retain) CWStatusBarNotification *fakeStatusBar;
@property (retain) UIImageView *statusImgView;
@property (retain) UIImageView *statusImgViewCopy;
@property (retain) UIWindow *window;
@property (strong, nonatomic) NSTimer *statusTimer;

@end

@implementation M_Player
@synthesisze fakeStatusBarView, fakeStatusBar, statusImgView, statusImgViewCopy, window, statusTimer;

-(void)viewDidLoad{

    self.window = [[UIApplication sharedApplication] delegate].window;

    UIPanGestureRecognizer *pan = [[UIPanGestureRecognizer alloc] initWithTarget:self action:@selector(handleStatusBarDrag:)];
    pan.delegate = self;
    [self.view addGestureRecognizer:pan];
}

-(void)viewWillAppear:(BOOL)animated{
    [super viewWillAppear:animated];

    if (!fakeStatusBar){
        [self buildFakeStatusBar];
    }

    if (!statusTimer) {
        [self setupStatusBarImageUpdateTimer];
    }

     // optional
    [[UIApplication sharedApplication] setStatusBarStyle:UIStatusBarStyleLightContent];
    [self setNeedsStatusBarAppearanceUpdate];


-(void)viewDidDisappear:(BOOL)animated{
   [super viewDidDisappear:animated];

   [self destroyStatusBarImageUpdateTimer];
}
-(void)destroyFakeStatusBar{
    [statusImgView removeFromSuperview];
    statusImgView = nil;
    [fakeStatusBarView removeFromSuperview];
    fakeStatusBarView = nil;
    fakeStatusBar = nil;
}

-(void)buildFakeStatusBar{
    UIWindow *statusBarWindow =  [[UIApplication sharedApplication] valueForKey:@"_statusBarWindow"];  // This window is actually still fullscreen. So we need to capture just the top 20 points.

    UIGraphicsBeginImageContext(self.view.bounds.size);
    [statusBarWindow.layer renderInContext:UIGraphicsGetCurrentContext()];
    UIImage *viewImage = UIGraphicsGetImageFromCurrentImageContext();
    UIGraphicsEndImageContext();
    CGRect rect = CGRectMake(0, 0, self.view.bounds.size.width, 20);
    CGImageRef imageRef = CGImageCreateWithImageInRect([viewImage CGImage], rect);
    UIImage *statusImg = [UIImage imageWithCGImage:imageRef];
    CGImageRelease(imageRef);

    statusImg = [statusImg imageWithRenderingMode:UIImageRenderingModeAlwaysTemplate];  // This allows us to set the status bar content's color via the imageView's .tintColor property

    statusImgView = [[UIImageView alloc] initWithFrame:CGRectMake(0, 0, self.view.bounds.size.width, 20)];
    statusImgView.image = statusImg;
    statusImgView.tintColor = [UIColor colorWithWhite:0.859 alpha:1.000];  // any color you want

    statusImgViewCopy = [[UIImageView alloc] initWithFrame:CGRectMake(0, 0, self.view.bounds.size.width, 20)];
    statusImgViewCopy.image = statusImg;
    statusImgViewCopy.tintColor = statusImgView.tintColor;


    fakeStatusBarView = nil;
    fakeStatusBar = nil;
    fakeStatusBarView = [[UIView alloc] initWithFrame:CGRectMake(0, 0, self.view.bounds.size.width, 20)];
    [fakeStatusBarView addSubview:statusImgView];

    fakeStatusBar = [CWStatusBarNotification new];
    fakeStatusBar.notificationStyle = CWNotificationStyleStatusBarNotification;
    [fakeStatusBar displayNotificationWithView:fakeStatusBarView forDuration:CGFLOAT_MAX];
}

-(void)handleStatusBarDrag:(UIPanGestureRecognizer*)gestureRecognizer{
    if (gestureRecognizer.state == UIGestureRecognizerStateBegan) {

    }

    if (gestureRecognizer.state == UIGestureRecognizerStateChanged){
        CGPoint convertedPoint = [self.window convertPoint:art.frame.origin fromView:self.view];
        CGFloat originY = convertedPoint.y - kStatusTextOffset;

        if (originY > 0 && originY <= 10) {  // the range of change we're interested in
            //NSLog(@"originY:%f statusImgView.frame:%@", originY, NSStringFromCGRect(statusImgView.frame));

            // render in context from new originY using our untouched copy as reference view
            UIGraphicsBeginImageContext(self.view.bounds.size);
            [statusImgViewCopy.layer renderInContext:UIGraphicsGetCurrentContext()];
            UIImage *viewImage = UIGraphicsGetImageFromCurrentImageContext();
            UIGraphicsEndImageContext();
            CGRect rect = CGRectMake(0, kStatusTextOffset + originY, self.view.bounds.size.width, 20);
            CGImageRef imageRef = CGImageCreateWithImageInRect([viewImage CGImage], rect);
            UIImage *statusImg = [UIImage imageWithCGImage:imageRef];
            CGImageRelease(imageRef);

            statusImgView.image = statusImg;
            statusImgView.transform = CGAffineTransformMakeTranslation(0, kStatusTextOffset + originY);

        }

       // destroy
        if (originY > 90) {
            [self destroyFakeStatusBar];
        }
    }

    if (gestureRecognizer.state == UIGestureRecognizerStateEnded){

    }
}

- (BOOL)gestureRecognizer:(UIGestureRecognizer *)gestureRecognizer shouldRecognizeSimultaneouslyWithGestureRecognizer:(UIGestureRecognizer *)otherGestureRecognizer{
    return YES;
}
To keep your status bar screenshots in sync with the actual status bar, setup your timer. Fire it in viewWillAppear, and kill it in viewDidDisappear.
-(void)setupStatusBarImageUpdateTimer{
    dispatch_async(dispatch_get_global_queue(DISPATCH_QUEUE_PRIORITY_DEFAULT, 0), ^{
        dispatch_async(dispatch_get_main_queue(), ^(){
            // main thread
            if (!statusTimer) {
                statusTimer = [NSTimer scheduledTimerWithTimeInterval:1 target:self selector:@selector(handleStatusTimer:) userInfo:nil repeats:YES];
                [[NSRunLoop currentRunLoop] addTimer:statusTimer forMode:NSRunLoopCommonModes];
            }
        });
    });
}

-(void)destroyStatusBarImageUpdateTimer{
    dispatch_async(dispatch_get_global_queue(DISPATCH_QUEUE_PRIORITY_DEFAULT, 0), ^{
        dispatch_async(dispatch_get_main_queue(), ^(){
            // main thread
            [statusTimer invalidate];
            statusTimer = nil;
        });
    });
}

-(void)handleStatusTimer:(NSTimer*)timer{
    UIWindow *statusBarWindow =  [[UIApplication sharedApplication] valueForKey:@"_statusBarWindow"];

    UIGraphicsBeginImageContext(CGSizeMake(self.view.bounds.size.width, 20));
    [statusBarWindow.layer renderInContext:UIGraphicsGetCurrentContext()];
    UIImage *viewImage = UIGraphicsGetImageFromCurrentImageContext();
    UIGraphicsEndImageContext();
    CGRect rect = CGRectMake(0, 0, self.view.bounds.size.width, 20);
    CGImageRef imageRef = CGImageCreateWithImageInRect([viewImage CGImage], rect);
    UIImage *statusImg = [UIImage imageWithCGImage:imageRef];
    CGImageRelease(imageRef);

    statusImg = [statusImg imageWithRenderingMode:UIImageRenderingModeAlwaysTemplate];
    statusImgViewCopy.image = statusImg;
}
Because we have a strong reference to the timer and setup and invalidation happens on the same thread, there's no worrying about the timer failing to invalidate.
The final result should look something like this:
![enter image description here]()


