New app with the service worker
The command will be following:
ng new myApp --service-worker (or using the alias — -sw )
Having this service worker flag, Angular CLI 1.6 will do some automation for us:
- Angular Service Worker package will be installed.
- Build support for NGSW will be enabled.
- NGSW will be registered for your application.
- NGSW configuration file will be created with some smart defaults.
Anyway, even after CLI 1.6 will be released, it’s good to know how to reproduce these steps, because we have to perform them manually to add NGSW support to the existing app. Let’s go to add Angular Service Worker to PWAtter.
Adding Angular Service Worker to the existing app
Let’s manually perform the same 4 steps from above:
1. Install NGSW
npm install @angular/service-worker --save
2. Enable build support (only for Angular CLI 1.6, see the notice below)
ng set apps.0.serviceWorker=true
or manually add/edit this parameter in .angular-cli.json file.
Important! For the moment, when we use Angular CLI 1.5, please make
sure that you don’t have this property in .angular-cli.json, it will
cause build errors. See how to emulate this step in Angular CLI 1.5
below.
3. Register NGSW in your AppModule. This is how it will look in Angular
CLI 1.6:
import { ServiceWorkerModule } from '@angular/service-worker'
import { environment } from '../environments/environment';

...

@NgModule({
  imports: [
    ...
    environment.production ? ServiceWorkerModule.register('/ngsw-worker.js') : []
  ],
  ...
})
export class AppModule { }
4. Create NGSW configuration file (default name is src/ngsw-config.json). Here is the default content will be generated by Angular CLI 1.6.
{
  "index": "/index.html",
  "assetGroups": [{
    "name": "app",
    "installMode": "prefetch",
    "resources": {
      "files": [
        "/favicon.ico",
        "/index.html"
      ],
      "versionedFiles": [
        "/*.bundle.css",
        "/*.bundle.js",
        "/*.chunk.js"
      ]
    }
  }, {
    "name": "assets",
    "installMode": "lazy",
    "updateMode": "prefetch",
    "resources": {
      "files": [
        "/assets/**"
      ]
    }
  }]
}
At the moment, while using Angular CLI 1.5 we also have to emulate build support from the step 2. Actually, there are 2 extra actions should perform in addition to ng build --prod command (it’s important to use production build in order to use NGSW!):
Generate NGSW control (manifest) file ngsw.json based on NGSW configuration file src/ngsw-config.json using NGSW CLI ngsw-config.
Copy NGSW itself from the npm_modules package folder to our dist folder.
To have one simple command to generate production build with NGSW support let’s add some npm scripts:
{
  ...
  "scripts": {
    ...
    "ngsw-config": "node_modules/.bin/ngsw-config dist src/ngsw-config.json",
    "ngsw-copy": "cp node_modules/@angular/service-worker/ngsw-worker.js dist/",
    "build-prod-ngsw": "ng build --prod && npm run ngsw-config && npm run ngsw-copy",
    "serve-prod-ngsw": "npm run build-prod-ngsw && http-server dist -p 8080"
  }
}
Now if we run npm run build-prod-ngsw we’ll have Angular PWA in the dist folder. Optionally, we could serve it using the simplest http-server by running npm run serve-prod-ngsw.
Important! Do not use ng serve to test your Angular Service Worker.
This development server was not designed to work in collaboration with
PWA flow. Always build a production version of the app and serve it
from your distributive folder using any static web server.
Application shell
If we perform the above actions and run npm run build-prod-ngsw — the Angular PWA in its default form is ready for us! Deploy the application or just run it locally using any static web server (http-server package in my case, you run npm run serve-prod-ngsw to build and serve).
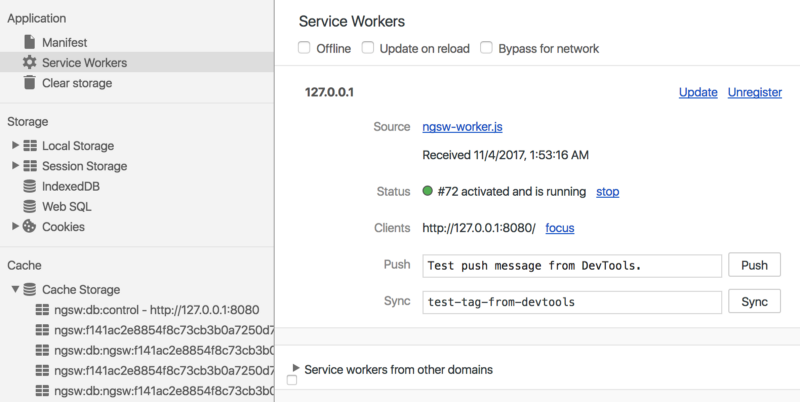
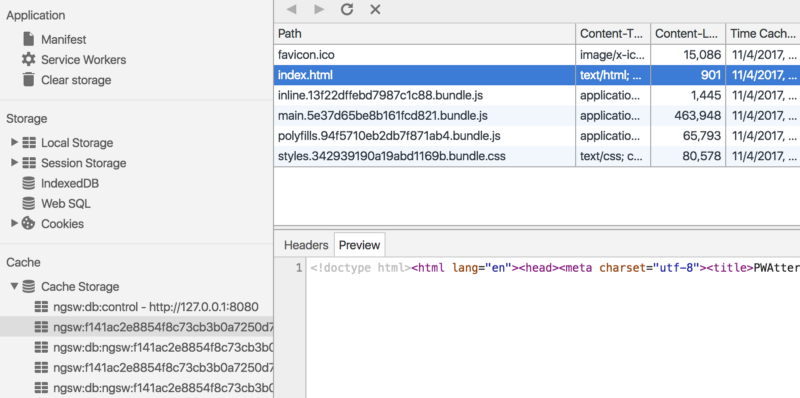
The application will be working after we went offline. Why? Because NGSW cached all the resources listed in theassetGroups section of the configuration file, and now it’s responsible for serving them from the Cache Storage, which is full of records now:
![enter image description here]()
Service Worker is registered and active
![enter image description here]()
We can view the content of cached response (available only in Chrome Canary at the moment)
NGSW uses Cache Storage to store both HTTP responses data and some metadata to handle versioning:
![enter image description here]()
Types of the storages by NGSW
- Entries with postfix
:cache — actual HTTP responses.
- Entries with postfix
:meta — to store the versioning meta information. Later this kind of stored data might be moved to indexedDB.
If you keep DevTools open, the entries inside Cache Storage section
most likely will not be updated automatically after each action from
service worker side. If you wish to see the actual data, right-click
and choose Refresh Caches.
Right. The default form of NGSW configuration file is not enough for our case because we use Material Icons webfont. Obviously, these resources (corresponding CSS and WOFF2 files) were not cached by NGSW, but we can easily fix it by adding one more group to assetGroups in addition to default app and assets ones. Let’s call it fonts:
{
  ...
  "assetGroups": [
   ...
   {
    "name": "fonts",
    "resources": {
      "urls": [
        "https://fonts.googleapis.com/**",
        "https://fonts.gstatic.com/**"
      ]
    }
  }]
}
It makes sense to specify these resources using globs syntax because the exact URL of the font file could change from time to time to support webfont versioning. Also, you may notice that we have specified neither installMode nor updateMode. On the one hand, both will be set as prefetch in the resulting NGSW control file as this is a default value. On the other hand, they will be cached only after they were requested because the specifics of urls-way to list the resources.
After we rebuild, run and switch to offline mode we will see the normal state of the application with all the icons in the place.
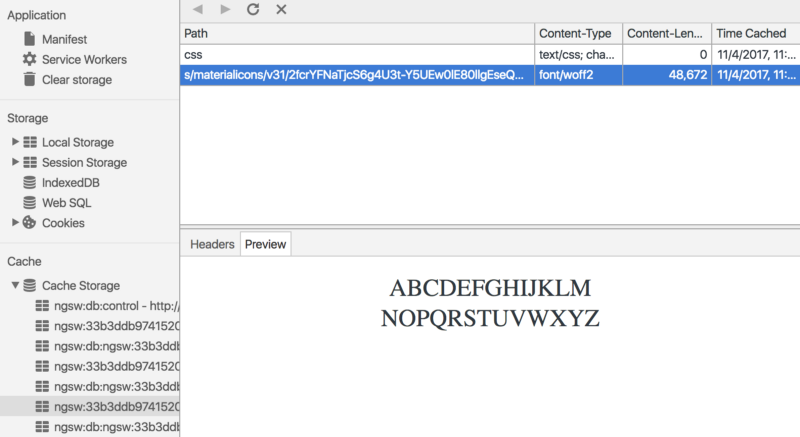
In the Cache Storage we’ll see two new entries:
![enter image description here]()
Storages generated by NGSW
We can even preview the cached font:
![enter image description here]()
There is a fundamental difference between assetGroups and dataGroups.
assetGroups are keeping track of the app [shell] version.dataGroups are independent of the app version. They are cached using
their own cache policies, and it’s the proper section to handle our
API responses.
Runtime caching
To use Network-First strategy for my /timeline API endpoint and Cache-First strategy for the /favorites endpoint. The corresponding setup in src/ngsw-config.json will look like:
{
  ...
  "dataGroups": [{
      "name": "api-freshness",
      "urls": [
        "/timeline"
      ],
      "cacheConfig": {
        "strategy": "freshness",
        "maxSize": 100,
        "maxAge": "3d",
        "timeout": "10s"
      }
    },
    {
      "name": "api-performance",
      "urls": [
        "/favorites"
      ],
      "cacheConfig": {
        "strategy": "performance",
        "maxSize": 100,
        "maxAge": "3d"
      }
    }
  ]
}
There is a main switch defining the behavior of NGSW: cacheConfig / strategy. For network-first strategy, it’s freshness, for cache-first — performance.
Now build, serve, click Load my timeline and Load my favorites buttons to get and cache API responses, and switch to offline.
About the optimization for online mode. Return back to online and click Timeline / Favorites once or twice. It’s clearly visible that Favorites are loaded immediately, just because we skip the whole network trip and get the data from the cache. To specify for how long to cache Using settings in cacheConfig section — we have the fine-grain control there.
NGSW helped us a lot with some really smart network optimizations, requiring only some JSON configuration from us.


