Why do PDFs resized in SwiftUI getting sharp edges?
Asked Answered
S

4

20

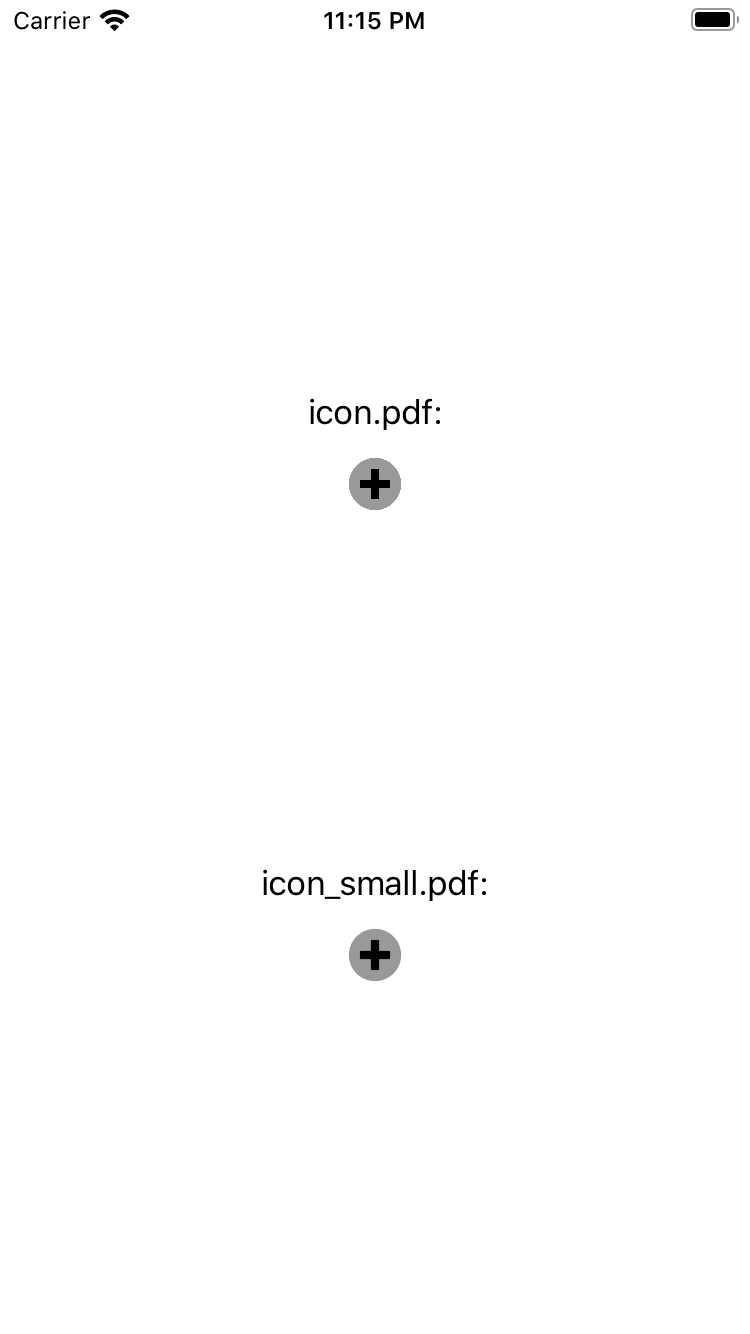
I try to include a pdf in my SwiftUI enabled app using Xcode 11.4 and iOS 13.4. However, when I resize the pdf, it gets crips edges. I have included two versions of the pdf: One large pdf (icon.pdf) and one small pdf (icon_small.pdf). When I resize icon.pdf it gets start edges, while icon_small.pdf gets smooth edges. The issue applies to all other pdfs I have tried as well.

enter image description here

This is my code:

struct ContentView: View {
    var body: some View {
        VStack {
            Spacer()
            Text("icon.pdf:")
            Image("icon")
                .resizable()
                .renderingMode(.template)
                .aspectRatio(contentMode: .fit)
                .frame(width: 27.0, height: 27.0)
            Spacer()
            Text("icon_small.pdf:")
            Image("icon_small")
            Spacer()
        }
    }
}

Both icon.pdf and icon_small.pdf have the following asset settings:

  • Render As: Template Image
  • Resizing: Preserve Vector Data
  • Devices: Universal
  • Scales: Single Scale

The pdfs are available here:

Slipper answered 11/4, 2020 at 21:36 Comment(6)
Since it's a vector image, why do you need icon.pdf and icon_small.pdf? My first guess would be that icon.pdf is messed up. Just use icon_small.pdf for all sizes. It's a vector image, it will scale as required.Deuteron
Both are vector graphics (pdfs). I included both to illustrate that pdfs resized by SwiftUI get sharp edges. So I have to resize them manually before including them in my project. However, as far as I understand, SwiftUI should be able to resize the image without the edges becoming sharp.Slipper
hm... I tried a large vector image I have and resized it, it did pixelize. Must be an issue with the vector image support in SwiftUI. Lets see what other have to say.Deuteron
True on macOS as wellEmployee
It seems it still doesn't work as expected. Did you report this somewhere?Alcyone
Actually, I don't remember @mallow. But I don't think so. I ended up scaling the PDFs to correct size before importing them in Xcode.Slipper
D
44

I did a side by side comparison for both vector images using the ones you provided:

At first, I used SwiftUI's inbuilt Image and as mentioned, both performed badly at their extreme ends:

  • Large image got sharp edges when it scaled down
  • Small image got blurred as it scaled up

At first I thought it might be your pdf vectors so I used ones that I know have worked well in my previous projects, but I got the same issues.
Thinking it to be a UIImage issue, I used SwiftUIs Image(uiImage:) but same problem.

Last guess was the image container, and knowing that UIImageView has handled vector images well, getting UIViewRepresentable to wrap the UIImageView seems to solve this issue. And for now it looks like a possible workaround.

Workaround Solution:

struct MyImageView: UIViewRepresentable {
  var name: String
  var contentMode: UIView.ContentMode = .scaleAspectFit
  var tintColor: UIColor = .black

  func makeUIView(context: Context) -> UIImageView {
    let imageView = UIImageView()
    imageView.setContentCompressionResistancePriority(.fittingSizeLevel, 
                                                      for: .vertical)
    return imageView
  }

  func updateUIView(_ uiView: UIImageView, context: Context) {
    uiView.contentMode = contentMode
    uiView.tintColor = tintColor
    if let image = UIImage(named: name) {
      uiView.image = image
    }
  }
}

This loses some SwiftUI Image modifiers (you still have normal View modifiers) but you can always pass in some parameters such as contentMode and tintColor as shown above. Add more if needed and handle accordingly.


Usage Example:

struct ContentView: View {
  var body: some View {
    VStack {
      MyImageView(name: "icon", //REQUIRED
                  contentMode: .scaleAspectFit, //OPTIONAL
                  tintColor: .black /*OPTIONAL*/)
        .frame(width: 27, height: 27)
      MyImageView(name: "icon_small", //REQUIRED
                  contentMode: .scaleAspectFit, //OPTIONAL
                  tintColor: .black /*OPTIONAL*/)
        .frame(width: 27, height: 27)
    }
  }
}

Now this is all speculation but it looks as though SwiftUI treats vector images as a PNG.

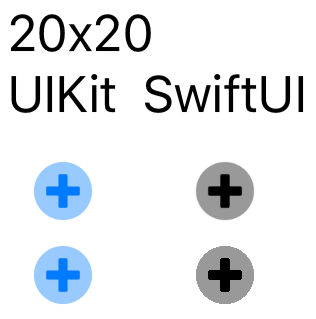
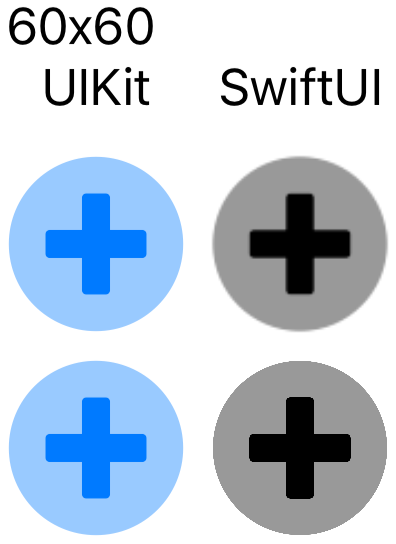
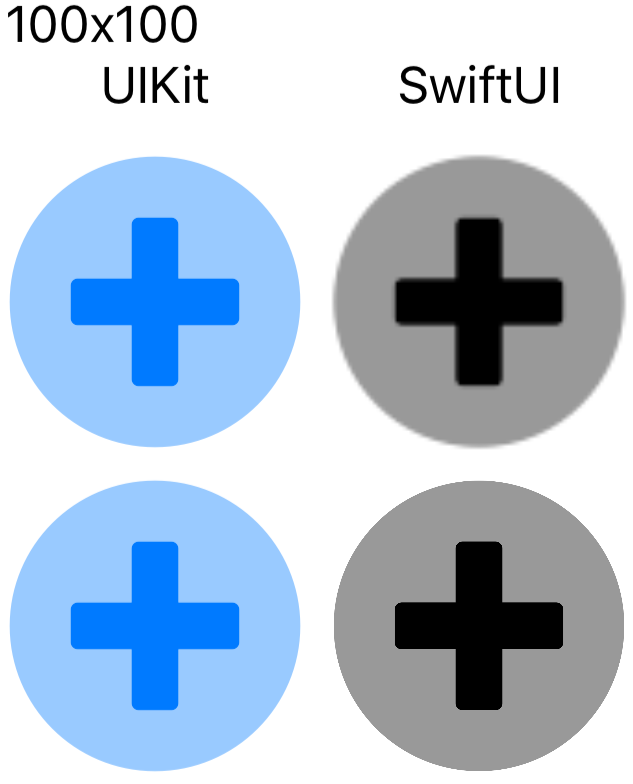
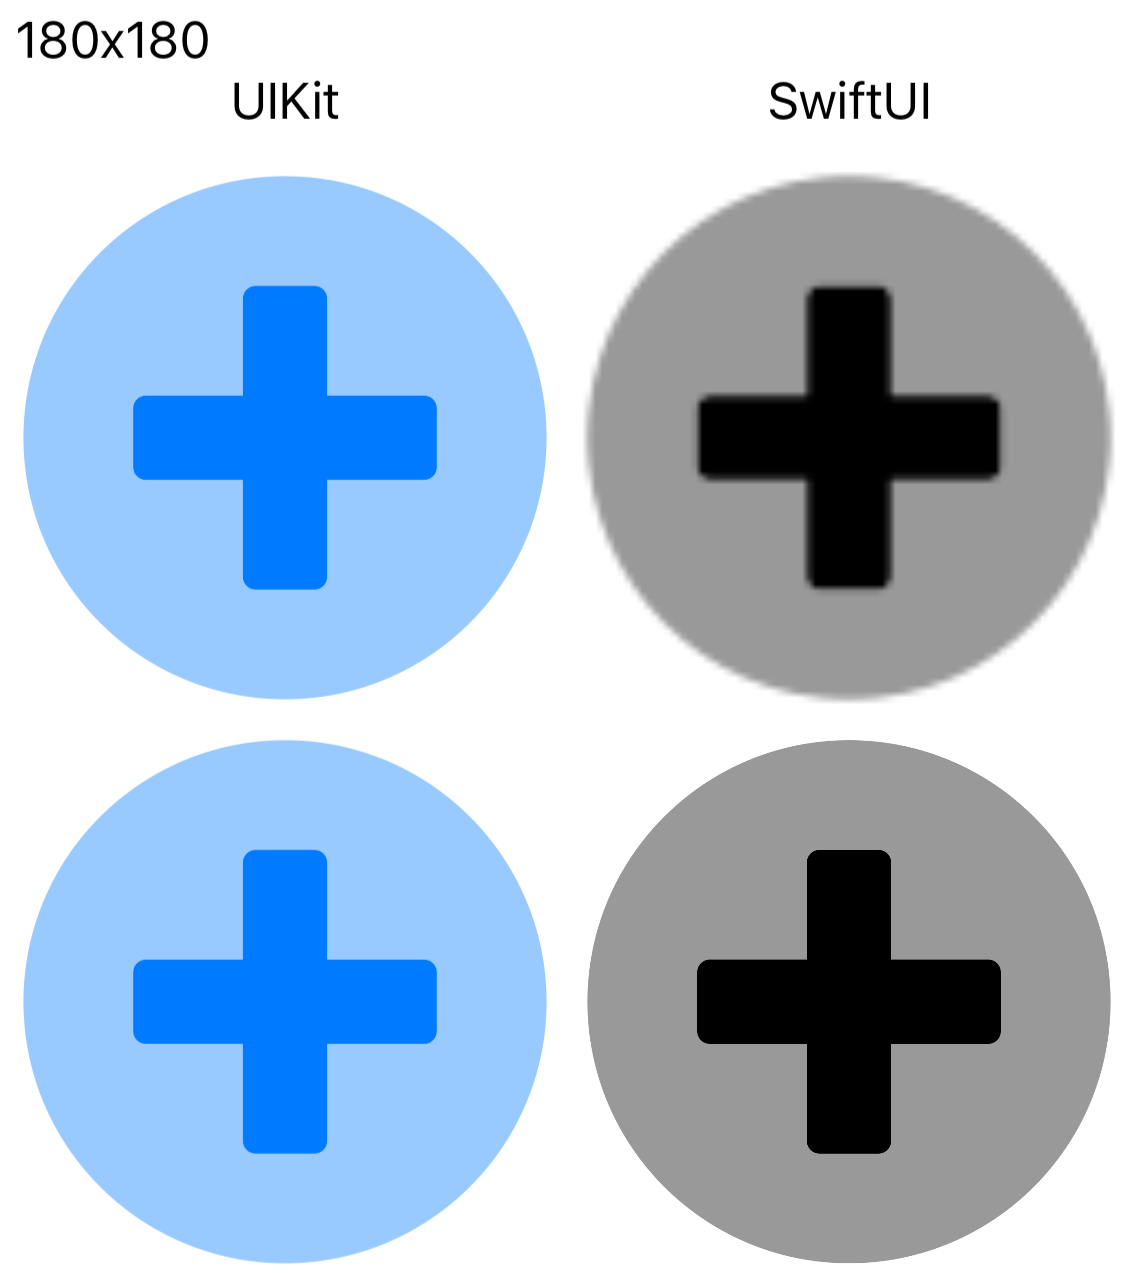
The following example is a simple side by side comparison of the small and large vector images rendered in UIKit's UIImageView and SwiftUI's Image.

Comparison:

struct ContentView: View {
  let (largeImage, smallImage) = ("icon", "icon_small")
  let range = stride(from: 20, to: 320, by: 40).map { CGFloat($0) }

  var body: some View {
    List(range, id: \.self) { (side) in
      ScrollView(.horizontal) {
        VStack(alignment: .leading) {
          Text(String(format: "%gx%g", side, side))
          HStack {
            VStack {
              Text("UIKit")
              MyImageView(name: self.smallImage)
                .frame(width: side, height: side)
              MyImageView(name: self.largeImage)
                .frame(width: side, height: side)
            }
            VStack {
              Text("SwiftUI")
              Image(self.smallImage)
                .resizable()
                .aspectRatio(contentMode: .fit)
                .frame(width: side)
              Image(self.largeImage)
                .resizable()
                .aspectRatio(contentMode: .fit)
                .frame(width: side)
            }
          }
        }
      }
    }
  }
}

Results:

  1. Top row; Left : Small Image in UIImageView
  2. Top row; Right : Small Image in SwiftUI Image
  3. Bottom row; Left : Large Image in UIImageView
  4. Bottom row; Right : Large Image in SwiftUI Image

UIKit's UIImageView has consistent performace while SwiftUI's Image is having trouble.

20x20


60x60


100x100


180x180

Deuteron answered 12/4, 2020 at 22:6 Comment(2)
Thank you for sharing this @staticVoidMan, this summarised it well and the workaround was a big help.Guerra
Thank you for sharing this, looks like a great solution. I'm trying to use this inside as a label icon, like this: ``` Label { Text("Metadata") } icon: { CustomImageViewWrapper(name: "Metadata") } ``` It had to conform to view so: ``` struct CustomImageViewWrapper: View { var name: String var contentMode: UIView.ContentMode = .scaleAspectFit var tintColor: UIColor = .black var body: some View { CustomImageView(name: name, contentMode: contentMode, tintColor: tintColor) } } ``` It won't show the icon in the label, what could it be?Mallett
F
3

The same issue show up in this post: Xcode 11 PDF image assets "Preserve Vector Data" not working in SwiftUI?

UIKit solution from the link:

let uiImage = UIImage(named: "Logo-vector")!
var image: Image {
        Image(uiImage: uiImage.resized(to: CGSize(width: 500, height: 500)))
            .resizable()
}

var body: some View {
        NavigationView {
            VStack(alignment: .center, spacing: 8) {
                Spacer()
                Text("Logo vector SwiftUI")
                image
                    .frame(width: 240, height: 216)
                ...
                }
                ...
            }
        }
}

extension UIImage {
    func resized(to size: CGSize) -> UIImage {
        return UIGraphicsImageRenderer(size: size).image { _ in
            draw(in: CGRect(origin: .zero, size: size))
        }
    }
}

I put together a cross-platform framework called ResizableVector which performs the same resizing method:

extension PlatformImage {
    func resized(to size: CGSize) -> PlatformImage {
        return GraphicsImageRenderer(size: size).image { _ in
            self.draw(in: CGRect(origin: .zero, size: size))
        }
    }
}

Where PlatformImage is simply a typealias for UIImage or NSImage and GraphicsImageRenderer is a typealias for the UIGraphicsImageRenderer or MacGraphicsImageRenderer.

The framework provides a SwiftUI View named ResizableVector to use in place of Image. It can also respect the original aspect ratio, if desired.

You can add this using SPM - check it out on GitHub: https://github.com/Matt54/ResizableVector

Felecia answered 1/3, 2022 at 0:49 Comment(1)
I've tried to draw my 24x24pt svg image to 180x180 and it was blurry. Then I checked "Preserve vector data and it worked fine"Dulsea
L
2

PDF vectors needs to be programmatically resized via UIGraphicsBeginImageContextWithOptions so that they are not shown blurred when you scale them up (or down). There is no need to have multiple PDFs with different resolution to accomplish this.

Unfortunately this is not done automatically by UIKit or SwiftUI. Here is an example where a 24x24 PDF vector is tinted and resized to 200x200.

Image(uiImage: UIImage(named: "heart")!.tinted(withColor: .blue,
                                               biggerSize: CGSize(width: 200, height: 200)))
      .resizable()
      .frame(width: 200, height: 200,
             alignment: .center)
extension UIImage {

    /// Uses compositor blending to apply color to an image. When an image is too small it will be shown
    /// blurred. So you have to provide a size property to get a good resolution image
    public func tinted(withColor: UIColor?, biggerSize: CGSize = .zero) -> UIImage {
        guard let withColor = withColor else { return self }
        
        let size = biggerSize == .zero ? self.size : biggerSize
        let img2 = UIImage.createWithColor(size, color: withColor)
        let rect = CGRect(x: 0, y: 0, width: size.width, height: size.height)
        let renderer = UIGraphicsImageRenderer(size: size)
        let result = renderer.image { _ in
            img2.draw(in: rect, blendMode: .normal, alpha: 1)
            draw(in: rect, blendMode: .destinationIn, alpha: 1)
        }
        return result
    }

    public static func createWithColor(_ size: CGSize, color: UIColor) -> UIImage {
        UIGraphicsBeginImageContextWithOptions(size, false, 0.0)
        let context = UIGraphicsGetCurrentContext()
        let rect = CGRect(size: size)
        color.setFill()
        context!.fill(rect)
        let image = UIGraphicsGetImageFromCurrentImageContext()
        UIGraphicsEndImageContext()
        return image!
    }
}
Luane answered 14/9, 2021 at 7:30 Comment(0)
B
0

There are essentially no differences between the two PDF files, other than the fact that in one case the co-ordinates of the content are scaled by a factor of ~14.2.

I would guess th difference is not in the PDF files, but in the rendering engine you are using to draw the contents. Note that the PDF file uses transparency (it has a constant alpha of 0.4) so the blending calculations might lead to slightly different results at the edges.

Looking at the two files in Adobe Acrobat, scaled to be the same size on screen, there is no visible difference between them.

Zooming in to your PNG file I see that icon_small.pdf has anti-aliased edges, while icon.pdf does not. You don't say what you are using to render the PDF files to a PNG but I think you're going to have to discuss it with the authors of whatever tool that is.

Boring answered 12/4, 2020 at 8:20 Comment(3)
Both images are pdfs – no png here. The pdf was originally a svg, converted to pdf using CairoSVG: cairosvg icon.svg -o icon.pdf. The icon_small.pdf was created with cairosvg icon.svg -o icon_small.pdf --output-width 36 --output-height 36.Slipper
The PNG I'm referring to is the one in your question, which demonstrates (I assume) the 'sharp edges'. The PDF files are identical when rendered with Acrobat at the same size, and the content is the same (barring the scaling). The PNG has other details in it (phone stuff ?) I assume its a screenshot. Whatever is rendering the two PDF files (which aren't images in the sense of bitmaps) to the screen is rendering them differently, presumably because one is 14 times the area of the other but they are being displayed in the same screen area. The 'problem' is the rendering not the PDF files.Boring
Ah, I understand. The PNG is just a screenshot from the iPhone 8 Simulator. But the same happens on my iPhone 8. I agree there are nothing wrong with the pdfs. So the problem (and solution) is probably within SwiftUI.Slipper

© 2022 - 2024 — McMap. All rights reserved.