How to create spacing between items in a SwiftUI List view?
Asked Answered
M

7

25

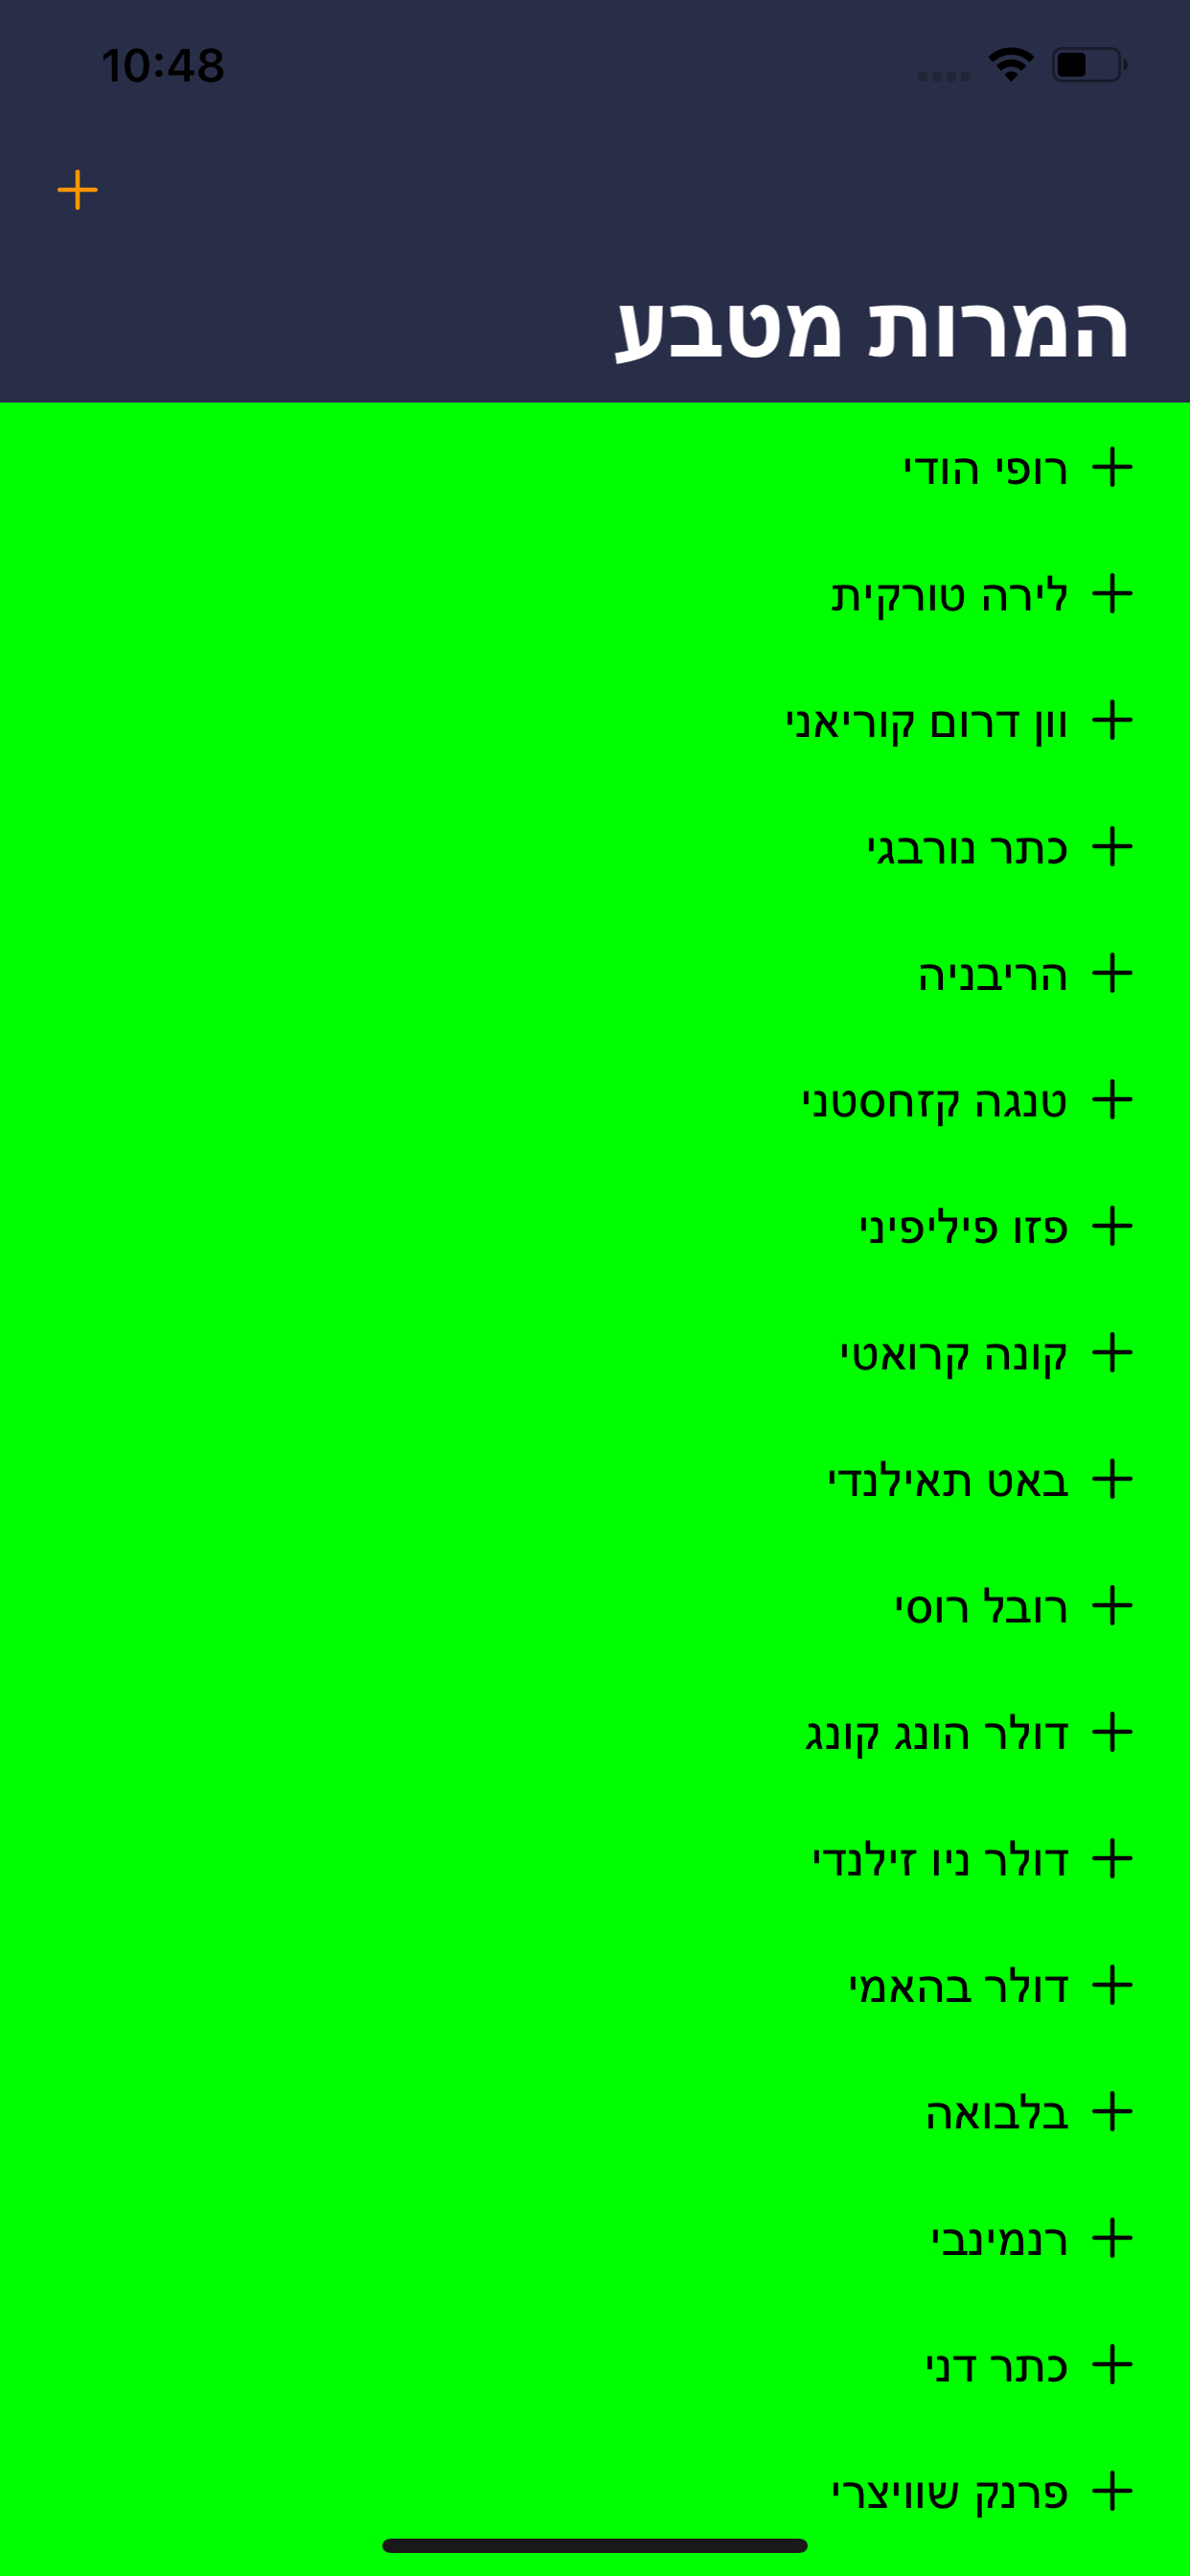
I can't seem to find a way to create spacing between List items. Maybe I shouldn't put in a list in the first place?

enter image description here

What do you think?

This the code that generates the view:

struct ContentView: View {
    
    @ObservedObject var ratesVM = RatesViewModel()
    
    init() {
        UINavigationBar.appearance().largeTitleTextAttributes = [.foregroundColor: UIColor.white]
        UITableView.appearance().backgroundColor = UIColor.init(named: "midnight blue")
        UITableViewCell.appearance().backgroundColor = .green
        UITableView.appearance().separatorStyle = .none
    }
    
    var body: some View {
        
        NavigationView {
            List (ratesVM.ratesList, id: \.self) { rate in
                    Image(systemName: "plus")
                    
                    Button(action: {print("pressed")}) {
                        Text(rate.hebrewCurrencyName)
                }
            }
            .navigationBarTitle("המרות מטבע")
            .navigationBarItems(leading:
                Button(action: {
                    print("button pressed")
                    self.ratesVM.callService()
                }) {
                    Image(systemName: "plus")
                        .foregroundColor(Color.orange)})
        }.environment(\.layoutDirection, .rightToLeft)
    }
}
Mckay answered 30/12, 2019 at 9:50 Comment(2)
developer.apple.com/documentation/swiftui/dividerNobukonoby
@JawadAli answer seems to be the correct way to do this actually this from Hacking with swift. Here is the link it contains a video explanation hackingwithswift.com/quick-start/swiftui/…Fool
S
18

You can define the minimum list row height to be bigger so you'll have more separation between rows.

List (ratesVM.ratesList, id: \.self) { rate in
       Image(systemName: "plus")
       Button(action: {print("pressed")}) {
                    Text(rate.hebrewCurrencyName)
       }
}.environment(\.defaultMinListRowHeight, 50) //minimum row height

Alternatively you can build your row as a HStack and specify a frame height.

List (ratesVM.ratesList, id: \.self) { rate in
    HStack {
       Image(systemName: "plus")
       Button(action: {print("pressed")}) {
          Text(rate.hebrewCurrencyName)
       }
    }.frame(height: 50) //your row height 
}.environment(\.defaultMinListRowHeight, 20) 

Or as a VStack and and use Spacers

List (ratesVM.ratesList, id: \.self) { rate in
    VStack{
        Spacer()
        HStack {
           Image(systemName: "plus")
           Button(action: {print("pressed")}) {
              Text(rate.hebrewCurrencyName)
           }
        }
        Spacer()
    }.frame(height: 50)
}.environment(\.defaultMinListRowHeight, 20) 
Scuffle answered 30/12, 2019 at 10:22 Comment(2)
Not working if you want to remove spacing. This only sets a minimum height of the cell but does not adjust the space between them.Actinometer
I don't see why this is an accepted answer as it doesn't answer the original question at all. The question is about space between rows, the answer is about rows height.Separator
I
12

The SwiftUI way

You can achieve it by removing the list row separators .listRowSeparator(.hidden) and setting the list row background to an InsettableShape .listRowBackground() defining top and bottom EdgeInsets padding. Btw, don't forget to set the .listStyle(.plain) to .plain.

You can find a better implementation on this dev post SwiftUI List Card View.

//
//  ContentView.swift
//  My App
//
//  Created by Kolmar Kafran on 25/08/22.
//  https://www.linkedin.com/in/kolmar-kafran/
//

import SwiftUI

struct ContentView: View {
    @State private var someList = [0, 1, 2, 3, 4]
    
    var body: some View {
        List {
            ForEach(someList, id: \.self) { n in
                Text("\(n)")
                    .foregroundColor(.white)
                    .listRowBackground(
                        RoundedRectangle(cornerRadius: 5)
                            .background(.clear)
                            .foregroundColor(.blue)
                            .padding(
                                EdgeInsets(
                                    top: 2,
                                    leading: 10,
                                    bottom: 2,
                                    trailing: 10
                                )
                            )
                    )
                    .listRowSeparator(.hidden)
            }
            .onDelete { idx in
                someList.remove(atOffsets: idx)
            }
        }
        .listStyle(.plain)
    }
}
Ivanaivanah answered 25/8, 2022 at 13:46 Comment(1)
This is a very good solution and it uses all standard SwiftUI components, no hacking, lol.Nonpartisan
A
8

In my case I needed to add the following to my Section:

List {
    Section {
        ForEach(nearbyLocations, id: \.id) { location in
            LocationCard(location: location)
        }
    }
    .listRowSeparator(.hidden)
}
.listStyle(.plain)
.listRowBackground(Color.clear)
.listRowSpacing(10)

To change the spacing of the cards, update the listRowSpacing as needed.

Posting this here incase someone needs a similar result.

enter image description here

Attrahent answered 7/8, 2023 at 16:28 Comment(4)
How did you get the nice shadow going?Buitenzorg
developer.apple.com/documentation/swiftui/view/…Attrahent
Thanks, but for me it looks like SwiftUI clips the cells, hence I can‘t make the shadow actually appear.Buitenzorg
In my example, LocationCard has a shadow (with a shadow offset less than 10). Then I have listRowSpacing(10). If the shadow offset is less than listRowSpacing, no clipping should occur 👍Attrahent
M
2

padding didn't work since it only increased the size of the item/cell and not the spacing between, but .environment(.defaultMinListRowHeight, 20) seemed to work

I also implemented a custom view for the button styling to adjust the frame and "pressable area" of the button relative to the item/cell.

struct MyButtonStyle: ButtonStyle {
    func makeBody(configuration: Configuration) -> some View {
        configuration.label
            .foregroundColor(.black)
            .opacity(configuration.isPressed ? 0.5 : 1.0)
            .frame(width: 350, height: 50, alignment: Alignment.center)
            .background(Color.orange)
    }
}

struct ContentView: View {

    @ObservedObject var ratesVM = RatesViewModel()

    init() {
        UINavigationBar.appearance().largeTitleTextAttributes = [.foregroundColor: UIColor.white]
        UITableView.appearance().backgroundColor = UIColor.init(named: "midnight blue")
        UITableViewCell.appearance().backgroundColor = .clear
        UITableView.appearance().separatorStyle = .none
    }

    var body: some View {

        NavigationView {
            List (ratesVM.ratesList, id: \.self) { rate in
                Button(action: {print("pressed")}) {
                    Text(rate.hebrewCurrencyName)
                }.buttonStyle(MyButtonStyle())
            }
            .navigationBarTitle("המרות מטבע")
            .navigationBarItems(leading:
                Button(action: {
                    print("button pressed")
                    self.ratesVM.callService()
                }) {
                    Image(systemName: "plus")
                        .foregroundColor(Color.orange)})
        }.environment(\.layoutDirection, .rightToLeft)
            .environment(\.defaultMinListRowHeight, 150)
    }
}

enter image description here

Mckay answered 30/12, 2019 at 10:40 Comment(0)
K
1

SwiftUI lets us set individual padding around views using the padding() modifier. If you use this with no parameters you’ll get system-default padding on all sides, like this:

VStack {
    Text("SwiftUI")
        .padding()
    Text("rocks")
}

But you can also customize how much padding to apply and where. So, you might want to apply system padding to only one side:

Text("SwiftUI")
    .padding(.bottom)

Or you might want to control how much padding is applied to all sides:

Text("SwiftUI")
    .padding(100)

Or you can combine the two to add a specific amount of padding to one side of the view:

Text("SwiftUI")
    .padding(.bottom, 100)

so you can do

Text(rate.hebrewCurrencyName)
      .padding(50)
Kunming answered 30/12, 2019 at 9:57 Comment(0)
L
1

A quick solution here is to just set the corresponding listStyle to SidebarListStyle. For instance:

List {
    Text("First row")
    Text("Second row")
    Text("Third row")
}
.listStyle(SidebarListStyle())

But please note that on macOS and iOS, the sidebar list style also displays disclosure indicators in the section headers that allow the user to collapse and expand sections.

Another quick alternative would be to use the Divider() helper view instead (i.e., a visual element that can be used to separate other content):

List {
    Text("First row")
    Divider()
    Text("Second row")
    Divider()
    Text("Third row")
}

Both solutions won't allow direct control of the vertical spacing but at least provides a more spacious layout alternative.

Locution answered 30/5, 2021 at 13:47 Comment(0)
B
0

Working example

struct AuthView_Previews: PreviewProvider {
static var previews: some View {
    let t = ["1","2","3","4","5","6","7","8","9"]
    GeometryReader { geometry in
        List(t, id: \.self){ item in
                HStack{
                    Text(item)
                }
                .frame(width: geometry.size.width - 40, height: 39, alignment: .center)
                .padding(10)
                .background(Color("AppRecommended"))
                .cornerRadius(10)
                .listRowSeparator(.hidden)
        }
        .listStyle(.plain)
    }
}

}

Note: .listRowSeparator(.hidden) works for iOS 15 and above

Brachyuran answered 6/2, 2023 at 14:26 Comment(0)

© 2022 - 2024 — McMap. All rights reserved.