Since your question says "How to use RecyclerView with a database" and you are not being specific whether you want SQLite or anything else with the RecyclerView, I'll give you a solution that is highly optimal. I'll be using Realm as database and let you display all the data inside your RecyclerView. It has asynchronous query support as well without using Loaders or AsyncTask.
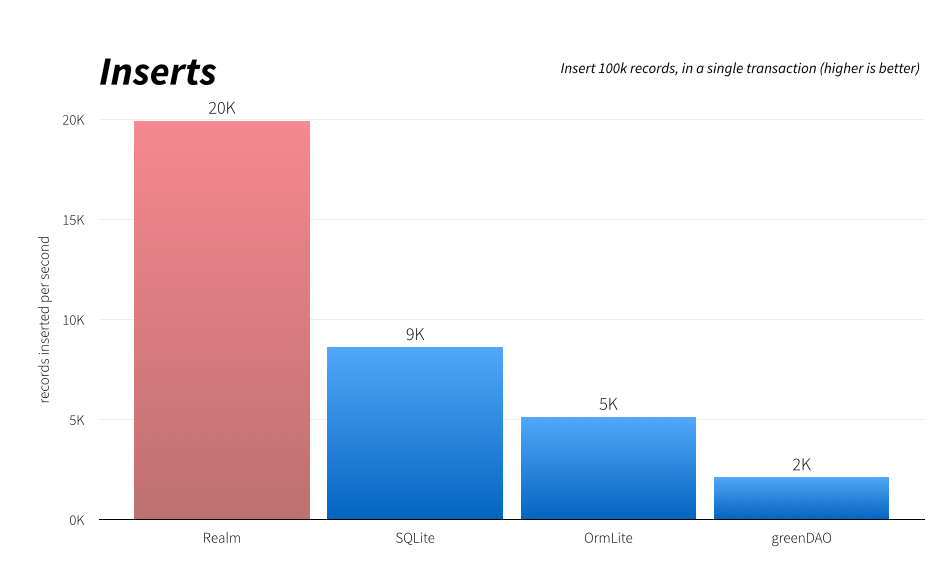
Why realm?
![realm.io performance Android]()
Step 1
Add the gradle dependency for Realm , the dependency for the latest version is found here
Step 2
Create your model class, for example, lets say something simple like Data which has 2 fields, a string to be displayed inside the RecyclerView row and a timestamp which will be used as itemId for allowing the RecyclerView to animate items. Notice that I extend RealmObject below because of which your Data class will be stored as a table and all your properties will stored as columns of that table Data. I have marked the data text as primary key in my case since I don't want a string to be added more than once. But if you prefer having duplicates, then make the timestamp as the @PrimaryKey. You can have a table without a primary key but it will cause problems if you try updating the row after creating it. A composite primary key at the time of writing this answer is not supported by Realm.
import io.realm.RealmObject;
import io.realm.annotations.PrimaryKey;

public class Data extends RealmObject {
@PrimaryKey
private String data;

//The time when this item was added to the database
private long timestamp;

public String getData() {
    return data;
}

public void setData(String data) {
    this.data = data;
}

public long getTimestamp() {
    return timestamp;
}

public void setTimestamp(long timestamp) {
    this.timestamp = timestamp;
}
}
Step 3
Create your layout for how a single row should appear inside the RecyclerView.
The layout for a single row item inside our Adapter is as follows
<?xml version="1.0" encoding="utf-8"?>
<FrameLayout xmlns:android="http://schemas.android.com/apk/res/android"
    android:layout_width="match_parent"
    android:layout_height="match_parent">

<TextView
    android:id="@+id/area"
    android:layout_width="match_parent"
    android:layout_height="wrap_content"
    android:layout_gravity="center"
    android:background="@android:color/white"
    android:padding="16dp"
    android:text="Data"
    android:visibility="visible" />

</FrameLayout>
Notice that I have kept a FrameLayout as root even though I have a TextView inside. I plan to add more items in this layout and hence made it flexible for now :)
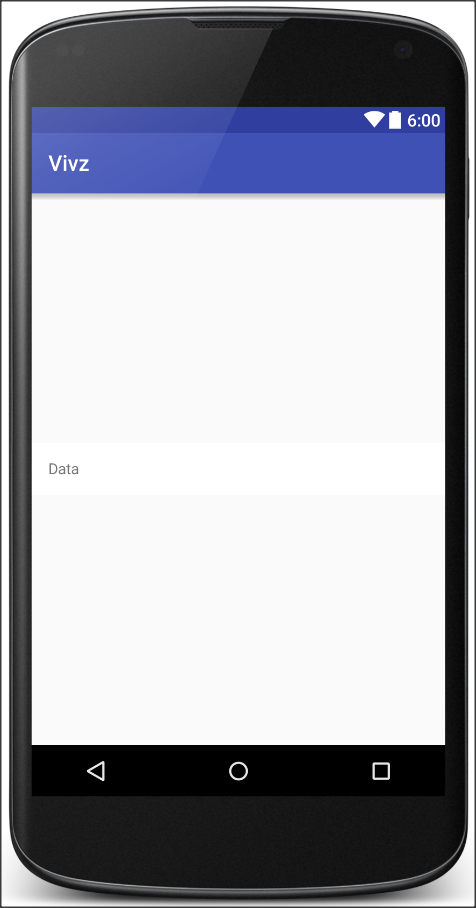
For the curious people out there, this is how a single item looks currently.
![single item row layout inside RecyclerView]()
Step 4
Create your RecyclerView.Adapter implementation. In this case, the data source object is a special object called RealmResults which is basically a LIVE ArrayList, in other words, as items are added or removed from your table, this RealmResults object auto updates.
import android.content.Context;
import android.support.v7.widget.RecyclerView;
import android.view.LayoutInflater;
import android.view.View;
import android.view.ViewGroup;
import android.widget.TextView;

import io.realm.Realm;
import io.realm.RealmResults;
import slidenerd.vivz.realmrecycler.R;
import slidenerd.vivz.realmrecycler.model.Data;

public class DataAdapter extends RecyclerView.Adapter<DataAdapter.DataHolder> {
private LayoutInflater mInflater;
private Realm mRealm;
private RealmResults<Data> mResults;

public DataAdapter(Context context, Realm realm, RealmResults<Data> results) {
    mRealm = realm;
    mInflater = LayoutInflater.from(context);
    setResults(results);
}

public Data getItem(int position) {
    return mResults.get(position);
}

@Override
public DataHolder onCreateViewHolder(ViewGroup parent, int viewType) {
    View view = mInflater.inflate(R.layout.row_data, parent, false);
    DataHolder dataHolder = new DataHolder(view);
    return dataHolder;
}

@Override
public void onBindViewHolder(DataHolder holder, int position) {
    Data data = mResults.get(position);
    holder.setData(data.getData());
}

public void setResults(RealmResults<Data> results) {
    mResults = results;
    notifyDataSetChanged();
}

@Override
public long getItemId(int position) {
    return mResults.get(position).getTimestamp();
}

@Override
public int getItemCount() {
    return mResults.size();
}

public void add(String text) {

    //Create a new object that contains the data we want to add
    Data data = new Data();
    data.setData(text);

    //Set the timestamp of creation of this object as the current time
    data.setTimestamp(System.currentTimeMillis());

    //Start a transaction
    mRealm.beginTransaction();

    //Copy or update the object if it already exists, update is possible only if your table has a primary key
    mRealm.copyToRealmOrUpdate(data);

    //Commit the transaction
    mRealm.commitTransaction();

    //Tell the Adapter to update what it shows.
    notifyDataSetChanged();
}

public void remove(int position) {

    //Start a transaction
    mRealm.beginTransaction();

    //Remove the item from the desired position
    mResults.remove(position);

    //Commit the transaction
    mRealm.commitTransaction();

    //Tell the Adapter to update what it shows
    notifyItemRemoved(position);
}

public static class DataHolder extends RecyclerView.ViewHolder {
    TextView area;

    public DataHolder(View itemView) {
        super(itemView);
        area = (TextView) itemView.findViewById(R.id.area);
    }

    public void setData(String text) {
        area.setText(text);
    }
}
}
Notice that I am calling notifyItemRemoved with the position at which the removal happened but I DON'T call notifyItemInserted or notifyItemRangeChanged because there is no direct way to know which position the item was inserted into the database since Realm entries are not stored in an ordered fashion. The RealmResults object auto updates whenever a new item is added, modified or removed from the database so we call notifyDataSetChanged while adding and inserting bulk entries. At this point, you are probably concerned about the animations that won't be triggered because you are calling notifyDataSetChanged in place of notifyXXX methods. That is exactly why I have the getItemId method return the timestamp for each row from the results object. Animation is achieved in 2 steps with notifyDataSetChanged if you call setHasStableIds(true) and then override getItemId to provide something other than just the position.
Step 5
Lets add the RecyclerView to our Activity or Fragment. In my case, I am using an Activity. The layout file containing the RecyclerView is pretty trivial and would look something like this.
<android.support.v7.widget.RecyclerView xmlns:android="http://schemas.android.com/apk/res/android"
xmlns:app="http://schemas.android.com/apk/res-auto"
android:id="@+id/recycler"
android:layout_width="match_parent"
android:layout_height="match_parent"
android:layout_margin="@dimen/text_margin"
app:layout_behavior="@string/appbar_scrolling_view_behavior" />
I have added an app:layout_behavior since my RecyclerView goes inside a CoordinatorLayout which I have not posted in this answer for brevity.
Step 6
Construct the RecyclerView in code and supply the data it needs. Create and initialise a Realm object inside onCreate and close it inside onDestroy pretty much like closing an SQLiteOpenHelper instance. At the simplest your onCreate inside the Activity will look like this. The initUi method is where all the magic happens. I open an instance of Realm inside onCreate.
@Override
protected void onCreate(Bundle savedInstanceState) {
    super.onCreate(savedInstanceState);
    setContentView(R.layout.activity_main);
    mRealm = Realm.getInstance(this);
    initUi();
}

private void initUi() {

    //Asynchronous query
    RealmResults<Data> mResults = mRealm.where(Data.class).findAllSortedAsync("data");

    //Tell me when the results are loaded so that I can tell my Adapter to update what it shows
    mResults.addChangeListener(new RealmChangeListener() {
        @Override
        public void onChange() {
            mAdapter.notifyDataSetChanged();
            Toast.makeText(ActivityMain.this, "onChange triggered", Toast.LENGTH_SHORT).show();
        }
    });
    mRecycler = (RecyclerView) findViewById(R.id.recycler);
    mRecycler.setLayoutManager(new LinearLayoutManager(this));
    mAdapter = new DataAdapter(this, mRealm, mResults);

    //Set the Adapter to use timestamp as the item id for each row from our database
    mAdapter.setHasStableIds(true);
    mRecycler.setAdapter(mAdapter);
}
Notice that in the first step, I query Realm to give me all objects from the Data class sorted by their variable name called data in an asynchronous manner. This gives me a RealmResults object with 0 items on the main thread which I am setting on the Adapter. I added a RealmChangeListener to be notified when the data has finished loading from the background thread where I call notifyDataSetChanged with my Adapter. I have also called setHasStableIds to true to let the RecyclerView.Adapter implementation keep track of items that are added, removed or modified. The onDestroy for my Activity closes the Realm instance
@Override
protected void onDestroy() {
    super.onDestroy();
    mRealm.close();
}
This method initUi can be called inside onCreate of your Activity or onCreateView or onViewCreated of your Fragment. Notice the following things.
Step 7
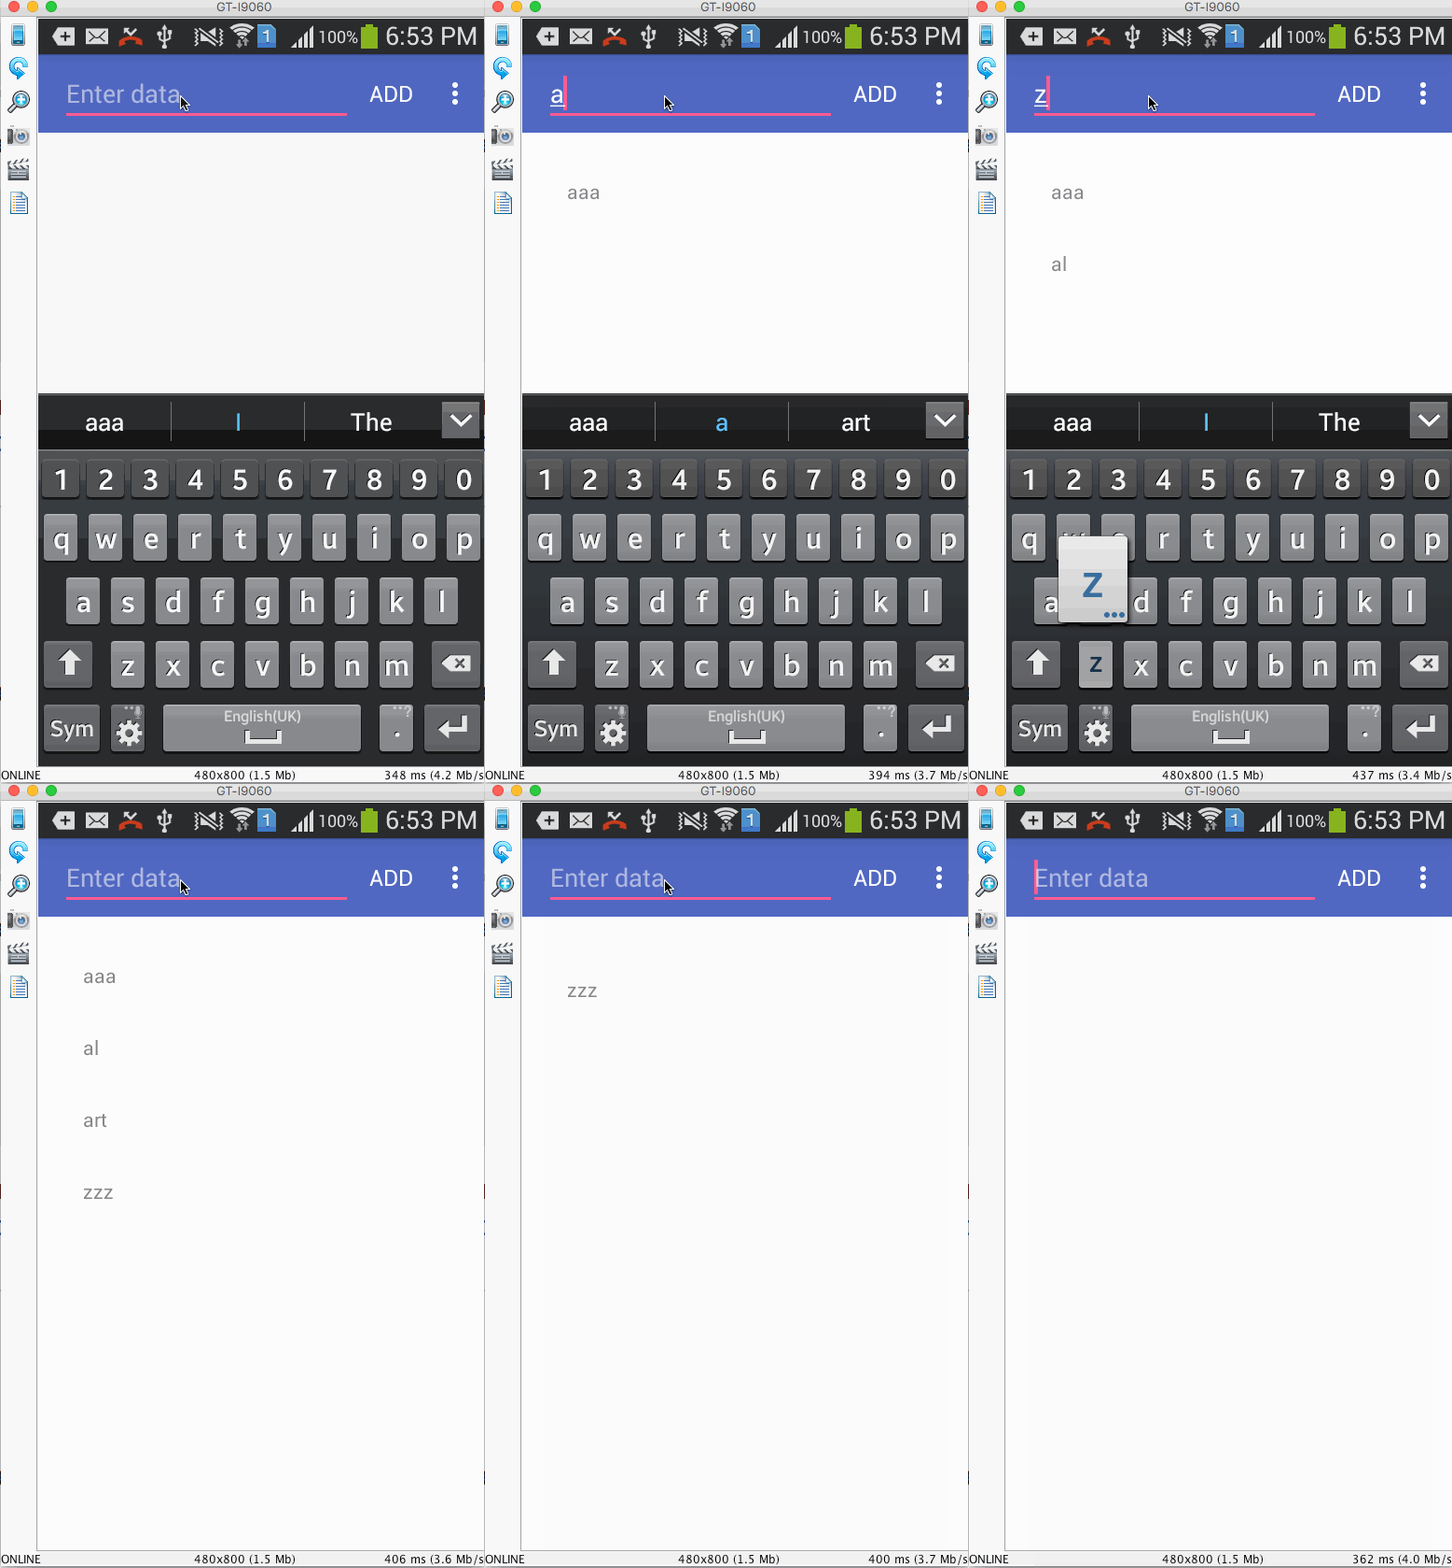
BAM! There is data from database inside your RecyclerView asynchonously loaded without CursorLoader, CursorAdapter, SQLiteOpenHelper with animations. The GIF image shown here is kinda laggy but the animations are happening when you add items or remove them.
![data from database inside RecyclerView]()


