SwiftUI: How to animate a TabView selection?
Asked Answered
H

6

28

When tapping a TabView .tabItem in SwiftUI, the destination view associated with the .tabItem changes.

I tried around with putting

            .animation(.easeInOut)
            .transition(.slide)

as modifiers for the TabView, for the ForEach within, and for the .tabItem - but there is always a hard change of the destination views.

How can I animated that change, for instance, to slide in the selected view, or to cross dissolve it?

I checked Google, but found nothing about that problem...

Henrique answered 15/5, 2020 at 20:5 Comment(1)
Possible duplicate of SwiftUI animation tabs of a TabViewAletaaletha
G
26

iOS:

for me, it works simply, it is a horizontal list, check //2 // 3

TabView(selection: $viewModel.selection.value) {
            ForEach(viewModel.dates.indices) { index in
                ZStack {
                    Color.white
                    horizontalListViewItem(item: viewModel.dates[index])
                        .tag(index)
                }
            }
        }
        .frame(width: UIScreen.main.bounds.width - 160, height: 80)
        .tabViewStyle(PageTabViewStyle(indexDisplayMode: .never))
        .animation(.easeInOut) // 2
        .transition(.slide) // 3

Update Also Check Patrick's comment to this answer below :)

Since .animation is deprecated, use animation with equatable for same.

Generalize answered 18/12, 2020 at 10:53 Comment(4)
I wouldn't consider this the right answer. .tabViewStyle(PageTabViewStyle(indexDisplayMode: .never)) already performs a slide animation when selection is changed. .animation(.easeInOut) and .transition(.slide) are redundant here. You can verify this by removing them or changing .transition(.slide) to .transition(.opacity) (demonstrating cross dissolve) and you'll see a slide animation still occurs.Wholism
Doesn't work for macos. PageTabViewStyle is not availableCitrin
@iPadawan, you can ignore it. transition and animation are key here.Alodi
@kelin, I meant, I would like to create the pages style view under macos.Citrin
S
22

Try replacing :

.animation(.easeInOut)
.transition(.slide)

with :

@State var tabSelection = 0
// ...
.animation(.easeOut(duration: 0.2), value: tabSelection)
Stacy answered 2/5, 2022 at 11:17 Comment(0)
C
7

Demo

I have found TabView to be quite limited in terms of what you can do. Some limitations:

  • custom tab item
  • animations

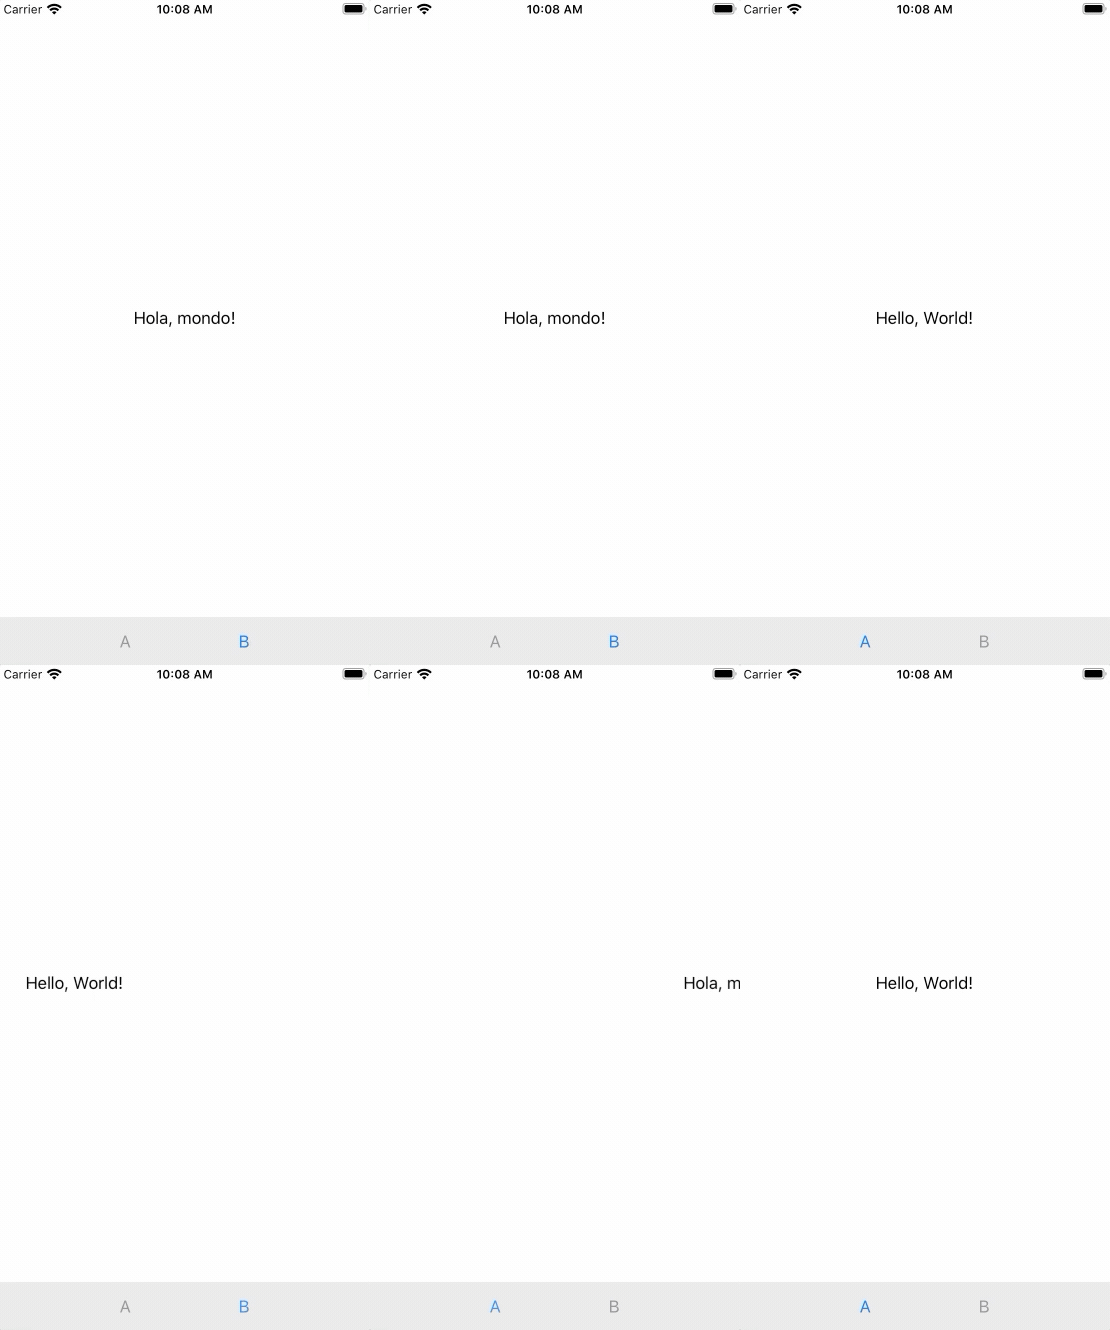
So I set out to create a custom tab view. Here's using it with animation

enter image description here

Here's the usage of the custom tab view

struct ContentView: View {
    var body: some View {
        CustomTabView {
            Text("Hello, World!")
                .customTabItem {
                    Text("A")}
                .customTag(0)
            Text("Hola, mondo!")
                .customTabItem { Text("B") }
                .customTag(2)
        }.animation(.easeInOut)
        .transition(.slide)
    }
}

Code

And here's the entirety of the custom tab view

typealias TabItem = (tag: Int, tab: AnyView)

class Model: ObservableObject {
    @Published var landscape: Bool = false

    init(isLandscape: Bool) {
        self.landscape = isLandscape // Initial value
        NotificationCenter.default.addObserver(self, selector: #selector(onViewWillTransition(notification:)), name: .my_onViewWillTransition, object: nil)
    }

    @objc func onViewWillTransition(notification: Notification) {
        guard let size = notification.userInfo?["size"] as? CGSize else { return }

        landscape = size.width > size.height
    }
}

extension Notification.Name {
    static let my_onViewWillTransition = Notification.Name("CustomUIHostingController_viewWillTransition")
}

class CustomUIHostingController<Content> : UIHostingController<Content> where Content : View {
    override func viewWillTransition(to size: CGSize, with coordinator: UIViewControllerTransitionCoordinator) {
        NotificationCenter.default.post(name: .my_onViewWillTransition, object: nil, userInfo: ["size": size])
        super.viewWillTransition(to: size, with: coordinator)
    }
}

struct CustomTabView<Content>: View where Content: View {

    @State private var currentIndex: Int = 0
    @EnvironmentObject private var model: Model

    let content: () -> Content

    init(@ViewBuilder content: @escaping () -> Content) {
        self.content = content
    }

    var body: some View {

        GeometryReader { geometry in
            return ZStack {
                // pages
                // onAppear on all pages are called only on initial load
                self.pagesInHStack(screenGeometry: geometry)
            }
            .overlayPreferenceValue(CustomTabItemPreferenceKey.self) { preferences in
                // tab bar
                return self.createTabBar(screenGeometry: geometry, tabItems: preferences.map {TabItem(tag: $0.tag, tab: $0.item)})
            }
        }
    }

    func getTabBarHeight(screenGeometry: GeometryProxy) -> CGFloat {
        // https://medium.com/@hacknicity/ipad-navigation-bar-and-toolbar-height-changes-in-ios-12-91c5766809f4
        // ipad 50
        // iphone && portrait 49
        // iphone && portrait && bottom safety 83
        // iphone && landscape 32
        // iphone && landscape && bottom safety 53
        if UIDevice.current.userInterfaceIdiom == .pad {
            return 50 + screenGeometry.safeAreaInsets.bottom
        } else if UIDevice.current.userInterfaceIdiom == .phone {
            if !model.landscape {
                return 49 + screenGeometry.safeAreaInsets.bottom
            } else {
                return 32 + screenGeometry.safeAreaInsets.bottom
            }
        }
        return 50
    }

    func pagesInHStack(screenGeometry: GeometryProxy) -> some View {

        let tabBarHeight = getTabBarHeight(screenGeometry: screenGeometry)
        let heightCut = tabBarHeight - screenGeometry.safeAreaInsets.bottom
        let spacing: CGFloat = 100 // so pages don't overlap (in case of leading and trailing safetyInset), arbitrary

        return HStack(spacing: spacing) {
            self.content()
                // reduced height, so items don't appear under tha tab bar
                .frame(width: screenGeometry.size.width, height: screenGeometry.size.height - heightCut)
                // move up to cover the reduced height
                // 0.1 for iPhone X's nav bar color to extend to status bar
                .offset(y: -heightCut/2 - 0.1)
        }
        .frame(width: screenGeometry.size.width, height: screenGeometry.size.height, alignment: .leading)
        .offset(x: -CGFloat(self.currentIndex) * screenGeometry.size.width + -CGFloat(self.currentIndex) * spacing)
    }

    func createTabBar(screenGeometry: GeometryProxy, tabItems: [TabItem]) -> some View {

        let height = getTabBarHeight(screenGeometry: screenGeometry)

        return VStack {
            Spacer()
            HStack(spacing: screenGeometry.size.width / (CGFloat(tabItems.count + 1) + 0.5)) {
                Spacer()
                ForEach(0..<tabItems.count, id: \.self) { i in
                    Group {
                        Button(action: {
                            self.currentIndex = i
                        }) {
                            tabItems[i].tab
                        }.foregroundColor(self.currentIndex == i ? .blue : .gray)
                    }
                }
                Spacer()
            }
            // move up from bottom safety inset
            .padding(.bottom, screenGeometry.safeAreaInsets.bottom > 0 ? screenGeometry.safeAreaInsets.bottom - 5 : 0 )
            .frame(width: screenGeometry.size.width, height: height)
            .background(
                self.getTabBarBackground(screenGeometry: screenGeometry)
            )
        }
        // move down to cover bottom of new iphones and ipads
        .offset(y: screenGeometry.safeAreaInsets.bottom)
    }

    func getTabBarBackground(screenGeometry: GeometryProxy) -> some View {

        return GeometryReader { tabBarGeometry in
            self.getBackgrounRectangle(tabBarGeometry: tabBarGeometry)
        }
    }

    func getBackgrounRectangle(tabBarGeometry: GeometryProxy) -> some View {

        return VStack {
            Rectangle()
                .fill(Color.white)
                .opacity(0.8)
                // border top
                // https://www.reddit.com/r/SwiftUI/comments/dehx9t/how_to_add_border_only_to_bottom/
                .padding(.top, 0.2)
                .background(Color.gray)

                .edgesIgnoringSafeArea([.leading, .trailing])
        }
    }
}

// MARK: - Tab Item Preference
struct CustomTabItemPreferenceData: Equatable {
    var tag: Int
    let item: AnyView
    let stringDescribing: String // to let preference know when the tab item is changed
    var badgeNumber: Int // to let preference know when the badgeNumber is changed


    static func == (lhs: CustomTabItemPreferenceData, rhs: CustomTabItemPreferenceData) -> Bool {
        lhs.tag == rhs.tag && lhs.stringDescribing == rhs.stringDescribing && lhs.badgeNumber == rhs.badgeNumber
    }
}

struct CustomTabItemPreferenceKey: PreferenceKey {

    typealias Value = [CustomTabItemPreferenceData]

    static var defaultValue: [CustomTabItemPreferenceData] = []

    static func reduce(value: inout [CustomTabItemPreferenceData], nextValue: () -> [CustomTabItemPreferenceData]) {
        value.append(contentsOf: nextValue())
    }
}

// TabItem
extension View {
    func customTabItem<Content>(@ViewBuilder content: @escaping () -> Content) -> some View where Content: View {
        self.preference(key: CustomTabItemPreferenceKey.self, value: [
            CustomTabItemPreferenceData(tag: 0, item: AnyView(content()), stringDescribing: String(describing: content()), badgeNumber: 0)
        ])
    }
}

// Tag
extension View {
    func customTag(_ tag: Int, badgeNumber: Int = 0) -> some View {

        self.transformPreference(CustomTabItemPreferenceKey.self) { (value: inout [CustomTabItemPreferenceData]) in

            guard value.count > 0 else { return }
            value[0].tag = tag
            value[0].badgeNumber = badgeNumber

        }
        .transformPreference(CustomTabItemPreferenceKey.self) { (value: inout [CustomTabItemPreferenceData]) -> Void in

            guard value.count > 0 else { return }
            value[0].tag = tag
            value[0].badgeNumber = badgeNumber
        }
        .tag(tag)
    }
}

And for the tab view to detect the phone's orientation, here's what you need to add to your SceneDelegate

if let windowScene = scene as? UIWindowScene {
    let contentView = ContentView()
        .environmentObject(Model(isLandscape: windowScene.interfaceOrientation.isLandscape))

    let window = UIWindow(windowScene: windowScene)
    window.rootViewController = CustomUIHostingController(rootView: contentView)
    self.window = window
    window.makeKeyAndVisible()
}
Catamount answered 15/5, 2020 at 22:17 Comment(0)
H
3

I was having this problem myself. There's actually a pretty simple solution. Typically we supply a selection parameter just by using the binding shorthand as $selectedTab. However if we create a Binding explicitly, then we'll have the chance to apply withAnimation closure when updating the value:

@State private var selectedTab = Tabs.firstTab

TabView(
  selection: Binding<ModeSwitch.Value>(
    get: {
      selectedTab
    },
    set: { targetTab in
      withAnimation {
        selectedTab = targetTab
      }
    }
  ),
  content: {
    ...
  }
)
Halsey answered 27/12, 2022 at 3:53 Comment(1)
I can not replicate that. What type is ModeSwitch.Value? And is your Tab Type an Enum: String or something else?Stadium
C
3

The answers were not working for me with XCode 14.3 - Tested -. We can achieve this with simple trick to the default TabView and create a tabs as we wish ( bottom or top).

import SwiftUI

struct ExtendedTabView: View {
    
    @State var tabSelection = 1
    
    var body: some View {
        VStack(spacing : 0 ){
            TabView(selection: $tabSelection) {
     
                Text("A - Tab 1")   //We don't need .tabItem
                    .tag(1)
                Text("B - Tab 2")
                    .tag(2)
                Text("C - Tab 3")
                    .tag(3)
                Text("D - Tab 4")
                    .tag(4)
            }
            //This is crucial to get the slide and gesture
            .tabViewStyle(PageTabViewStyle(indexDisplayMode: .never))
            .animation(.default, value : tabSelection)
            //Uncomment this if you only want the animation 
            //.gesture(DragGesture(minimumDistance: 0, coordinateSpace: .local).onChanged({_ in })) // Disable swipe gesture
            
            //Add the custom TabBar
            Spacer()
            CustomTabBar(selection: $tabSelection)
                           .frame(height: 50)
        }
        
    }
}

Now implement a custom Bar as your design requirements

struct CustomTabBar: View {
    @Binding var selection: Int
    
    var body: some View {
        HStack(spacing: 0) {
            TabBarButton(imageName: "1.circle", text: "Tab A", index: 1, selection: $selection)
            TabBarButton(imageName: "2.circle", text: "Tab B", index: 2, selection: $selection)
            TabBarButton(imageName: "3.circle", text: "Tab C", index: 3, selection: $selection)
            TabBarButton(imageName: "4.circle", text: "Tab D", index: 4, selection: $selection)
        }
        .background(Color.white)
        .shadow(radius: 4)
    }
}

And the TabbarButton;

struct TabBarButton: View {
    let imageName: String
    let text: String
    let index: Int
    @Binding var selection: Int
    
    var isSelected: Bool {
        index == selection
    }
    
    var body: some View {
        Button(action: {
            selection = index
        }, label: {
            VStack {
                Text(text)
                    .font(.title3)
                    .foregroundColor(isSelected ? .blue : .gray)
                
                Image(systemName: imageName)
                    .resizable()
                    .frame(width: 30, height: 30)
                    .foregroundColor(isSelected ? .blue : .gray)
                
            }.padding(.bottom,8)
        })
        .frame(maxWidth: .infinity)
    }
}

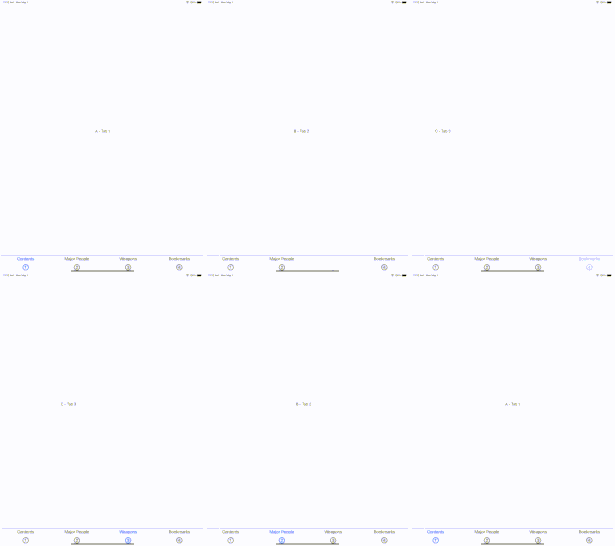
Here is the result where going to right with button the left with the gesture;

enter image description here

Cosby answered 1/5, 2023 at 8:41 Comment(1)
Note: Unfortunately the rotation is recreating the view? Why apple?Cosby
P
1

The animation of tabview only work when you choose tabViewStyle with .page. Add this to your tabView .tabViewStyle(.page(indexDisplayMode: PageTabViewStyle.IndexDisplayMode.never))

Planography answered 16/5 at 2:46 Comment(0)

© 2022 - 2024 — McMap. All rights reserved.