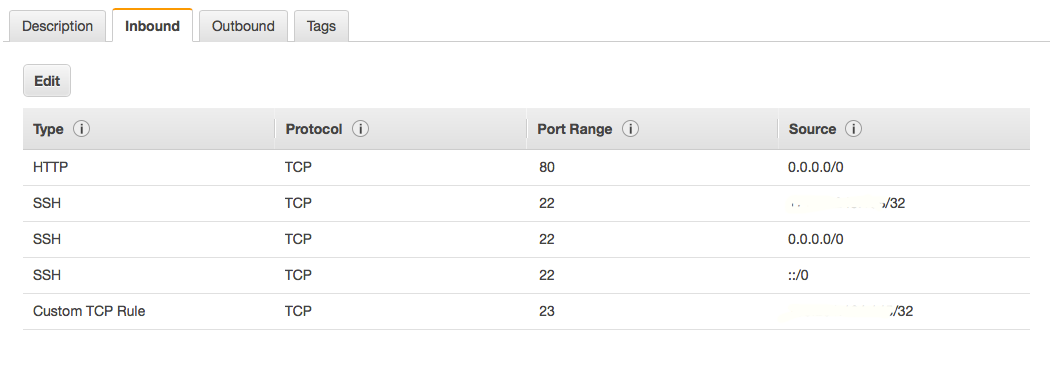
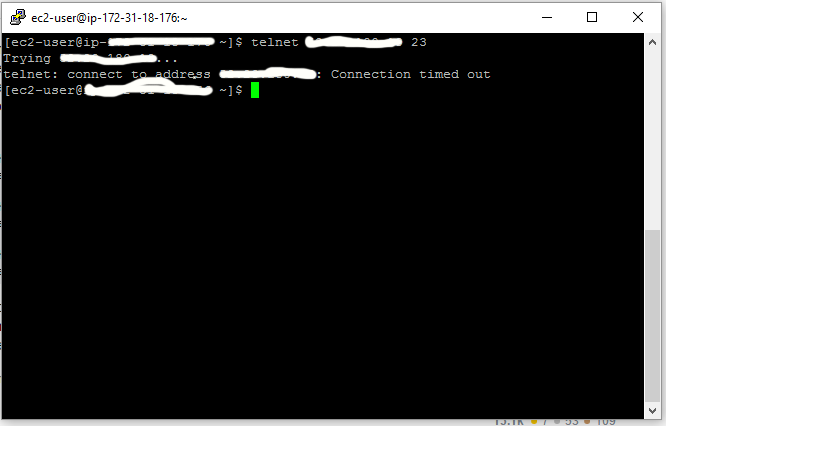
I got SSH working fine. But I am facing an issue with connecting via telnet.
ssh is recommended over telnet, as telnet is not encrypted and is by default not installed in amazon instance.
However if needed, steps involved for Linux : Amazon Instance or Centos
Install telnet daemon in the instance: Install telnet-server using
sudo yum install telnet-server. Packagetelnetis for the client program in case one want to connect using telnet client from the instance, not needed for the exercise.Enable the telnet daemon service: - By default the service is disabled in
/etc/xinetd.d/telnet, Thedisableflag needs to be set tono.service telnet { flags = REUSE socket_type = stream wait = no user = root server = /usr/sbin/in.telnetd log_on_failure += USERID disable = yes }Post change it should look like below
service telnet
{
        flags           = REUSE
        socket_type     = stream
        wait            = no
        user            = root
        server          = /usr/sbin/in.telnetd
        log_on_failure  += USERID
        disable         = no
}
Verify the configuration in case of any edit related errors.
sudo chkconfig xinetd onBring up the telnet service:
Bring up the telnet daemon as root using
sudo service xinetd restartcommandEnable inbound telnet default port (23) on AWS Console: In AWS Console
EC2/Security Groups/<Your Security Group>/Inbound, set a ruleType:Custom-TCP RuleProtocol: TCP RangePort Range: 23Source: <As per your business requirement>Test the telnet connection: Test the telnet connection from any client enabled in the firewall.
>telnet ec2-XX-XX-XXX-XXX.region.compute.amazonaws.com.
Connected to ec2-XX-XX-XXX-XXX.region.compute.amazonaws.com.
Escape character is '^]'.
Password:
The steps(tools) will vary slightly for other linux variants.
PS: Referred http://aws-certification.blogspot.in/2016/01/install-and-setup-telnet-on-ec2-amazon.html, fixed few issues in the commands.
sudo yum -y install telnet
This works for me after logging in to the EC2 instance
ssh is recommended over telnet, as telnet is not encrypted and is by default not installed in amazon instance.
However if needed, steps involved for Linux : Amazon Instance or Centos
Install telnet daemon in the instance: Install telnet-server using
sudo yum install telnet-server. Packagetelnetis for the client program in case one want to connect using telnet client from the instance, not needed for the exercise.Enable the telnet daemon service: - By default the service is disabled in
/etc/xinetd.d/telnet, Thedisableflag needs to be set tono.service telnet { flags = REUSE socket_type = stream wait = no user = root server = /usr/sbin/in.telnetd log_on_failure += USERID disable = yes }Post change it should look like below
service telnet
{
        flags           = REUSE
        socket_type     = stream
        wait            = no
        user            = root
        server          = /usr/sbin/in.telnetd
        log_on_failure  += USERID
        disable         = no
}
Verify the configuration in case of any edit related errors.
sudo chkconfig xinetd onBring up the telnet service:
Bring up the telnet daemon as root using
sudo service xinetd restartcommandEnable inbound telnet default port (23) on AWS Console: In AWS Console
EC2/Security Groups/<Your Security Group>/Inbound, set a ruleType:Custom-TCP RuleProtocol: TCP RangePort Range: 23Source: <As per your business requirement>Test the telnet connection: Test the telnet connection from any client enabled in the firewall.
>telnet ec2-XX-XX-XXX-XXX.region.compute.amazonaws.com.
Connected to ec2-XX-XX-XXX-XXX.region.compute.amazonaws.com.
Escape character is '^]'.
Password:
The steps(tools) will vary slightly for other linux variants.
PS: Referred http://aws-certification.blogspot.in/2016/01/install-and-setup-telnet-on-ec2-amazon.html, fixed few issues in the commands.
© 2022 - 2024 — McMap. All rights reserved.


