for my example:
Windows XP ---> Synology:DS218+
- Step1:
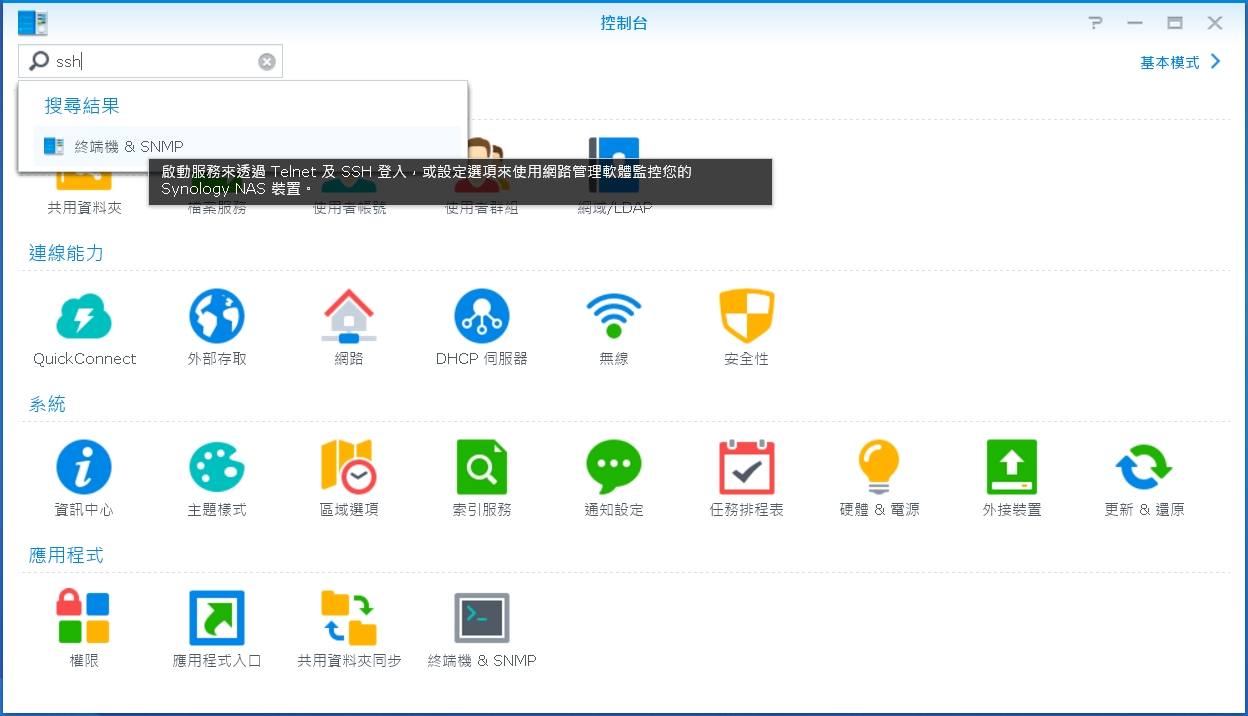
> DNS: Control Panel (控制台)
> Terminal & SNMP(終端機 & SNMP)
Step2:
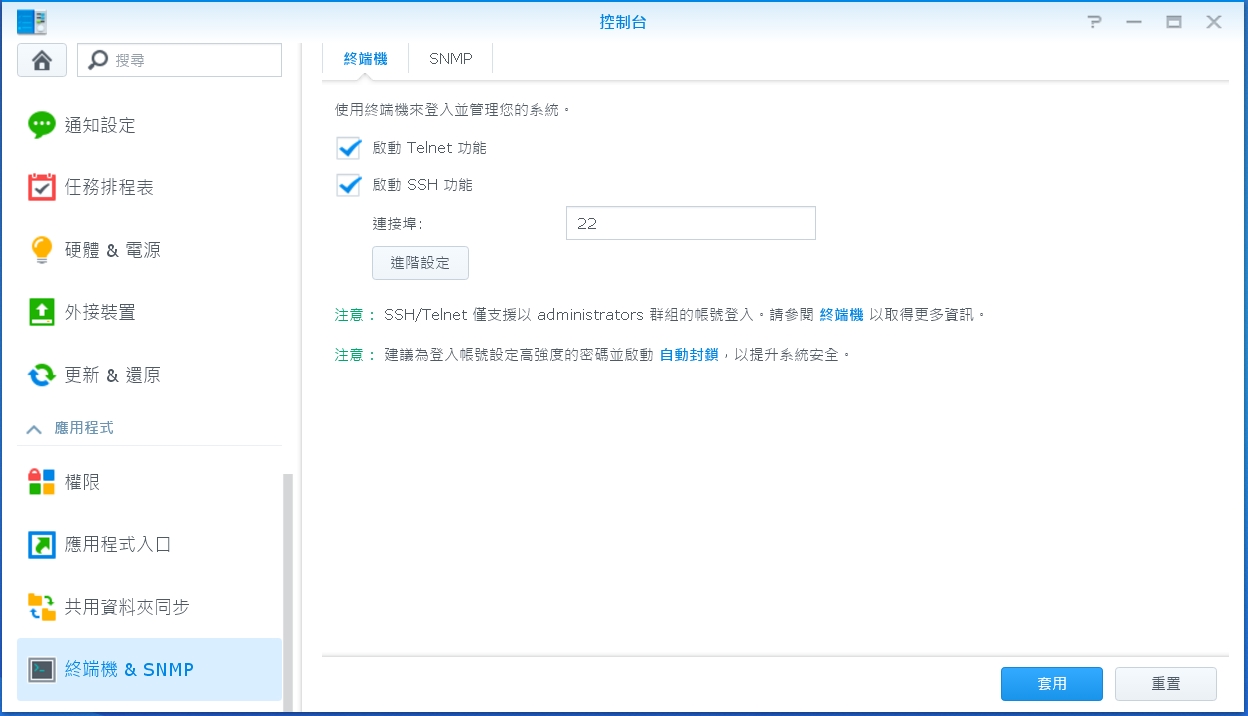
Enable Telnet service (啟動 Telnet 功能)
or Enable SSH Service (啟動 SSH 功能)
![enter image description here]()
![enter image description here]()
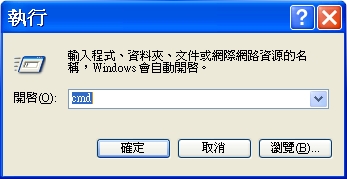
Step3: Launch the terminal on Windows (or via executing cmd
to launch the terminal)
![enter image description here]()
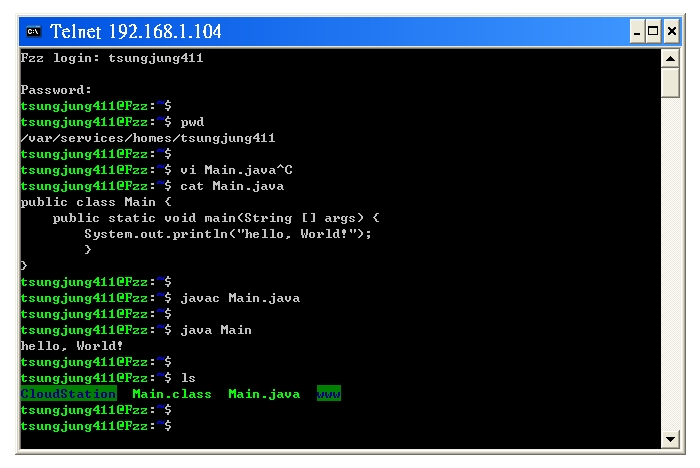
Step4: type: telnet your_nas_ip_or_domain_name, like below telnet 192.168.1.104
![enter image description here]()
- Step5:
demo a terminal application, like compiling the Java code
    Fzz login: tsungjung411

    Password:

    # shows the current working directory (顯示目前的工作目錄)
    $ pwd
    /var/services/homes/tsungjung411


    # edit a Java file (via vi), then compile and run it
    # (透過 vi 編輯 Java 檔案,然後編譯和執行)
    $ vi Main.java

    # show the file content (顯示檔案內容)
    $ cat Main.java
    public class Main {
        public static void main(String [] args) {
            System.out.println("hello, World!");
        }
    }

    # compiles the Java file (編譯 Java 檔案)
    javac Main.java

    # executes the Java file (執行 Java 檔案)
    $ java Main
    hello, World!

    # shows the file list (顯示檔案清單)
    $ ls
    CloudStation  Main.class  Main.java  www
![enter image description here]()
    # shows the JRE version on this Synology Disk Station
    $ java -version
    openjdk version "1.8.0_151"
    OpenJDK Runtime Environment (IcedTea 3.6.0) (linux-gnu build 1.8.0_151-b12)
    OpenJDK 64-Bit Server VM (build 25.151-b12, mixed mode)
- Step6:
demo another terminal application, like running the Python code
    $ python
    Python 2.7.12 (default, Nov 10 2017, 20:30:30)
    [GCC 4.9.3 20150311 (prerelease)] on linux2
    Type "help", "copyright", "credits" or "license" for more information.
    >>>
    >>> import sys
    >>>
    >>> # shows the the python version
    >>> print(sys.version)
    2.7.12 (default, Nov 10 2017, 20:30:30)
    [GCC 4.9.3 20150311 (prerelease)]
    >>>
    >>> import os
    >>>
    >>> # shows the current working directory
    >>> print(os.getcwd())
    /volume1/homes/tsungjung411
![enter image description here]()
    $ # launch Python 3
    $ python3
    Python 3.5.1 (default, Dec  9 2016, 00:20:03)
    [GCC 4.9.3 20150311 (prerelease)] on linux
    Type "help", "copyright", "credits" or "license" for more information.
    >>>


