How to blur an existing image in a UIImageView with Swift?
Asked Answered
B

11

31

The setup is simple.

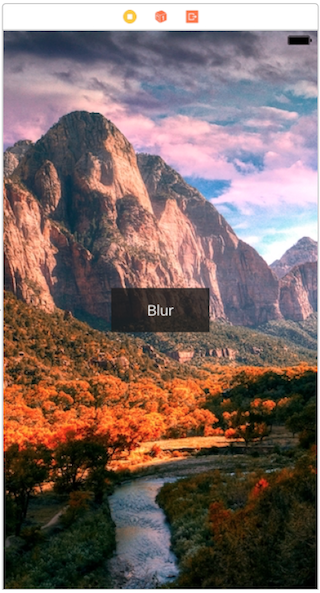
  • A ViewController with UIImageView that has an image assigned.
  • A UIButton that when clicked blurs the image in the UIImageView.

Storyboard

import UIKit

class ViewController: UIViewController {

    @IBOutlet weak var bg: UIImageView!

    @IBAction func blur(_ sender: Any) {
        let inputImage = CIImage(cgImage: (bg.image?.cgImage)!)

        let filter = CIFilter(name: "CIGaussianBlur")
        filter?.setValue(inputImage, forKey: "inputImage")
        filter?.setValue(10, forKey: "inputRadius")
        let blurred = filter?.outputImage
        bg.image = UIImage(ciImage: blurred!)
    }
}

When the button is clicked the screen just turns white. Can't figure out what I'm doing wrong. Anyone know what I'm doing wrong?

Baillieu answered 15/12, 2016 at 4:39 Comment(2)
Are you testing on a real device or the simulator? Some CI filters (I'm working on a masked blur right now) have pitiful performance (think in terms of taking a minute to display) in the simulator.Rajewski
Please check my answer with Github link to test..Dehnel
R
38

You could simply use UIVisualEffect to achieve blur effect. As you trying to achieve a blur effect using CoreImage.Try below code after import CoreImage to your class.

var context = CIContext(options: nil)

func blurEffect() {

    let currentFilter = CIFilter(name: "CIGaussianBlur") 
    let beginImage = CIImage(image: bg.image!)
    currentFilter!.setValue(beginImage, forKey: kCIInputImageKey)
    currentFilter!.setValue(10, forKey: kCIInputRadiusKey)

    let cropFilter = CIFilter(name: "CICrop")
    cropFilter!.setValue(currentFilter!.outputImage, forKey: kCIInputImageKey)
    cropFilter!.setValue(CIVector(cgRect: beginImage!.extent), forKey: "inputRectangle")

    let output = cropFilter!.outputImage 
    let cgimg = context.createCGImage(output!, from: output!.extent)
    let processedImage = UIImage(cgImage: cgimg!)
    bg.image = processedImage
}

Output:

enter image description here

Note: I recommend you to test the code in real device as Simulator performance is too slow on coreImage.

Reconstruction answered 15/12, 2016 at 5:30 Comment(5)
This worked great. I didn't want to use UIVisualEffect because I wanted to control the level of blur with the inputRadius. Thanks!Baillieu
@MarkMoeykens Please see here for custom blur scale https://mcmap.net/q/86518/-creating-a-blurring-overlay-viewPurport
blur with specific blur value gist.github.com/afshin-hoseini/9c370268ffa4c43b0696Meilen
Tried all other blurring suggestions and this worked perfectly! The other attempts I used always cropped the image in a strange way.. the crop filter fixed that, thanks!Emissive
Modified the code to maintain the original scale and orientation. Without that modification, if the original was a rotated image the blurred image would be rotated with respect to the original.Bolshevist
O
32

for those who ❤️ protocols

protocol Blurable {
    func addBlur(_ alpha: CGFloat)
}

extension Blurable where Self: UIView {
    func addBlur(_ alpha: CGFloat = 0.5) {
        // create effect
        let effect = UIBlurEffect(style: .dark)
        let effectView = UIVisualEffectView(effect: effect)
        
        // set boundry and alpha
        effectView.frame = self.bounds
        effectView.autoresizingMask = [.flexibleWidth, .flexibleHeight]
        effectView.alpha = alpha
        
        self.addSubview(effectView)
    }
}

// Conformance
extension UIView: Blurable {}

// use
someImageview.addBlur()
Ocd answered 16/8, 2017 at 1:13 Comment(1)
Thank you! Just one nit: 'protocol Blurable', a bit better naming I believe :)Willy
F
8

Here is how I got my expected result in SWIFT 3.1: Hope it will help.

func blurImage(image:UIImage) -> UIImage? {
        let context = CIContext(options: nil)
        let inputImage = CIImage(image: image)
        let originalOrientation = image.imageOrientation
        let originalScale = image.scale

        let filter = CIFilter(name: "CIGaussianBlur")
        filter?.setValue(inputImage, forKey: kCIInputImageKey)
        filter?.setValue(10.0, forKey: kCIInputRadiusKey) 
        let outputImage = filter?.outputImage

        var cgImage:CGImage?

        if let asd = outputImage
        {
            cgImage = context.createCGImage(asd, from: (inputImage?.extent)!)
        }

        if let cgImageA = cgImage
        {
            return UIImage(cgImage: cgImageA, scale: originalScale, orientation: originalOrientation)
        }

        return nil
    }
Fawnfawna answered 11/7, 2017 at 6:3 Comment(2)
good answer, I upvoted, but please follow a Code Style writing your code. For instance what is this: asd or cgImageA. You can simply write: if let outputImage = outputImage { // }. For more info check raywenderlich code Style I use: github.com/raywenderlich/swift-style-guide#optionalsDemagogue
Works but it is slowDisembroil
U
7

There is actually a handy implementation right in CoreImage https://developer.apple.com/documentation/coreimage/ciimage/1645897-applyinggaussianblur

extension UIImage {

func blur(_ radius: Double) -> UIImage? {
    if let img = CIImage(image: self) {
        return UIImage(ciImage: img.applyingGaussianBlur(sigma: radius)).cropped(to: img.extent)
    }
    return nil
}
Urbanize answered 17/8, 2020 at 13:16 Comment(3)
This almost works but it changes the image size/position, be sure to crop the img afterwards. img.applyingGaussianBlur(sigma: radius).cropped(to: img.extent)Selwyn
You could have edited the answer. I just did. :)Bolshevist
@VictorEngel thank you :) sorry I didnt keep track on thisUrbanize
D
2

Use this:

 import UIKit

    class ViewController: UIViewController {

        @IBOutlet weak var bgImageView: UIImageView!
        @IBOutlet weak var blurButton: UIButton!


        override func viewDidLoad() {
            super.viewDidLoad()
            // Do any additional setup after loading the view, typically from a nib.
        }

        override func didReceiveMemoryWarning() {
            super.didReceiveMemoryWarning()
            // Dispose of any resources that can be recreated.
        }


        @IBAction func blurButtonTapped(_ sender: Any) {

                let inputImage = CIImage(cgImage: (self.bgImageView.image?.cgImage)!)
                let filter = CIFilter(name: "CIGaussianBlur")
                filter?.setValue(inputImage, forKey: "inputImage")
                filter?.setValue(10, forKey: "inputRadius")
                let blurred = filter?.outputImage

                var newImageSize: CGRect = (blurred?.extent)!
                newImageSize.origin.x += (newImageSize.size.width - (self.bgImageView.image?.size.width)!) / 2
                newImageSize.origin.y += (newImageSize.size.height - (self.bgImageView.image?.size.height)!) / 2
                newImageSize.size = (self.bgImageView.image?.size)!

                let resultImage: CIImage = filter?.value(forKey: "outputImage") as! CIImage
                let context: CIContext = CIContext.init(options: nil)
                let cgimg: CGImage = context.createCGImage(resultImage, from: newImageSize)!
                let blurredImage: UIImage = UIImage.init(cgImage: cgimg)
                self.bgImageView.image = blurredImage
        }

    }

Output:

enter image description here

Gitbub link:

https://github.com/k-sathireddy/ImageBlurEffect

Dehnel answered 15/12, 2016 at 6:12 Comment(0)
A
2

A good performing solution with decent results is StackBlur which uses a clever algorithm that efficiently approximates a blur:

This is a compromise between Gaussian Blur and Box blur It creates much better looking blurs than Box Blur, but is 7x faster than my Gaussian Blur implementation. I called it Stack Blur because this describes best how this filter works internally: it creates a kind of moving stack (or maybe a "Tower of Hanoi" kind of structure) of colors whilst scanning through the image. This "tower" controls the weights of the single pixels within the convolution kernel and gives the pixel in the center the highest weight. The secret of the speed is that the algorithm just has to add one new pixel to the right side of the stack and at the same time remove the leftmost pixel. The remaining colors on the topmost layer of the stack are either added on or reduced by one, depending on if they are on the right or on the left side of the stack.

Check out StackBlur on Github.

There are many versions out there, also Swift ports, but those are considerable slower than the Obj-C versions.

Addition 2019:

If the images to blur are remotely loaded, I can highly recommend the Nuke framework that remotely loads images and can apply a blur filter out of the box. It's application is comparable to the Glide library on Android. While blurring one image may be easy, blurring many images - like in a collection view - while considering device resource constraints is less trivial. Nuke is highly optimized for remote image loading, caching and processing. It is also extendable in several aspects. From comparing available remote image loading frameworks, I think that Nuke is the most stable and most advanced for that purpose as of Nov 2019.

Alfieri answered 9/4, 2018 at 22:23 Comment(0)
D
1

my extension

extension UIImage {
    
    func blurImage(radius: CGFloat = 10) -> UIImage? {
        guard let cgImage = cgImage else { return nil }
        let inputCIImage = CIImage(cgImage: cgImage)
        let context = CIContext(options: nil)
        
        let filter = CIFilter(name: "CIGaussianBlur")
        filter?.setValue(inputImage, forKey: kCIInputImageKey)
        filter?.setValue(radius, forKey: kCIInputRadiusKey)
        let outputImage = filter?.outputImage
        
        if let outputImage = outputImage,
            let cgImage = context.createCGImage(outputImage, from: inputImage.extent) {
            
            return UIImage(
                cgImage: cgImage,
                scale: scale,
                orientation: imageOrientation
            )
        }
        return nil
    }
 }
Dulles answered 2/7, 2020 at 12:49 Comment(0)
P
0

I made the blur in a NSObject class, so I can use this method in whole project easily.

class Helper: NSObject
{
    class func addBlurView(_ inView : UIView) -> UIVisualEffectView
    {
        let blurEffect = UIBlurEffect(style: UIBlurEffectStyle.dark)
        let blurEffectView = UIVisualEffectView(effect: blurEffect)

        //always fill the view
        blurEffectView.frame = inView.bounds
        blurEffectView.autoresizingMask = [.flexibleWidth, .flexibleHeight]
        blurEffectView.alpha = 0.5

        return blurEffectView
    }
}

In ViewController I made object of UIVisualEffectView. Then call the helper class method of to add blur.

import UIKit

class ViewController: UIViewController
{
   var blurEffectView : UIVisualEffectView!
    override func viewDidLoad() {
        super.viewDidLoad()

      blurEffectView = Helper.addBlurView((imgView)!)
      self.imgView.addSubview(blurEffectView)
}
Phyte answered 15/12, 2016 at 4:55 Comment(0)
M
0

Check if something is coming nil. I had a similar issue, but in my case I wasn't creating a new instance of CIImage, because of that image.ciimage was coming nil.

Minhminho answered 21/11, 2019 at 18:19 Comment(0)
P
-1

You can add blur effect by UIBlurEffect and UIVisualEffectView:

@IBAction func blur(_ sender: Any) {

    let darkBlur = UIBlurEffect(style: UIBlurEffectStyle.dark) 
    let blurView = UIVisualEffectView(effect: darkBlur)
    blurView.frame = bg_imagview.bounds
    blurView.autoresizingMask = [.flexibleWidth, .flexibleHeight]
    bg_imagview.addSubview(blurView)

}
Paucity answered 15/12, 2016 at 4:43 Comment(0)
G
-2

Hey to all the LAZY guys just like me.

Just add SwifterSwift with cocoapods.

Import SwifterSwift.

import SwifterSwift

Blur your image view just like below.

someImageView.blur()
Georas answered 4/2, 2020 at 10:17 Comment(0)

© 2022 - 2024 — McMap. All rights reserved.