Inverted mask swiftui with system image
Asked Answered
L

4

11

I am trying to cut out a sf symbol from a circle shape in swiftUI.

I currently have the following code:

Circle()
   .fill(Color.white)
   .frame(width: 50, height: 50)
   .mask(
       Image(systemName: "play.fill")
           .font(.system(size: 24))
           .foregroundColor(Color.black)
           .frame(width: 50, height: 50)
   )

Which generates:

enter image description here

However, what I want is to invert the effect of the mask: The symbol is cut out of the circle as in the image below:

enter image description here

Note that the actual background is not red as in the image but will be a user uploaded image, so setting the symbol foregroundColor to red is not possible.

Is there any way to invert the mask of the symbol/image such that the circle has a hole in it with the shape of the image?

Lissa answered 12/2, 2020 at 15:59 Comment(0)
H
3

This answer by Vlad Lego works when applied here.

You create your mask using .black for the parts you want cut out, and .white for the parts you want preserved.

(assuming the background is red, this is what it would look like)

enter image description here

Rectangle()
  .foregroundColor(Color.white)
  .mask(
    ZStack {
      Circle()
        .fill(Color.white)
        .frame(width: 50, height: 50)
      Image(systemName: "play.fill")
        .font(.system(size: 24))
        .foregroundColor(Color.black)
    }
      .compositingGroup()
      .luminanceToAlpha()
  )
Hereat answered 2/6, 2020 at 22:46 Comment(0)
V
16

For cutouts, simply use .blendMode(.destinationOut) and .compositingGroup(). No need to repeat the shape, mask it, and define white/black.

var buttonCutOut: some View {
        ZStack {
            shape
            mask.blendMode(.destinationOut)
        }.compositingGroup()
    }

Here is a sample reusable component for either a masked shape or luminance masked shape.

enter image description here


struct Demo: View {
    var body: some View {
        ZStack {
            userImage.blur(radius: 5)
            playButtons
        }
    }

    var playButtons: some View {
        VStack {
            Mask(thisShape: Circle(),
                 with: maskImage,
                 offset: maskImageOffset,
                 maskToShapeRatio: maskImageToShapeRatio)
                .frame(width: square, height: square)
                .foregroundColor(colorDestinationOut)

            LuminanceMask(thisShape: Circle(),
                          with: maskImage,
                          offset: maskImageOffset,
                          maskToShapeRatio: maskImageToShapeRatio)
                .frame(width: square, height: square)
                .foregroundColor(colorLuminanceAlpha)
        }
        .font(font)
    }
}

struct Mask<S: Shape>: View {
    init(thisShape: S,
         with mask: Image,
         offset: CGSize,
         maskToShapeRatio: CGFloat) {
        self.shape = thisShape
        self.mask = mask
        self.offset = offset
        self.scale = maskToShapeRatio
    }

    let shape: S
    let mask: Image
    let offset: CGSize
    let scale: CGFloat

    var body: some View {
        ZStack(alignment: .center) {
            shape.fill()
            mask
                .resizable()
                .offset(offset)
                .aspectRatio(contentMode: .fit)
                .blendMode(.destinationOut)
                .scaleEffect(scale)
        }.compositingGroup()
    }
}

struct LuminanceMask<S: Shape>: View {
    init(thisShape: S,
         with mask: Image,
         offset: CGSize,
         maskToShapeRatio: CGFloat) {
        self.shape = thisShape
        self.mask = mask
        self.offset = offset
        self.scale = maskToShapeRatio
    }

    let shape: S
    let mask: Image
    let offset: CGSize
    let scale: CGFloat

    let keep = Color.white
    let remove = Color.black

    var body: some View {
            shape.mask(maskView)
    }

    var maskView: some View {
        ZStack(alignment: .center) {
            shape
                .foregroundColor(keep)

            mask
                .resizable()
                .offset(offset)
                .aspectRatio(contentMode: .fit)
                .scaleEffect(scale)
                .foregroundColor(remove)

        }.compositingGroup()
        .luminanceToAlpha()

    }
}

Volotta answered 5/10, 2020 at 12:57 Comment(1)
Awesome! Thank you! I'm excited to look more into blend mode!Clout
H
9

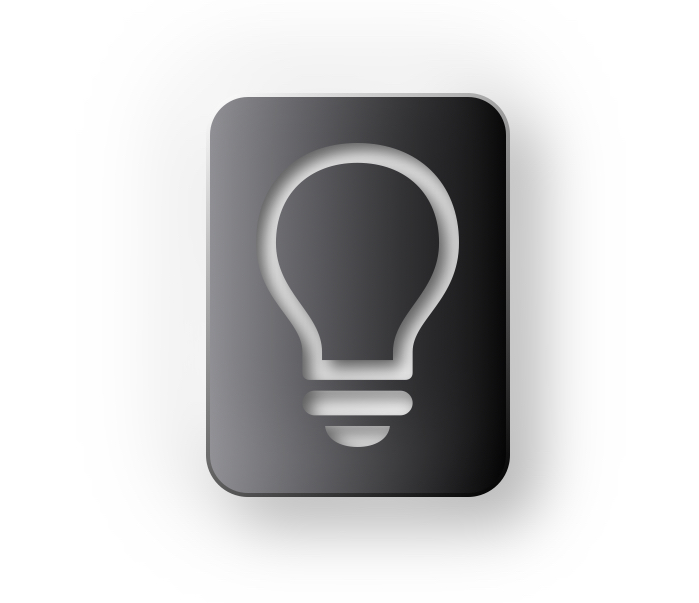
Inspired by this post, here is my solution:

First, let's make a view modifier .inverseMask():

extension View {
    // view.inverseMask(_:)
    public func inverseMask<M: View>(_ mask: M) -> some View {
        // exchange foreground and background
        let inversed = mask
            .foregroundColor(.black)  // hide foreground
            .background(Color.white)  // let the background stand out
            .compositingGroup()       // ⭐️ composite all layers
            .luminanceToAlpha()       // ⭐️ turn luminance into alpha (opacity)
        return self.mask(inversed)
    }
}

Second, let's make a demo view:

Please note that I have used a custom extension in the following code for LinearGradient, it's listed at the bottom.

import SwiftUI
import PlaygroundSupport

struct ContentView: View {
    var body: some View {
        
        // lightbulb image
        let lightbulb = Image(systemName: "lightbulb")
            .resizable().scaledToFit().padding(24)
        // rounded rect (shape)
        let roundedRect = RoundedRectangle(cornerRadius: 20)
        // rounded rect (stroked border)
        let border = roundedRect
            .stroke(
                Gradient.diagonal(.white, .black),  // my custom extension
                lineWidth: 2
        )
        
        // container
        return ZStack {
            // background color
            Color.white.grayscale(0.3)
                
            // rounded card
            Gradient.horizontal(.gray, .black)      // my custom extension 
                
                // ⭐️ inverse mask
                .inverseMask(lightbulb)
                
                .shadow(color: Color.black.opacity(0.6), radius: 4, x: 4, y: 4)
                .frame(width: 150, height: 200)
                .clipShape(roundedRect)
                .overlay(border)
                .shadow(color: Color.white.opacity(0.9), radius: 18, x: -18, y: -18)
                .shadow(color: Color.black.opacity(0.3), radius: 14, x: 14, y: 14)
            
        }
    }
}

PlaygroundPage.current.setLiveView(ContentView())

and the result is:

enter image description here

----[ Edited ]----

Here is my custom extension for Gradient if you're curious:

import SwiftUI

extension Gradient {
    
    // general linear gradient ---------------------------
    
    public static func linear(
        from start: UnitPoint, 
        to     end: UnitPoint, 
        colors    : [Color]       // use array
    ) -> LinearGradient 
    {
        LinearGradient(
            gradient  : Gradient(colors: colors), 
            startPoint: start, 
            endPoint  : end
        )
    }
    
    public static func linear(
        from start: UnitPoint, 
        to     end: UnitPoint, 
        colors    : Color...     // use variadic parameter
    ) -> LinearGradient 
    {
        linear(from: start, to: end, colors: colors)
    }
    
    // specialized linear gradients ------------------------
    
    // top to bottom
    public static func vertical(_ colors: Color...) -> LinearGradient {
        linear(from: .top, to: .bottom, colors: colors)
    }
    
    // leading to trailing
    public static func horizontal(_ colors: Color...) -> LinearGradient {
        linear(from: .leading, to: .trailing, colors: colors)
    }
    
    // top leading to bottom trailing
    public static func diagonal(_ colors: Color...) -> LinearGradient {
        linear(from: .topLeading, to: .bottomTrailing, colors: colors)
    }
    
    // top leading to bottom trailing
    public static func diagonal2(_ colors: Color...) -> LinearGradient {
        linear(from: .bottomLeading, to: .topTrailing, colors: colors)
    }
}

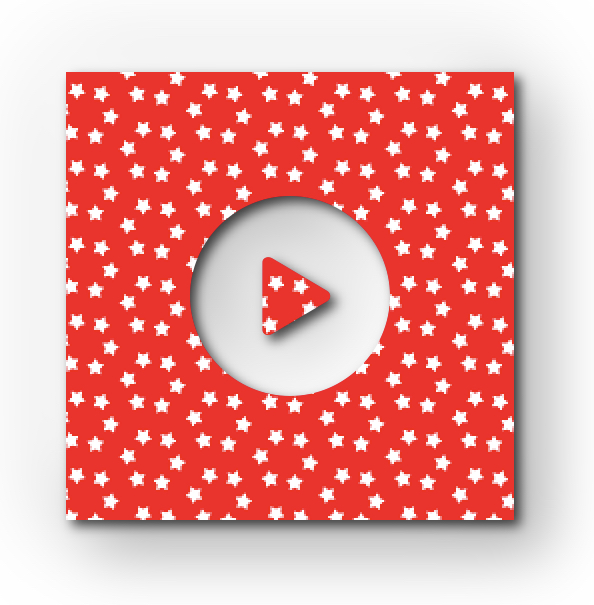
Oh, by the way, maybe this is what the OP wanted:

import SwiftUI
import PlaygroundSupport

struct ContentView: View {
    var body: some View {
        
        // background image
        let background = Image("red stars.PNG")
        
        // mask
        let mask = Image(systemName: "play.circle.fill")
            .font(.system(size: 100))
            .scaledToFit()               // center the mask
        
        // container
        return ZStack {
            
            // background color
            Color.white.grayscale(0.3)
            
            // card
            background
                .inverseMask(mask)                    // ⭐️ cut out the mask
                // shadow for hole
                .shadow(color: Color.black.opacity(0.7), radius: 3, x: 3, y: 3)
                // highlight & shadow for border
                .shadow(color: Color.white.opacity(0.9), radius: 18, x: -18, y: -18)
                .shadow(color: Color.black.opacity(0.3), radius: 14, x:  14, y:  14)
        }
    }
}

PlaygroundPage.current.setLiveView(ContentView())

and the result is:

enter image description here

Hegemony answered 17/9, 2020 at 8:32 Comment(0)
H
3

This answer by Vlad Lego works when applied here.

You create your mask using .black for the parts you want cut out, and .white for the parts you want preserved.

(assuming the background is red, this is what it would look like)

enter image description here

Rectangle()
  .foregroundColor(Color.white)
  .mask(
    ZStack {
      Circle()
        .fill(Color.white)
        .frame(width: 50, height: 50)
      Image(systemName: "play.fill")
        .font(.system(size: 24))
        .foregroundColor(Color.black)
    }
      .compositingGroup()
      .luminanceToAlpha()
  )
Hereat answered 2/6, 2020 at 22:46 Comment(0)
G
0

You may use another image:

 Circle()
    .fill(Color.white)
    .frame(width: 50, height: 50)
    .mask(
        Image(systemName: "play.circle.fill")
            .font(.system(size: 24))
            .foregroundColor(Color.black)
            .frame(width: 50, height: 50)
    )
Gayle answered 12/2, 2020 at 16:25 Comment(1)
Thank you, this indeed works by adding a ZStack to the mask with the Image and a Circle with a transparent fill and a solid stroke. Having only the Image as in your answer results in a button that is still masked to the size of the symbol and not of the circle. This method however does not work for more advanced symbolsLissa

© 2022 - 2024 — McMap. All rights reserved.