How to pass authentication details to the ZAP tool to scan the website. Please help me to solve the problem.
Quite old question but here it goes.
The most simple way to do this is setting your browser to Proxy through ZAP. On Firefox you can go to:
Options -> Advanced -> Network -> Settings.
Select Manual Proxy Configuration and fill the HTTP Host with the address of the machine running ZAP (most probably localhost) and the configured ZAP port.
You can check and configure ZAP port opening ZAP and accessing:
Tools -> Options -> Local Proxy.
Then open your web browser and login to your application. Now go to ZAP, in the Sites tab (left side of ZAP), select your site, right click on it and select:
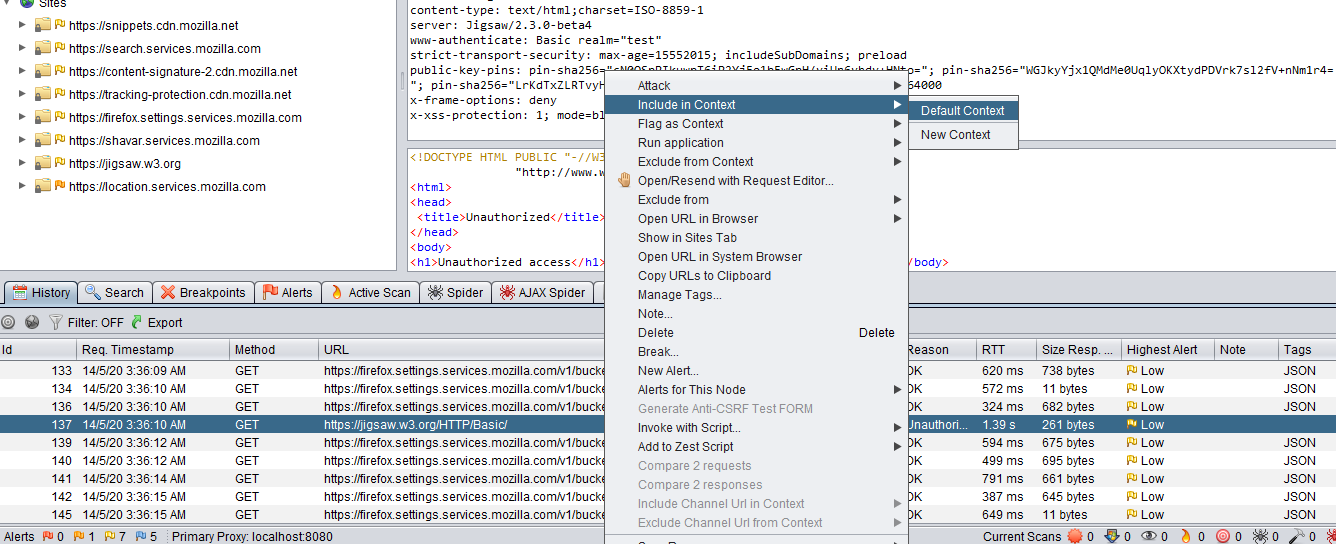
Include in Context -> Default Context
Now open the HTTP Sessions tab right click on the session and "Set as Active". (HTTP Sessions Tab: View -> Show Tab -> HTTP Sessions)
Now you can perform ZAP Spider, Active Scan and so with an logged in session. If this is not your scenario, please provide more info about which authentication method your application is using.
Hope it still helps you or someone searching for similar questions. Thanks,
Authentication through ZAP proxy
ZAP supports multiple types of authentication implemented by the websites/webapps. Authentication Methods within ZAP is implemented through Contexts which defines how authentication is handled. The authentication is used to create Sessions that correspond to authenticated webapp Users.
Some of the authentication methods implemented by OWASP ZAP are:
- Manual Authentication: This method allows users to perform the authentication manually (e.g. authenticate in the browser while proxy-ing through ZAP).
- HTTP/NTLM Authentication: This method is used for websites / webapps where authentication is enforced using the HTTP or NTLM Authentication mechanisms employing HTTP message headers. Three authentication schemes are supported: Basic, Digest and NTLM.
- Form-Based Authentication: This method is used for websites / webapps where authentication is done by submitting a form or performing a GET request to a ‘login url’ using a ‘username/password’ pair of authentication credentials.
- JSON-Based Authentication: This method is used for websites / webapps where authentication is done by submitting a JSON object to a ‘login url’ using a ‘username/password’ pair of authentication credentials.
- Script-Based Authentication: This method is useful for websites / webapps where the authentication is a more complex one and some custom scripts that handle the authentication process are beneficial. To use this method, you must first define an Authentication script which sends messages or performs other actions as needed by your web-application. This script is then selected for use for a given Context and it is called whenever an authentication is performed.
Demonstration
As an example I will demonstrate the Basic Authentication test implemented by HTTP/1.1 as per the RFC 1945 using the url https://jigsaw.w3.org/HTTP/Basic/
Steps
Follow the steps below to implement Basic Authentication through ZAP:
- Open ZAP and open a browser e.g. Firefox by clicking on the icon for opening the browser you have choosen in the Quick Start Tab pre-configured to proxy through ZAP.
- Click on Basic Authentication test (the third last link on the webpage) on which the Basic Authentication popup appears.
- Provide the credentials to login:
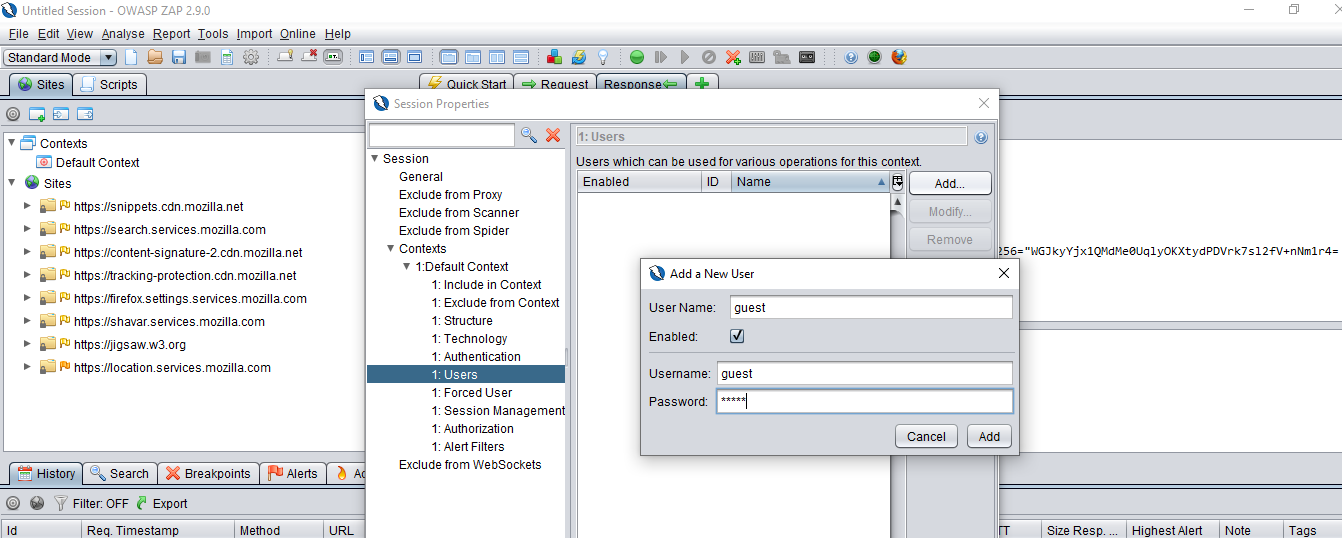
- User Name: guest
- Password: guest
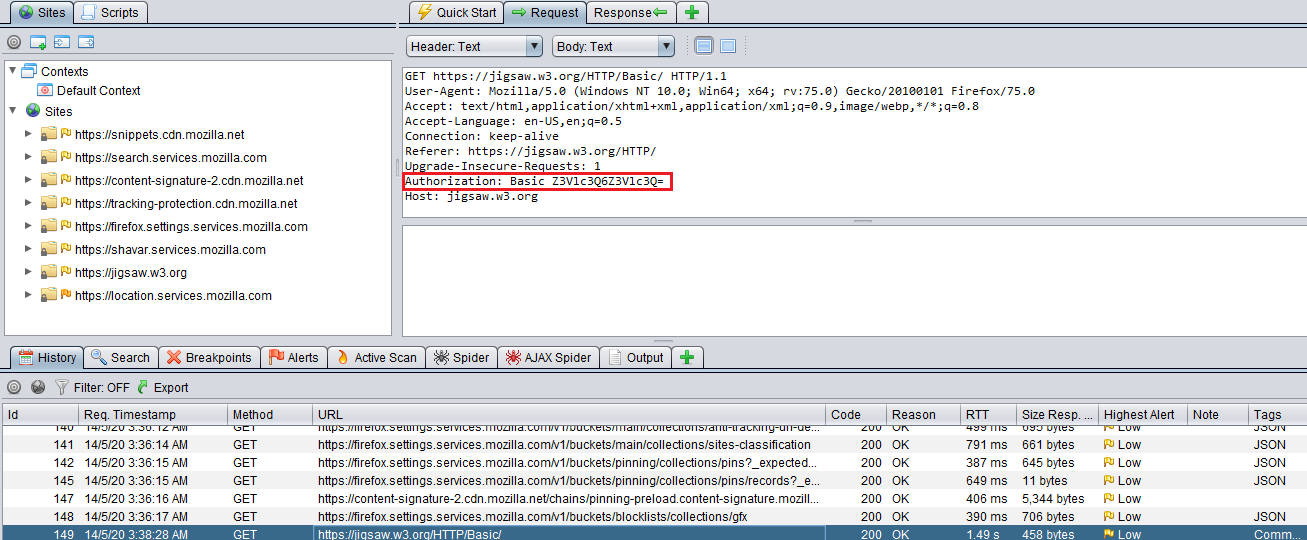
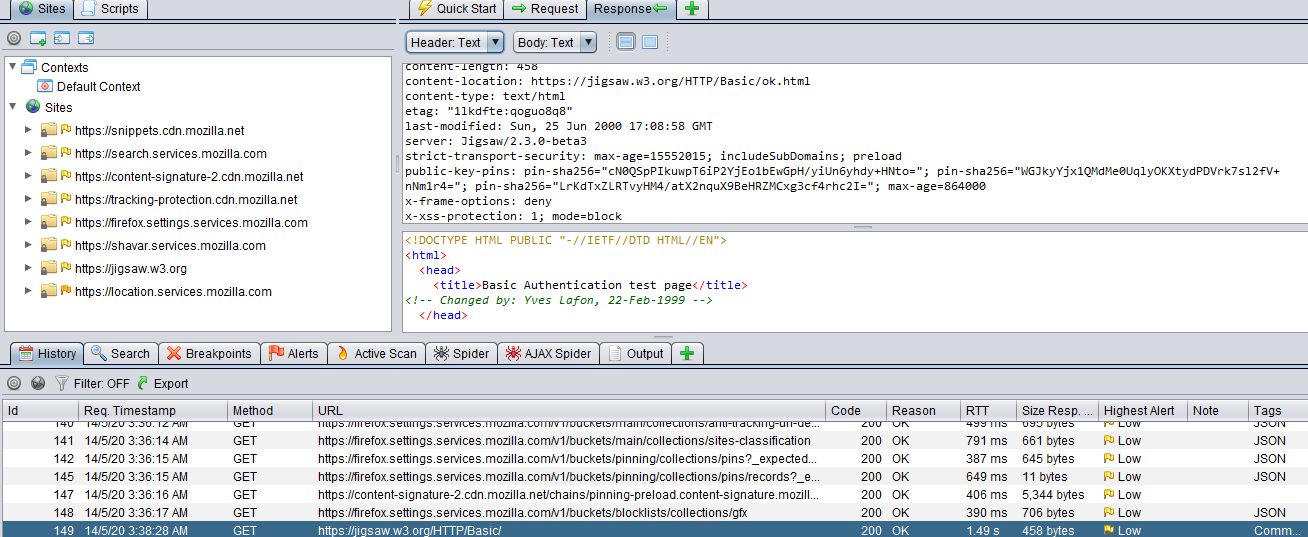
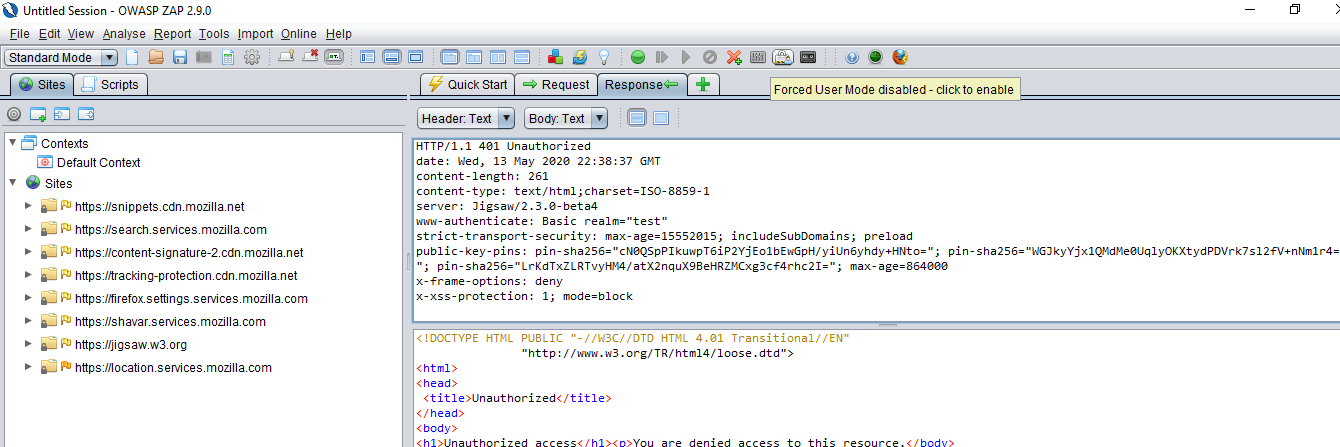
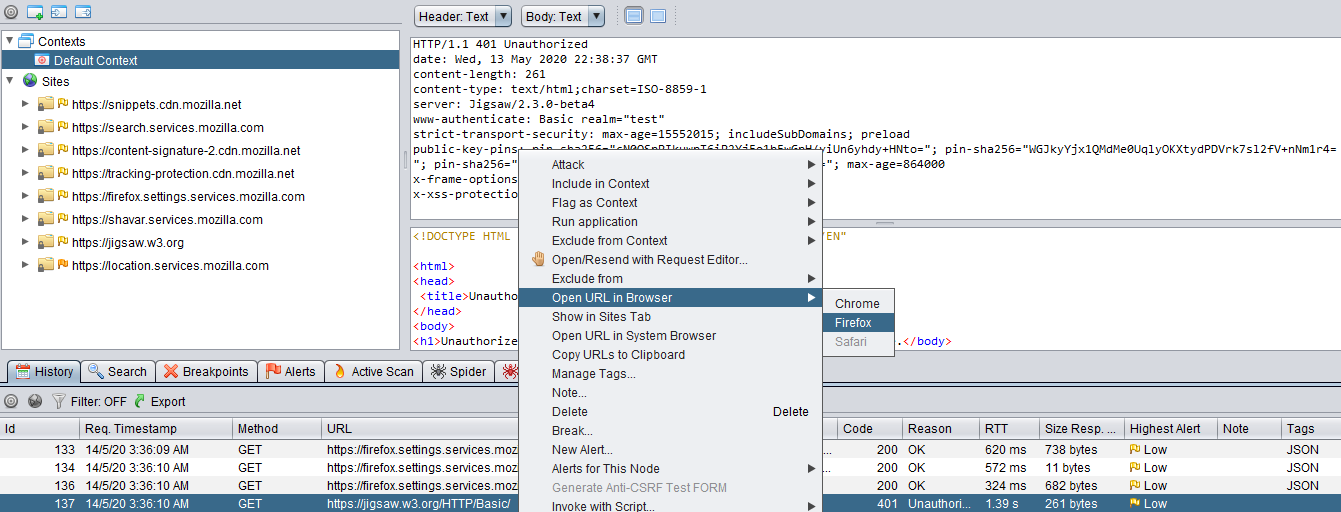
- Now within the ZAP tool, History tab, locate the GET request to the URL https://jigsaw.w3.org/HTTP/Basic/ and observe the Response which confirms of Basic Authentication.
- Snapshot of the Request:
- Snapshot of the Response:
- Now you need to create a Context to include it with in the Default Context. So right-click on the URL and select Include In Context from the Context Menu and select Default Context.
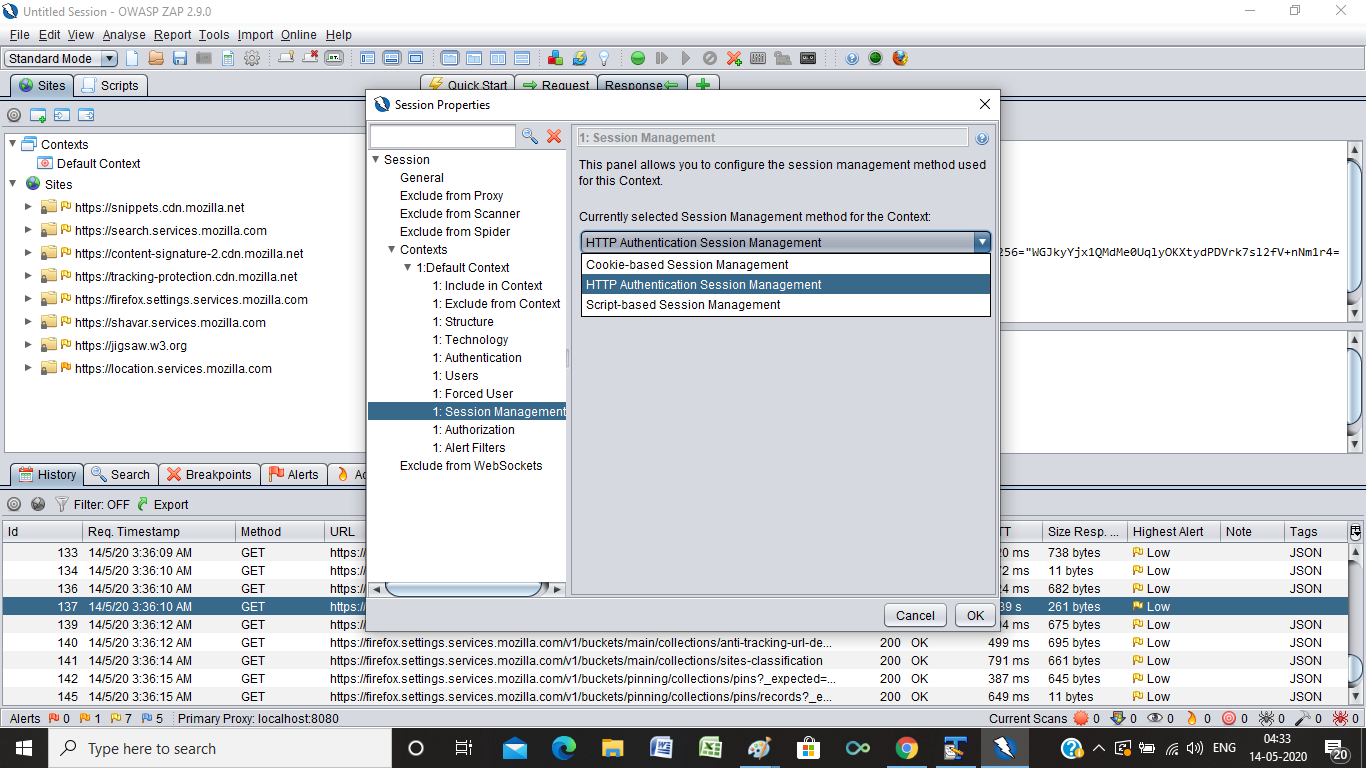
- Within the Session Management menu, select HTTP Authentication Session Management.
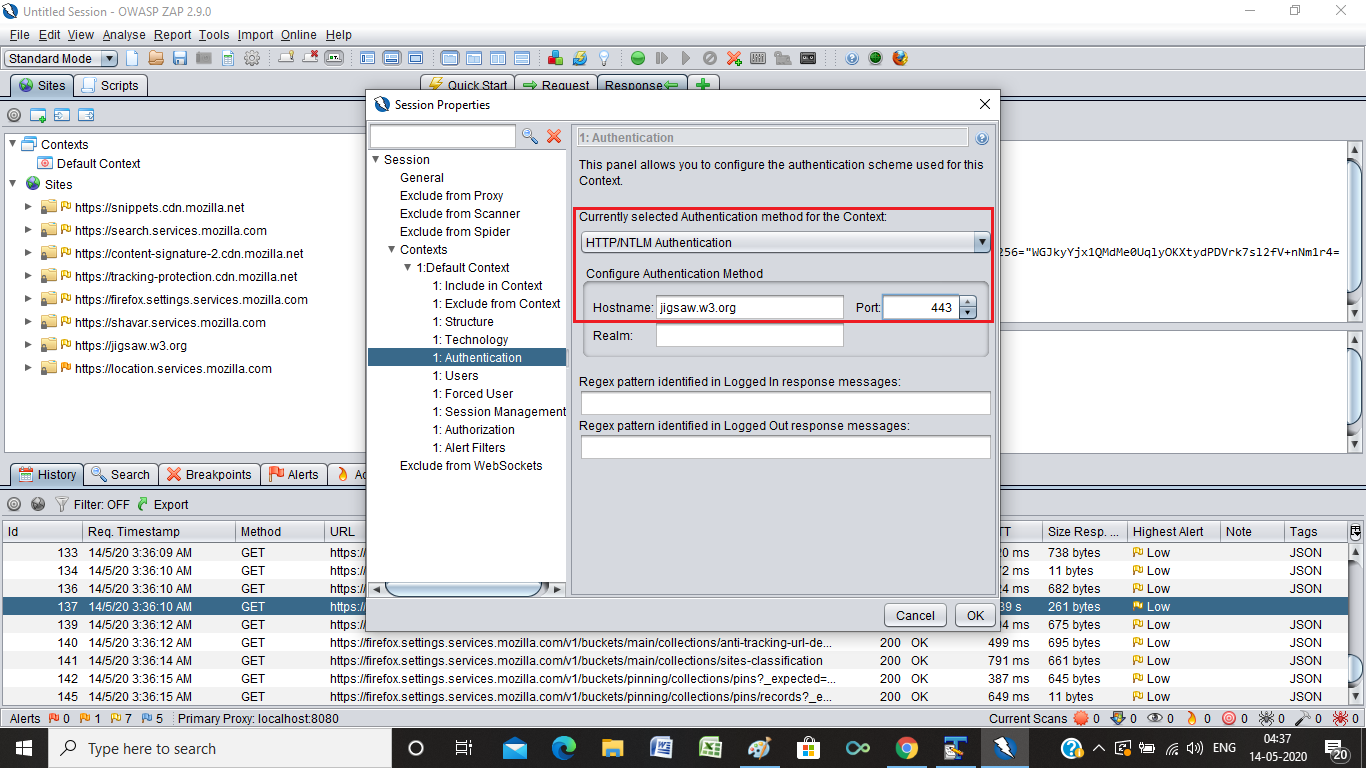
- Within the Authentication menu, select HTTP/NTLM Authentication and provide the Hostname & Port.
- Within the User menu, add the credentials of the desired user.
- Click on OK button to save the configuration.
- Finally you need to configure ZAP to use the forced user mode by enabling it from the ZAP pane.
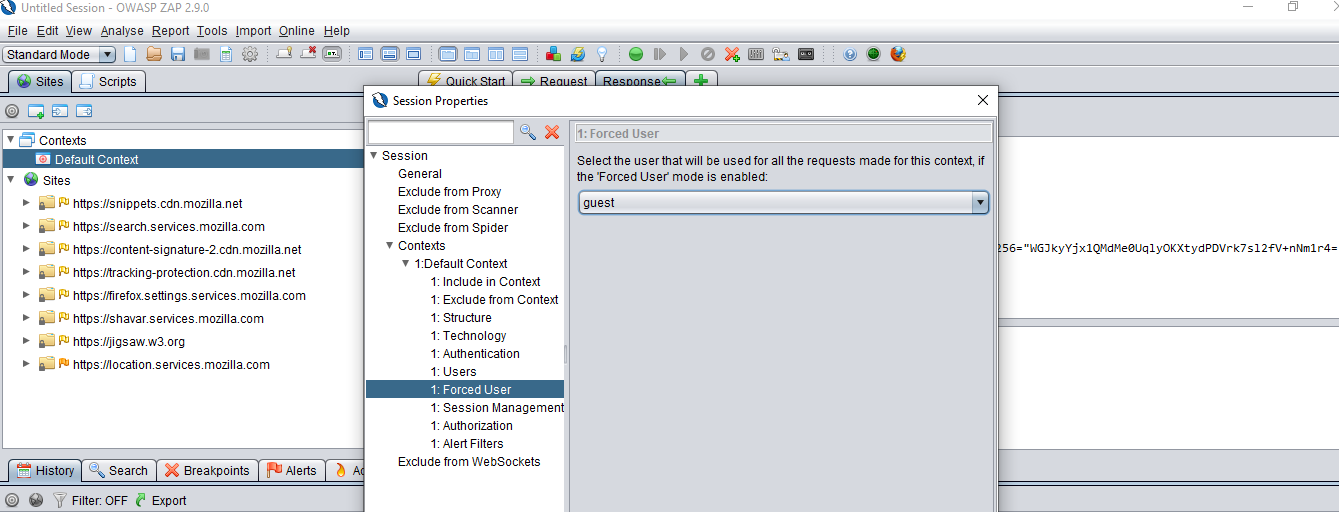
- Double Click on the Default Context, select Forced User and ensure that the desired user is set.
- Now, select the URL, right-click, select Open URL in Browser and select Firefox
- You will automatically authorized through the Basic Authentication through ZAP.
Old question, old answer, but here is a good tutorial by one of the core developer of OWASP ZAP: https://www.youtube.com/watch?v=cR4gw-cPZOA
Quick answer: It depends on the method used for authentication. You can set the options in the Session Properties in the "Authentication" menu and you can also define different users in the "Users" menu.
© 2022 - 2024 — McMap. All rights reserved.



HTTP Session tab– Metage