Can anybody help me? I can't find any description of the localization in Swift UI. Can anyone please give advice or better an example of how to localize for example Text()?
When you look at documentation for Text you can see that it takes LocalizedStringKey not a String into its initializer:
init(_ key: LocalizedStringKey, tableName: String? = nil, bundle: Bundle? = nil, comment: StaticString? = nil)
It makes localizing very straightforward. All you have to do is:
- create a new file of type "Strings File", call it
Localizable.strings - select the new file and navigate to File Inspector in the right hand side panel and click Localize...
- go to your project file to the Localizations section and add another language to the list - Xcode will create localization files for you
When you select you Localizable.strings you will see that it contains files for the original language and the language you have just added. That's where you put your translations, i.e. key - localized text pairs.
If you have a text like this is your app:
Text("Hello World!")
You have to now add to your Localizable.strings your translations:
for your base language:
"Hello World!" = "Hello World!";
and for your second language (in this case German):
"Hello World!" = "Hallo Welt!";
To see your previews localised you can define them like this:
struct ContentViewView_Previews: PreviewProvider {

    static var previews: some View {
        ForEach(["en", "de"], id: \.self) { id in
            ContentView()
                .environment(\.locale, .init(identifier: id))
        }
    }
}
LocalizedStringKey() for this to work. Not sure if I'm doing something wrong. –
Newmarket There is a thing you can do wrong that's not made very clear in any explanation I've seen. It turns out that Text("hello") is only interpreted as a localization key if you pass it a literal. If you pass a variable of type String, this doesn't happen. The answer is instead to declare the variable as type LocalizedStringKey.
  Text("hello") //-> implicitly treats string literal as a key; looks up and displays "Hello World!"
  let cap1:String = "hello"
  Text(cap1)   //-> no lookup for explicit String variable; just displays "hello"
  let cap2:LocalizedStringKey = "hello"
  Text(cap2)   //-> looks up explicit LocalizedStringKey value; displays "Hello World!"
You can simply wrap the string in LocalizedStringKey before giving it to Text().
Localizable.strings file:
"Dismiss" = "关闭";
"Cancel" = "取消";
SwiftUI view file:
Text(LocalizedStringKey("Dismiss"))
For swift UI file, you just need to insert string key from localization .strings file
import SwiftUI

struct ContentView: View {
    var body: some View {
        VStack {
            Text("selectLanguage")
            Text("languagesList")
        }


    }
}

struct ContentView_Previews: PreviewProvider {
    static var previews: some View {
        ContentView()
            .environment(\.locale, .init(identifier: "en"))
    }
}
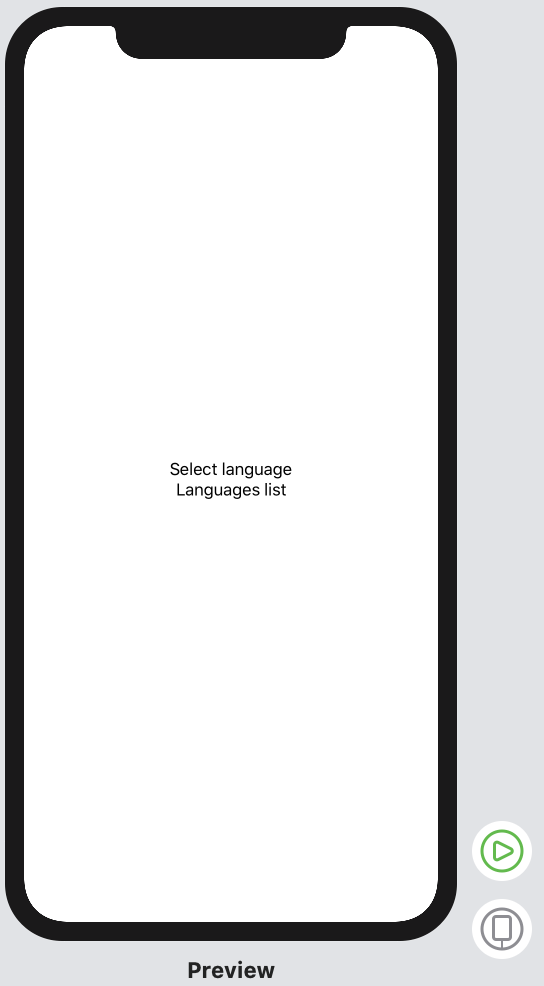
and this is an example from .strings file
"selectLanguage" = "Select language";
"languagesList" = "Languages list";
result is here:
To localise your app you need:
- Use SwiftUI elements like: Text("Nice"). Nice becomes the key in Localizable.strings.
- In the cases where text is not in the SwiftUI element needs to use NSLocalizedString.
- Select you app target.
- Export localisation: Edit -> Export for Localisation...
- Give exported files to translator.
- Import translations: Edit -> Import Localisations...
To use Localazable in SwiftUI, you can perform this way:
import SwiftUI to use LocalizedStringKey in your files
//MARK: - File where you enum your keys to your Localized file
enum ButtonName: LocalizedStringKey {
case submit
case cancel
}

//MARK: - Your Localized file where are your translation
"submit" = "Submit is pressed";
"cancel" = "Cancel";

//MARK: - In your code
let submitButtonName = ButtonName.submit.rawValue
let cancelButtonName = ButtonName.cancel.rawValue

VStack {
Text(submitButtonName)
Text(cancelButtonName)
}
I created this custom SwiftUI Text
struct Localized: View {
    var text: String
    var arg: Any?
    var body: some View {
        if let arg = arg {
            if let arg = arg as? [Any] {
                Text(String(format: NSLocalizedString(text, comment: ""), arg.compactMap({String(describing:$0)}).joined(separator: " ")).replacingOccurrences(of: "(null)", with: ""))
            } else {
                Text(String(format: NSLocalizedString("\(text) %@", comment: ""), String(describing: arg)))
            }
        } else {
            Text(LocalizedStringKey(text))
        }
    }
 }
Usage:
Localized(text: "hello")
Localized(text: "this %@ %@", arg: [4, "a"])
© 2022 - 2024 — McMap. All rights reserved.

