I'm editing my answer to make it clear that you don't need to upgrade your .csproj file. As Drew commented below there are benefits to doing so. However, VS2017 will continue to work with the classic csproj file just fine. In addition there is nothing in VS2017 that will perform the upgrade for you. If you do wish to take advantage of the new format the walk through below should help.
Upgrading the .csproj file to the new Visual Studio 2017 format is easy for simple class libraries or console projects.
If you're not using version control, before you begin be sure to backup your csproj file, and both Properties/AssemblyInfo.cs, and packages.config. The new csproj file is great. In many projects I've replaced hundreds of lines of code with a dozen or so. However, as Visual Studio 2017 continues to support the previous csproj files this may be a case of premature optimization. If you have a solution that contains dozens of projects, many NuGet packages, and any customization to csproj you are likely undertaking an unnecessary make work project.
Replace the entire contents of your .csproj file with the appropriate code as follows.
Class Library
<Project Sdk="Microsoft.NET.Sdk">
  <PropertyGroup>
    <TargetFramework>net462</TargetFramework>
  </PropertyGroup>
</Project>
Console Application
<Project Sdk="Microsoft.NET.Sdk">
  <PropertyGroup>
    <OutputType>Exe</OutputType>
    <TargetFramework>net462</TargetFramework>
  </PropertyGroup>
</Project>
Change the <TargetFramework>attribute to the .NET version you require such as net452, net46, net461 etc.
By default all code within your project folder will be picked up by the compiler. If you have code outside your project folder you must explicitly reference it the same way you do in previous versions of Visual Studio and csproj.
After making the above changes load your solution in Visual Studio 2017. At this point the most basic projects should build. If not you likely need to add missing assembly or project references. Adding references is very similar to doing so in previous versions of Visual Studio. Select your project in the Solution Explorer, right click on Dependencies, and select Add Reference. Add any Framework or Project references that you're missing.
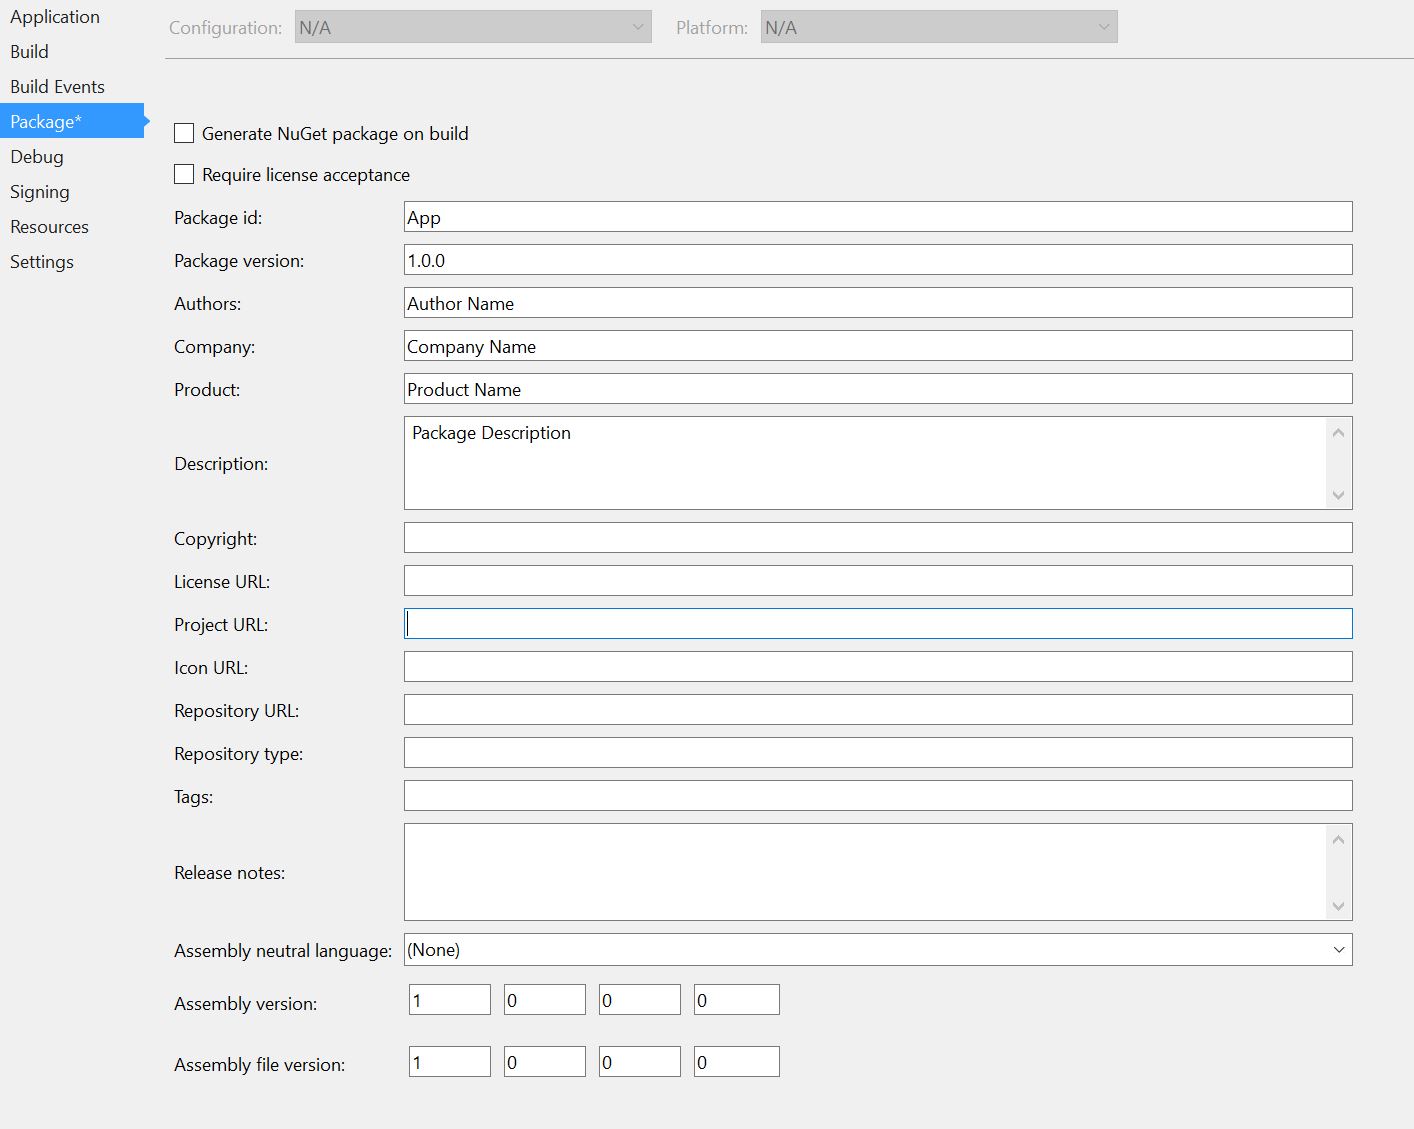
Attempt to build your solution/project again. You may receive errors about duplicate attributes. This error is because attributes previously defined in AssemblyInfo.cs have been moved to the csproj file. Deleting the AssemblyInfo.cs file, found under the Properties folder, should resolve these errors. Before deleting the AssemblyInfo.cs you should move any data you have defined. Most attributes can be entered in the package information section of your project file. Right click on your project name, select the Package page, and enter any data that was previously defined in your AssemblyInfo.cs file. This includes items such as the assembly version, author, copyright etc.
Below is a screen shot that shows the previous step.
![enter image description here]()
If you are using any NuGet packages in your project you need to move those to the new format as well. Previous to Visual Studio 2017 NuGet relied on a file named Packages.config in the root of your project in addition to references in csproj. To migrate your NuGet package references right click on your solution and load the Nuget Package Manager. Once loaded in the upper-right hand corner, click the cog, and the NuGet Package Manager Options will load. Select General. Under Package Management change the option Default package management format to PackageReference. At this point you'll have to manually add all your NuGet packages back to your solution. You can find all the packages in the packages.config file in the project's root folder. Once you have added all the packages back you can delete the packages.config file.


.csprojfor non-Core projects is possible, with restrictions, as shown here – Damales