Changing CardView shadow color
Asked Answered
V

9

51

This question was asked on SO many times, but still I didn't find a good solution for this problem.

Why do I need this to do? Well because project me and my team develops has iOS style.

What did I try?

  1. 9.pathch shadow generator but 9.pathes are essentially pngs and it gives me no flexibility and if I'll use this approach I should edit margins everywhere.
  2. Carbon library it supports custom shadows and they get drawn outside of view borders, but there is issue regarding rounded rectangles, when library doesn't draw shadow for rounded corners.
  3. using old CardView implementation and overriding its shadow color, but it gets drawn inside of card bounds, so it isn't option.

So is there a way to change shadow color of CardView with minimum edits of all layout files and with drawing shadow outside of the view like original CardView does?

Vorfeld answered 23/6, 2018 at 14:3 Comment(2)
You can make your own shadow of any colour without relying in Android CardViewSatterfield
@Satterfield how? could you provide an example?Vorfeld
L
53

Consider this thread in twitter, where Nick Butcher talks about how to implement the feature:

enter image description here

See outlineAmbientShadowColor, outlineSpotShadowColor, spotShadowAlpha and ambientShadowAlpha attributes for details. Unfortunately, that's possible from API 28 onwards.

For lower APIs Nick has shared a gist. Here's the result:

Running on API 21

This technique isn't directly connected to CardView, it can be applied to any View.

Lyophilic answered 29/6, 2018 at 9:19 Comment(5)
sorry for late response, but I think that code form gist is pretty messy and can't be reused easilyVorfeld
But you have to choose which color no and only one color, no? What if the image has multiple colors on its edges ?Compendious
But you have to choose which color no and only one color, no? Can you please paraphrase this question. Related to multiple colors in edges: the implementation in gist will basically take the image, upscale it, blur it. So, I suppose you'll end up seeing multiple colors, because upscaling and blurring won't get rid of those colors.Lyophilic
can we draw this shadow around whole view insted of bottom only?Bassorilievo
I only wonrked on FloatingActionButton. Can't apply to MaterialCardView or MaterialButton, any ideas? Thanks.Beechnut
A
10

display shadow >= 28 or >= P for above Sdk level 28

use below code in your CardView

with xml

android:outlineAmbientShadowColor="<yourCoolor>"
android:outlineSpotShadowColor="<yourCoolor>"

with java and kt file

mCardView.setOutlineAmbientShadowColor(ContextCompat.getColor(getContext(), R.color.color_new_yellow));
mCardView.setOutlineSpotShadowColor(ContextCompat.getColor(getContext(), R.color.color_new_yellow));

display like this

enter image description here

Astral answered 7/10, 2021 at 6:30 Comment(0)
S
6

Well I think of an easy solution without using a Java or Some Libraries. You should make a Drawable shape and put it in the drawable folder and then adjust the gradient to be like a shadow.

For example, in my solution I have added two colors:

<color name="yellow_middle">#ffee58</color>
<color name="yellow_end">#7ae7de83</color>

Then I made a file and put it in drawable folder drawable\card_view_shape.xml

<?xml version="1.0" encoding="utf-8"?>
<shape xmlns:android="http://schemas.android.com/apk/res/android"
android:shape="rectangle">
  <size
        android:width="10dp"
        android:height="10dp" />
  <corners android:radius="6dp" />
  <stroke
        android:width="2dp"
        android:color="@color/yellow_end" />
  <gradient
       android:angle="-90"
       android:centerColor="@color/yellow_middle"
       android:endColor="@color/yellow_end"
       android:startColor="#fff" />
</shape>

Then from there you need to wrap a your view(that would have been inside CardView) in a container like LinearLayout then apply as the background to the container that you want to be seen like a cardview. To solve it well add some padding (Thats your shadow) to the Container itself. For instance check mine:

<?xml version="1.0" encoding="utf-8"?>
<FrameLayout xmlns:android="http://schemas.android.com/apk/res/android"
xmlns:tools="http://schemas.android.com/tools"
    android:layout_width="match_parent"
    android:layout_height="match_parent"
    tools:context="com.xenolion.ritetrends.MainActivity">

    <LinearLayout
        android:layout_width="200dp"
        android:layout_height="200dp"
        android:layout_gravity="center"
        android:background="@drawable/card_view_shape"
        android:orientation="vertical"
        android:paddingBottom="10dp"
        android:paddingLeft="3dp"
        android:paddingRight="3dp"
        android:paddingTop="3dp">

        <TextView
            android:layout_width="match_parent"
            android:layout_height="match_parent"
            android:background="#fff"
            android:gravity="center"
            android:text="I love StackOverflow"
            android:textColor="#000"
            android:textSize="18sp" />

    </LinearLayout>


</FrameLayout>

Then the results looks like this:
Testing Results

Adjusting the bottom padding it will look like this:

Testing results

COMMENT
Since I am not of an artist but if you play with it you may make the whole thing look exactly like CardView check some hints:

  • Putting multiple gradients in the shape
  • Adjust the end colors of gradients to appear more greyish
  • The end colours must also be a little transparent
  • Adjust your View's padding to appear like a shadow and coloured but greyish
  • The main View's background also matters to bring the reality From there redesign the shape to look even more realistic like a CardView.
Satterfield answered 3/7, 2018 at 22:5 Comment(0)
C
5

You Can Implement this without having a cardview, and can also have all the properties of cardview

You have to Do:

  1. Copy the two classes

  2. Wrap your required view with the Custom View as in the example, you don't have to do much changes in your layout or anywhere else!

The below class will create a custom view, this will be wrapping your layout/View to be displayed in cardview with custom shadow color

Create a class:

import android.content.Context;
import android.support.annotation.Nullable;
import android.support.v4.content.ContextCompat;
import android.util.AttributeSet;
import android.view.Gravity;
import android.widget.LinearLayout;

import com.qzion.nfscrew.R;


public class RoundLinerLayoutNormal extends LinearLayout {
    public RoundLinerLayoutNormal(Context context) {
        super(context);
        initBackground();
    }

    public RoundLinerLayoutNormal(Context context, @Nullable AttributeSet attrs) {
        super(context, attrs);
        initBackground();
    }

    public RoundLinerLayoutNormal(Context context, @Nullable AttributeSet attrs, int defStyleAttr) {
        super(context, attrs, defStyleAttr);
        initBackground();
    }

    private void initBackground() {
        setBackground(ViewUtils.generateBackgroundWithShadow(this,R.color.white,
                R.dimen.radius_corner,R.color.colorPrimaryDark,R.dimen.elevation, Gravity.BOTTOM));
    }
}

Also create the class for the Shadow Settings, ViewUtils.java

import android.graphics.Paint;
import android.graphics.Rect;
import android.graphics.drawable.Drawable;
import android.graphics.drawable.LayerDrawable;
import android.graphics.drawable.ShapeDrawable;
import android.graphics.drawable.shapes.RoundRectShape;
import android.support.annotation.ColorRes;
import android.support.annotation.DimenRes;
import android.support.v4.content.ContextCompat;
import android.view.Gravity;
import android.view.View;

import static android.support.v4.view.ViewCompat.LAYER_TYPE_SOFTWARE;


public class ViewUtils {

    public static Drawable generateBackgroundWithShadow(View view, @ColorRes int backgroundColor,
                                                        @DimenRes int cornerRadius,
                                                        @ColorRes int shadowColor,
                                                        @DimenRes int elevation,
                                                        int shadowGravity) {
        float cornerRadiusValue = view.getContext().getResources().getDimension(cornerRadius);
        int elevationValue = (int) view.getContext().getResources().getDimension(elevation);
        int shadowColorValue = ContextCompat.getColor(view.getContext(),shadowColor);
        int backgroundColorValue = ContextCompat.getColor(view.getContext(),backgroundColor);

        float[] outerRadius = {cornerRadiusValue, cornerRadiusValue, cornerRadiusValue,
                cornerRadiusValue, cornerRadiusValue, cornerRadiusValue, cornerRadiusValue,
                cornerRadiusValue};

        Paint backgroundPaint = new Paint();
        backgroundPaint.setStyle(Paint.Style.FILL);
        backgroundPaint.setShadowLayer(cornerRadiusValue, 0, 0, 0);

        Rect shapeDrawablePadding = new Rect();
        shapeDrawablePadding.left = elevationValue;
        shapeDrawablePadding.right = elevationValue;

        int DY;
        switch (shadowGravity) {
            case Gravity.CENTER:
                shapeDrawablePadding.top = elevationValue;
                shapeDrawablePadding.bottom = elevationValue;
                DY = 0;
                break;
            case Gravity.TOP:
                shapeDrawablePadding.top = elevationValue*2;
                shapeDrawablePadding.bottom = elevationValue;
                DY = -1*elevationValue/3;
                break;
            default:
            case Gravity.BOTTOM:
                shapeDrawablePadding.top = elevationValue;
                shapeDrawablePadding.bottom = elevationValue*2;
                DY = elevationValue/3;
                break;
        }

        ShapeDrawable shapeDrawable = new ShapeDrawable();
        shapeDrawable.setPadding(shapeDrawablePadding);

        shapeDrawable.getPaint().setColor(backgroundColorValue);
        shapeDrawable.getPaint().setShadowLayer(cornerRadiusValue/3, 0, DY, shadowColorValue);

        view.setLayerType(LAYER_TYPE_SOFTWARE, shapeDrawable.getPaint());

        shapeDrawable.setShape(new RoundRectShape(outerRadius, null, null));

        LayerDrawable drawable = new LayerDrawable(new Drawable[]{shapeDrawable});
        drawable.setLayerInset(0, elevationValue, elevationValue*2, elevationValue, elevationValue*2);

        return drawable;

    }
}

and finally your XML, where you have the views required to have shadow.

<com.qzion.nfscrew.utils.RoundLinerLayoutNormal
                android:layout_width="match_parent"
                android:layout_height="wrap_content"
                android:layout_margin="10dp">

                <TextView
                    android:layout_width="wrap_content"
                    android:layout_height="wrap_content"
                    android:text="This view will have shadow"/>

            </com.qzion.nfscrew.utils.RoundLinerLayoutNormal>
Cod answered 23/6, 2018 at 14:43 Comment(2)
you copied this answer from here medium.com/@ArmanSo/… I tried it earlier it doesn't solve my problemVorfeld
yes, its from medium, but it works well in my code, i tested. if you share your sample code of layout file will be more helpful to get an answer.Cod
C
2

Use Fake Shadow.

Well, it is not possible to change the color of the shadow of cardview before API 28 but we can add a custom shadow behind a layout. You need to use a drawable background (shadow.xml) in the parent layout which is looking like a shadow.

shadow.xml -

<?xml version="1.0" encoding="utf-8"?>
<layer-list xmlns:android="http://schemas.android.com/apk/res/android">
    <item>
        <shape>
            <padding
                android:bottom="2dp"
                android:left="2dp"
                android:right="2dp"
                android:top="2dp" />

            <solid android:color="#05FF46A9" />
            <corners android:radius="15dp" />
        </shape>
    </item>
    <item>
        <shape>
            <padding
                android:bottom="2dp"
                android:left="2dp"
                android:right="2dp"
                android:top="2dp" />

            <solid android:color="#10FF46A9" />
            <corners android:radius="15dp" />
        </shape>
    </item>
    <item>
        <shape>
            <padding
                android:bottom="2dp"
                android:left="2dp"
                android:right="2dp"
                android:top="2dp" />

            <solid android:color="#15FF46A9" />
            <corners android:radius="15dp" />
        </shape>
    </item>
    <item>
        <shape>
            <padding
                android:bottom="2dp"
                android:left="2dp"
                android:right="2dp"
                android:top="2dp" />

            <solid android:color="#20FF46A9" />
            <corners android:radius="15dp" />
        </shape>
    </item>

    <item>
        <shape>
            <padding
                android:bottom="2dp"
                android:left="2dp"
                android:right="2dp"
                android:top="2dp" />

            <solid android:color="#25FF46A9" />
            <corners android:radius="15dp" />
        </shape>
    </item>
</layer-list>

Now use the following code -

<FrameLayout
    android:layout_width="match_parent"
    android:background="@drawable/shadow"
    android:layout_height="200dp">

    <CardView
        android:layout_width="match_parent"
        android:layout_height="match_parent"
        app:cardCornerRadius="15dp"
        app:cardElevation="0dp">

            <!--  your code here  -->

    </CardView>

</FrameLayout>

You can replace FF46A9 in shadow.xml to change the color of shadow. Also android:backgroundTint="@color/colorShadow" works but you have to adjust colors alpha in shadow.xml.

Adjust the <corners android:radius="15dp"/> as app:cardCornerRadius="15dp".

Covenant answered 7/7, 2020 at 12:48 Comment(0)
C
0

This trick is difficult to achieve in most cases , due Official Android Framework do not have any way to change the cardview shadow color. In this case you refers to ilumination light on the cardview . This library is optimized for this this trick.

Library Link:https://github.com/meetsl/SCardView-master I hope can help you! Good Luck

Constantina answered 5/5, 2020 at 2:50 Comment(0)
T
0

enter image description hereI know I'm late but I want to share the solution as I searched hard for this issue and solved the issue The solution is, You have to use "ComplexView" to create your custom shadow,

dependency: implementation 'com.github.BluRe-CN:ComplexView:v1.1'

XML:

<com.blure.complexview.ComplexView
   android:id="@+id/shadow_card_1"
   android:layout_width="@dimen/_65sdp"
   android:layout_height="@dimen/_65sdp"
   android:layout_centerInParent="true"
   app:radius="@dimen/_30sdp"
   app:shadow="true"
   app:shadowAlpha="250"
   app:shadowSpread="2"/>

//this will create the circular shadow for my need you can reduce the radius

Custom View

val shadow = ComplexView(context)
val radii = floatArrayOf(100f, 100f, 100f, 100f, 100f, 100f, 100f, 100f)//customise according to your requirement
val opacity = 150//customise according to your requirement
 shadow.shadow =Shadow(
       2,
       opacity,
       "#96B9BB",
       GradientDrawable.RECTANGLE,
       radii,
       Shadow.Position.CENTER
      )

val param: RelativeLayout.LayoutParams =
                    RelativeLayout.LayoutParams(
                        context.resources.getDimension(R.dimen._160sdp).toInt(),
                        context.resources.getDimension(R.dimen._160sdp).toInt()
                    )
shadow.layoutParams = param
shadow.addView(yourCustomView)

here is the result:

also

thanks :)

Tale answered 13/4, 2022 at 7:36 Comment(0)
H
-1

Already late for the answer.

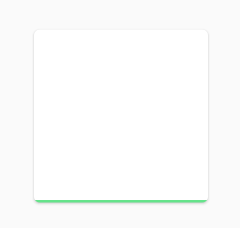
Some trick can work perfectly for meenter image description here

And XML file like

    <?xml version="1.0" encoding="utf-8"?>
<LinearLayout xmlns:android="http://schemas.android.com/apk/res/android"
    android:layout_width="match_parent"
    android:layout_height="match_parent"
    android:gravity="center"
    xmlns:app="http://schemas.android.com/apk/res-auto"
    android:orientation="vertical">
    <androidx.cardview.widget.CardView
        android:id="@+id/cardview"
        android:layout_width="@dimen/_150sdp"
        android:layout_height="@dimen/_150sdp"
        android:layout_marginLeft="@dimen/_10sdp"
        android:layout_marginRight="@dimen/_10sdp"
        app:cardBackgroundColor="@color/white"
        app:cardCornerRadius="@dimen/_5sdp"
        app:cardUseCompatPadding="true">

        <LinearLayout
            android:layout_width="match_parent"
            android:layout_height="@dimen/_50sdp"
            android:orientation="vertical">
        </LinearLayout>
        <View
            android:id="@+id/view_color"
            android:layout_width="match_parent"
            android:layout_height="@dimen/_2sdp"
            android:layout_gravity="bottom"
            android:background="@color/app_green" />
    </androidx.cardview.widget.CardView>

</LinearLayout>

Enjoy coding

Haunt answered 28/12, 2020 at 6:53 Comment(0)
S
-1

Simple way to change card 's shadow color is to set android:outlineSpotShadowColor="@color/#CCCCCC" inside your CardView

           <androidx.cardview.widget.CardView
                android:layout_width="match_parent"
                android:layout_height="wrap_content"
                
                app:cardElevation="15dp"
                android:outlineAmbientShadowColor="@color/#CCCCCC"
                android:outlineSpotShadowColor="@color/#CCCCCC" />
Sorrell answered 4/3, 2021 at 10:3 Comment(0)

© 2022 - 2024 — McMap. All rights reserved.