IntelliJ shows decompiled .class file instead of source code
Asked Answered
M

14

60

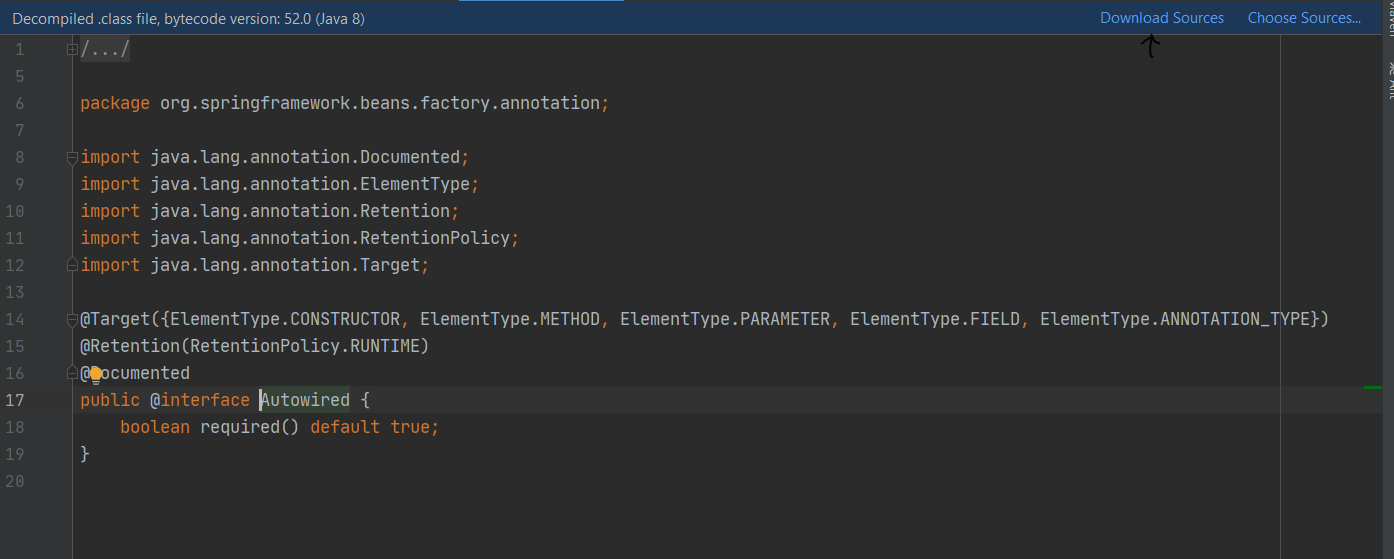
I am having issues with IntelliJ - it shows me a "decompiled" version of the class instead of its source code if I ctrl+click the class.

This is what I see:

Decompiled class message

I am trying to open regular JDK source files.

The most relevant issue I found is explained here: Java sources replaced by decompiled files in Intellij

The most detailed answer I've found so far is there as well.

Yet it doesn't work for me:

  1. Bytecode Viewer plugin is off.

  2. Java Bytecode Decompiler plugin is off.

  3. Platform, Project and Module all have same JDK version setup.

  4. I have two JDKs available in IntelliJ: jdk1.8.0_161 and jbsdk8u112b287.2_windows_x86 (bundled with IntelliJ, but comes without src.zip). Tried with both (had to specify src.zip of jdk1.8.0_161 for jbsdk8u112b287.2_windows_x86) - no luck

  5. src.zip is not corrupt - I can open it via WinRAR

  6. When added jdk1.8.0_161 to IntelliJ, it automatically found src.zip. When manually adding src.zip to jbsdk8u112b287.2_windows_x86 Sourcepath tab - it started "Scanning for roots", but warned me that it "cannot determine what kind of files the chosen items contain" and offered me to "attach them as 'Sources'" so I agreed.

  7. Tried File > Invalidate Caches / Restart... - same result.

  8. Same issue in 2017.3 and fresh 2018.1 versions of IntelliJ.

  9. Providing path for Documentation makes IntelliJ look for the documentation in the path specified. So it works as it should for both of JDKs. But not for sources.

  10. Everything else works/compiles properly.

My settings:

Settings

Mohl answered 29/3, 2018 at 13:56 Comment(6)
Which of the 2 configured JDKs is used in the project/modules? Does it have the sources attached? Try removing the second JDK configuration.Gravelblind
Thanks for reply. I tried both jdks while being consistent with them in project/module with no luck. Just deleted bundled jdk, invalidated cache, restarted. The issue is still there. Now I have 2 machines to compare. Both have same new IDE version. Both run 32-bit version of Intellij. Both have same and only version of jdk installed (jdk1.8.0_161). Both have same settings (synced via settings repository). And on the 2nd machine everything works as it should! Same behavior when creating new project. I don't even know what to try now...Mohl
Try to delete IDE configuration (intellij-support.jetbrains.com/hc/articles/206544519), then set up everything from scratch without importing the settings.Gravelblind
ok, it looks like the problem is in the project itself. Removing settings fixes the issue, until I open the project. Then I get this decompiling message asking to agree to some conditions and then it starts showing me a decompiled code version once again. Had to re-import it instead of re-openMohl
unfortunately, it still happens from time to time. Now in my project in Android Studio.. to lazy to fight it back.. Try settings removal and re-importing your project as mentioned aboveMohl
Did somebody figure out which config setting exactly is the issue? Wanna avoid having to set up everything from scratch...Hollins
D
27

1. Get the source files

Make sure you have downloaded and installed the source files of the JDK.

I'm on Arch Linux and installed them with pacman -S openjdk8-src which put a src.zip into /usr/lib/jvm/java-8-openjdk/. We'll use that zip file in the next step.

To list source packages of different JDK versions, do pacman -Ss "openjdk.*-src".

See this question on how to get the source files for your specific platform.

2. Point IntelliJ to the source files

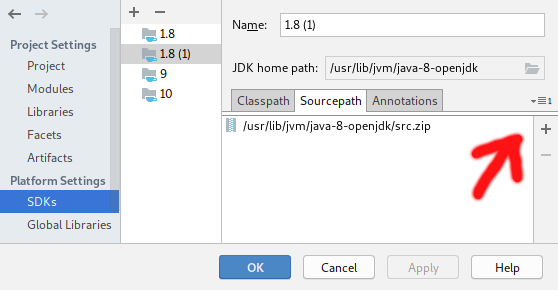
In your module settings (open them with F4) under "Platform Settings" → "SDKs" → "Sourcepath", add the zip file containing the JDK source to your project JDK (be sure to pick the right JDK if IntelliJ lists more than one JDK) using the button with the plus sign:

Sourcepath screenshot

3. Jump into the source

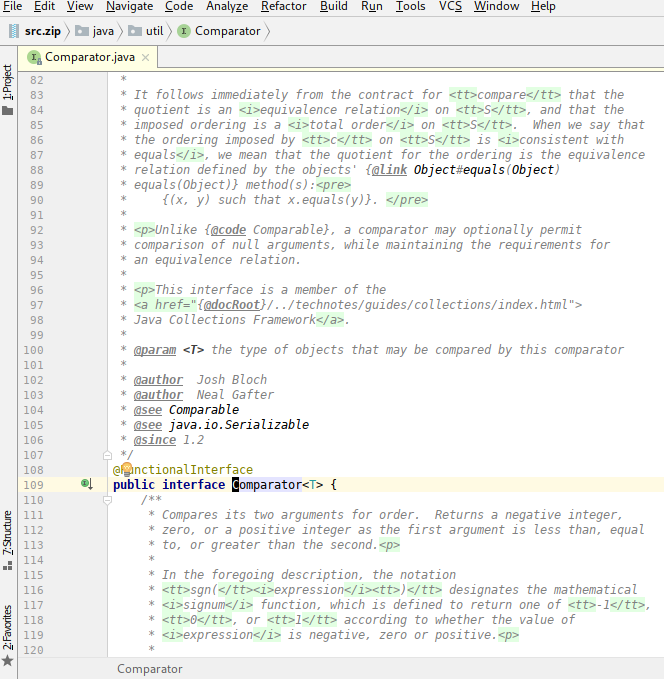
Select a JDK class, like Comparator, using IntelliJ's Search Everywhere or Ctrl+b with the cursor on the name of the class.

Comparator source

Dandle answered 28/10, 2018 at 12:14 Comment(4)
I've tried this and it is impossible for me to select and add the src.zip file even though it is there in the file system. IntelliJ does not show it in the file list, and if I manually type "src.zip" at the end of the path then IntelliJ automatically erases it from the text input field after about 0.5 seconds!Tessera
@flodin: Could it be that IntelliJ doesn't have the permission to access the file or its directory? Maybe try changing the permissions with chmod (assuming you use macOS or Linux) or save the src.zip somewhere else.Dandle
Good thinking. It wasn't a permissions issue. It turns out that the src.zip file is in fact a symbolic link, and it points to a path that doesn't exist. This is on a stock install of openjdk from the Ubuntu package repository so it seems like a distribution bug.Tessera
Update: Installing openjdk-VERSION-source made the symlink resolve and now it works fine. Confusing behavior from both IntelliJ and Ubuntu conspired to make this hard to crack.Tessera
P
3

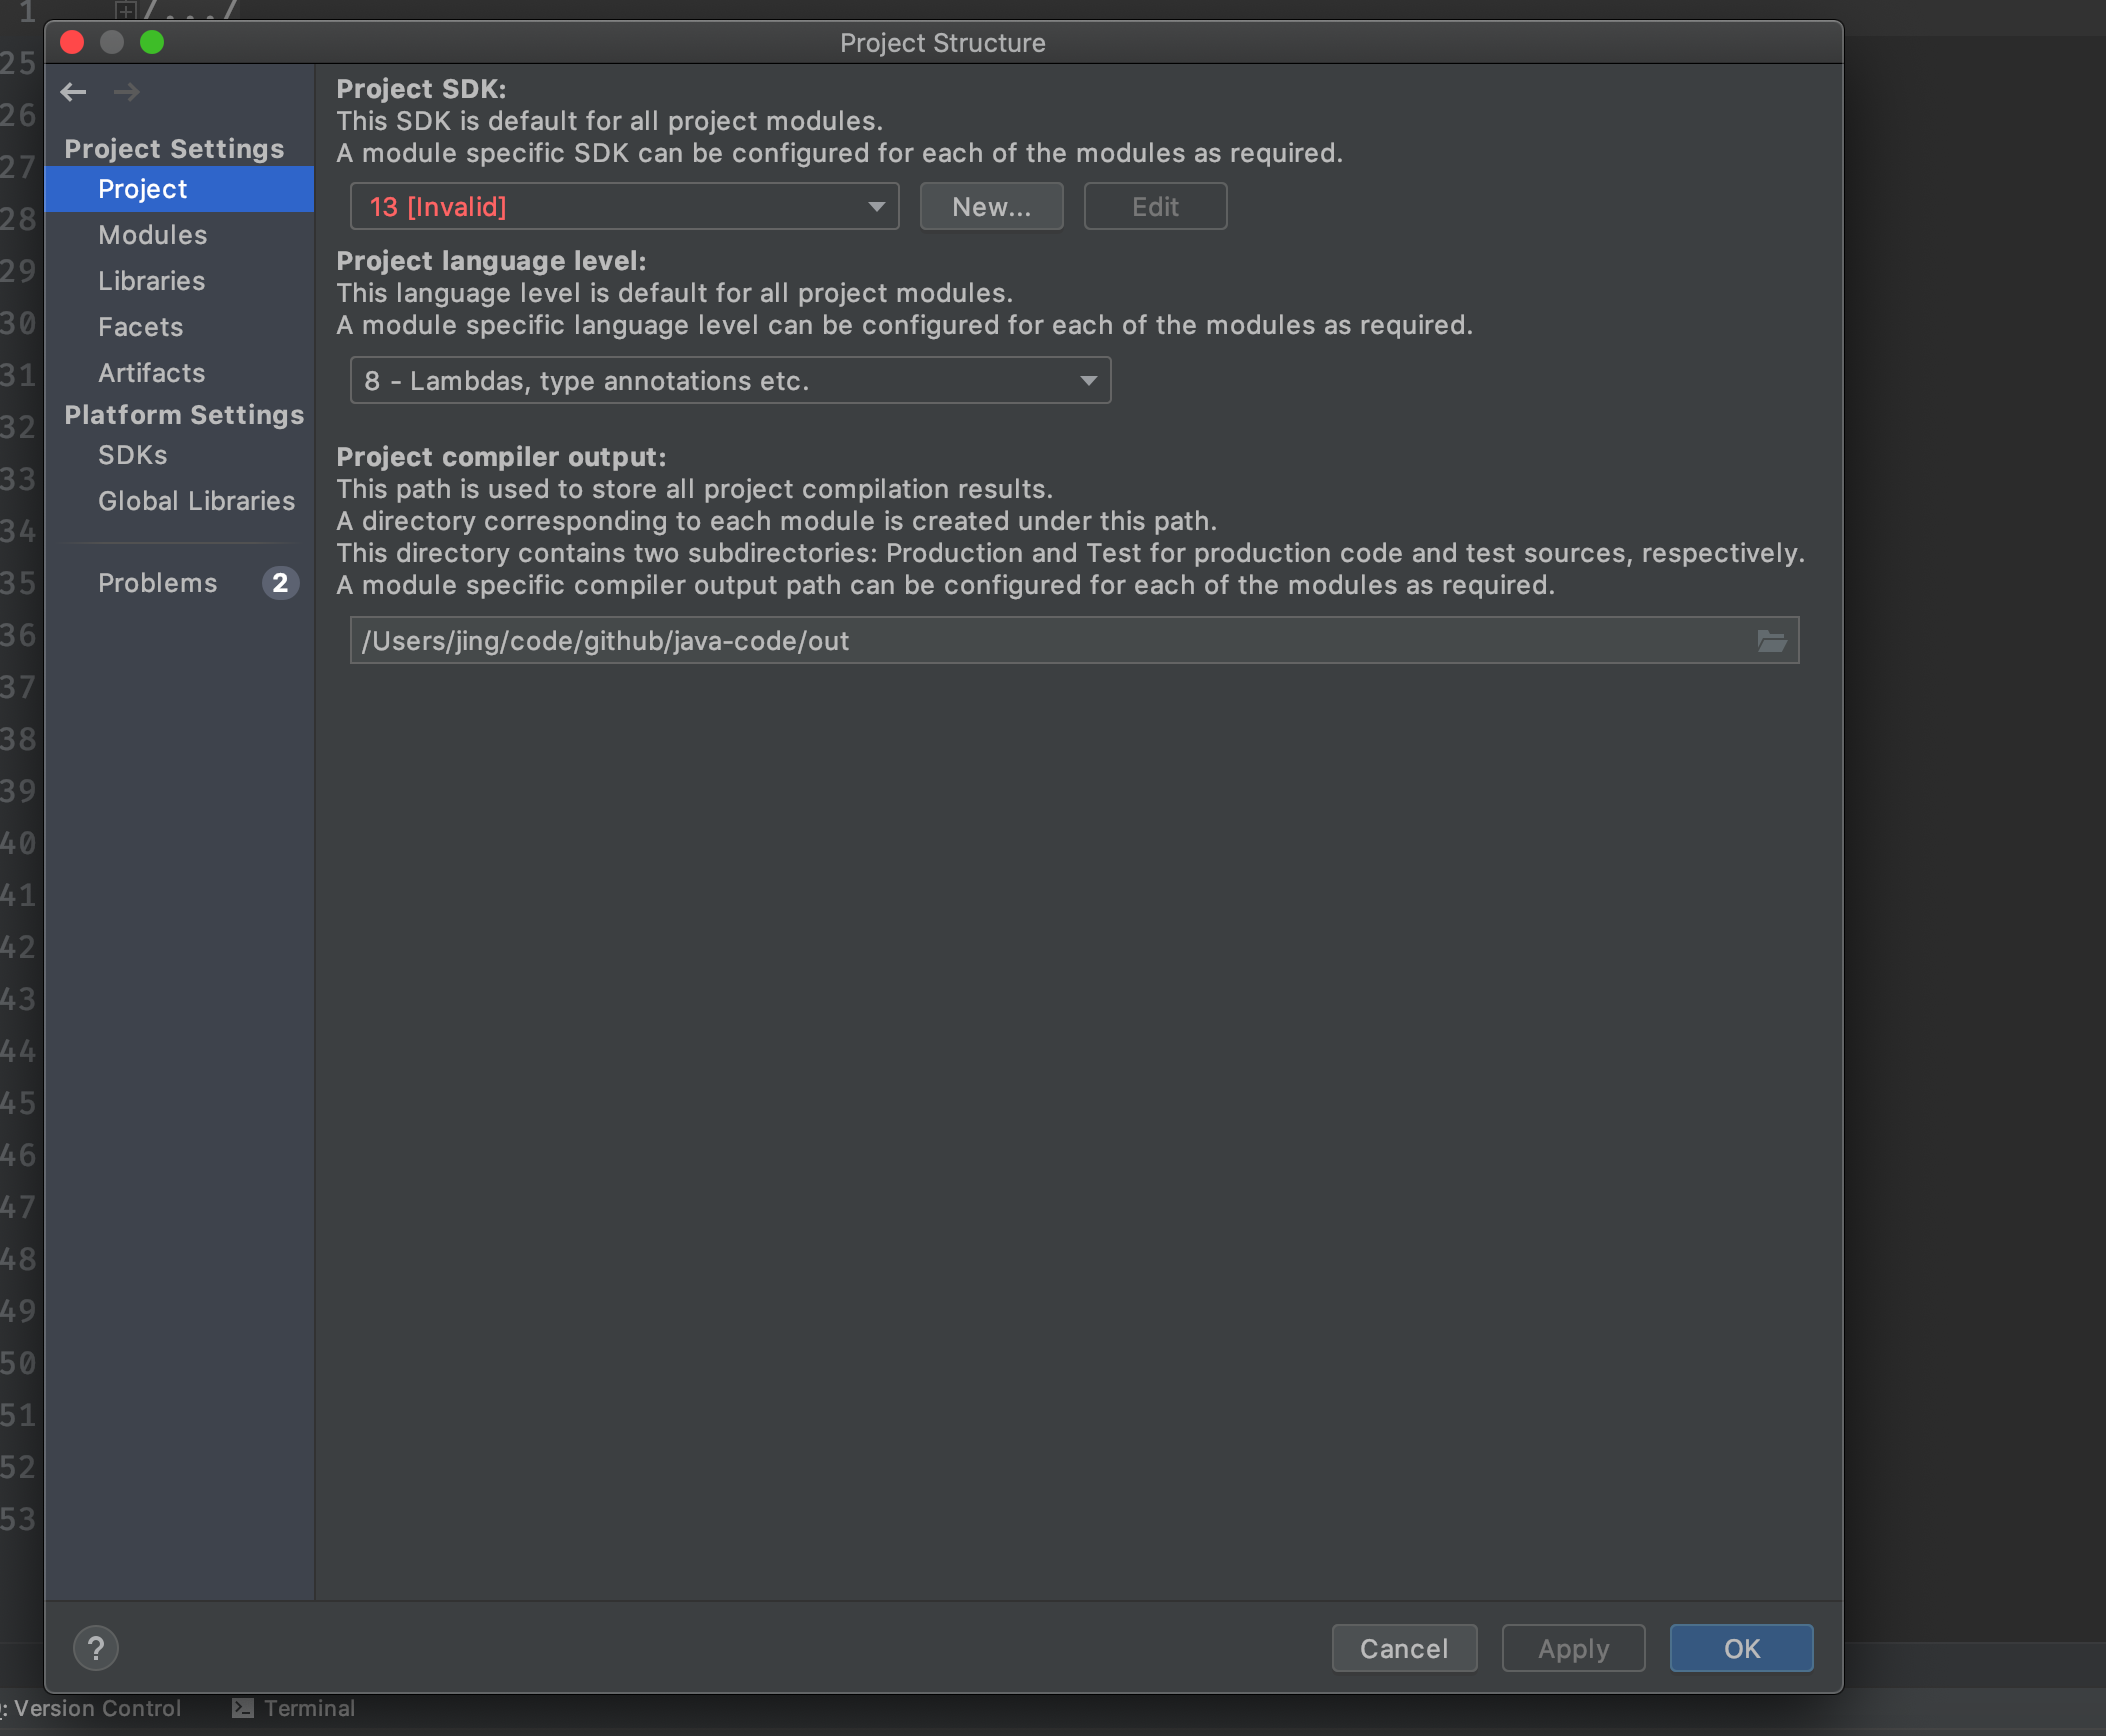
I also have the same problem. The problem for my case is that Project SDK is set to 13 [Invalid]. After I can Project SDK to a valid SDK. My problem is solved.

Project Structure

Premarital answered 5/4, 2020 at 1:50 Comment(0)
C
2

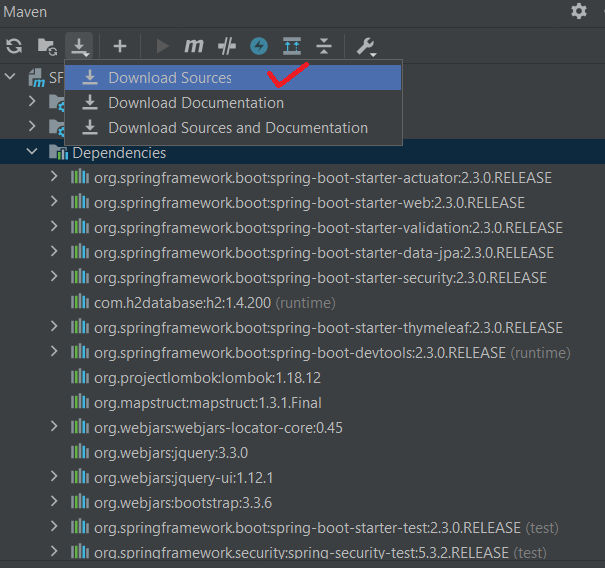
On my Windows 10, expand maven:

enter image description here

Convincing answered 15/5, 2021 at 11:42 Comment(2)
This only works for dependencies, not the JDK source.Selfjustifying
It worked for me for JDK 17Duteous
D
1

I tried all the things mentioned at other places for this but at the end I was doing a silly mistake. Intellij was pointing to JDK 11 for which there was no source code (I had both the SDKs 8 & 11). I removed JDK 11 and pointed to JDK 8. JDK had the source code, thus now I can see the source code on ctrl click. Also, I had disabled the bytecode viewer and decompiler plugins. Hope this helps some one.

Desouza answered 23/8, 2020 at 15:2 Comment(1)
Disabling the bytecode viewer and decompiler plugins did the trick for me as I had tried everything else. Thank you!Transitory
H
1

This also happens for large files - IDEA decides to decompile them instead if indexing sources, which can take ages. If you're willing to accept the drawdown, adding the following in Help | Edit Custom Properties might fix the problem:

idea.max.intellisense.filesize=4096
Hesychast answered 30/12, 2020 at 12:13 Comment(0)
A
1

On ubuntu there was java version “OpenJDK” when I changed to “Oracle Java”, the error went away and javadoc returned

Anabelle answered 2/1, 2022 at 12:8 Comment(0)
W
0

I meet same problem and finally it gone after I copy JDK to another folder and change config in IntelliJ. I think maybe cause there is a space in path before, because it is installed under "Program Files" folder.

Warrick answered 16/8, 2019 at 7:41 Comment(0)
R
0

For downloading the source code of class files belong to jar you can use download source option present on top right corner in the de-compiled class file.

enter image description here

Ronironica answered 22/4, 2020 at 5:0 Comment(1)
In my experience, this does not work for JDKs, only things like maven dependencies. And, for those, specifically, you can setup IntelliJ to always download maven sources.Selfjustifying
C
0

For me going to File -> Project Structure -> Project -> SDK -> Add SDK -> Download JDK and selecting Oracle OpenJDK solved the problem. Prior to that I had a different JDK selected and apparently it didn't include source code

Cubic answered 19/10, 2022 at 7:47 Comment(0)
R
0

i tried all this options and the only thing that worked for me was deleting de .jar, that in the first shouldn't been there.

Russ answered 13/12, 2023 at 15:38 Comment(0)
Y
-1

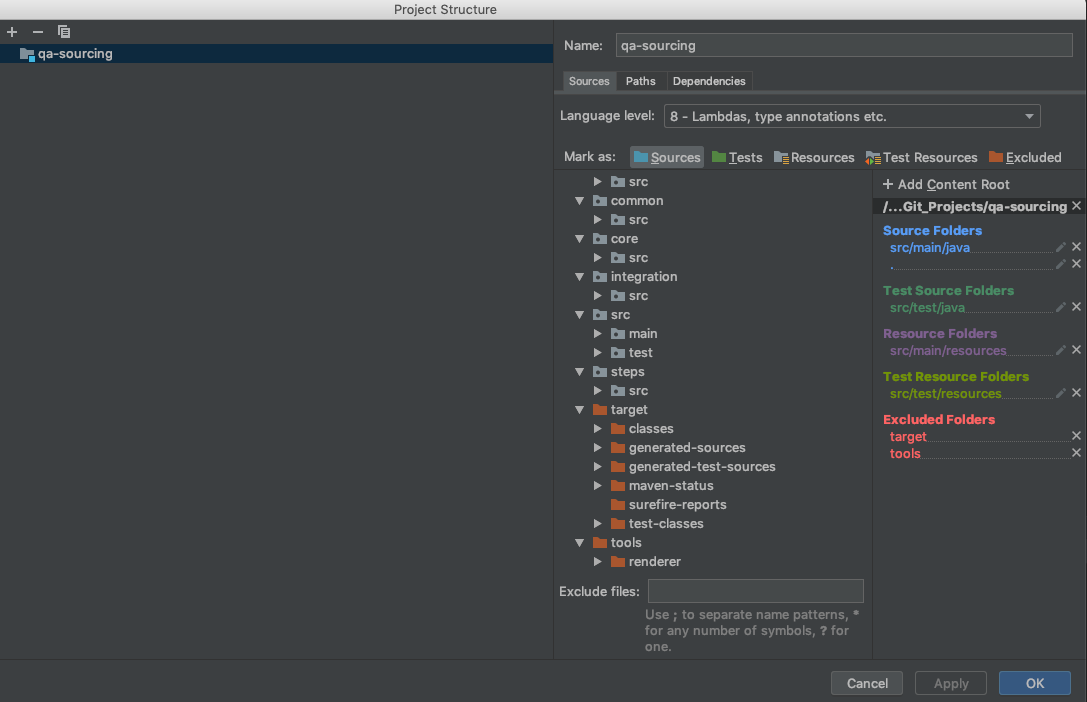
If you are in a maven project make sure in the project structure all the complied folders are in the excluded section. enter image description here

Yiyid answered 13/5, 2019 at 12:0 Comment(1)
Has nothing to do with including source files for a JDK.Selfjustifying
C
-1
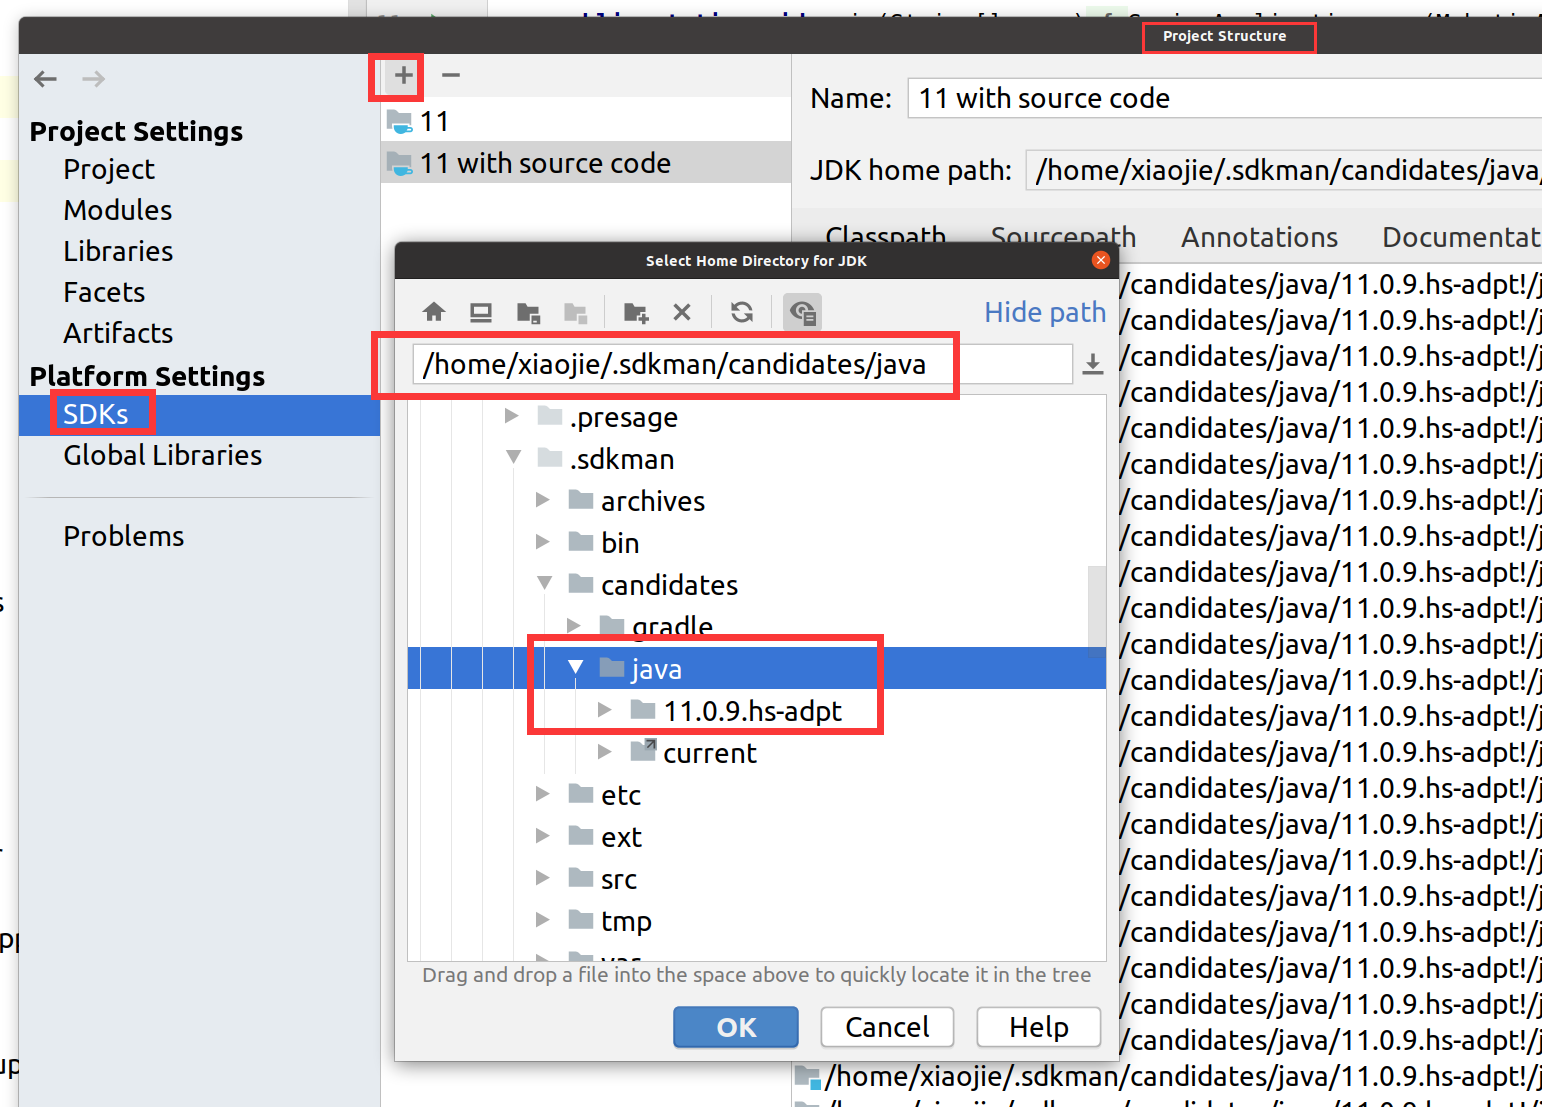
  1. I suggest to use Linux Instead of windows. It's easy to find and download Java.
  2. If you are using Linux, you can download SDKMAN
  3. Install Java by SDKMAN
# find version
$ sdk list java
# download
$ sdk install java x.y.z-amzn
  1. ctrl+alt+shift+s add JDK enter image description here

  2. Switch project JDK enter image description here

Crowberry answered 6/12, 2020 at 7:24 Comment(0)
D
-1

If you are using maven , Right click on Project explorer -> choose Maven -> chick on "reload projects"

Dusk answered 27/4, 2021 at 4:27 Comment(1)
This will never pull in JDK source files.Selfjustifying
L
-2

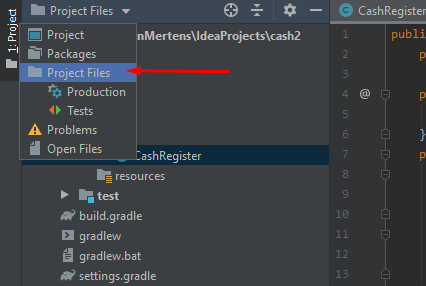
This did the trick for me:

Make sure you select the option "Project Files" (instead e.g. "Project").

screenshot

Lura answered 21/11, 2019 at 18:5 Comment(1)
Way off-base. Has absolutely nothing to do with IntelliJ not having access to JDK source files.Selfjustifying

© 2022 - 2024 — McMap. All rights reserved.