Android emulator camera custom image
Asked Answered
A

7

76

Does anybody know is it possible to open some personal picture when emulator camera starts?

I have an application which is based on image analysis and I would like when I click a button for camera that camera opens not that default Android emulator moving image. I want it to open some image which I set as a default image. So when I choose to take a picture it will show only that image and when I take a take a picture, that image will be saved to gallery, not Android default image.

Amadavat answered 11/12, 2012 at 10:33 Comment(0)
G
-1

Download the source from following url . This is work as the another Gallery in the emulator. While passing intent to capture image from camera choose this gallery. this is looks like samsung mobile 3d gallery.. this will return the default images.. in emulators . one more thing it will work fine after 3.0 versions only.

https://github.com/c-jiang/Gallery3D-Mod

Gargantua answered 20/12, 2012 at 10:6 Comment(1)
Out of date: nine years oldSharpeyed
S
146

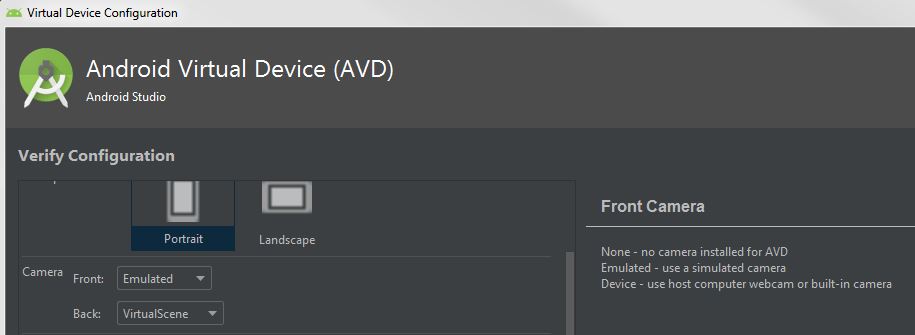
Under Tools > AVD Manager, select the "pencil" to get to "Virtual Device Configuration". Show Advanced Settings > Camera will give you the option of using emulated, or a device:

Device - use host computer webcam or built-in camera

Virtual Device Camera Configuration

If all you need is to get a still image into the camera, starting with Android Studio 3.2 you can put your static images into the virtual scene:

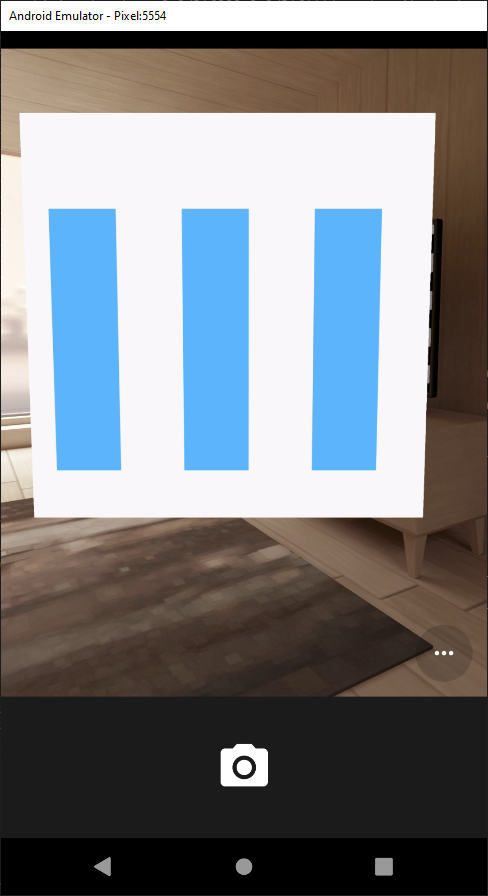
Virtual Scene Demo

as discussed in this entry from Android developers blog. Note that you'll need to move the camera position into the dining room to see your images (turn around and use Alt-w to move forward).

Sharpeyed answered 18/4, 2019 at 15:50 Comment(6)
Here's a more direct link than the blog link to the documentation for the virtual scene changes. Additionally, I didn't know how to access the "Extended controls" to find that "Camera" link. I found those instructions here: "To open the Extended controls window, click More in the emulator panel."Dunning
I made a comprehensive list of steps gist.github.com/gabrieljoelc/df8256b896cac46bd51fd2deb412da5fDunning
this answer teach me how to use it. thank you Dale !!Minuteman
If you're having difficulties getting to "Advanced Settings" try this. Tools > AVD Manager . Click on the down arrow (within the 'Actions' column) associated with the AVD you're interested in, then select EDIT from the resulting menu. Click on the 'Show Advanced Settings' button. I think this is where the earlier instructions were trying to get you to. This is valid for the 2020.3.1 Patch 2Urnfield
First option worked (a notebook camera), while the second didn't.Hickie
Is there a way to customize the geometry of the virtual scene? I'd like to do Augmented Reality tests in a 3D environment I created.Converge
F
38

Finally!

  1. Append to file ~/Android/Sdk/emulator/resources/Toren1BD.posters
poster custom
size 2 2
position 0 0 -1.8
rotation 0 0 0
default custom.png
  1. Place 'custom.png' in ~/Android/Sdk/emulator/resources/
  2. Restart! emulator @Phone -no-snapshot -no-boot-anim (replace 'Phone' with the name of your avd! (see: emulator -list-avds)
  3. Profit!

Now you have a texture just in front of camera-default-position.

Sample-View

Fernyak answered 20/11, 2020 at 0:49 Comment(5)
+1 this works fine for the standard camera app on the emulator, but i have the problem that my own app using camerax does not see the custom.png. I get only teh default environment. @Fernyak do you have any suggestions why different apps on same emulator might get different environments?Seftton
This is exactly what I was looking for, thanks for posting this solution here. Do we have anything similar in iOS simulators as well?Oniskey
Thanks, this is working for me! I think this is should be the accepted answer.Heelpost
Memo to myself: These are good values for scanning qr codes with whatsapp: size 1 1 position 0.1 -0.1 -1.9Eugenie
My Android SDK had this path: ~/Library/Android/sdk, but once I modified the path to emulator/resources/ from there, everything worked. I'm running MacOS Sonoma and Android Studio Hedgehog.Thorndike
D
10

Update 2022

The best way use the OBS. this project creates a virtual webcam and you can play videos or show picture.

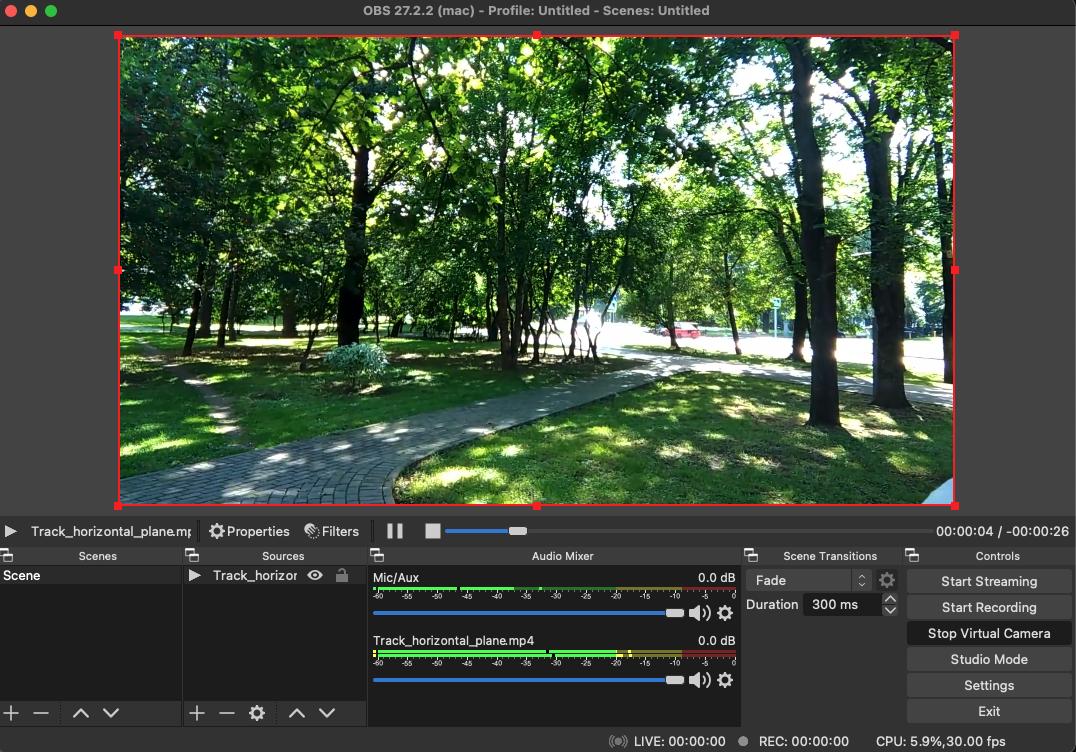
Step 1: Download the OBS Studio from this site and create a virtual webcam and add a video for plying that.

enter image description here

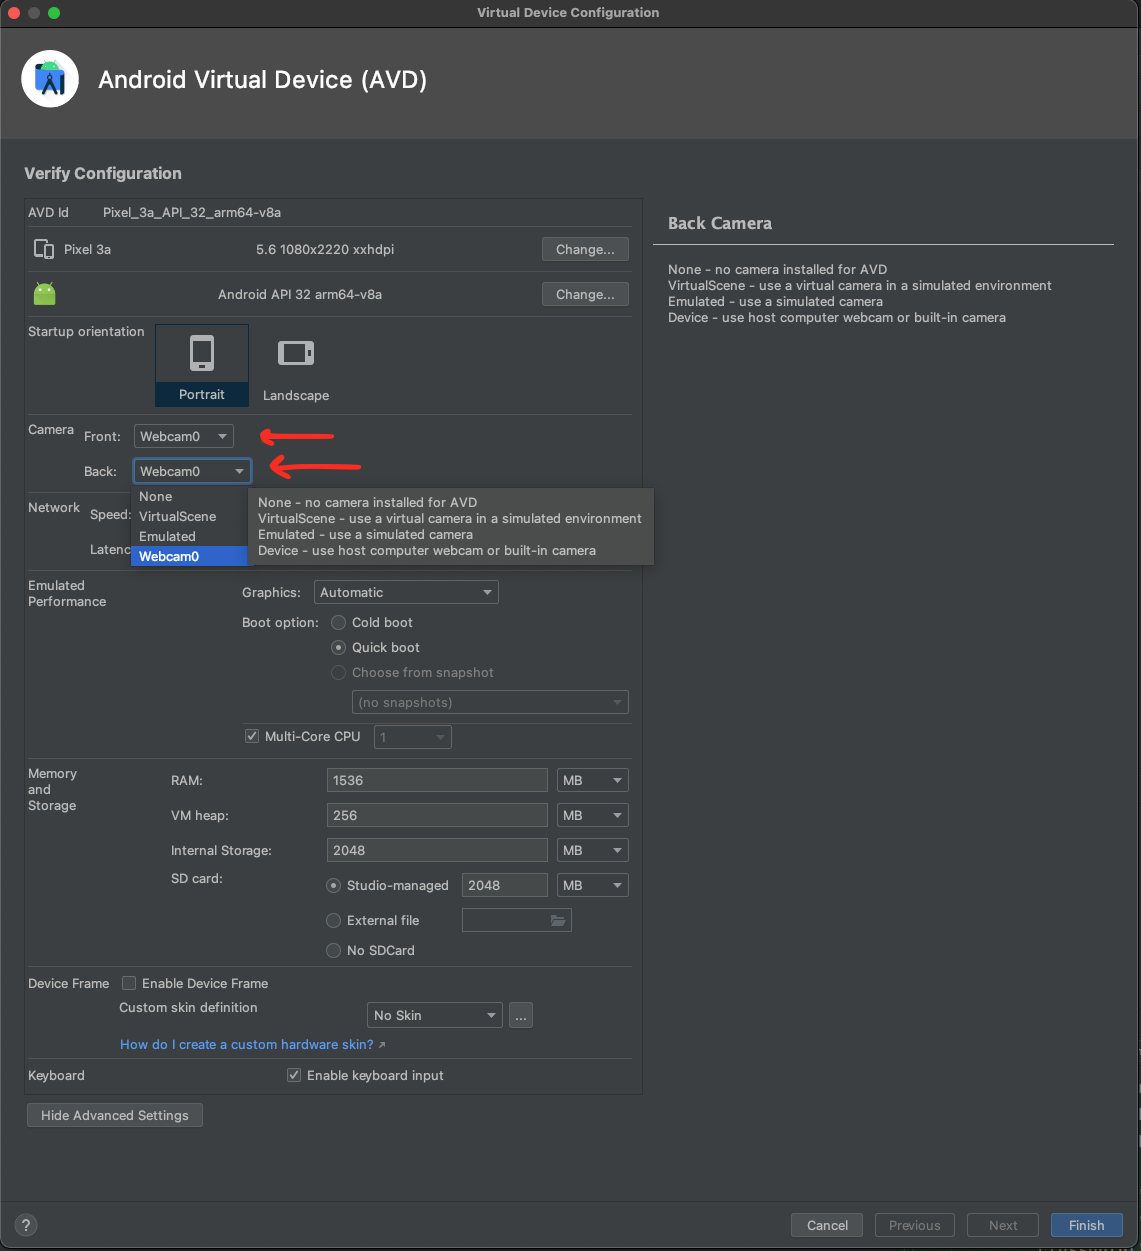
Step 2: Changing the config in android AVD. change front and back camera to webcom0.

enter image description here

Discernible answered 2/3, 2022 at 8:33 Comment(4)
This does not work for me. If i set one of the cameras to Webcam0, that camera becomes unavailable (OS doesn't recognize it exists at all)Overhead
You can check this documents obsproject.com/helpDiscernible
@GradynWursten I had the same problem, but this answer worked fine for me: askubuntu.com/a/1141398/400932Lactose
@Gradyn Wursten Try with low resolution or rotate the preview in the OBS settings. try to right-click on the preview then set: Preview Scaling > Canvas Transform > Rotate 90 degrees Ani-ClockwiseStacte
G
5

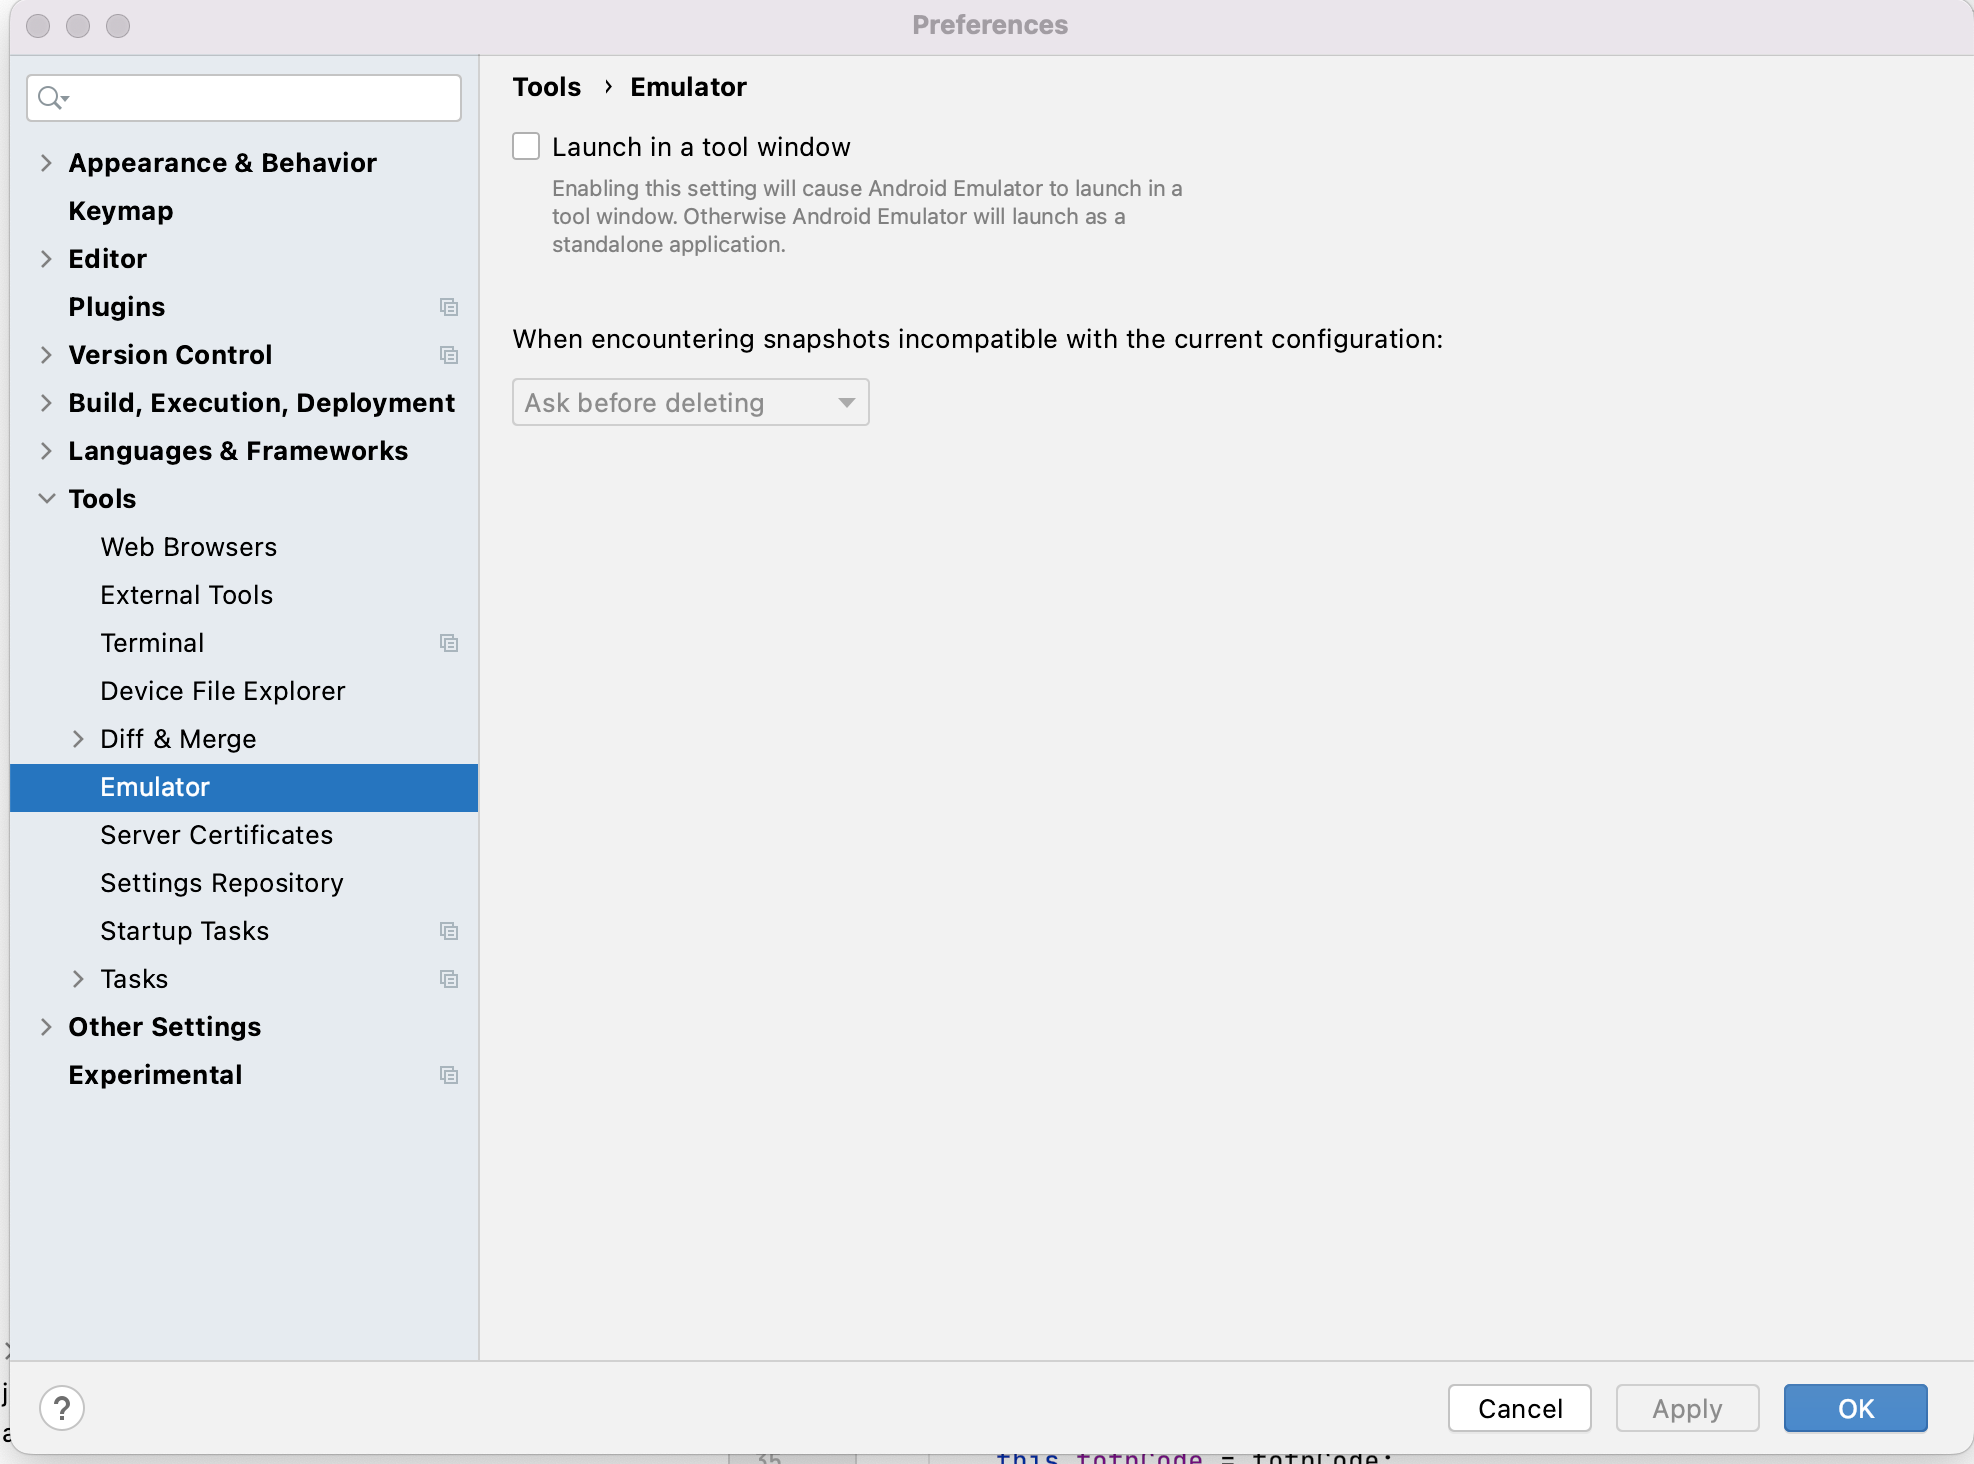
On Mac OS, ensure that the emulator runs in Standalone mode.

You can check this at: Preferences > Tools > Emulator, See image below (Launch in tool window should be unticked as shown below):

enter image description here

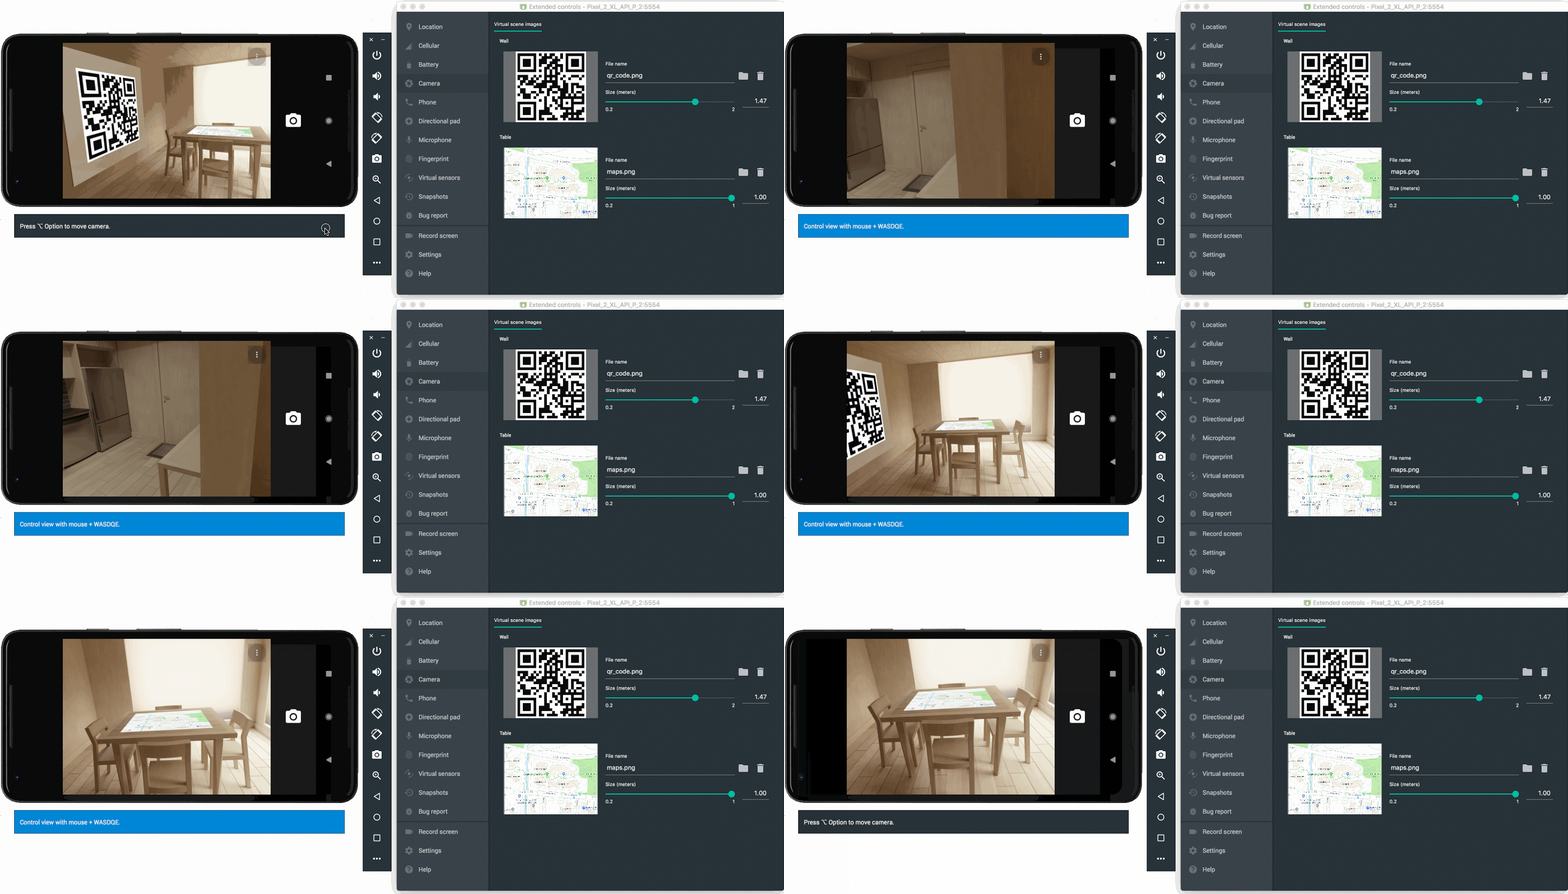
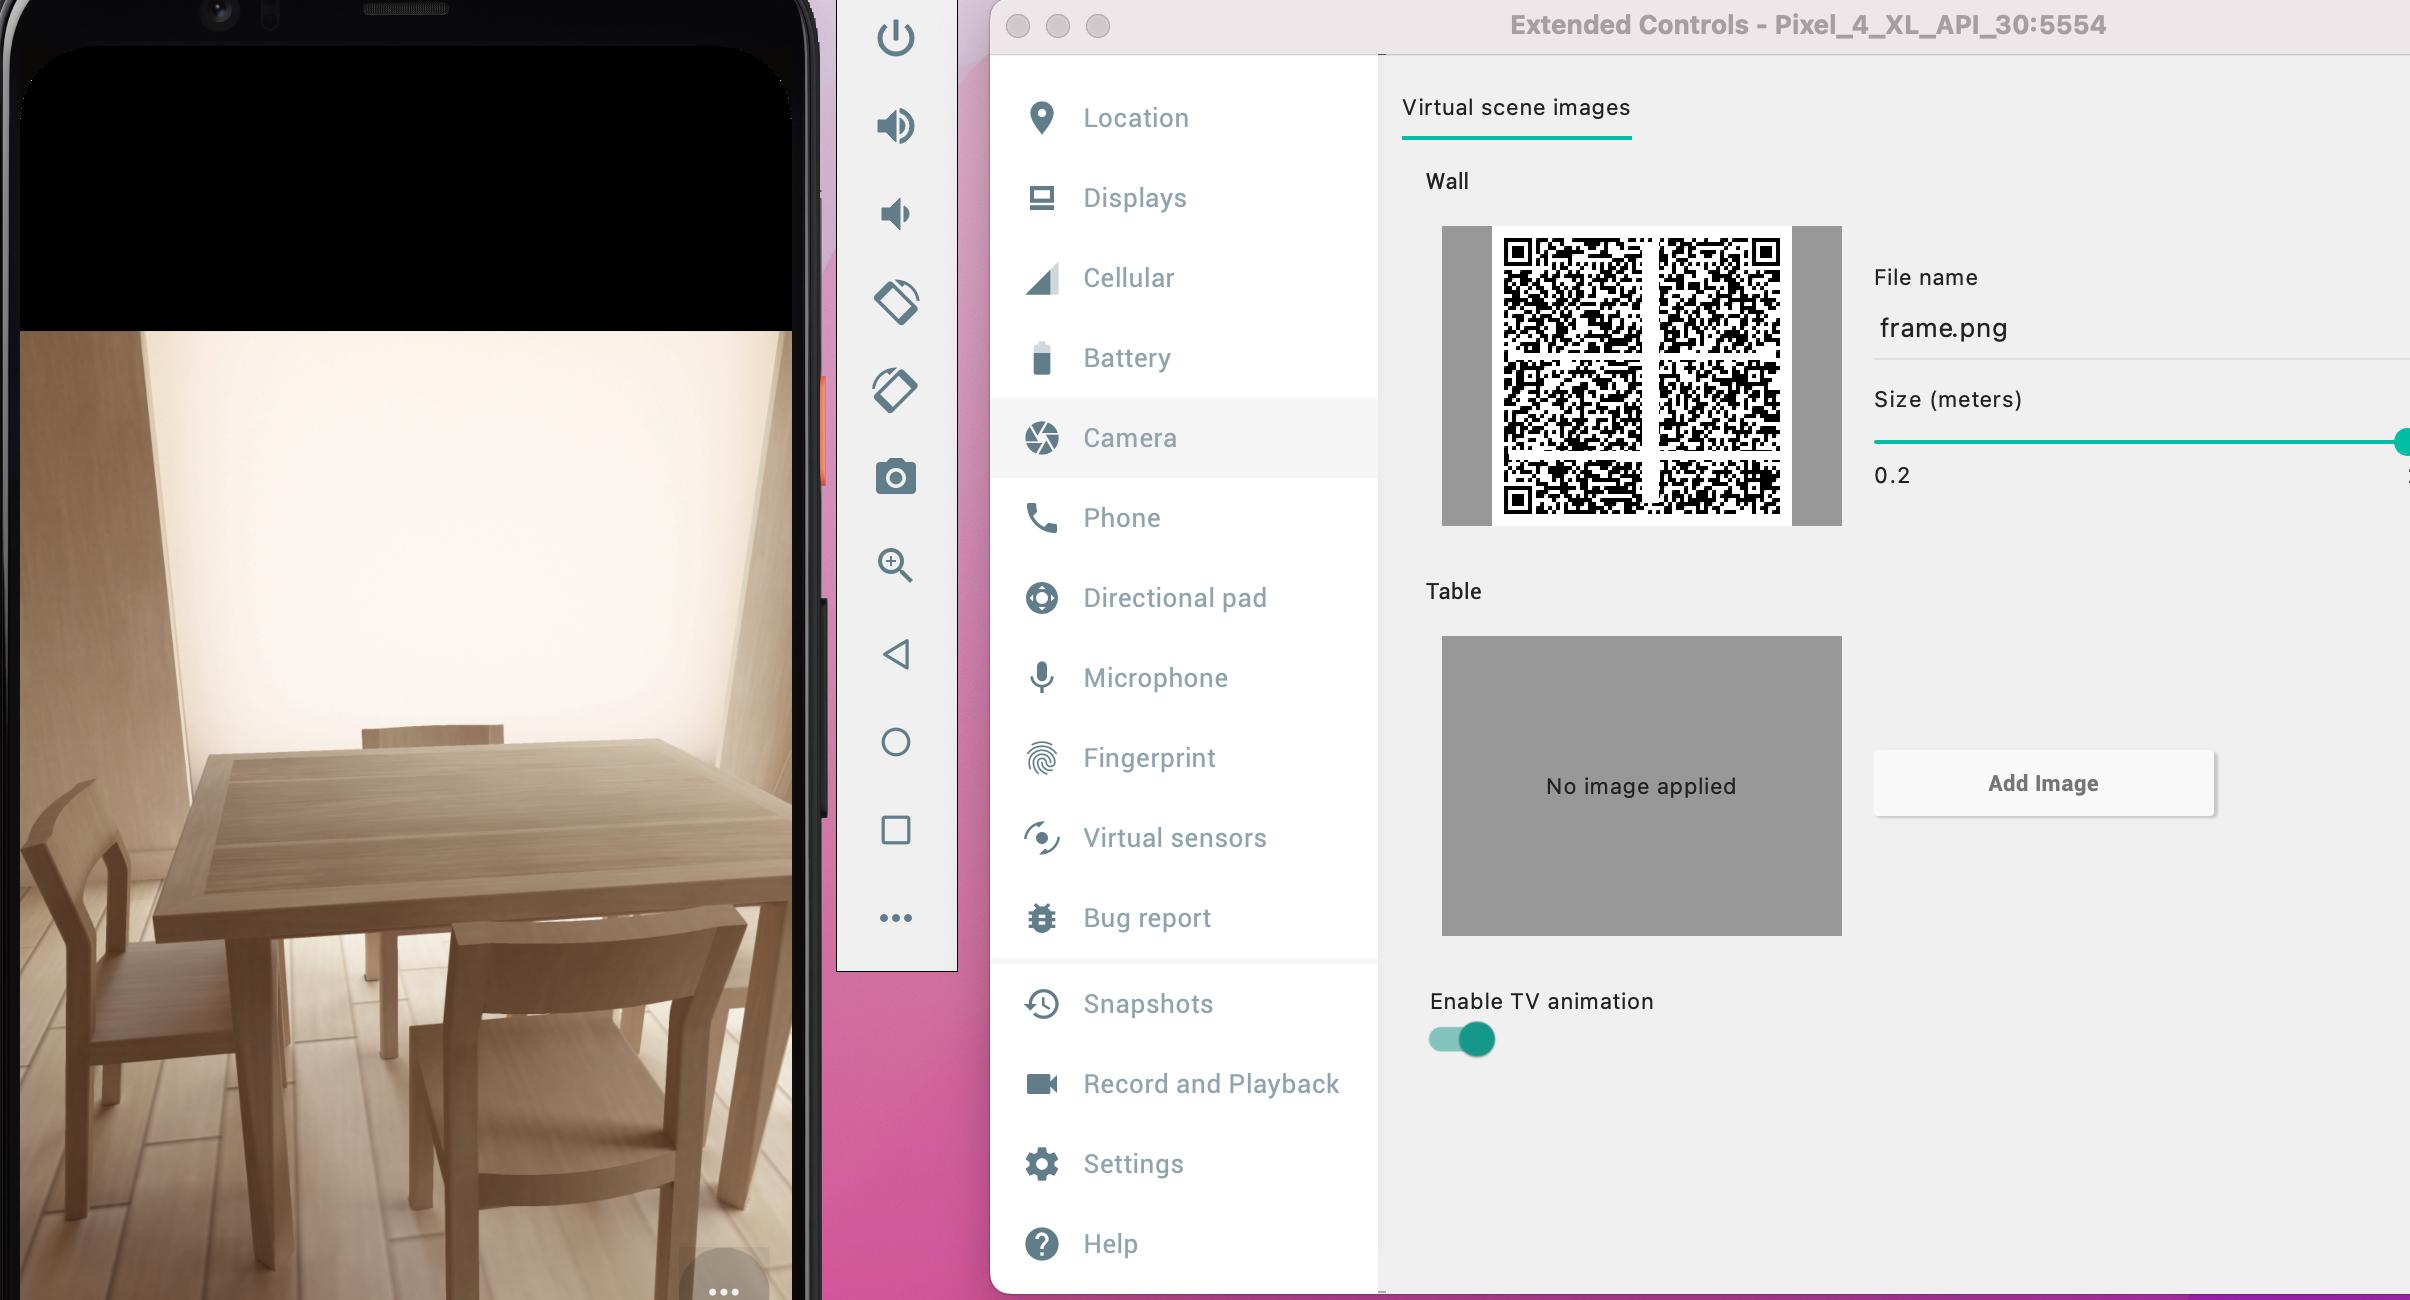
You can then launch the emulator and under the Camera extended control, upload your desired image, in my case, a QR code.

enter image description here

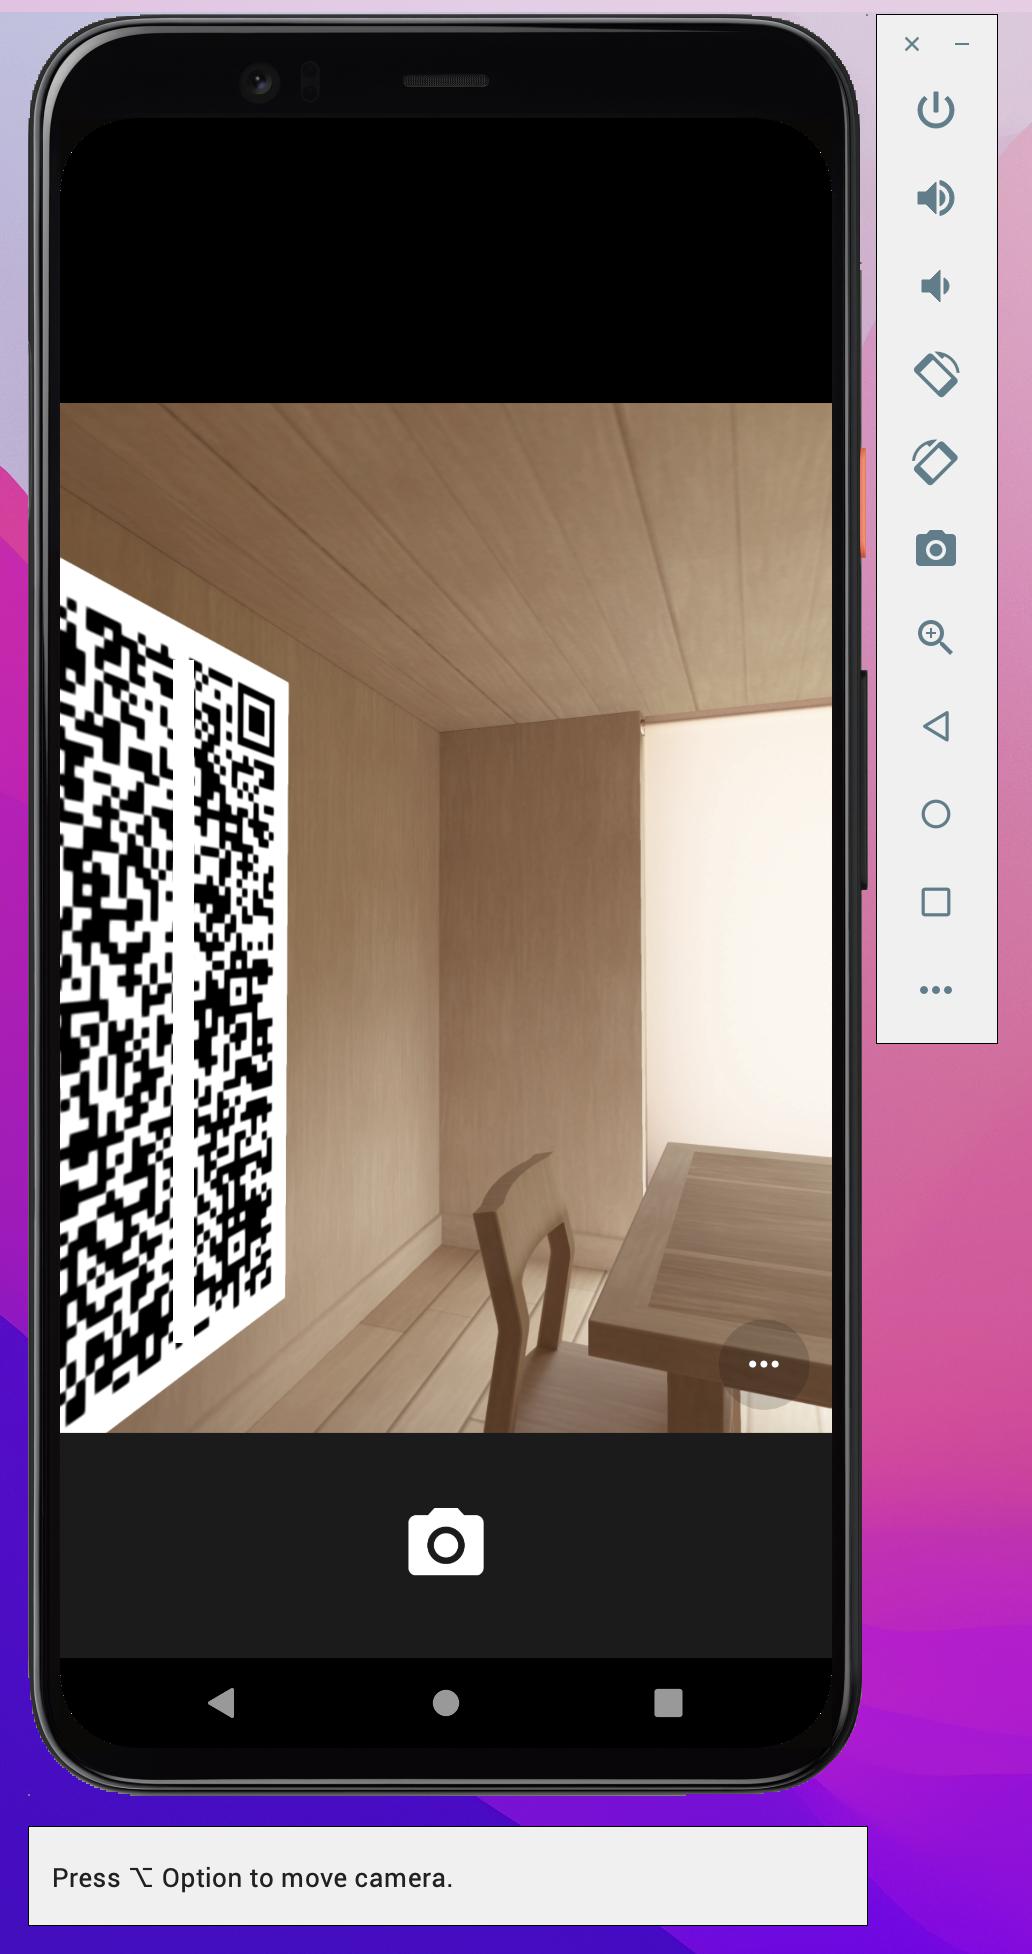
Finally, using the option key on Mac / Alt on Windows + QWEASD + Mouse, you can navigate the camera around the room and find your image (in my case the QR code) as shown below:

enter image description here

Gignac answered 27/6, 2022 at 9:0 Comment(0)
A
1

Adding here as I've been troubleshooting an issue for the past day and eventually found a solution that could help others. (On MacOSX, using Android Studio Emulator)

Problem: When trying to use OBS Studio as a virtual camera for the emulator, the emulator does not recognize the OBS Virtual Camera and the only option in the device manager camera settings is webcam0 which is the built in webcam. AND the camera app on the android emulator does not recognize the virtual camera device.

Solution:

  1. install OBS Studio and run it, start the virtual camera for the first time, this will automatically install a CoreMediaIO DAL plug-in at /Library/CoreMediaIO/Plug-Ins/DAL and create the virtual webcam device.

  2. go to the emulator folder of your Android Studio installation cd ~/Library/Android/sdk/emulator and check the available web cam list with the command ./emulator -webcam-list, you should see two webcams available; the built in camera webcam0 and the obs virtual device webcam1.

  3. edit the config file for your avd to use webcam1 by opening terminal and running nano ~/.android/avd/{AVD NAME}/config.ini scroll down and amend the line hw.camera.back = webcam1 Ctrl+O to write out and Ctrl+X to exit nano.

  4. make sure your OBS virtual device is started in the OBS Studio program.

  5. run the emulator through command line specifying the virtual camera by going to the emulator folder cd ~/Library/Android/sdk/emulator and running ./emulator -avd {AVD NAME} -camera-back webcam1

  6. the device will now boot and when you open the camera app, you should see the OBS virtual device input. IF YOU DO NOT, follow below, as this was my major problem.

If the camera app shows an error and you cannot see the OBS virtual device even after following the above steps, the solution that worked for me is to reset camera access permissions. It turned out for me that the emulator had previously requested access to the camera from the system whilst the built in webcam0 was the camera source for the avd. The emulator needed permission to use the virtual device webcam1 from the system, but would not request it again as it already had permission for the built in camera webcam0. This caused an error when opening the camera app in the emulator as it could not access the source.

To solve this you must close the emulator and android studio, and run tccutil reset Camera (note this will reset camera permissions for all applications, you can reset the permissions for only Android Studio/specific applications by running tccutil reset Camera com.WHATEVERBUNDLE.YOURAPPID.

After resetting the camera permissions, start the emulator again using step 4 above, and when opening the camera app, you should be prompted by the mac system to allow camera access to Android Studio, give it access and then you should see the OBS virtual camera input as expected.

Note: I found after running the emulator through the command line once, you can then run the emulator normally and the camera settings will persist.

Also answered 10/8, 2022 at 1:58 Comment(0)
A
-1

It seems the only solution is to use a remote camera.

This is one way to do it: http://www.tomgibara.com/android/camera-source

It's not something what I was looking for but I think it can be used for testing. Maybe even barcode scanner would work with this if the barcode is placed properly in front of camera.

Amadavat answered 20/12, 2012 at 8:58 Comment(3)
Hi you can use android 3D gallery source for this. in that you can set the constant image in the camera...Gargantua
Hi. If you can please post new answer and explain that a little bit I will accept your answer. I was searching a little bit and I don't see some tutorial. Thanks!Amadavat
Normally my application is unchanged and when I use the emulator to go to the camera it shows the default living room with the cat statue and a TV with a moving checkerboard. To implement this suggestion, I would have to change my app rather than configure the emulator or Android Studio?Sharpeyed
G
-1

Download the source from following url . This is work as the another Gallery in the emulator. While passing intent to capture image from camera choose this gallery. this is looks like samsung mobile 3d gallery.. this will return the default images.. in emulators . one more thing it will work fine after 3.0 versions only.

https://github.com/c-jiang/Gallery3D-Mod

Gargantua answered 20/12, 2012 at 10:6 Comment(1)
Out of date: nine years oldSharpeyed

© 2022 - 2024 — McMap. All rights reserved.