How to set cornerRadius for only top-left and top-right corner of a UIView?
Asked Answered
C

31

552

Is there a way to set cornerRadius for only top-left and top-right corner of a UIView?

I tried the following, but it end up not seeing the view anymore.

UIView *view = [[UIView alloc] initWithFrame:frame];

CALayer *layer = [CALayer layer];
UIBezierPath *shadowPath = [UIBezierPath bezierPathWithRoundedRect:frame byRoundingCorners:(UIRectCornerTopLeft|UIRectCornerTopRight) cornerRadii:CGSizeMake(3.0, 3.0)];
layer.shadowPath = shadowPath.CGPath;
view.layer.mask = layer;
Chukchi answered 15/4, 2012 at 23:58 Comment(7)
After your edit, three things to fix: (1) the rounded path should be based on view.bounds, not frame, (2) the layer should be a CAShapeLayer, not CALayer; (3) set the layer's path, not shadowPath.Blair
Possible duplicate of this question & answer.Oarlock
Use the Bezier curve algorithm, to create curves on a CGPath. I'm pretty sure it's part of CoreGraphics. If not, en.wikipedia.org/wiki/Bézier_curve has some great definitions and animations.God
iosdevcenters.blogspot.com/2018/02/…Sanfo
See my answer here: https://mcmap.net/q/23676/-create-a-rectangle-with-just-two-rounded-corners-in-swiftHanford
It's much easier on iOS 11 and above: johncodeos.com/…Gardy
iOS 11 - Interface Builder only solution: stackoverflow.com/a/58626264Megalocardia
M
371

Pay attention to the fact that if you have layout constraints attached to it, you must refresh this as follows in your UIView subclass:

override func layoutSubviews() {
    super.layoutSubviews()
    roundCorners(corners: [.topLeft, .topRight], radius: 3.0)
}

If you don't do that it won't show up.


And to round corners, use the extension:

extension UIView {
   func roundCorners(corners: UIRectCorner, radius: CGFloat) {
        let path = UIBezierPath(roundedRect: bounds, byRoundingCorners: corners, cornerRadii: CGSize(width: radius, height: radius))
        let mask = CAShapeLayer()
        mask.path = path.cgPath
        layer.mask = mask
    }
}


Additional view controller case: Whether you can't or wouldn't want to subclass a view, you can still round a view. Do it from its view controller by overriding the viewWillLayoutSubviews() function, as follows:

class MyVC: UIViewController {
    /// The view to round the top-left and top-right hand corners
    let theView: UIView = {
        let v = UIView(frame: CGRect(x: 10, y: 10, width: 200, height: 200))
        v.backgroundColor = .red
        return v
    }()
    
    override func loadView() {
        super.loadView()
        view.addSubview(theView)
    }
    
    override func viewWillLayoutSubviews() {
        super.viewWillLayoutSubviews()

        // Call the roundCorners() func right there.
        theView.roundCorners(corners: [.topLeft, .topRight], radius: 30)
    }
}
Mourner answered 17/12, 2016 at 10:50 Comment(9)
You have to do this after the view has appearedSunstroke
if anyone faces the same dummy issue I did - if you're writing within ViewController, don't forget override func viewDidLayoutSubviews() { roundCorners() }Burkhalter
What if there is no subclass? Only an outlet to uiview.Astrix
In that case, you would like to override the view controller func viewWillLayoutSubviews() { super.viewWillLayoutSubviews() theView.roundCorners() }. Let me add this to the answer.Practically
I use the 1st solution but its not working properly on ipadZetana
borderColor and borderWidth not effect in ios 10 when use corner [.topLeft, .topRight]. github.com/phucdth12a/Images/blob/master/…Raceway
UIBezierPath works with fix size view, but create problem when view size change with auto layout constrainsSerrated
It has saved me time (quick rounding of a fixed view), and cost me time (it breaks layout constraints unexpectedly). This way is causing glitches when animating the rounded view in certain cases (e.g. using animation with spring damping based).Breccia
Huge respect, Saved my hours, was missing viewWillLayoutSubviews, ThanksPitiless
U
565

I am not sure why your solution did not work but the following code is working for me. Create a bezier mask and apply it to your view. In my code below I was rounding the bottom corners of the _backgroundView with a radius of 3 pixels. self is a custom UITableViewCell:

UIBezierPath *maskPath = [UIBezierPath
    bezierPathWithRoundedRect:self.backgroundImageView.bounds
    byRoundingCorners:(UIRectCornerBottomLeft | UIRectCornerBottomRight)
    cornerRadii:CGSizeMake(20, 20)
];

CAShapeLayer *maskLayer = [CAShapeLayer layer];

maskLayer.frame = self.bounds;
maskLayer.path = maskPath.CGPath;

self.backgroundImageView.layer.mask = maskLayer;

Swift 2.0 version with some improvements:

let path = UIBezierPath(roundedRect:viewToRound.bounds, byRoundingCorners:[.TopRight, .BottomLeft], cornerRadii: CGSizeMake(20, 20))
let maskLayer = CAShapeLayer()

maskLayer.path = path.CGPath
viewToRound.layer.mask = maskLayer

Swift 3.0 version:

let path = UIBezierPath(roundedRect:viewToRound.bounds,
                        byRoundingCorners:[.topRight, .bottomLeft],
                        cornerRadii: CGSize(width: 20, height:  20))

let maskLayer = CAShapeLayer()

maskLayer.path = path.cgPath
viewToRound.layer.mask = maskLayer

Swift extension here

Unbrace answered 31/10, 2012 at 17:38 Comment(12)
try in textfield. success in left, failure in rightMatrilineal
@RainerLiao i had the same issue, i did all this on the viewDidLoad method, move it to viewDidAppear and it worked.Gide
how can I set this to work for any device. this only works fine for the simulator size int the storyboard. ex: if the simulator size is 6s it works fine for 6s, but not of others. how can I overcome this.Neotropical
Little syntax error in Swift 3 version: path.CGPath should be path.cgPathFur
@RainerLiao if you don't want it to flick as the view appears, change it to viewWillAppear instead. This also works.Casease
Please note that masks are quite CPU-consuming.Lathing
not working for bottom. i.e. bottomLeft & bottomRightKosse
don't forget to add viewToRound.layoutIfNeeded() ThanksTanguy
It's a UIView propertyUnbrace
@YunusNedimMehel this is working well But how can I use it in my view class in IBDesignable for changing the Edge corners in story board ?Senter
Glad to hear. Sadly, I don't think you can do this on IB since this is an operation on the .layer.Unbrace
You can expose IBDesignable properties on UIView subclasses who's getters and/or setters return/change properties of the view's backing layer. I keep an extension to UIView around that exposes a borderColor property that's a UIColor, for example. The getter returns the border color of the backing Layer (converted from a CGColor to a UIColor) and the setter takes a UIColor as input and sets the layer's border CGColor.Stavro
C
456

And finally… there is CACornerMask in iOS11! With CACornerMask it can be done pretty easy:

let view = UIView()
view.clipsToBounds = true
view.layer.cornerRadius = 10
view.layer.maskedCorners = [.layerMaxXMinYCorner, .layerMinXMinYCorner] // Top right corner, Top left corner respectively
Coordination answered 16/6, 2017 at 12:14 Comment(8)
this definitely works best. we always had issues with the other solutions when rounding the edges of dynamically sizing tableview cells.Principe
what will do for older version? self.layer.maskedCorners = [.layerMaxXMaxYCorner, .layerMinXMaxYCorner,.layerMaxXMinYCorner]Murrhine
@SHEBIN, try solutions from the other answers on this pageCoordination
The other answers don't work when rotating the device, this code works for rotation and allows you to round certain corners, this should be the accepted answer.Evetta
Do not needed to set "view.clipsToBounds = true". Else it can have some side-effects on Shadow(if you have applied shadows as well)Agricola
This should be the top answer. It is the most direct and relevant answer to the OP's question.Sunn
Let's get this in top placeCalabar
CACornerMask extension constants so humans can understand: gist.github.com/derekleerock/19a767c528b53ffa381a51c49f220595Hectometer
M
371

Pay attention to the fact that if you have layout constraints attached to it, you must refresh this as follows in your UIView subclass:

override func layoutSubviews() {
    super.layoutSubviews()
    roundCorners(corners: [.topLeft, .topRight], radius: 3.0)
}

If you don't do that it won't show up.


And to round corners, use the extension:

extension UIView {
   func roundCorners(corners: UIRectCorner, radius: CGFloat) {
        let path = UIBezierPath(roundedRect: bounds, byRoundingCorners: corners, cornerRadii: CGSize(width: radius, height: radius))
        let mask = CAShapeLayer()
        mask.path = path.cgPath
        layer.mask = mask
    }
}


Additional view controller case: Whether you can't or wouldn't want to subclass a view, you can still round a view. Do it from its view controller by overriding the viewWillLayoutSubviews() function, as follows:

class MyVC: UIViewController {
    /// The view to round the top-left and top-right hand corners
    let theView: UIView = {
        let v = UIView(frame: CGRect(x: 10, y: 10, width: 200, height: 200))
        v.backgroundColor = .red
        return v
    }()
    
    override func loadView() {
        super.loadView()
        view.addSubview(theView)
    }
    
    override func viewWillLayoutSubviews() {
        super.viewWillLayoutSubviews()

        // Call the roundCorners() func right there.
        theView.roundCorners(corners: [.topLeft, .topRight], radius: 30)
    }
}
Mourner answered 17/12, 2016 at 10:50 Comment(9)
You have to do this after the view has appearedSunstroke
if anyone faces the same dummy issue I did - if you're writing within ViewController, don't forget override func viewDidLayoutSubviews() { roundCorners() }Burkhalter
What if there is no subclass? Only an outlet to uiview.Astrix
In that case, you would like to override the view controller func viewWillLayoutSubviews() { super.viewWillLayoutSubviews() theView.roundCorners() }. Let me add this to the answer.Practically
I use the 1st solution but its not working properly on ipadZetana
borderColor and borderWidth not effect in ios 10 when use corner [.topLeft, .topRight]. github.com/phucdth12a/Images/blob/master/…Raceway
UIBezierPath works with fix size view, but create problem when view size change with auto layout constrainsSerrated
It has saved me time (quick rounding of a fixed view), and cost me time (it breaks layout constraints unexpectedly). This way is causing glitches when animating the rounded view in certain cases (e.g. using animation with spring damping based).Breccia
Huge respect, Saved my hours, was missing viewWillLayoutSubviews, ThanksPitiless
I
287

Here is a Swift version of @JohnnyRockex answer

extension UIView {

    func roundCorners(_ corners: UIRectCorner, radius: CGFloat) {
         let path = UIBezierPath(roundedRect: self.bounds, byRoundingCorners: corners, cornerRadii: CGSize(width: radius, height: radius))
         let mask = CAShapeLayer()
         mask.path = path.cgPath
         self.layer.mask = mask
    }

}

view.roundCorners([.topLeft, .bottomRight], radius: 10)

Note

If you're using Auto Layout, you'll need to subclass your UIView and call roundCorners in the view's layoutSubviews for optimal effect.

class View: UIView {
    override func layoutSubviews() {
        super.layoutSubviews()

        self.roundCorners([.topLeft, .bottomLeft], radius: 10)
    }
}
Isaiasisak answered 4/12, 2014 at 12:12 Comment(18)
Great extension. However: .TopRight and .BottomRight don't seem to work for me.Nisbet
When doesnt those edges work? When you use only one of those edges or both or all edges? Because I havent ran into this problem.Isaiasisak
on Swift 2: view.roundCorners([.TopLeft , .BottomLeft], radius: 10)Hade
This is a beautiful solution, but I can't seem to round any other corner but .TopLeft. Could this be due to AutoLayout or something? I don't know where to look, hehe.Agathaagathe
Can't edit my comment but I was calling the function in the wrong function. Calling it in anAgathaagathe
It's not working on the Right, because your view's bounds is not yet well defined with autolayout... I'm currently facing the same issue.Sackett
@Sackett Subclass that view and in layoutSubviews round the corners of self.Isaiasisak
just to make it clear, like what Arbitur said: override func viewDidLayoutSubviews() {viewToRound.roundCorners([.TopLeft, .TopRight], radius: BUTTON_RADIUS)}Laski
If you are in a UIView, use override func layoutSubviews() { super.layoutSubviews() // Round the bottom-left and top-right corners self.label.roundCorners([.BottomLeft, .TopRight], radius: CORNER_RADIUS) }Carswell
If you use auto layout, and have not the reference to the view want to round, you can call .layoutIfNeeded(), then this method.Vip
issue => That's work perfectly! Except that my view is resizing when Im using your function :( Any ideas??Illuminant
not working for bottom. i.e. bottomLeft & bottomRightKosse
I'm on Swift 4, use Auto-Layout, and I get a blank screen lol (view is invisible)Cufic
Calling layoutIfNeeded() did the trick. Just a note, if you want shadow on your view, shadow won't appear.Cufic
@Isaiasisak in swift 4 this is resizing the view and making it shorter. Any idea why? In override func awakeFromNib() I call self.scheduledView.roundCorners([.topLeft, .topRight], radius: 3.0) then layoutIfNeeded()Zinck
@u.gen as I've stated in my answer. Place the code inside layoutSubViews instead.Isaiasisak
awesome small solution. both topLeft and topRight are working.Ledbetter
It wont work if you are the view inside a table view. And also during screen rotation.Crusted
B
103

Swift code example here: https://mcmap.net/q/23676/-create-a-rectangle-with-just-two-rounded-corners-in-swift


Not directly. You will have to:

  1. Create a CAShapeLayer
  2. Set its path to be a CGPathRef based on view.bounds but with only two rounded corners (probably by using +[UIBezierPath bezierPathWithRoundedRect:byRoundingCorners:cornerRadii:])
  3. Set your view.layer.mask to be the CAShapeLayer
Blair answered 16/4, 2012 at 0:13 Comment(3)
Be warned this will hurt performance if you do it on more than just a couple of views...Bushmaster
@Bushmaster So what's the best way to do it without much performance loss? I want to show it in UITableViewCell.Scrouge
@Scrouge from what I remember setting layer.shouldRasterize == YES improves speed 5 times or so. But the docs say it only works if you work with non-transparent cells. Give it a shot.Ushaushant
R
68

Here is a short method implemented like this:

- (void)viewDidLoad {
    [super viewDidLoad];
    UIButton *openInMaps = [UIButton new];
    [openInMaps setFrame:CGRectMake(15, 135, 114, 70)];
    openInMaps = (UIButton *)[self roundCornersOnView:openInMaps onTopLeft:NO topRight:NO bottomLeft:YES bottomRight:NO radius:5.0];
}

- (UIView *)roundCornersOnView:(UIView *)view onTopLeft:(BOOL)tl topRight:(BOOL)tr bottomLeft:(BOOL)bl bottomRight:(BOOL)br radius:(float)radius {

    if (tl || tr || bl || br) {
        UIRectCorner corner = 0;
        if (tl) {corner = corner | UIRectCornerTopLeft;}
        if (tr) {corner = corner | UIRectCornerTopRight;}
        if (bl) {corner = corner | UIRectCornerBottomLeft;}
        if (br) {corner = corner | UIRectCornerBottomRight;}

        UIView *roundedView = view;
        UIBezierPath *maskPath = [UIBezierPath bezierPathWithRoundedRect:roundedView.bounds byRoundingCorners:corner cornerRadii:CGSizeMake(radius, radius)];
        CAShapeLayer *maskLayer = [CAShapeLayer layer];
        maskLayer.frame = roundedView.bounds;
        maskLayer.path = maskPath.CGPath;
        roundedView.layer.mask = maskLayer;
        return roundedView;
    }
    return view;
}
Rostrum answered 22/8, 2013 at 9:38 Comment(2)
What about setting color ? maskLayer.borderWidth = 10; maskLayer.borderColor = [UIColor redColor].CGColor; its not working for me sir.Bodycheck
@Bodycheck a mask doesn't have a colour, you could add a second CAShapeLayer if you want to have a borderRostrum
G
59

It can workes Swift 5.x also, follow my complete answers. In Swift 4.1 and Xcode 9.4.1

In iOS 11 this single line is enough:

detailsSubView.layer.maskedCorners = [.layerMinXMinYCorner, .layerMaxXMinYCorner]//Set your view here

See the complete code:

//In viewDidLoad
if #available(iOS 11.0, *) {
        detailsSubView.clipsToBounds = false
        detailsSubView.layer.cornerRadius = 10
        detailsSubView.layer.maskedCorners = [.layerMinXMinYCorner, .layerMaxXMinYCorner]
} else {
      //For lower versions
}

But for lower versions

let rectShape = CAShapeLayer()
    rectShape.bounds = detailsSubView.frame
    rectShape.position = detailsSubView.center
    rectShape.path = UIBezierPath(roundedRect: detailsSubView.bounds,    byRoundingCorners: [.topLeft , .topRight], cornerRadii: CGSize(width: 20, height: 20)).cgPath
    detailsSubView.layer.mask = rectShape

Complete code is.

if #available(iOS 11.0, *) {
    detailsSubView.clipsToBounds = false
    detailsSubView.layer.cornerRadius = 10
    detailsSubView.layer.maskedCorners = [.layerMinXMinYCorner, .layerMaxXMinYCorner]
} else {
    let rectShape = CAShapeLayer()
    rectShape.bounds = detailsSubView.frame
    rectShape.position = detailsSubView.center
    rectShape.path = UIBezierPath(roundedRect: detailsSubView.bounds,    byRoundingCorners: [.topLeft , .topRight], cornerRadii: CGSize(width: 20, height: 20)).cgPath
    detailsSubView.layer.mask = rectShape
}

If you are using AutoResizing in storyboard write this code in viewDidLayoutSubviews().

override func viewDidLayoutSubviews() {
    super.viewDidLayoutSubviews()

    if #available(iOS 11.0, *) {
        detailsSubView.clipsToBounds = false
        detailsSubView.layer.cornerRadius = 10
        detailsSubView.layer.maskedCorners = [.layerMinXMinYCorner, .layerMaxXMinYCorner]
    } else {
        let rectShape = CAShapeLayer()
        rectShape.bounds = detailsSubView.frame
        rectShape.position = detailsSubView.center
        rectShape.path = UIBezierPath(roundedRect: detailsSubView.bounds,    byRoundingCorners: [.topLeft , .topRight], cornerRadii: CGSize(width: 20, height: 20)).cgPath
        detailsSubView.layer.mask = rectShape
    }
}
Geraud answered 29/5, 2018 at 8:43 Comment(6)
Any solution for ios 9?Inviolate
@jay let rectShape = CAShapeLayer() rectShape.bounds = detailsSubView.frame rectShape.position = detailsSubView.center rectShape.path = UIBezierPath(roundedRect: detailsSubView.bounds, byRoundingCorners: [.topLeft , .topRight], cornerRadii: CGSize(width: 20, height: 20)).cgPath detailsSubView.layer.mask = rectShape This code can work for iOS 9Geraud
Not working for ios 9. Its there is no border on corner part.Inviolate
@jay I don't have iOS 9 os phone, but I checked in iOS 9 simulator. It's working...How & Where you checked. Can you suggest for me to check in iOS 9Geraud
i checked in simulator.. here is out put docs.google.com/document/d/…Inviolate
` detailsSubView.clipsToBounds = false` should be true right ?Uniaxial
R
40

There is a super simple way of doing it. I found it on here.

view.clipsToBounds = true
view.layer.cornerRadius = 24
view.layer.maskedCorners = [.layerMinXMinYCorner, .layerMaxXMinYCorner]

It uses the stock cornerRadius property on the CALayer of a view. You just need to define the corners. layerMinXMinYCorner is top left layerMaxXMinYCorner is top right.

Resurrect answered 30/12, 2020 at 11:49 Comment(1)
I like this answer, short and concise.Sudatorium
K
36

This would be the simplest answer:

yourView.layer.cornerRadius = 8
yourView.layer.masksToBounds = true
yourView.layer.maskedCorners = [.layerMinXMinYCorner, .layerMaxXMinYCorner]
Kiele answered 26/11, 2019 at 22:36 Comment(1)
tag that it is the solution for iOS 11 or aboveTijerina
C
30

Swift 4 Swift 5 easy way in 1 line

Usage:

//MARK:- Corner Radius of only two side of UIViews
self.roundCorners(view: yourview, corners: [.bottomLeft, .topRight], radius: 12.0)

Function:

//MARK:- Corner Radius of only two side of UIViews
func roundCorners(view :UIView, corners: UIRectCorner, radius: CGFloat){
        let path = UIBezierPath(roundedRect: view.bounds, byRoundingCorners: corners, cornerRadii: CGSize(width: radius, height: radius))
        let mask = CAShapeLayer()
        mask.path = path.cgPath
        view.layer.mask = mask
}

In Objective-C

Usage:

[self.verticalSeparatorView roundCorners:UIRectCornerTopLeft | UIRectCornerTopRight radius:10.0];

Function used in a Category (only one corner):

-(void)roundCorners: (UIRectCorner) corners radius:(CGFloat)radius {
        UIBezierPath *path = [UIBezierPath bezierPathWithRoundedRect:self.bounds byRoundingCorners:corners cornerRadii:CGSizeMake(radius, radius)];
        CAShapeLayer *mask = [[CAShapeLayer alloc] init];
        mask.path = path.CGPath;
        self.layer.mask = mask;
    }
Catullus answered 6/9, 2018 at 11:8 Comment(4)
Only remember that the corners of your view are not calculated until the viewDidLayoutSubviews is done so you should call roundCorners func inside itIntubate
first add corner radius and then add shadowCatullus
@JirsonTavera thanks for the tip mate, it was making me crazy, almost took me an hour to find your comment here!Hexameter
this solution causing shadows applied to the layer not to appearHighbrow
H
29

iOS 11 , Swift 4
And you can try this code:

if #available(iOS 11.0, *) {
   element.clipsToBounds = true
   element.layer.cornerRadius = CORNER_RADIUS
   element.layer.maskedCorners = [.layerMaxXMaxYCorner]
} else {
   // Fallback on earlier versions
}

And you can using this in table view cell.

Hotchpot answered 27/2, 2018 at 7:10 Comment(2)
that's the right answer for today's coding. bye bye to mask layer.Golightly
This must be the best answer!Jankey
R
18

My solution for rounding specific corners of UIView and UITextFiels in swift is to use

.layer.cornerRadius

and

layer.maskedCorners

of actual UIView or UITextFields.

Example:

fileprivate func inputTextFieldStyle() {
        inputTextField.layer.masksToBounds = true
        inputTextField.layer.borderWidth = 1
        inputTextField.layer.cornerRadius = 25
        inputTextField.layer.maskedCorners = [.layerMaxXMaxYCorner,.layerMaxXMinYCorner]
        inputTextField.layer.borderColor = UIColor.white.cgColor
    }

And by using

.layerMaxXMaxYCorner

and

.layerMaxXMinYCorner

, I can specify top right and bottom right corner of the UITextField to be rounded.

You can see the result here:

enter image description here

Rosalie answered 22/1, 2020 at 7:36 Comment(2)
Perfect for border and specific corners combination 🎉🎉🎉Merrell
perfect solutionSudatorium
A
17

Emma: .TopRight and .BottomRight are not working for you perhaps because the call to view.roundCorners is done BEFORE final view bounds are calculated. Note that the Bezier Path derives from the view bounds at the time it is called. For example, if auto layout will narrow the view, the round corners on the right side might be outside the view. Try to call it in viewDidLayoutSubviews, where the view's bound is final.

Anemometry answered 14/4, 2015 at 9:2 Comment(2)
Thank you. For me, what solved the issue was moving the call to the implementation given by "Arbitur" from viewDidLoad and viewWillAppear to viewDidAppear. I could do so since my control is initially set to hidden.Thrombin
You are right. It will create issue with autolayout and you have done good job.Gadroon
F
17

Try this code,

UIBezierPath *maskPath = [UIBezierPath bezierPathWithRoundedRect:view.bounds byRoundingCorners:( UIRectCornerTopLeft | UIRectCornerTopRight) cornerRadii:CGSizeMake(5.0, 5.0)];

CAShapeLayer *maskLayer = [[CAShapeLayer alloc] init];
maskLayer.frame = self.view.bounds;
maskLayer.path  = maskPath.CGPath;

view.layer.mask = maskLayer;
Forgery answered 18/9, 2015 at 9:35 Comment(0)
D
12

Swift 4

extension UIView {

    func roundTop(radius:CGFloat = 5){
        self.clipsToBounds = true
        self.layer.cornerRadius = radius
        if #available(iOS 11.0, *) {
            self.layer.maskedCorners = [.layerMaxXMinYCorner, .layerMinXMinYCorner]
        } else {
            // Fallback on earlier versions
        }
    }

    func roundBottom(radius:CGFloat = 5){
        self.clipsToBounds = true
        self.layer.cornerRadius = radius
        if #available(iOS 11.0, *) {
            self.layer.maskedCorners = [.layerMaxXMaxYCorner, .layerMinXMaxYCorner]
        } else {
            // Fallback on earlier versions
        }
    }
}
Doorbell answered 2/8, 2018 at 0:18 Comment(2)
You saved my day in my case I had to make the table view rounded for particular cellsLuciolucita
Perfect ans according my requirement. I used all the answer, nothing worked for me, but your answer helped me and solved my problem.Ploy
S
12

Simple extension

extension UIView {
    func roundCorners(corners: UIRectCorner, radius: CGFloat) {
        if #available(iOS 11, *) {
            self.clipsToBounds = true
            self.layer.cornerRadius = radius
            var masked = CACornerMask()
            if corners.contains(.topLeft) { masked.insert(.layerMinXMinYCorner) }
            if corners.contains(.topRight) { masked.insert(.layerMaxXMinYCorner) }
            if corners.contains(.bottomLeft) { masked.insert(.layerMinXMaxYCorner) }
            if corners.contains(.bottomRight) { masked.insert(.layerMaxXMaxYCorner) }
            self.layer.maskedCorners = masked
        }
        else {
            let path = UIBezierPath(roundedRect: bounds, byRoundingCorners: corners, cornerRadii: CGSize(width: radius, height: radius))
            let mask = CAShapeLayer()
            mask.path = path.cgPath
            layer.mask = mask
        }
    }
}

Usage:

view.roundCorners(corners: [.bottomLeft, .bottomRight], radius: 12)
Sacristy answered 4/6, 2020 at 6:59 Comment(0)
E
9

Use this extension, it'll cover everything.

extension UIView {

   func roundTopCorners(radius: CGFloat = 10) {
    
       self.clipsToBounds = true
       self.layer.cornerRadius = radius
       if #available(iOS 11.0, *) {
           self.layer.maskedCorners = [.layerMinXMinYCorner, .layerMaxXMinYCorner]
       } else {
           self.roundCorners(corners: [.topLeft, .topRight], radius: radius)
       }
   }

   func roundBottomCorners(radius: CGFloat = 10) {
    
       self.clipsToBounds = true
       self.layer.cornerRadius = radius
       if #available(iOS 11.0, *) {
           self.layer.maskedCorners = [.layerMinXMaxYCorner, .layerMaxXMaxYCorner]
       } else {
           self.roundCorners(corners: [.bottomLeft, .bottomRight], radius: radius)
       }
   }

   private func roundCorners(corners: UIRectCorner, radius: CGFloat) {
    
        let path = UIBezierPath(roundedRect: bounds, byRoundingCorners: corners, cornerRadii: CGSize(width: radius, height: radius))
        let mask = CAShapeLayer()
        mask.path = path.cgPath
        layer.mask = mask
    }
}

and then use it like this:-

override func viewDidAppear(_ animated: Bool) {
    super.viewDidAppear(animated)
            
    self.yourView.roundTopCorners()
}

Note:- I'll recommend you to don't put this code inside viewDidLayoutSubviews(), because whenever view updates, you'll get call inside it. So use viewDidAppear(), it'll work like a charm.

Elwandaelwee answered 12/7, 2021 at 6:14 Comment(1)
@SourabhSharma glad it helped :)Elwandaelwee
A
7

Here is best way Swift 5:

import UIKit

extension UIView {

func roundCorners(radius: CGFloat = 10, corners: UIRectCorner = .allCorners) {
        self.clipsToBounds = true
        self.layer.cornerRadius = radius
        if #available(iOS 11.0, *) {
            var arr: CACornerMask = []
            
            let allCorners: [UIRectCorner] = [.topLeft, .topRight, .bottomLeft, .bottomRight, .allCorners]
            
            for corn in allCorners {
                if(corners.contains(corn)){
                    switch corn {
                    case .topLeft:
                        arr.insert(.layerMinXMinYCorner)
                    case .topRight:
                        arr.insert(.layerMaxXMinYCorner)
                    case .bottomLeft:
                        arr.insert(.layerMinXMaxYCorner)
                    case .bottomRight:
                        arr.insert(.layerMaxXMaxYCorner)
                    case .allCorners:
                        arr.insert(.layerMinXMinYCorner)
                        arr.insert(.layerMaxXMinYCorner)
                        arr.insert(.layerMinXMaxYCorner)
                        arr.insert(.layerMaxXMaxYCorner)
                    default: break
                    }
                }
            }
            self.layer.maskedCorners = arr
        } else {
            self.roundCornersBezierPath(corners: corners, radius: radius)
        }
    }
    
    private func roundCornersBezierPath(corners: UIRectCorner, radius: CGFloat) {
        let path = UIBezierPath(roundedRect: bounds, byRoundingCorners: corners, cornerRadii: CGSize(width: radius, height: radius))
        let mask = CAShapeLayer()
        mask.path = path.cgPath
        layer.mask = mask
    }
    
}
Animism answered 22/10, 2021 at 13:38 Comment(0)
G
6

A way to do this programmatically would be to create a UIView over the top part of the UIView that has the rounded corners. Or you could hide the top underneath something.

God answered 16/4, 2012 at 2:26 Comment(1)
Its a very ugly solution :PIsaiasisak
C
6
    // Create the path (with only the top-left corner rounded)
UIBezierPath *maskPath = [UIBezierPath bezierPathWithRoundedRect:view.bounds 
                           byRoundingCorners:(UIRectCornerBottomLeft | UIRectCornerBottomRight) 
                           cornerRadii:CGSizeMake(7.0, 7.0)];

// Create the shape layer and set its path
CAShapeLayer *maskLayer = [CAShapeLayer layer];
maskLayer.frame = cell.stripBlackImnageView.bounds;
maskLayer.path = maskPath.CGPath; 
// Set the newly created shapelayer as the mask for the image view's layer
view.layer.mask = maskLayer;
Cress answered 9/1, 2015 at 7:57 Comment(0)
H
4

The easiest way would be to make a mask with a rounded corner layer.

CALayer *maskLayer = [CALayer layer];
maskLayer.frame = CGRectMake(0,0,maskWidth ,maskHeight);
maskLayer.contents = (__bridge id)[[UIImage imageNamed:@"maskImageWithRoundedCorners.png"] CGImage];

aUIView.layer.mask = maskLayer;

And don't forget to:

#import <QuartzCore/QuartzCore.h>
Henleyonthames answered 16/4, 2012 at 0:11 Comment(0)
T
4

All of the answers already given are really good and valid (especially Yunus idea of using the mask property).

However I needed something a little more complex because my layer could often change sizes which mean I needed to call that masking logic every time and this was a little bit annoying.

I used swift extensions and computed properties to build a real cornerRadii property which takes care of auto updating the mask when layer is layed out.

This was achieved using Peter Steinberg great Aspects library for swizzling.

Full code is here:

extension CALayer {
  // This will hold the keys for the runtime property associations
  private struct AssociationKey {
    static var CornerRect:Int8 = 1    // for the UIRectCorner argument
    static var CornerRadius:Int8 = 2  // for the radius argument
  }

  // new computed property on CALayer
  // You send the corners you want to round (ex. [.TopLeft, .BottomLeft])
  // and the radius at which you want the corners to be round
  var cornerRadii:(corners: UIRectCorner, radius:CGFloat) {
    get {
      let number = objc_getAssociatedObject(self, &AssociationKey.CornerRect)  as? NSNumber ?? 0
      let radius = objc_getAssociatedObject(self, &AssociationKey.CornerRadius)  as? NSNumber ?? 0
      return (corners: UIRectCorner(rawValue: number.unsignedLongValue), radius: CGFloat(radius.floatValue))
    }
    set (v) {
      let radius = v.radius
      let closure:((Void)->Void) = {
        let path = UIBezierPath(roundedRect: self.bounds, byRoundingCorners: v.corners, cornerRadii: CGSize(width: radius, height: radius))
        let mask = CAShapeLayer()
        mask.path = path.CGPath
        self.mask = mask
      }
      let block: @convention(block) Void -> Void = closure
      let objectBlock = unsafeBitCast(block, AnyObject.self)
      objc_setAssociatedObject(self, &AssociationKey.CornerRect, NSNumber(unsignedLong: v.corners.rawValue), .OBJC_ASSOCIATION_RETAIN)
      objc_setAssociatedObject(self, &AssociationKey.CornerRadius, NSNumber(float: Float(v.radius)), .OBJC_ASSOCIATION_RETAIN)
      do { try aspect_hookSelector("layoutSublayers", withOptions: .PositionAfter, usingBlock: objectBlock) }
      catch _ { }
    }
  }
}

I wrote a simple blog post explaining this.

Throng answered 19/9, 2015 at 14:10 Comment(0)
F
3

A lovely extension to reuse Yunus Nedim Mehel solution

Swift 2.3

extension UIView {
func roundCornersWithLayerMask(cornerRadii: CGFloat, corners: UIRectCorner) {
    let path = UIBezierPath(roundedRect: bounds,
                            byRoundingCorners: corners,
                            cornerRadii: CGSize(width: cornerRadii, height: cornerRadii))
    let maskLayer = CAShapeLayer()
    maskLayer.path = path.CGPath
    layer.mask = maskLayer
} }

Usage

let view = UIView()
view.roundCornersWithLayerMask(10,[.TopLeft,.TopRight])
Fons answered 2/11, 2016 at 15:19 Comment(1)
Nice clean solutionNorwich
M
3

If you're looking for an interface builder only solution there is one for iOS 11 and higher. See my answer here: https://stackoverflow.com/a/58626264

Megalocardia answered 30/10, 2019 at 13:19 Comment(0)
R
3

Use this extension for set corner round and round border with round corners

use like this :

override func viewWillLayoutSubviews() {
            super.viewWillLayoutSubviews()

         myView.roundCornersWithBorder(corners: [.topLeft, .topRight], radius: 8.0)
    
        myView.roundCorners(corners: [.topLeft, .topRight], radius: 8.0)

        }


extension UIView {
   func roundCorners(corners: UIRectCorner, radius: CGFloat) {
        let path = UIBezierPath(roundedRect: bounds, byRoundingCorners: corners, cornerRadii: CGSize(width: radius, height: radius))
        let mask = CAShapeLayer()
        mask.path = path.cgPath
        layer.mask = mask
    }
    
    func roundCornersWithBorder(corners: UIRectCorner, radius: CGFloat) {
        let maskLayer = CAShapeLayer()
        maskLayer.frame = bounds
        maskLayer.path = UIBezierPath(roundedRect: bounds, byRoundingCorners: [.topLeft, .topRight], cornerRadii: CGSize(width: radius, height: radius)).cgPath
        
        layer.mask = maskLayer
        
        // Add border
        let borderLayer = CAShapeLayer()
        borderLayer.path = maskLayer.path // Reuse the Bezier path
        borderLayer.fillColor = UIColor.clear.cgColor
        borderLayer.strokeColor = UIColor(red:3/255, green:33/255, blue:70/255, alpha: 0.15).cgColor
        borderLayer.lineWidth = 2
        borderLayer.frame = bounds
        layer.addSublayer(borderLayer)
    }
    
}
Radnorshire answered 5/10, 2021 at 11:48 Comment(0)
S
2

This is how you can set a corner radius for each corner of a button with Xamarin in C#:

var maskPath = UIBezierPath.FromRoundedRect(MyButton.Bounds, UIRectCorner.BottomLeft | UIRectCorner.BottomRight,
    new CGSize(10.0, 10.0));
var maskLayer = new CAShapeLayer
{
    Frame = MyButton.Bounds,
    Path = maskPath.CGPath
};
MyButton.Layer.Mask = maskLayer;
Spermatophyte answered 27/1, 2016 at 11:11 Comment(0)
C
2

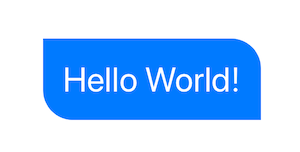
For SwiftUI

I found these solutions you can check from here https://mcmap.net/q/23505/-how-to-round-specific-corners-of-a-view

I highly recommend the first one

Option 1: Using Path + GeometryReader

(more info on GeometryReader: https://swiftui-lab.com/geometryreader-to-the-rescue/)

struct ContentView : View {
    var body: some View {

        Text("Hello World!")
            .foregroundColor(.white)
            .font(.largeTitle)
            .padding(20)
            .background(RoundedCorners(color: .blue, tl: 0, tr: 30, bl: 30, br: 0))
    }
}

give corner radius to text view using background

RoundedCorners

struct RoundedCorners: View {

    var color: Color = .white

    var tl: CGFloat = 0.0
    var tr: CGFloat = 0.0
    var bl: CGFloat = 0.0
    var br: CGFloat = 0.0

    var body: some View {
        GeometryReader { geometry in
            Path { path in

                let w = geometry.size.width
                let h = geometry.size.height

                // Make sure we do not exceed the size of the rectangle
                let tr = min(min(self.tr, h/2), w/2)
                let tl = min(min(self.tl, h/2), w/2)
                let bl = min(min(self.bl, h/2), w/2)
                let br = min(min(self.br, h/2), w/2)

                path.move(to: CGPoint(x: w / 2.0, y: 0))
                path.addLine(to: CGPoint(x: w - tr, y: 0))
                path.addArc(center: CGPoint(x: w - tr, y: tr), radius: tr, startAngle: Angle(degrees: -90), endAngle: Angle(degrees: 0), clockwise: false)
                path.addLine(to: CGPoint(x: w, y: h - be))
                path.addArc(center: CGPoint(x: w - br, y: h - br), radius: br, startAngle: Angle(degrees: 0), endAngle: Angle(degrees: 90), clockwise: false)
                path.addLine(to: CGPoint(x: bl, y: h))
                path.addArc(center: CGPoint(x: bl, y: h - bl), radius: bl, startAngle: Angle(degrees: 90), endAngle: Angle(degrees: 180), clockwise: false)
                path.addLine(to: CGPoint(x: 0, y: tl))
                path.addArc(center: CGPoint(x: tl, y: tl), radius: tl, startAngle: Angle(degrees: 180), endAngle: Angle(degrees: 270), clockwise: false)
            }
            .fill(self.color)
        }
    }
}

RoundedCorners_Previews

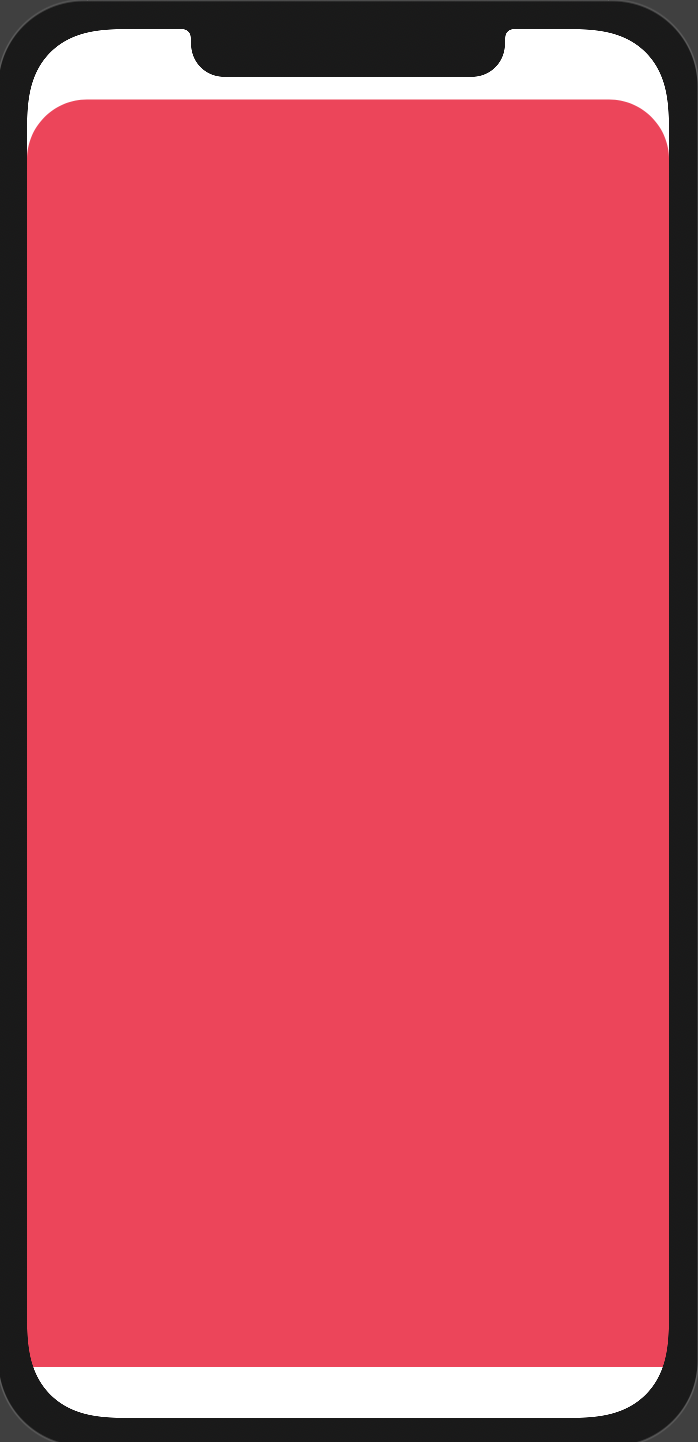
struct RoundedCorners_Previews: PreviewProvider {
    static var previews: some View {
        RoundedCorners(color: .pink, tl: 40, tr: 40, bl: 40, br: 40)
    }
}

I give the corner radius to the top of view only

Camus answered 26/10, 2020 at 23:55 Comment(1)
How to make RoundedCorners cover the bottom part and ignore the safe area ...Gynandry
D
2

Make View TopLeft and TopRight CornerRadius ONLY

lazy var footerBackgroundView: UIView = {

    let view = UIView()
    view.translatesAutoresizingMaskIntoConstraints = false
    view.backgroundColor = .blue

    //Make Corners Radius TopLeft & Top Right
    view.clipsToBounds = true
    view.layer.cornerRadius = 8
    view.layer.maskedCorners = [.layerMaxXMinYCorner, .layerMinXMinYCorner] 
    
    return view
}()
Dogoodism answered 25/10, 2022 at 8:23 Comment(0)
Y
1

After change bit of code @apinho In swift 4.3 working fine

extension UIView {
func roundCornersWithLayerMask(cornerRadii: CGFloat, corners: UIRectCorner) {
    let path = UIBezierPath(roundedRect: bounds,
                            byRoundingCorners: corners,
                            cornerRadii: CGSize(width: cornerRadii, height: cornerRadii))
    let maskLayer = CAShapeLayer()
    maskLayer.path = path.cgPath
    layer.mask = maskLayer
  }
}

To use this function for you view

YourViewName. roundCornersWithLayerMask(cornerRadii: 20,corners: [.topLeft,.topRight])
Yoga answered 8/5, 2019 at 12:46 Comment(0)
R
0

Another version of Stephane's answer.

import UIKit

    class RoundCornerView: UIView {
    var corners : UIRectCorner = [.topLeft,.topRight,.bottomLeft,.bottomRight]
        var roundCornerRadius : CGFloat = 0.0
        override func layoutSubviews() {
            super.layoutSubviews()
            if corners.rawValue > 0 && roundCornerRadius > 0.0 {
                self.roundCorners(corners: corners, radius: roundCornerRadius)
            }
        }
        private func roundCorners(corners: UIRectCorner, radius: CGFloat) {
            let path = UIBezierPath(roundedRect: bounds, byRoundingCorners: corners, cornerRadii: CGSize(width: radius, height: radius))
            let mask = CAShapeLayer()
            mask.path = path.cgPath
            layer.mask = mask
        }

    }
Romain answered 9/4, 2019 at 12:56 Comment(0)
C
0

In Swift 4.2, Create it via @IBDesignable like this:

@IBDesignable

class DesignableViewCustomCorner: UIView {

    @IBInspectable var cornerRadious: CGFloat = 0 {
        didSet {
            let path = UIBezierPath(roundedRect: self.bounds, byRoundingCorners: [.topLeft, .topRight], cornerRadii: CGSize(width: cornerRadious, height: cornerRadious))
            let mask = CAShapeLayer()
            mask.path = path.cgPath
            self.layer.mask = mask
        }
    }

}
Columbian answered 30/8, 2019 at 15:34 Comment(0)

© 2022 - 2024 — McMap. All rights reserved.