Welcome to SO, confuseman!
OpenCV is a computer vision library that works really nicely for these kinds of tasks. You can install it with pip install opencv-python. In a nutshell, here are the steps required:
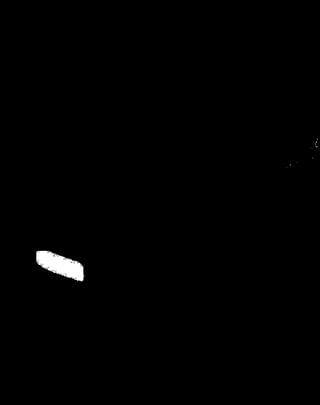
- Figure out where the black pixels are located.
![enter image description here]()
- Figure out where the largest chunk of black pixels exists, by converting them into contours then calculating their individual sizes. (notice the few black pixels hanging out in the back on the right side, highlighted in green)
![enter image description here]()
- Find the rotated rectangle that most closely matches the largest contour.
![enter image description here]()
- Resize the overlay image and rotate it. Create a pad around the overlay image so that it doesn't cut off when you rotate it.
![enter image description here]()
![right arrow]()
![enter image description here]()
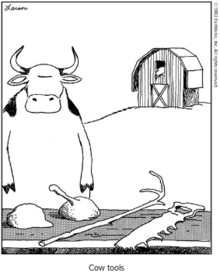
(image used is Gary Larson's "Cow Tools", I used a tall image to showcase the scaling property)
- Paste the resulting overlay image on top of the original image. Make sure to take the pad into account when calculating the position, otherwise it will go southeast of where you intended to go.
![enter image description here]()
Voila!
import cv2
import numpy as np

# Load images
img = cv2.imread('stack_car.jpg')
# Replace the overlay image with your own,
# for now I will use Gary Larson's "Cow Tools" because it showcases the
# scaling property, what a fantastic image though
overlay_img = cv2.imread('cow_tools.png', -1)

# Convert image to grayscale for easier thresholding
gray = cv2.cvtColor(img, cv2.COLOR_BGR2GRAY)

# Threshold the image
_, thresh = cv2.threshold(gray, 1, 255, cv2.THRESH_BINARY_INV)

# Show the threshold image
cv2.imshow('Threshold Image', thresh)
cv2.waitKey(0)

# Find contours
contours, _ = cv2.findContours(thresh, cv2.RETR_EXTERNAL, cv2.CHAIN_APPROX_SIMPLE)

# Draw contours on a copy of the image for visualization
img_contours = img.copy()
cv2.drawContours(img_contours, contours, -1, (0, 255, 0), 3)
cv2.imshow('Contours', img_contours)
cv2.waitKey(0)

# Find the largest chunk of black pixels
max_contour = max(contours, key=cv2.contourArea)

# Get a rotated box around the largest contour
rotated_rect = cv2.minAreaRect(max_contour)

# draw the rotated rectangle on a copy of the image for visualization
img_rotated_rect = img.copy()
box = cv2.boxPoints(rotated_rect)
box = np.int0(box)
cv2.drawContours(img_rotated_rect, [box], 0, (0, 0, 255), 2)
cv2.imshow('Rotated Rectangle', img_rotated_rect)
cv2.waitKey(0)

# Get the rotation angle, width, and height from the rotated rectangle
center, (width, height), angle = rotated_rect

# Resize the overlay image to match the rotated rectangle
overlay_img_resized = cv2.resize(overlay_img, (int(width), int(height)))

# Add some transparent padding to the image so that it doesn't get cut off when it rotates
# (I'm not sure of the best math for pad, but overshooting is better than undershooting)
pad = int(max(width, height))
overlay_img_resized = cv2.copyMakeBorder(overlay_img_resized, pad, pad, pad, pad, cv2.BORDER_CONSTANT, value=(0, 0, 0, 0))

# Rotate the image by the angle
M = cv2.getRotationMatrix2D((overlay_img_resized.shape[1] / 2, overlay_img_resized.shape[0] / 2), -angle, 1)
overlay_img_resized = cv2.warpAffine(overlay_img_resized, M, (overlay_img_resized.shape[1], overlay_img_resized.shape[0]))

# Show the resized overlay image
cv2.imshow('Resized Overlay Image', overlay_img_resized)
cv2.waitKey(0)

# Overlay the rotated and resized image onto the original image,
# make sure to take pad into account, otherwise it will drift southeast
for i in range(overlay_img_resized.shape[0]):
    for j in range(overlay_img_resized.shape[1]):
        if overlay_img_resized[i, j][3] != 0:
            img[int(center[1]-height/2)-pad+i, int(center[0]-width/2)-pad+j] = overlay_img_resized[i, j][:3]

# Show the final image
cv2.imshow('Final Image', img)
cv2.waitKey(0)
cv2.destroyAllWindows()


 Change the segmented plate (color) into my logo, how can i achieve that?


