How to turn off adjusting large titles by UITableView in iOS 11?
Asked Answered
H

3

5

There's this large titles feature in iOS 11 that shows large title when the UITableViewController's table is scrolled to top, and gets collapsed to standard small title when the user scrolls the table away from top. This is standard behavior. I need the navigation controller to behave a bit differently - I need to always show the large title. How to achieve this?

Following code does not help, it still collapses when scrolled.

navigationController?.navigationBar.prefersLargeTitles = true
navigationItem.largeTitleDisplayMode = .always
Homogenize answered 30/9, 2017 at 19:38 Comment(0)
S
4

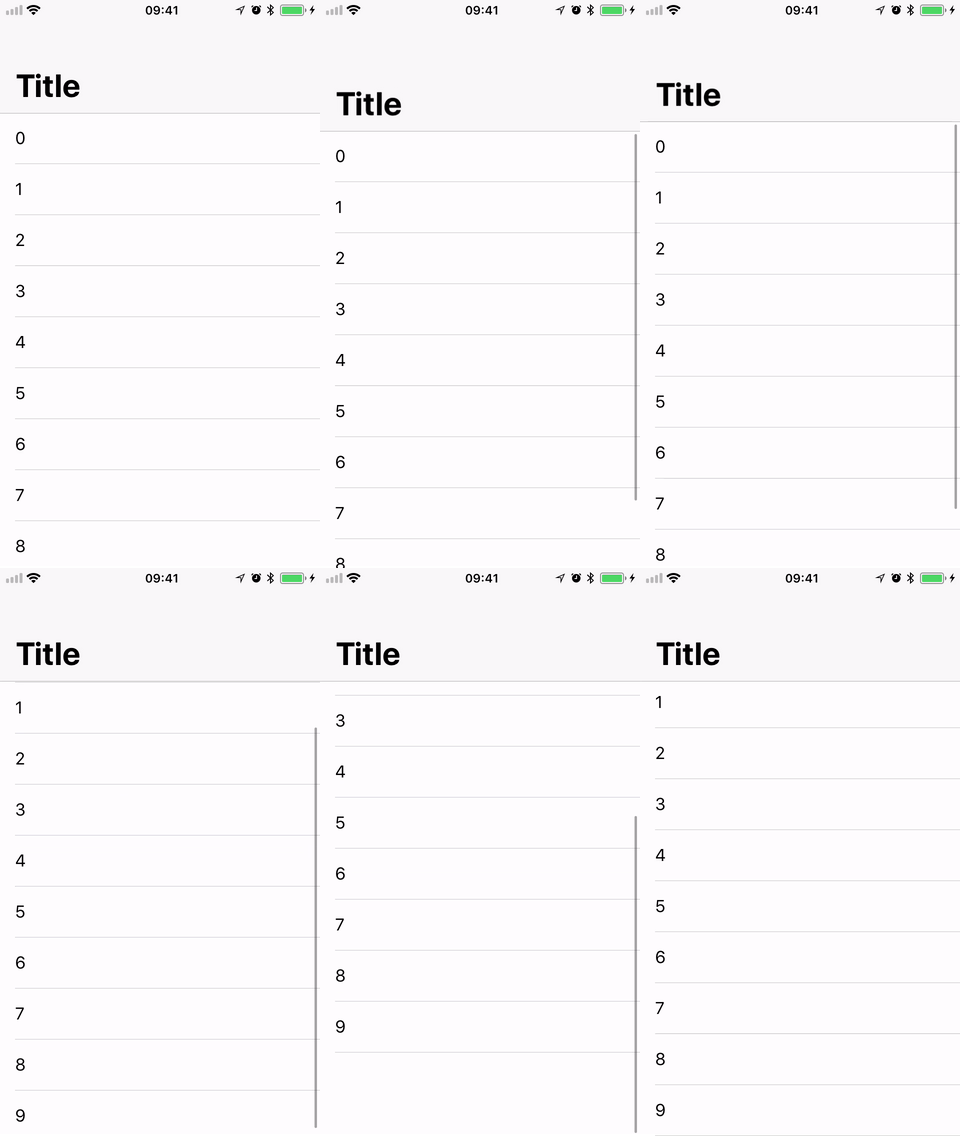
I've achieved it unintentionally when embedded UITableViewController inside UIViewController.

I'm not sure whether it is an Apple's bug or intended behavior.

So stack is as simple as UINavigationController -> UIViewController(used as container) -> UITableViewController

Here is sample of view controller with embedded UITableViewController fullscreen

class ViewController: UIViewController, UITableViewDelegate, UITableViewDataSource {

    var vc = UITableViewController(style: .plain)
    var array: [String] = []

    override func viewDidLoad() {
        super.viewDidLoad()

        vc.view.translatesAutoresizingMaskIntoConstraints = false
        view.addSubview(vc.view)
        view.addConstraint(view.leadingAnchor.constraint(equalTo: vc.view.leadingAnchor))
        view.addConstraint(view.rightAnchor.constraint(equalTo: vc.view.rightAnchor))
        view.addConstraint(view.safeAreaLayoutGuide.topAnchor.constraint(equalTo: vc.view.topAnchor))
        view.addConstraint(view.bottomAnchor.constraint(equalTo: vc.view.bottomAnchor))

        vc.tableView.delegate = self
        vc.tableView.dataSource = self

        array = "0123456789".characters.map(String.init)
        vc.tableView.register(UITableViewCell.self, forCellReuseIdentifier: "identifier")

        title = "Title"
    }

    func tableView(_ tableView: UITableView, numberOfRowsInSection section: Int) -> Int {
        return array.count
    }
    func tableView(_ tableView: UITableView, cellForRowAt indexPath: IndexPath) -> UITableViewCell {
        let cell = tableView.dequeueReusableCell(withIdentifier: "identifier", for: indexPath)
        cell.textLabel?.text = array[indexPath.row]
        return cell
    }
}

Here is the result

enter image description here

Hope it helps.

P.S. Surprisingly, my current problem is that I don't know how to get collapsing behavior with such architecture :)

Spiritualty answered 1/10, 2017 at 23:5 Comment(6)
I can help you with that, check this SO question: #46179393Rooke
but that's weird, in my code I have already embedded UITableViewController into the top UIViewController. I'm gonna try to do line by line diff with your code to find if there is something obscure thereRooke
@MilanNosáľ So, actually the post you've linked, is with answer to your problem. At least it's very similar to what you want. And thanks for the answer on my question, I'll give it a try.Spiritualty
sounds like it is, but it wasn't working.. it's like super weird behavior. In the end the embedding worked, I just had to use UIViewController with a tableView instead of UITableViewController (maybe it's UITableViewController that causes this behavior)..Rooke
moreover, I am adding some other views along with the tableView to the main view of my top viewController. one weird think that might shed a bit light on this is, that if I first add the tableView as a subview, and the other views, the tableView still controls the large title. However, when I first add other views, and only then the tableView, then it behaves as I expect. So the order of UIViews added to the top viewController matters.Rooke
please let me know if the other question/answer helped youRooke
P
1

What I did was to add another view between navigationBar and TableView with a height of 1.

let tableViewSeperator: UIView = {
    let view = UIView()
    // remove the color, so it wont be visible.
    view.backgroundColor = UIColor.systemBlue 
    view.translatesAutoresizingMaskIntoConstraints = false
    return view
 }()

One thing which is important is add this seperator view as a subview of your viewcontroller's view before tableView, otherwise it won't work

view.addSubview(tableViewSeperator)
view.addSubview(tableView)

or if you want to save one line of code, you can also do it like this.

[tableViewSeperator, tableView].forEach({view.addSubview($0)})

Then set its constraints like this.

tableViewSeperator.leadingAnchor.constraint(equalTo: view.leadingAnchor, constant: 0).isActive = true
tableViewSeperator.trailingAnchor.constraint(equalTo: view.trailingAnchor, constant: 0).isActive = true        
tableViewSeperator.topAnchor.constraint(equalTo: view.safeAreaLayoutGuide.topAnchor, constant: 0).isActive = true
tableViewSeperator.heightAnchor.constraint(equalToConstant: 1).isActive = true

The last thing is change the tableView TopAnchor to be the BottomAnchor of sperator View.

tableView.leadingAnchor.constraint(equalTo: view.leadingAnchor, constant: 0).isActive = true
tableView.trailingAnchor.constraint(equalTo: view.trailingAnchor, constant: 0).isActive = true
tableView.topAnchor.constraint(equalTo: tableViewSeperator.bottomAnchor, constant: 0).isActive = true
tableView.bottomAnchor.constraint(equalTo: createItemBtn.topAnchor, constant: 0).isActive = true

Now when you scroll the the NavigationBar will stay as Large.

Presentation answered 15/8, 2020 at 5:55 Comment(0)
R
1

You need to add UIView(it's can be width=0, height=0) before add UITableView.

example

Then this code will work

navigationController?.navigationBar.prefersLargeTitles = true
navigationItem.largeTitleDisplayMode = .always
Reproductive answered 7/7, 2022 at 9:56 Comment(0)

© 2022 - 2024 — McMap. All rights reserved.