How to add design time icon for FireMonkey component?
Asked Answered
B

1

6

I have read this article by Paweł Głowacki and I have been able to display an icon for my component. The result is the following:

enter image description here

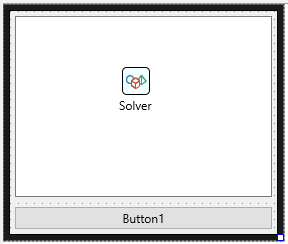
I can see the image in the Tool Palette and in the structure view. By the way in the designer I see the default icon:

enter image description here

How can I display the icon of my component in the designer as well?


I am using Delphi Tokyo 10.2 Update 2. I have followed the article I have linked to get the image shown. My component is the following:

type
  TEquationSolver = class(TComponent)
    //code...
  end;

Basically, I have done the following:

  1. I have created 3 bitmaps (16x16 24x24 32x32) and a png (128x128)
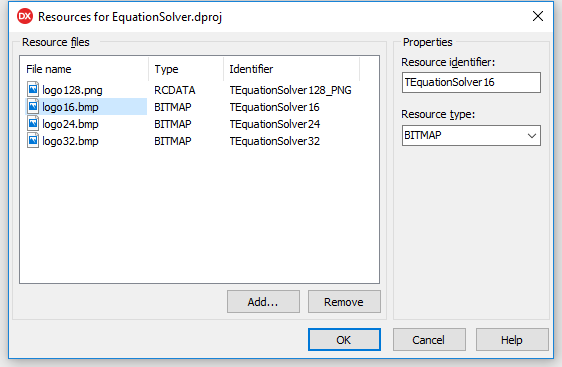
  2. I have added them as resources going into Project > Resources and Images enter image description here
  3. I have called them TEquationSolver with the suffix that indicates the size. In this way they are properly displayed on the IDE.

What am I missing for the design time part? In this article I have read the following:

Our guide is: Use PNG if you want very easy backwards compatibility, or small file (BPL) size; use bitmaps if you want fast loading. We use bitmaps for 16, 24, and 32px icons, and PNG for the 128px icons.

In fact I have 16x16, 24x24, 32x32 bitmaps and the 128px png. Is there something else?

Buckley answered 24/8, 2018 at 19:9 Comment(3)
I've modified question title as it seems you're at FireMonkey "environment" (maybe it's different there).Kook
@RemyLebeau I have found the solution. I had to upload another 32x32 and give the ID of that resource as 'TEquationSolver' without specifying the size at the end, like 'TEquationSolver32'. Now it worksBuckley
Seeing @Kook after a long time. Welcome to Delphi.Protozoan
B
6

It seems that you have to create the files I have shown above plus the image for the Designer. The latter needs to match the name of the class that inherits from TComponent (in my case):

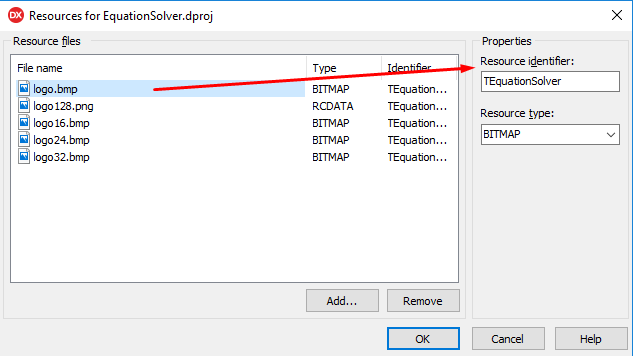
enter image description here

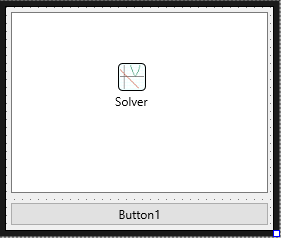
As you can see I have added another bitmap (it's the 32x32, I have just made a copy and changed the name) and I have used TEquationSolver as name. After a Build + Install I have the following result:

enter image description here


Note that I could have added only logo.bmp as resource (with the ID that matches the TComponent-derived class name) and it would have worked anyway. The problem is that the pictures won't be neat because they'll be resized and they may appear blurred, like in my case.

For this reason I think that it's good:

  1. Put an image that will appear in the form designer
  2. Put the 16x16, 24x24, 32x32 and 128x128 that will be used by the IDE

The difference is evident in my case. When I have only a single bitmap the quality of the image is low but when I provide the various sizes they look better.

Buckley answered 24/8, 2018 at 23:34 Comment(3)
The (minor) problem is the following now. In the Form Designer under firemonkey, a 32x32 is a good looking bitmap image. Under VCL, a 32x32 is blurry and opaque. Could it be an IDE problem?Buckley
The image whose resource ID matches the component class name exactly should be 24x24, not 32x32 or any other size (in which case, you don't need a separate TEquationSolver24 resource). The rest of the image resources must specify the size they represent (16x16, 32x32, 128x128, etc). The Form Designer does not have a dedicated image resource, it uses whatever image(s) are present, same as the rest of the IDE does.Substratum
@RemyLebeau thank you, now it is perfect! I have put the 24x24 as "main" bitmap with the same class name and now the image is neat. It's perfect under VCL and FMX!Buckley

© 2022 - 2024 — McMap. All rights reserved.