NSLayoutManager: How to fill background colors where there are renderable glyphs only
Asked Answered
A

2

6

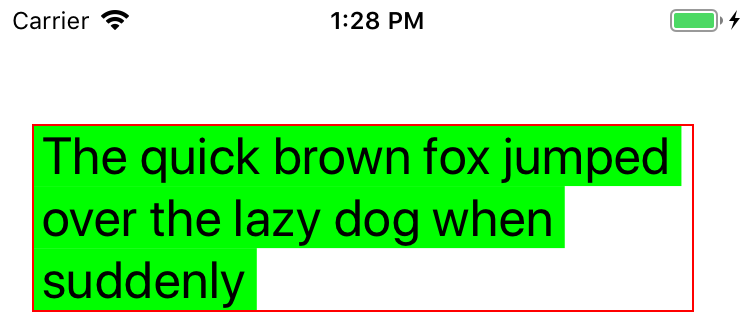
The default layout manager fills in the background color (specified via NSAttributedString .backgroundColor attribute) where there's no text (except for the last line).

enter image description here

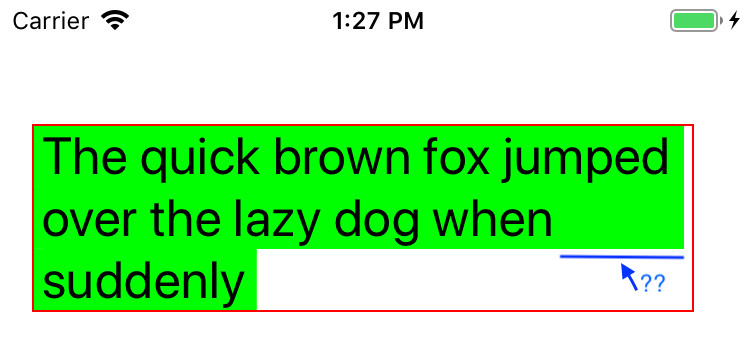
I've managed to achieve the effect I want by sublclassing NSLayoutManager and overriding func drawBackground(forGlyphRange glyphsToShow: NSRange, at origin: CGPoint) as follows:

override func drawBackground(forGlyphRange glyphsToShow: NSRange, at origin: CGPoint) {
    guard let textContainer = textContainers.first, let textStorage = textStorage else { fatalError() }

    // This just takes the color of the first character assuming the entire container has the same background color.
    // To support ranges of different colours, you'll need to draw each glyph separately, querying the attributed string for the
    // background color attribute for the range of each character.
    guard textStorage.length > 0, let backgroundColor = textStorage.attribute(.backgroundColor, at: 0, effectiveRange: nil) as? UIColor else { return }

    var lineRects = [CGRect]()

    // create an array of line rects to be drawn.
    enumerateLineFragments(forGlyphRange: glyphsToShow) { (_, usedRect, _, range, _) in
        var usedRect = usedRect
        let locationOfLastGlyphInLine = NSMaxRange(range)-1
        // Remove the space at the end of each line (except last).
        if self.isThereAWhitespace(at: locationOfLastGlyphInLine) {
            let lastGlyphInLineWidth = self.boundingRect(forGlyphRange: NSRange(location: locationOfLastGlyphInLine, length: 1), in: textContainer).width
            usedRect.size.width -= lastGlyphInLineWidth
        }
        lineRects.append(usedRect)
    }

    lineRects = adjustRectsToContainerHeight(rects: lineRects, containerHeight: textContainer.size.height)

    for (lineNumber, lineRect) in lineRects.enumerated() {
        guard let context = UIGraphicsGetCurrentContext() else { return }
        context.saveGState()
        context.setFillColor(backgroundColor.cgColor)
        context.fill(lineRect)
        context.restoreGState()
    }
}

private func isThereAWhitespace(at location: Int) -> Bool {
    return propertyForGlyph(at: location) == NSLayoutManager.GlyphProperty.elastic
}

enter image description here

However, this doesn't handle the possibility of having multiple colors specified by range in the attributed string. How might I achieve this? I've looked at fillBackgroundRectArray with little success.

Arse answered 12/11, 2018 at 13:39 Comment(3)
Have a look at this: github.com/kimikaza/TagFieldDemoPlayground/blob/master/… This way you can have different attribute keys for each color.Karlie
Koen, thanks for this, it doesn't quite work over multiple lines, howeverArse
Yeah - In the end, I moved away from using attributes, and tracked the selected ranges myself, and colored them as appropriate. But I don't have those gaps like you show (after the word when), so it may also not work in your case.Karlie
E
5

How might I achieve this?

Heres' how I reached your goal to highlight the " sit " term in different colors inside the famous Lorem ipsum... that is huge enough to test on multiple lines.

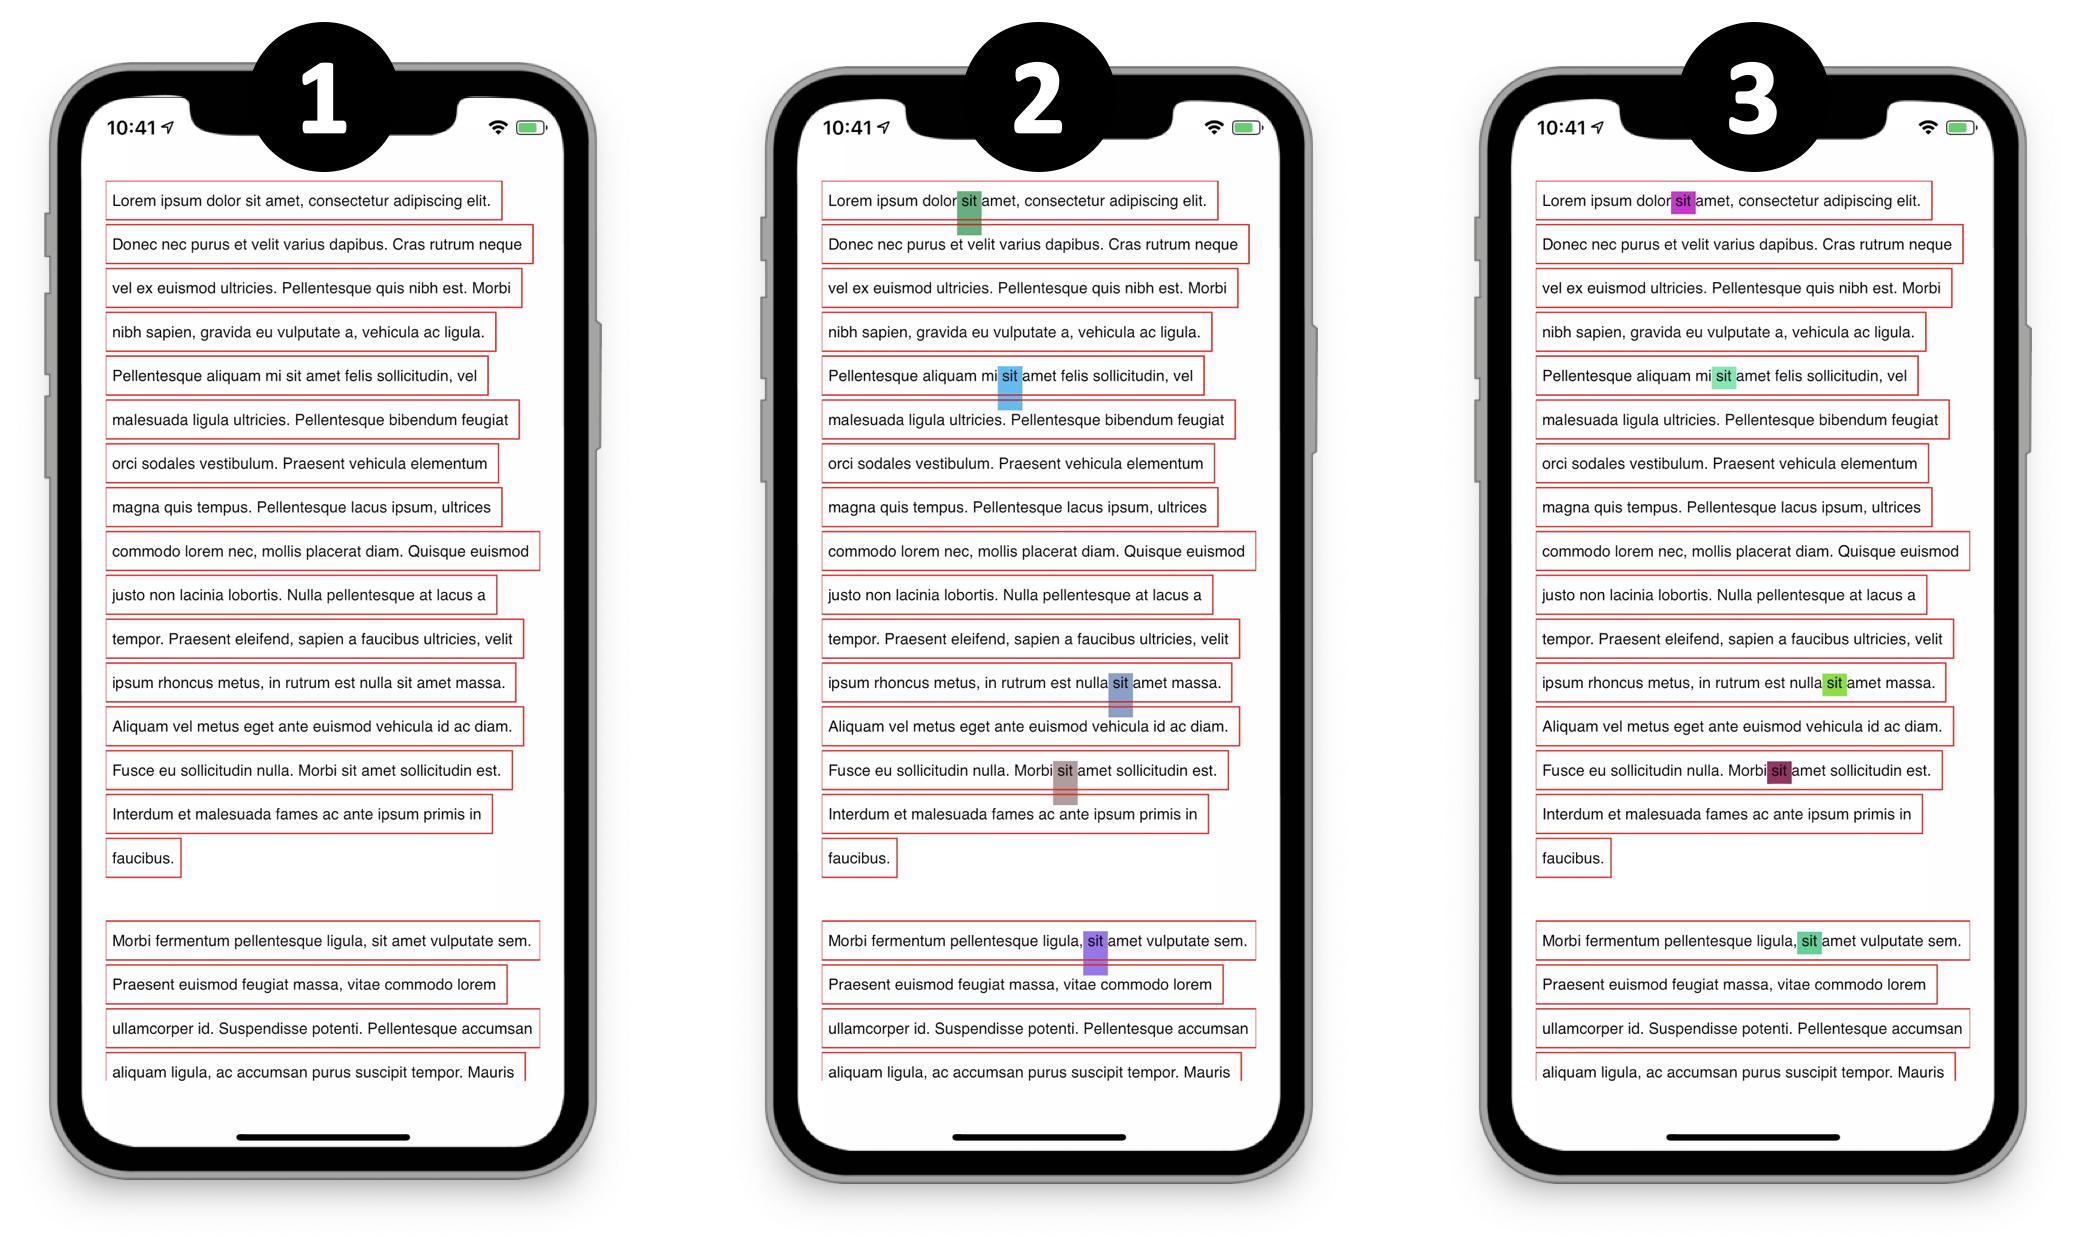
All the basics that support the following code (Swift 5.1, iOS 13) are provided in this answer and won't be copied here for clarity reason ⟹ they led to the result 1 hereafter.

enter image description here

In your case, you want to highlight some specific parts of a string which means that these elements should have dedicated key attributes due to their content ⟹ in my view, it's up to the textStorage to deal with it.

MyTextStorage.swift

// Sent when a modification appears via the 'replaceCharacters' method.
    override func processEditing() {

        var regEx: NSRegularExpression

        do {
            regEx = try NSRegularExpression.init(pattern: " sit ", options: .caseInsensitive)
            let stringLength = backingStorage.string.distance(from: backingStorage.string.startIndex,
                                                              to: backingStorage.string.endIndex)
            regEx.enumerateMatches(in: backingStorage.string,
                                   options: .reportCompletion,
                                   range: NSRange(location: 1, length: stringLength-1)) { (result, flags, stop) in

                                guard let result = result else { return }
                                self.setAttributes([NSAttributedString.Key.foregroundColor : UIColor.black, //To be seen above every colors.
                                                    NSAttributedString.Key.backgroundColor : UIColor.random()],
                                                   range: result.range)
            }
        } catch let error as NSError {
            print(error.description)
        }

        super.processEditing()
    }
}

//A random color is provided for each " sit " element to highlight the possible different colors in a string.
extension UIColor {
    static func random () -> UIColor {
        return UIColor(red: CGFloat.random(in: 0...1),
                       green: CGFloat.random(in: 0...1),
                       blue: CGFloat.random(in: 0...1),
                       alpha: 1.0)
    }
}

If you build and run from here, you get the result 2 that shows a problem with each colored background of " sit " found in the text ⟹ there's an offset between the lineFragment and the colored background rectangles. 🤔

I went and see the fillBackgroundRectArray method you mentioned and about which Apple states that it 'fills background rectangles with a color' and 'is the primitive method used by drawBackground': seems to be perfect here to correct the layout problem. 🤩

MyLayoutManager.swift

override func fillBackgroundRectArray(_ rectArray: UnsafePointer<CGRect>,
                                      count rectCount: Int,
                                      forCharacterRange charRange: NSRange,
                                      color: UIColor) {

    self.enumerateLineFragments(forGlyphRange: charRange) { (rect, usedRect, textContainer, glyphRange, stop) in

        var newRect = rectArray[0]
        newRect.origin.y = usedRect.origin.y + (usedRect.size.height / 4.0)
        newRect.size.height = usedRect.size.height / 2.0

        let currentContext = UIGraphicsGetCurrentContext()
        currentContext?.saveGState()
        currentContext?.setFillColor(color.cgColor)
        currentContext?.fill(newRect)

        currentContext?.restoreGState()
    }
}

Parameters adjustments need to be explored in depth to have a generic formula but for the example it works fine as is.

Finally, we get the result 3 that enables the possibility of having multiple colors specified by range in the attributed string once the conditions of the regular expression are adapted. 🎉🥳🎊

Exemplum answered 9/12, 2019 at 14:34 Comment(0)
K
1

Alternatively, you could bypass using the attributes at all, like this:

So first I defined this struct:

struct HighlightBackground {
    let range: NSRange
    let color: NSColor
}

Then in my NSTextView subclass:

var highlightBackgrounds = [HighlightBackground]()

override func setSelectedRanges(_ ranges: [NSValue], affinity: NSSelectionAffinity, stillSelecting stillSelectingFlag: Bool) {
    if stillSelectingFlag == false {
        return
    }

 // remove old ranges first
    highlightBackgrounds = highlightBackgrounds.filter { $0.color != .green }

    for value in ranges {
        let range = value.rangeValue

        highlightBackgrounds.append(HighlightBackground(range: range, color: .green))
    }

    super.setSelectedRanges(ranges, affinity: affinity, stillSelecting: stillSelectingFlag)
}

And then call this from your draw(_ rect: NSRect) method:

func showBackgrounds() {
    guard
        let context = NSGraphicsContext.current?.cgContext,
        let lm = self.layoutManager
    else { return }

    context.saveGState()
    //        context.translateBy(x: origin.x, y: origin.y)

    for bg in highlightBackgrounds {
        bg.color.setFill()

        let glRange = lm.glyphRange(forCharacterRange: bg.range, actualCharacterRange: nil)    
        for rect in lm.rectsForGlyphRange(glRange) {    
            let path = NSBezierPath(roundedRect: rect, xRadius: selectedTextCornerRadius, yRadius: selectedTextCornerRadius)
            path.fill()
        }
    }

    context.restoreGState()
}

Finally, you'll need this in your NSLayoutManager subclass, although you probably could also put it in the NSTextView subclass:

func rectsForGlyphRange(_ glyphsToShow: NSRange) -> [NSRect] {

    var rects = [NSRect]()
    guard
        let tc = textContainer(forGlyphAt: glyphsToShow.location, effectiveRange: nil)
    else { return rects }

    enumerateLineFragments(forGlyphRange: glyphsToShow) { _, _, _, effectiveRange, _ in
        let rect = self.boundingRect(forGlyphRange: NSIntersectionRange(glyphsToShow, effectiveRange), in: tc)
        rects.append(rect)
    }

    return rects
}

Hopefully, this works also in your case.

Karlie answered 4/1, 2019 at 20:13 Comment(0)

© 2022 - 2024 — McMap. All rights reserved.