converting images to indexed 2-bit grayscale BMP
Asked Answered
S

6

6

First of all, my question is different to How do I convert image to 2-bit per pixel? and unfortunately its solution does not work in my case...

I need to convert images to 2-bit per pixel grayscale BMP format. The sample image has the following properties:

Color Model: RGB
Depth: 4
Is Indexed: 1
Dimension: 800x600
Size: 240,070 bytes (4 bits per pixel but only last 2 bits are used to identify the gray scales as 0/1/2/3 in decimal or 0000/0001/0010/0011 in binary, plus 70 bytes BMP metadata or whatever)

sample

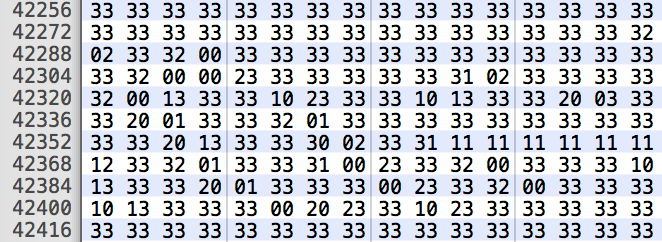
The Hex values of the beginning part of the sample BMP image: head of sample image

The 3s represent white pixels at the beginning of the image. Further down there are some 0s, 1s and 2s representing black, dark gray and light gray: mid-part of sample image

With the command below,

convert pic.png -colorspace gray +matte -depth 2 out.bmp

I can get visually correct 4-level grayscale image, but wrong depth or size per pixel:

Color Model: RGB
Depth: 8 (expect 4)
Dimension: 800x504
Size: 1,209,738 bytes (something like 3 bytes per pixel, plus metadata)
(no mention of indexed colour space)

conversion outcome

Please help...

Scooter answered 4/3, 2016 at 14:1 Comment(11)
What awful program requires you to use 2 bpp? ImageMagick does not support that. NetPBM does not support that. Wikipedia says "Typical values are 1, 4, 8, 16, 24 and 32" here en.wikipedia.org/wiki/BMP_file_formatSkyscraper
it's for e-paper display module that natively supports 4 level gray scale display. its manufacture only provides an image converter for Windows platform, but I'm a Linux/Mac user.Scooter
Maybe try running their program in VirtualBox - which is free and will allow you to run Windows on your Mac and Linux boxes. Or try wine. Can you provide a product name & link to the module manufacturer and, if it rains or I get bored, I might write a Mac/Linux version. No promises though.Skyscraper
Or, if you don't want to pollute your lovely Mac with 'Windows trash', you could run up a free Amazon E2C Windows box and install their converter on there:-)Skyscraper
By the way, you can make ImageMagick create a palettised/indexed BMP by adding -type palette to your command.Skyscraper
hi Mark, thanks for your comments. I do have Windows in a VM for certain applications, but I'm a big scripting+automation fan, and I prefer non-GUI for efficiency :-) The Windows BMP converter is 7zipped as UC-GUI-BitmapConvert.7z at waveshare.com/wiki/4.3inch_e-Paper_Software It's a single executable, which opens an existing BMP, choose convert->2bpp and saves as the desired format for the e-paper module. I've written a Python library to update the e-paper via cmdline instead of its GUI utility. Once I get over this hurdle, it'll be all-cmdline.Scooter
just tried -type palette, didn't work. still getting 3bytes per pixel.Scooter
I think I'm going to manually build the 2bpp BMP files by bytes. once I create a BMP file header following en.wikipedia.org/wiki/BMP_file_format#Bitmap_file_header , mapping the rest pixels to binary is easy.Scooter
Cool, good luck! Remember to share it back as an answer that you can then accept. Consider letting ImageMagick do the depth reduction, greyscale conversion, alpha removal, and conversion to 8-bit so that your program can be very simple... convert input.png +matte -colors 4 -depth 8 -colorspace gray pgm:- | yourProgram > 2bpp.bmp. Or, equally but with the lighter weight NetPBM pngtopam input.png | pamcolors 4 ... | yourProgram.Skyscraper
https://mcmap.net/q/319859/-writing-bmp-image-in-pure-c-c-without-other-libraries ... may provide a starting point.Skyscraper
Done. Thanks for the inspiration! :-)Scooter
S
8

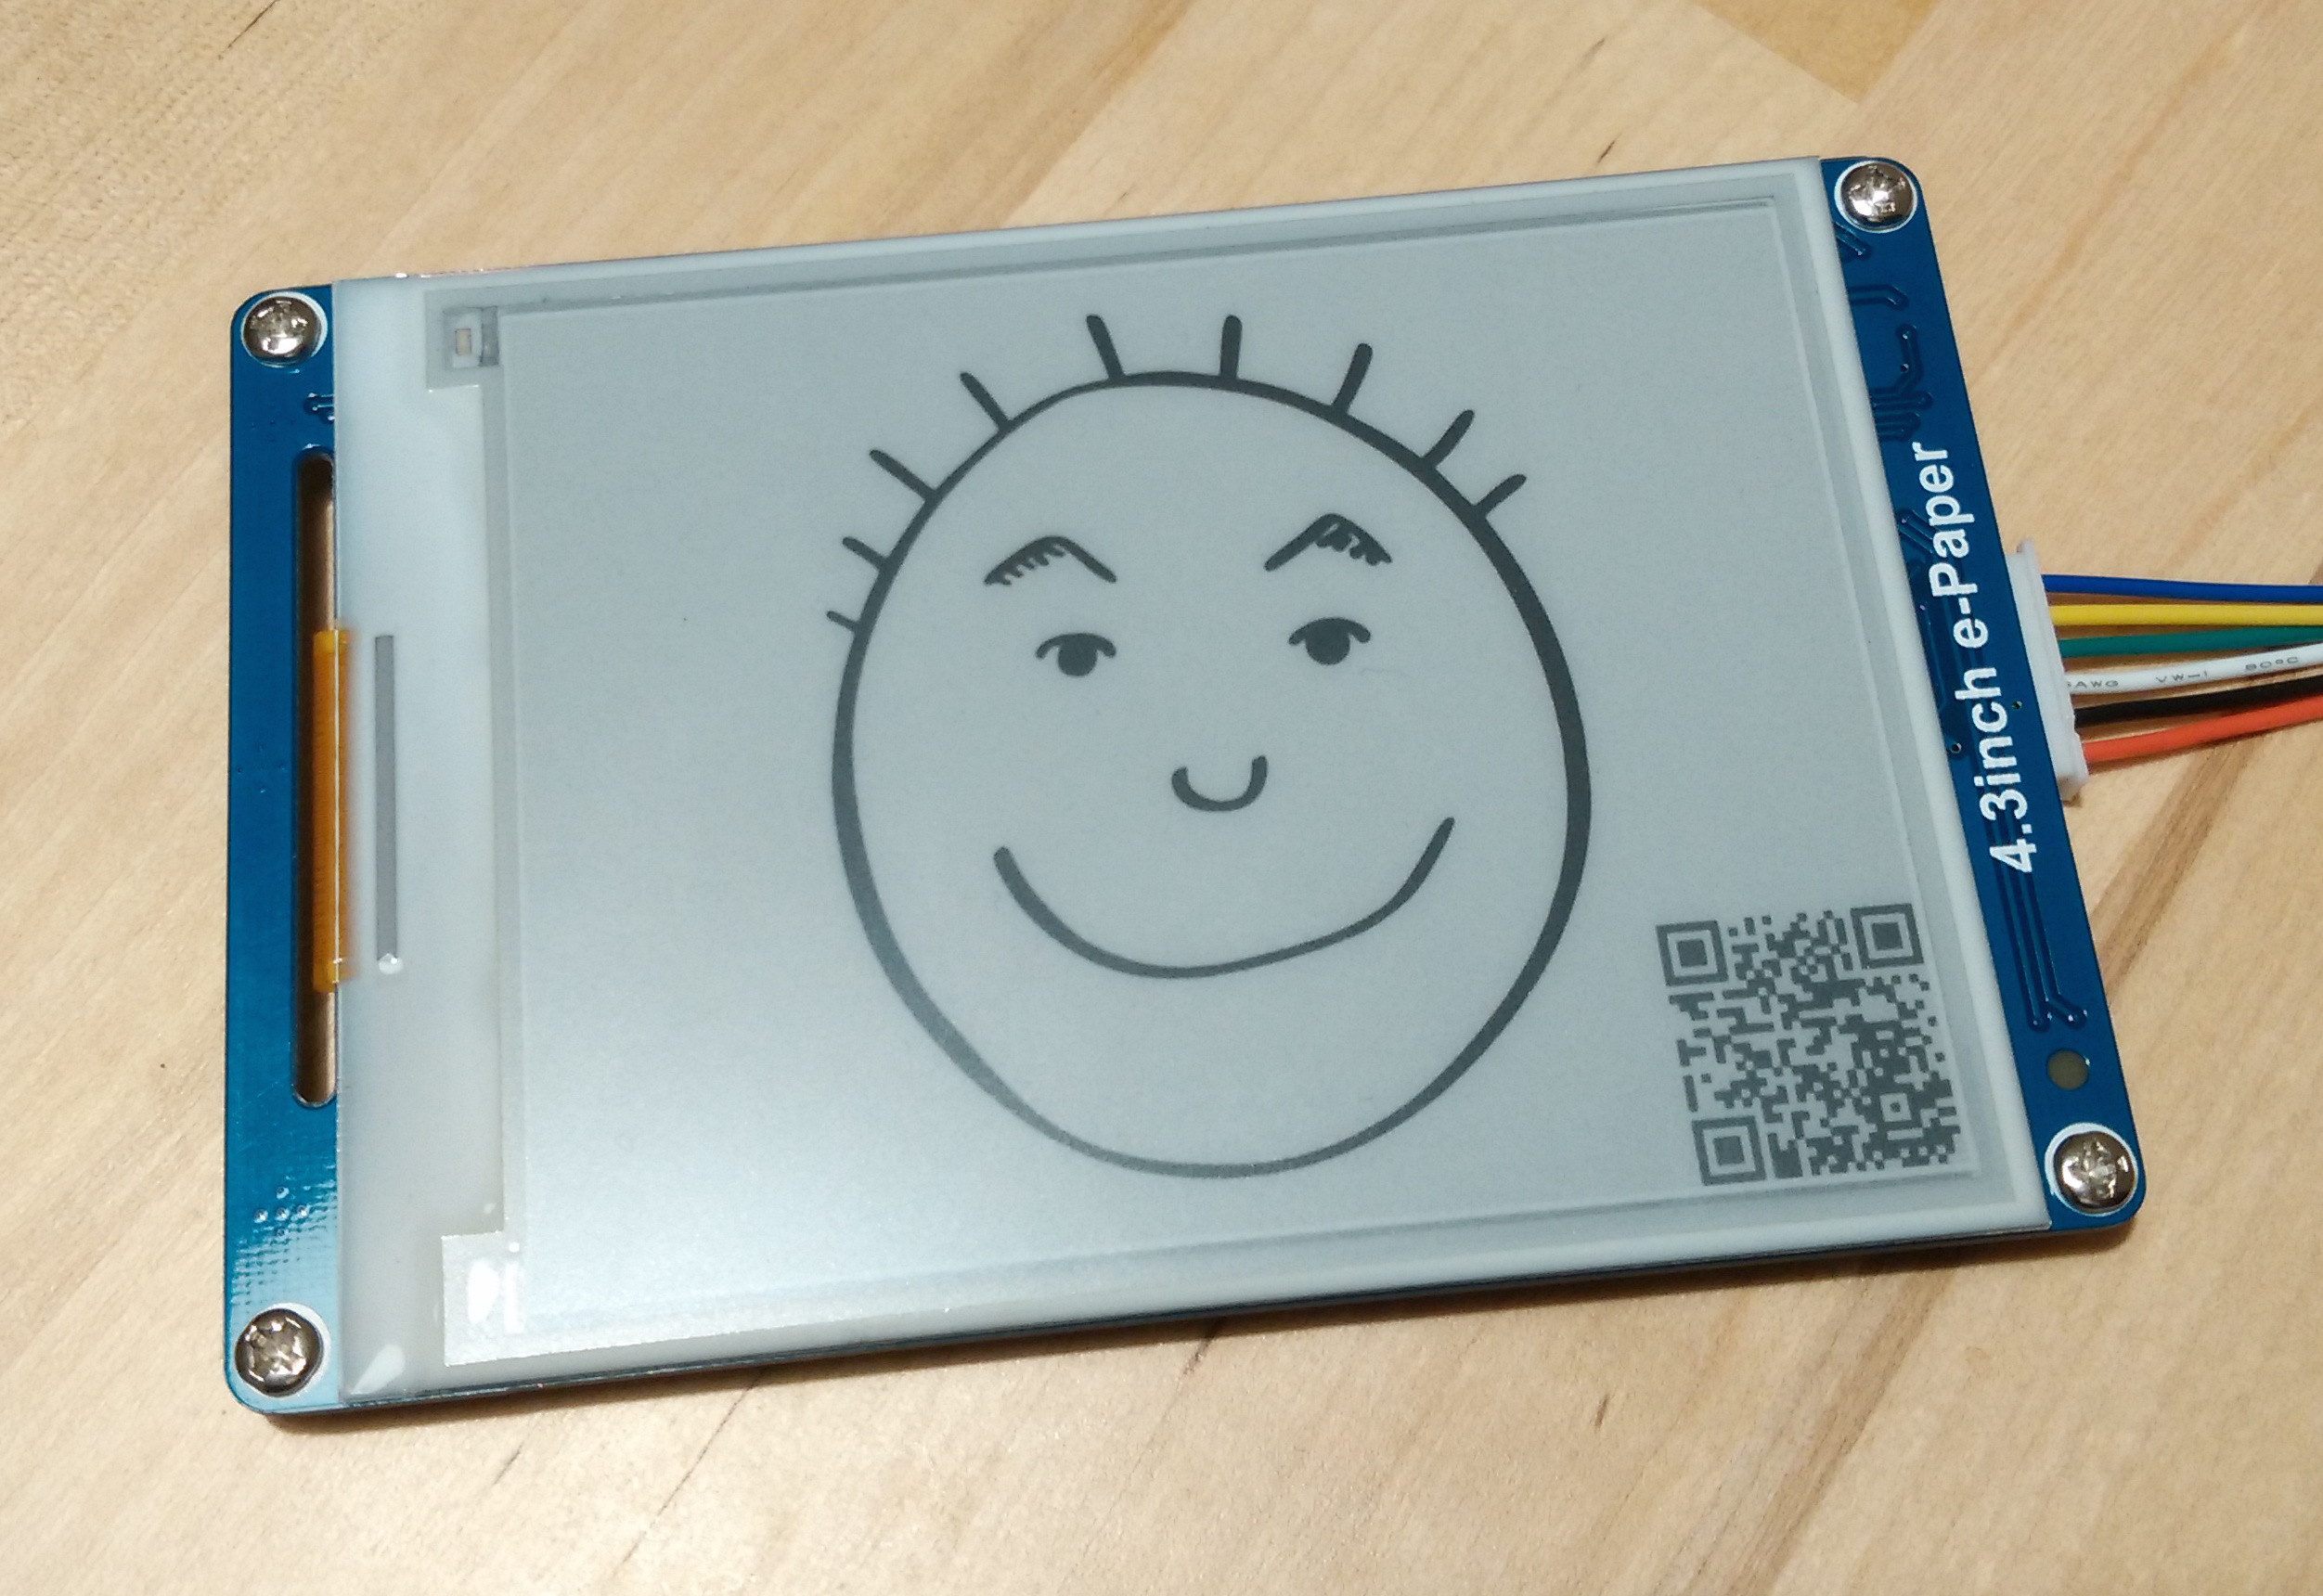
OK, I have written a Python script following Mark's hints (see comments under original question) to manually create a 4-level gray scale BMP with 4bpp. This specific BMP format construction is for the 4.3 inch e-paper display module made by WaveShare. Specs can be found here: http://www.waveshare.com/wiki/4.3inch_e-Paper

Here's how to pipe the original image to my code and save the outcome.

convert in.png -colorspace gray +matte -colors 4 -depth 2 -resize '800x600>' pgm:- | ./4_level_gray_4bpp_BMP_converter.py > out.bmp

Contents of 4_level_gray_4bpp_BMP_converter.py:

#!/usr/bin/env python

"""

### Sample BMP header structure, total = 70 bytes
### !!! little-endian !!!

Bitmap file header 14 bytes
42 4D          "BM"
C6 A9 03 00    FileSize = 240,070       <= dynamic value
00 00          Reserved
46 00 00 00    Offset = 70 = 14+56

DIB header (bitmap information header)
BITMAPV3INFOHEADER 56 bytes
28 00 00 00    Size = 40
20 03 00 00    Width = 800              <= dynamic value
58 02 00 00    Height = 600             <= dynamic value
01 00          Planes = 1
04 00          BitCount = 4
00 00 00 00    compression
00 00 00 00    SizeImage
00 00 00 00    XPerlPerMeter
00 00 00 00    YPerlPerMeter
04 00 00 00    Colours used = 4
00 00 00 00    ColorImportant
00 00 00 00    Colour definition index 0
55 55 55 00    Colour definition index 1
AA AA AA 00    Colour definition index 2
FF FF FF 00    Colour definition index 3

"""

# to insert File Size, Width and Height with hex strings in order
BMP_HEADER = "42 4D %s 00 00 00 00 46 00 00 00 28 00 00 00 %s %s 01 00 04 00 00 00 00 00 00 00 00 00 00 00 00 00 00 00 00 00 04 00 00 00 00 00 00 00 00 00 00 00 55 55 55 00 AA AA AA 00 FF FF FF 00"
BMP_HEADER_SIZE = 70
BPP = 4
BYTE = 8
ALIGNMENT = 4 # bytes per row

import sys
from re import findall

DIMENTIONS = 1
PIXELS = 3

BLACK     = "0"
DARK_GRAY = "1"
GRAY      = "2"
WHITE     = "3"

# sample data:
# ['P5\n', '610 590\n', '255\n', '<1 byte per pixel for 4 levels of gray>']
# where item 1 is always P5, item 2 is width heigh, item 3 is always 255, items 4 is pixels/colours
data = sys.stdin.readlines()

width = int(data[DIMENTIONS].strip().split(' ')[0])
height = int(data[DIMENTIONS].strip().split(' ')[1])


if not width*height == len(data[PIXELS]):
    print "Error: pixel data (%s bytes) and image size (%dx%d pixels) do not match" % (len(data[PIXELS]),width,height)
    sys.exit()

colours = [] # enumerate 4 gray levels
for p in data[PIXELS]:
    if not p in colours:
        colours.append(p)
        if len(colours) == 4:
            break

# it's possible for the converted pixels to have less than 4 gray levels

colours = sorted(colours) # sort from low to high

# map each colour to e-paper gray indexes
# creates hex string of pixels
# e.g. "0033322222110200....", which is 4 level gray with 4bpp

if len(colours) == 1: # unlikely, but let's have this case here
    pixels = data[PIXELS].replace(colours[0],BLACK)
elif len(colours) == 2: # black & white
    pixels = data[PIXELS].replace(colours[0],BLACK)\
                         .replace(colours[1],WHITE)
elif len(colours) == 3:
    pixels = data[PIXELS].replace(colours[0],DARK_GRAY)\
                         .replace(colours[1],GRAY)\
                         .replace(colours[2],WHITE)
else: # 4 grays as expected
    pixels = data[PIXELS].replace(colours[0],BLACK)\
                         .replace(colours[1],DARK_GRAY)\
                         .replace(colours[2],GRAY)\
                         .replace(colours[3],WHITE)

# BMP pixel array starts from last row to first row
# and must be aligned to 4 bytes or 8 pixels
padding = "F" * ((BYTE/BPP) * ALIGNMENT - width % ((BYTE/BPP) * ALIGNMENT))
aligned_pixels = ''.join([pixels[i:i+width]+padding for i in range(0, len(pixels), width)][::-1])

# convert hex string to represented byte values
def Hex2Bytes(hexStr):
    hexStr = ''.join(hexStr.split(" "))
    bytes = []
    for i in range(0, len(hexStr), 2):
        byte = int(hexStr[i:i+2],16)
        bytes.append(chr(byte))
    return ''.join(bytes)

# convert integer to 4-byte little endian hex string
# e.g. 800 => 0x320 => 00000320 (big-endian) =>20030000 (little-endian)
def i2LeHexStr(i):
    be_hex = ('0000000'+hex(i)[2:])[-8:]
    n = 2 # split every 2 letters
    return ''.join([be_hex[i:i+n] for i in range(0, len(be_hex), n)][::-1])

BMP_HEADER = BMP_HEADER % (i2LeHexStr(len(aligned_pixels)/(BYTE/BPP)+BMP_HEADER_SIZE),i2LeHexStr(width),i2LeHexStr(height))

sys.stdout.write(Hex2Bytes(BMP_HEADER+aligned_pixels))

Edit: everything about this e-paper display and my code to display things on it can be found here: https://github.com/yy502/ePaperDisplay

enter image description here

Scooter answered 6/3, 2016 at 23:54 Comment(2)
Well done! And thanks for sharing back with the community. Maybe add a few words with the make & model of the device so that other users find your answer when searching. Well done again!Skyscraper
Done. Thanks for the suggestion! :-)Scooter
F
1

This works for me in Imagemagick 6.9.10.23 Q16 Mac OSX Sierra

Input: enter image description here

convert logo.png -colorspace gray -depth 2 -type truecolor logo_depth8_gray_rgb.bmp

enter image description here

Adding -type truecolor converts the image to RGB, but in gray tones as per the -colorspace gray. And the depth 2 creates only 4 colors in the histogram.

identify -verbose logo_depth8_gray_rgb.bmp

Image:
  Filename: logo_depth8_gray_rgb.bmp
  Format: BMP (Microsoft Windows bitmap image)
  Class: DirectClass
  Geometry: 640x480+0+0
  Units: PixelsPerCentimeter
  Colorspace: sRGB
  Type: Grayscale
  Base type: Undefined
  Endianness: Undefined
  Depth: 8/2-bit
  Channel depth:
    red: 2-bit
    green: 2-bit
    blue: 2-bit
  Channel statistics:
    Pixels: 307200
    Red:
      min: 0  (0)
      max: 255 (1)
      mean: 228.414 (0.895742)
      standard deviation: 66.9712 (0.262632)
      kurtosis: 4.29925
      skewness: -2.38354
      entropy: 0.417933
    Green:
      min: 0  (0)
      max: 255 (1)
      mean: 228.414 (0.895742)
      standard deviation: 66.9712 (0.262632)
      kurtosis: 4.29925
      skewness: -2.38354
      entropy: 0.417933
    Blue:
      min: 0  (0)
      max: 255 (1)
      mean: 228.414 (0.895742)
      standard deviation: 66.9712 (0.262632)
      kurtosis: 4.29925
      skewness: -2.38354
      entropy: 0.417933
  Image statistics:
    Overall:
      min: 0  (0)
      max: 255 (1)
      mean: 228.414 (0.895742)
      standard deviation: 66.9712 (0.262632)
      kurtosis: 4.29928
      skewness: -2.38355
      entropy: 0.417933
  Colors: 4 <--------
  Histogram: <--------
    12730: (0,0,0) #000000 black
    24146: (85,85,85) #555555 srgb(85,85,85)
    9602: (170,170,170) #AAAAAA srgb(170,170,170)
    260722: (255,255,255) #FFFFFF white
Flautist answered 5/1, 2019 at 23:39 Comment(2)
When I try to use this on Linux I get: biBitCount = 24 and Debug: Bmp image is not a 4-color bitmap! so it does not work in my case. Could the OS make a difference? `Caracalla
What is your IM version? Can you post your input and output image?Flautist
M
0

Look at https://en.wikipedia.org/wiki/BMP_file_format#File_structure . The problem is that you do not specify a color table. According to the wikipedia-article, those are mandatory if the bit depth is less than 8 bit.

Mammillary answered 4/3, 2016 at 14:14 Comment(2)
thanks very much for your reply. you are right, the sample BMP is indexed while my result does not mention 'indexed' in the properties. I guess I need to focus on converting the original to indexed image somehow.Scooter
ok, it seems quicker if I wrote my own script to create the BMP image format that I need using raw bytes. thanks for the file structure diagram!Scooter
S
0

Well done on solving the problem. You could consider also making a personal delegate, or custom delegate, for ImageMagick to help automate the process. ImageMagick is able to delegate formats it cannot process itself to delegates, or helpers, such as your 2-bit helper ;-)

Rather than interfere with the system-wide delegates, which probably live in /etc/ImageMagick/delegates.xml, you can make your own in $HOME/.magick/delegates.xml. Yours would look something like this:

<?xml version="1.0" encoding="UTF-8"?>
<delegatemap>
  <delegate encode="epaper" command="convert &quot;%f&quot; +matte -colors 4 -depth 8 -colorspace gray pgm:- | /usr/local/bin/4_level_gray_4bpp_BMP_converter.py > out.bmp"/>
</delegatemap>

Then if you run:

identify -list delegate

you will see yours listed as a "known" helper.

This all means that you will be able to run commands like:

convert a.png epaper:

and it will do the 2-bit BMP thing automagically.

Skyscraper answered 7/3, 2016 at 10:39 Comment(3)
Cool! This brings it to the next level! I'd love to give it a go :-)Scooter
I'm going to put all the code here github.com/yy502/ePaperDisplay and tidy them up gradually.Scooter
Cool. Click share underneath your answer here on StackOverflow and it will give you a URL you can copy and paste into your GitHub repo.Skyscraper
O
0

You can just use this:

convert in.jpg -colorspace gray +matte -colors 2 -depth 1 -resize '640x384>' pgm:- > out.bmp**
Overabundance answered 21/9, 2018 at 13:52 Comment(0)
N
0

I too have this epaper display. After alot of trial and error, I was able to correctly convert the images using ImageMagick using the following command:

convert -verbose INPUT.BMP -resize 300x300 -monochrome -colorspace sRGB -colors 2 -depth 1 BMP3:OUTPUT.BMP
Natale answered 5/1, 2019 at 21:38 Comment(0)

© 2022 - 2024 — McMap. All rights reserved.