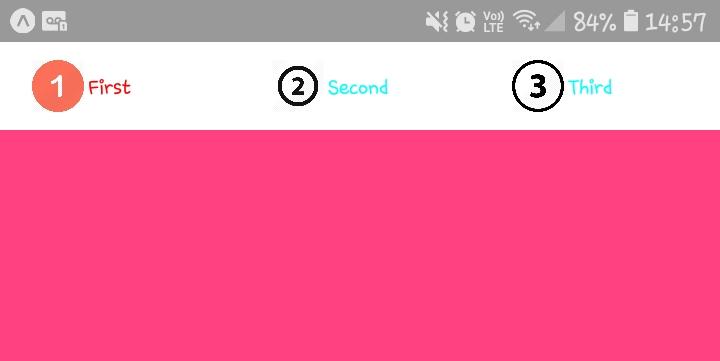
I am working with react-native-tab-view and I can just put text on tabs but I want icons. There are some answers on GitHub but they are unclear. If you know anything it would be perfect!
1. Get an imported icon library:-
import Icon from 'react-native-vector-icons/AwesomeFont'
2. Create a method for rendering the icons depending on route using props:-
const getTabBarIcon = (props) => {

    const {route} = props

      if (route.key === 'Search') {

       return <Icon name='search' size={30} color={'red'}/>

      } else {

       return <Icon name='circle' size={30} color={'red'}/>

      }
}
3. Render TabView with a rendered TabBar prop calling back to getTabBarIcon:-
export default class App extends React.Component {

    state = {
        index: 0,
        routes: [
            {key: 'Home', title: 'Hello'},
            {key: 'Search', title: 'Second'}
        ],
    }

    render() {
        return (
            <TabView
                navigationState={this.state}
                renderScene={SceneMap({
                    Home: FirstRoute,
                    Search: SearchScreen,
                })}
                onIndexChange={index => this.setState({index})}
                initialLayout={{height: 100, width: Dimensions.get('window').width}}
                renderTabBar={props =>
                    <TabBar
                        {...props}
                        indicatorStyle={{backgroundColor: 'red'}}
                        renderIcon={
                            props => getTabBarIcon(props)
                        }
                        tabStyle={styles.bubble}
                        labelStyle={styles.noLabel}
                    />
                }
                tabBarPosition={'bottom'}
            />
        );
    }
}
4. You can style the TabBar with anything (here the label is hidden to use icon only tabs)
const styles = StyleSheet.create({
    scene: {
        flex: 1,
    },
    noLabel: {
        display: 'none',
        height: 0
    },
    bubble: {
        backgroundColor: 'lime',
        paddingHorizontal: 18,
        paddingVertical: 12,
        borderRadius: 10
    },
})
You have to override renderHeader method and define in TabBar your own render label method:
  renderHeader = (props) => (
      <TabBar
        style={styles.tabBar}
        {...props}
        renderLabel={({ route, focused }) => (
          <View style={styles.tabBarTitleContainer}>
               /* HERE ADD IMAGE / ICON */
          </View>
        )}
        renderIndicator={this.renderIndicator}
      />
  );
I had the same problem. I solved it as follows by creating a "_renderTabBar" function and passing as props to the renderTabBar method of the TabView component and in this function I put the component "image" as my icon, I hope it helps.
_renderTabBar = props => {
const inputRange = props.navigationState.routes.map((x, i) => i);

return (
  <View style={styles.tabBar}>
    {props.navigationState.routes.map((route, i) => {
      const color = props.position.interpolate({
        inputRange,
        outputRange: inputRange.map(
          inputIndex => (inputIndex === i ? 'red' : 'cyan')
        ),
      });
        return (
        <TouchableOpacity
          style={[styles.tabItem, {backgroundColor: '#FFF' }]}
          onPress={() => this.setState({ index: i })}>
          <Image
      style={styles.iconTab}
      source={{uri: 'https://www.gstatic.com/images/branding/product/2x/google_plus_48dp.png'}}
    />
          <Animated.Text style={{ color }}>{route.title}</Animated.Text>

        </TouchableOpacity>

      );
    })}
  </View>
);
};
Here you render
render() {
return (
  <TabView
    navigationState={this.state}
    renderScene={this._renderScene}
    renderTabBar={this._renderTabBar}
    onIndexChange={index => this.setState({ index })}
  />
);
Code complete: https://snack.expo.io/@brunoaraujo/react-native-tab-view-custom-tabbar
You could pass the icons name in the routes array and directly use it as well
const renderScene = SceneMap({
 first: Gallery,
 second: Camera
})

export default function App() {
 const layout = useWindowDimensions();

 const [index, setIndex] = useState(0);
 const [routes] = useState([
  { key: "first", icon:"camera" },
  { key: "second", icon:"view-gallery"}
 ]);


return (
 <>
  <StatusBar />
  <TabView
    navigationState={{ index, routes }}
    renderScene={renderScene}
    onIndexChange={setIndex}
    initialLayout={{ width: layout.width }}
    renderTabBar={ props => (
      <TabBar {...props}
      renderIcon={ routes => (
        <Icon name={routes?.route?.icon} size={30} color="#fff" />
      ) }
      />
    ) }
  />
</>
);
}
© 2022 - 2024 — McMap. All rights reserved.


