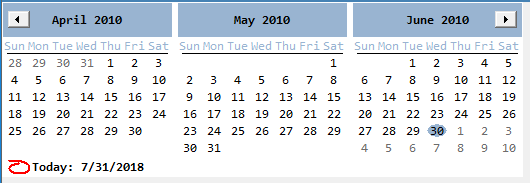
I discovered that manipulating the MonthCalendar to "scroll" to the desired range needs to occur After the MonthCalendar is self-aware.
After the MonthCalendar is self-aware (after your program is done initializing and displaying it, if you execute MyMonthCalendar.SetSelectionRange(startDate,endDate) you can scroll the calendar by making the startDate outside of the currently displayed months. For example, if I am displaying 8 months as 2 columns by 4 rows, then MyMonthCalendar.SetSelectionRange(DateTime.Now.AddMonths(+6),DateTime.Now.AddMonths(+6)); will scroll the MonthCalendar to show DateTime.Now in the Month[col1,row[0]] (top row, right column).
The catch is that the MonthCalendar.SetSelectionRange() does not take affect until AFTER the MonthCalendar is displayed and can "scroll" After it has exited its initialization thread. This is why the Timer method described by others works.
I don't know about earlier .NET versions, but in .NET 4.6, you don't need to modify MinDate or MaxDate to scroll the MonthCalendar.
Instead of using a Timer component and event, I suggest trying the MonthCalendar.Layout event.
public MyForm()
{
  // Standard design time component initialization
  InitializeComponent();

  // enable the MonthCalendar's Layout event handler
  this.MyMonthCalendar.Layout += MyMonthCalendar_Layout;
}

/// MonthCalendar Layout Event Handler
private void MyMonthCalendar_Layout;(object sender, LayoutEventArgs e)
{
  // disable this event handler because we only need to do it one time
  this.MyMonthCalendar.Layout -= MyMonthCalendar_Layout;

  // initialize the MonthCalendar so its months are aligned like we want them to be
  // To show a calendar with only April, May, and June 2010 do this
  this.MyMonthCalendar.SetSelectionRange(new DateTime(2010, 4, 1), new DateTime(2010, 6, 30));

  // MyMonthCalendar.TodayDate can be any date you want
  // However, MyMonthCalendar.SetDate should be within the SelectionRange or you might scroll the calendar
  this.MyMonthCalendar.SetDate(new DateTime(2010, 6, 30));
}
![enter image description here]()

