How to work with progress indicator in flutter?
Asked Answered
K

15

141

I'm newbie in flutter and wanted to know what is better way to add CircularProgressIndicator in my layout. For example, my login view. This view have username, password and login Button. I did want create a overlay layout (with Opacity) that, when loading, show progress indicator like I use in NativeScript, but I'm little confused with how to do and too if it is the better way. On NativeScript, for example, I add IndicatorActivity in main layout and set busy to true or false, so it overlay all view components when is loading.

Edit:

I was able to reach this result:

void main() {
  runApp(new MyApp());
}

class MyApp extends StatelessWidget {
  // This widget is the root of your application.
  @override
  Widget build(BuildContext context) {
    return new MaterialApp(
      title: 'Flutter Demo',
      theme: new ThemeData(
        primarySwatch: Colors.blue,
      ),
      home: new MyHomePage(title: 'Flutter Demo Home Page'),
    );
  }
}

class MyHomePage extends StatefulWidget {
  MyHomePage({Key key, this.title}) : super(key: key);

  final String title;

  @override
  _MyHomePageState createState() => new _MyHomePageState();
}

class _MyHomePageState extends State<MyHomePage> {
  bool _loading = false;

  void _onLoading() {
    setState(() {
      _loading = true;
      new Future.delayed(new Duration(seconds: 3), _login);
    });
  }


  Future _login() async{
    setState((){
      _loading = false;
    });
  }

  @override
  Widget build(BuildContext context) {


      var body = new Column(
          children: <Widget>[
            new Container(
              height: 40.0,
              padding: const EdgeInsets.all(10.0),
              margin: const EdgeInsets.fromLTRB(15.0, 150.0, 15.0, 0.0),
              decoration: new BoxDecoration(
                color: Colors.white,
              ),
              child: new TextField(
                decoration: new InputDecoration.collapsed(hintText: "username"),
              ),
            ),
            new Container(
              height: 40.0,
              padding: const EdgeInsets.all(10.0),
              margin: const EdgeInsets.all(15.0),
              decoration: new BoxDecoration(
                color: Colors.white,
              ),
              child: new TextField(
                decoration: new InputDecoration.collapsed(hintText: "password"),
              ),
            ),
          ],
        );


      var bodyProgress = new Container(
        child: new Stack(
          children: <Widget>[
            body,
            new Container(
              alignment: AlignmentDirectional.center,
              decoration: new BoxDecoration(
                color: Colors.white70,
              ),
              child: new Container(
                decoration: new BoxDecoration(
                  color: Colors.blue[200],
                  borderRadius: new BorderRadius.circular(10.0)
                ),
                width: 300.0,
                height: 200.0,
                alignment: AlignmentDirectional.center,
                child: new Column(
                  crossAxisAlignment: CrossAxisAlignment.center,
                  mainAxisAlignment: MainAxisAlignment.center,
                  children: <Widget>[
                    new Center(
                      child: new SizedBox(
                        height: 50.0,
                        width: 50.0,
                        child: new CircularProgressIndicator(
                          value: null,
                          strokeWidth: 7.0,
                        ),
                      ),
                    ),
                    new Container(
                      margin: const EdgeInsets.only(top: 25.0),
                      child: new Center(
                        child: new Text(
                          "loading.. wait...",
                          style: new TextStyle(
                            color: Colors.white
                          ),
                        ),
                      ),
                    ),
                  ],
                ),
              ),
            ),
          ],
        ),
      );

      return new Scaffold(
        appBar: new AppBar(
          title: new Text(widget.title),
        ),
        body: new Container(
          decoration: new BoxDecoration(
            color: Colors.blue[200]
          ),
          child: _loading ? bodyProgress : body
        ),
        floatingActionButton: new FloatingActionButton(
          onPressed: _onLoading,
          tooltip: 'Loading',
          child: new Icon(Icons.check),
        ),
      );
  }
}

app screen result

I'm still adapting to the idea of ​​states. This code is within the expected when working with flutter?

Kaminski answered 1/11, 2017 at 23:12 Comment(1)
how to disable backpressed while dialog is showing ?Annates
R
133

In flutter, there are a few ways to deal with Asynchronous actions.

A lazy way to do it can be using a modal. Which will block the user input, thus preventing any unwanted actions. This would require very little change to your code. Just modifying your _onLoading to something like this :

void _onLoading() {
  showDialog(
    context: context,
    barrierDismissible: false,
    builder: (BuildContext context) {
      return Dialog(
        child: new Row(
          mainAxisSize: MainAxisSize.min,
          children: [
            new CircularProgressIndicator(),
            new Text("Loading"),
          ],
        ),
      );
    },
  );
  new Future.delayed(new Duration(seconds: 3), () {
    Navigator.pop(context); //pop dialog
    _login();
  });
}

The most ideal way to do it is using FutureBuilder and a stateful widget. Which is what you started. The trick is that, instead of having a boolean loading = false in your state, you can directly use a Future<MyUser> user

And then pass it as argument to FutureBuilder, which will give you some info such as "hasData" or the instance of MyUser when completed.

This would lead to something like this :

@immutable
class MyUser {
  final String name;

  MyUser(this.name);
}

class MyApp extends StatelessWidget {
  // This widget is the root of your application.
  @override
  Widget build(BuildContext context) {
    return new MaterialApp(
      title: 'Flutter Demo',
      home: new MyHomePage(title: 'Flutter Demo Home Page'),
    );
  }
}

class MyHomePage extends StatefulWidget {
  MyHomePage({Key key, this.title}) : super(key: key);

  final String title;

  @override
  _MyHomePageState createState() => new _MyHomePageState();
}

class _MyHomePageState extends State<MyHomePage> {
  Future<MyUser> user;

  void _logIn() {
    setState(() {
      user = new Future.delayed(const Duration(seconds: 3), () {
        return new MyUser("Toto");
      });
    });
  }

  Widget _buildForm(AsyncSnapshot<MyUser> snapshot) {
    var floatBtn = new RaisedButton(
      onPressed:
          snapshot.connectionState == ConnectionState.none ? _logIn : null,
      child: new Icon(Icons.save),
    );
    var action =
        snapshot.connectionState != ConnectionState.none && !snapshot.hasData
            ? new Stack(
                alignment: FractionalOffset.center,
                children: <Widget>[
                  floatBtn,
                  new CircularProgressIndicator(
                    backgroundColor: Colors.red,
                  ),
                ],
              )
            : floatBtn;

    return new ListView(
      padding: const EdgeInsets.all(15.0),
        children: <Widget>[
          new ListTile(
            title: new TextField(),
          ),
          new ListTile(
            title: new TextField(obscureText: true),
          ),
          new Center(child: action)
        ],
    );
  }

  @override
  Widget build(BuildContext context) {
    return new FutureBuilder(
      future: user,
      builder: (context, AsyncSnapshot<MyUser> snapshot) {
        if (snapshot.hasData) {
          return new Scaffold(
            appBar: new AppBar(
              title: new Text("Hello ${snapshot.data.name}"),
            ),
          );
        } else {
          return new Scaffold(
            appBar: new AppBar(
              title: new Text("Connection"),
            ),
            body: _buildForm(snapshot),
          );
        }
      },
    );
  }
}
Replacement answered 2/11, 2017 at 12:40 Comment(13)
Cool, both examples will be useful on login and other situations. Handler progress with dialog looks better than my version and FutureBuilder It's more elegant than my solution too. thanks for help!Kaminski
a question off topic.. to each TextField I need a TextEditingController unique?Kaminski
@RicardoBocchi YesForestall
I do not think the Dialog will work with actual example, it is confusing how will the user be redirected after the _login() is returned. Your second example though seems way more convenient. Well baked.Forestall
Well, the Dialog is functional and requires very little modification to his original code. He could for example follow the dialog close with a Navigator.pushNamed("/home").Tidewaiter
FutureBuilder is great, but it's usually even better to split your app in different views. I'd rather go for the Dialog option for Authentification then FutureBuilder. I putted it here mostly because it's a "Good to know" which the author was somehow trying to achieve.Tidewaiter
Works both ways. With Dialog, after login successful I called Navigator.pop(context) to close dialog and Navigator.pushNamed(context, "/home"); to go to new page.. and work fine. Using dialog the code is simplified.Kaminski
@RicardoBocchi you can use Navigator.pushReplacementNamed(context)Niela
@RémiRousselet Could you please help me with the following question: #57063725Danyluk
What a hero! Thanks for this answer!Locomotion
How can i use the dialog but make the background transparent so user doesn't see the dialog?Bohemia
@RémiRousselet can you suggest any jumping colorful dots library with API calling in flutter.Legerdemain
will freeze if process to heavyEmmen
F
57

For me, one neat way to do this is to show a SnackBar at the bottom while the Signing-In process is taken place, this is a an example of what I mean:

enter image description here

Here is how to setup the SnackBar.

Define a global key for your Scaffold

final GlobalKey<ScaffoldState> _scaffoldKey = new GlobalKey<ScaffoldState>();

Add it to your Scaffold key attribute

return new Scaffold(
      key: _scaffoldKey,
.......

My SignIn button onPressed callback:

onPressed: () {
                  _scaffoldKey.currentState.showSnackBar(
                      new SnackBar(duration: new Duration(seconds: 4), content:
                      new Row(
                        children: <Widget>[
                          new CircularProgressIndicator(),
                          new Text("  Signing-In...")
                        ],
                      ),
                      ));
                  _handleSignIn()
                      .whenComplete(() =>
                      Navigator.of(context).pushNamed("/Home")
                  );
                }

It really depends on how you want to build your layout, and I am not sure what you have in mind.

Edit

You probably want it this way, I have used a Stack to achieve this result and just show or hide my indicator based on onPressed

enter image description here

class TestSignInView extends StatefulWidget {
  @override
  _TestSignInViewState createState() => new _TestSignInViewState();
}


class _TestSignInViewState extends State<TestSignInView> {
  bool _load = false;
  @override
  Widget build(BuildContext context) {
    Widget loadingIndicator =_load? new Container(
      color: Colors.grey[300],
      width: 70.0,
      height: 70.0,
      child: new Padding(padding: const EdgeInsets.all(5.0),child: new Center(child: new CircularProgressIndicator())),
    ):new Container();
    return new Scaffold(
      backgroundColor: Colors.white,
      body:  new Stack(children: <Widget>[new Padding(
        padding: const EdgeInsets.symmetric(vertical: 50.0, horizontal: 20.0),
        child: new ListView(

          children: <Widget>[
            new Column(
              mainAxisAlignment: MainAxisAlignment.center,
              crossAxisAlignment: CrossAxisAlignment.center
              ,children: <Widget>[
            new TextField(),
            new TextField(),

            new FlatButton(color:Colors.blue,child: new Text('Sign In'),
                onPressed: () {
              setState((){
                _load=true;
              });

                  //Navigator.of(context).push(new MaterialPageRoute(builder: (_)=>new HomeTest()));
                }
            ),

            ],),],
        ),),
        new Align(child: loadingIndicator,alignment: FractionalOffset.center,),

      ],));
  }

}
Forestall answered 2/11, 2017 at 0:43 Comment(9)
Hi, that's what I wanted to do, but I was not getting the layout I needed. Stack is the answer. About StatefulWidget, is it correct build all view when progress state change?Kaminski
Hey, I do not understand your question?Forestall
In my code, when _loading change, all views are rebuild. Is that so?Kaminski
Yes, the whole tree is re-built each time setState is calledForestall
I have just seen your edit on the post, do not worry about changing the state as long as you are not doing heavy rendering.Forestall
Using a modal is probably much easier and more intuitive at the same time. You can just push a loading dialog at the beggining or your request, and pop it when finished. It also has the advantage of preventing further user input.Tidewaiter
@Darky I have actually started with this idea, but never got it to work with a Dialog, if you achieved this maybe you can share your code with us. I managed to sign in and show the dialoge, but the actual navigation never happened just until I had to manually close the dialoge, I am not sure how to force the dialog to pop itself.Forestall
Okey, let me bake something.Tidewaiter
dont do this peopleFrancis
O
48

Create a bool isLoading and set it to false. With the help of ternary operator, When user clicks on login button set state of isLoading to true. You will get circular loading indicator in place of login button

 isLoading ? new PrimaryButton(
                      key: new Key('login'),
                      text: 'Login',
                      height: 44.0,
                      onPressed: setState((){isLoading = true;}))
                  : Center(
                      child: CircularProgressIndicator(),
                    ),

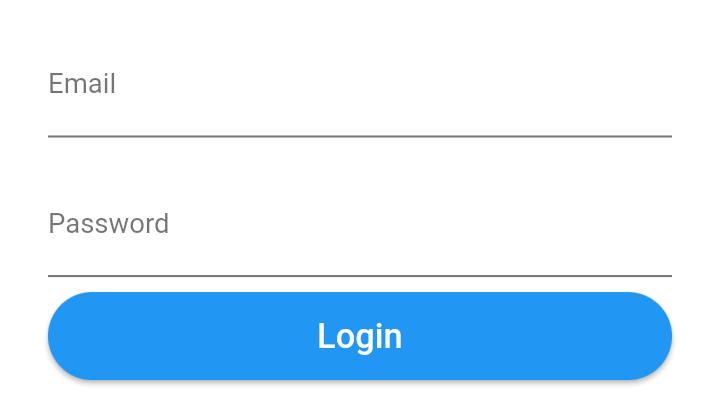
You can see Screenshots how it looks while before login is clicked enter image description here

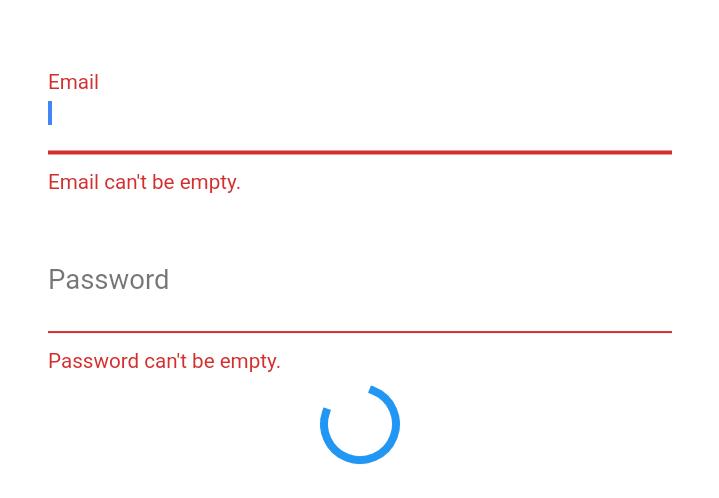
After login is clicked enter image description here

In mean time you can run login process and login user. If user credentials are wrong then again you will setState of isLoading to false, such that loading indicator will become invisible and login button visible to user. By the way, primaryButton used in code is my custom button. You can do same with OnPressed in button.

Oosperm answered 27/11, 2018 at 9:57 Comment(9)
That's actually pretty smart! No need to handle double click etc. Thanks.Diffusive
how to handle double click in flutter like this scenario?Brief
I never got that situation to handle double tap as on single tap it changes to loading indicator. As per my understanding of your comment I think we can wrap the custom button with gesture detector and then you can work on double tap there.Oosperm
Where to use the ternary operator? Your example looks smart but not sure how to implement it.Tactician
Use the above mentioned code snippet in the build method where you want to have a (login) button. When user clicks that button the bool(isLoading) becomes true and shows the circular loading indicator instead of button.Oosperm
This is a very clean and useful solution! However: "Create a bool isLoading and set it to false" is wrong :-) This should be set to true for the ternary operator to show the button.Desiree
Nice, i use this code. But I use ! isLoading ? new PrimaryButton() : Center().Huehuebner
This is exactly what I'm trying to achieve but I did exactly the same and it didn't work. Was there an update that changed the way to do thisRootstock
I use this method. Its brilliant I just need a way to make it abstract and reusable.Lackey
G
33

Step 1: Create Dialog

   showAlertDialog(BuildContext context){
      AlertDialog alert=AlertDialog(
        content: new Row(
            children: [
               CircularProgressIndicator(),
               Container(margin: EdgeInsets.only(left: 5),child:Text("Loading" )),
            ],),
      );
      showDialog(barrierDismissible: false,
        context:context,
        builder:(BuildContext context){
          return alert;
        },
      );
    }

Step 2: Call it

showAlertDialog(context);
await firebaseAuth.signInWithEmailAndPassword(email: email, password: password);
Navigator.pop(context);

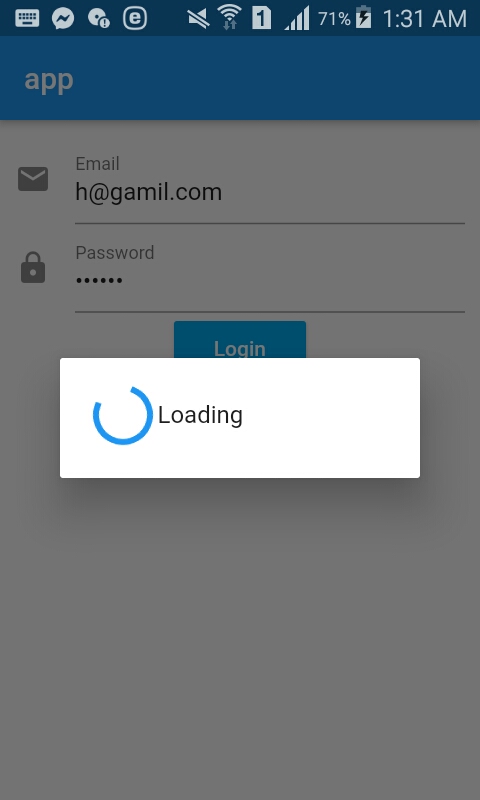
Example Dialog and login form

import 'package:flutter/cupertino.dart';
import 'package:flutter/material.dart';
import 'package:firebase_auth/firebase_auth.dart';
class DynamicLayout extends StatefulWidget{
  @override
  State<StatefulWidget> createState() {
    // TODO: implement createState
    return new MyWidget();
    }
  }
showAlertDialog(BuildContext context){
  AlertDialog alert=AlertDialog(
    content: new Row(
        children: [
           CircularProgressIndicator(),
           Container(margin: EdgeInsets.only(left: 5),child:Text("Loading" )),
        ],),
  );
  showDialog(barrierDismissible: false,
    context:context,
    builder:(BuildContext context){
      return alert;
    },
  );
}

  class MyWidget extends State<DynamicLayout>{
  Color color = Colors.indigoAccent;
  String title='app';
  GlobalKey<FormState> globalKey=GlobalKey<FormState>();
  String email,password;
  login() async{
   var currentState= globalKey.currentState;
   if(currentState.validate()){
        currentState.save();
        FirebaseAuth firebaseAuth=FirebaseAuth.instance;
        try {
          showAlertDialog(context);
          AuthResult authResult=await firebaseAuth.signInWithEmailAndPassword(
              email: email, password: password);
          FirebaseUser user=authResult.user;
          Navigator.pop(context);
        }catch(e){
          print(e);
        }
   }else{

   }
  }
  @override
  Widget build(BuildContext context) {
    return new Scaffold(
        appBar:AppBar(
        title: Text("$title"),
        ) ,
          body: Container(child: Form(
            key: globalKey,
            child: Container(
              padding: EdgeInsets.all(10),
              child: Column(children: <Widget>[
              TextFormField(decoration: InputDecoration(icon: Icon(Icons.email),labelText: 'Email'),
              // ignore: missing_return
              validator:(val){
                if(val.isEmpty)
                  return 'Please Enter Your Email';
              },
              onSaved:(val){
                email=val;
              },
              ),
                TextFormField(decoration: InputDecoration(icon: Icon(Icons.lock),labelText: 'Password'),
             obscureText: true,
                  // ignore: missing_return
                  validator:(val){
                    if(val.isEmpty)
                      return 'Please Enter Your Password';
                  },
                  onSaved:(val){
                    password=val;
                  },
              ),
                RaisedButton(color: Colors.lightBlue,textColor: Colors.white,child: Text('Login'),
                  onPressed:login),
            ],)
              ,),)
         ),
    );
  }
}

Example from Ui

enter image description here

Gut answered 10/2, 2020 at 22:30 Comment(2)
Please add just a little more context to your answer.Fifine
There are several example of that. First need to check tutorial of that. refer that link. techandroidhub.com/flutter-progress-indicators-tutorialRuthieruthless
D
31

1. Without plugin

    class IndiSampleState extends State<ProgHudPage> {
  @override
  Widget build(BuildContext context) {
    return new Scaffold(
        appBar: new AppBar(
          title: new Text('Demo'),
        ),
        body: Center(
          child: RaisedButton(
            color: Colors.blueAccent,
            child: Text('Login'),
            onPressed: () async {
              showDialog(
                  context: context,
                  builder: (BuildContext context) {
                    return Center(child: CircularProgressIndicator(),);
                  });
              await loginAction();
              Navigator.pop(context);
            },
          ),
        ));
  }

  Future<bool> loginAction() async {
    //replace the below line of code with your login request
    await new Future.delayed(const Duration(seconds: 2));
    return true;
  }
}

2. With plugin

check this plugin progress_hud

add the dependency in the pubspec.yaml file

dev_dependencies:
  progress_hud: 

import the package

import 'package:progress_hud/progress_hud.dart';

Sample code is given below to show and hide the indicator

class ProgHudPage extends StatefulWidget {
  @override
  _ProgHudPageState createState() => _ProgHudPageState();
}

class _ProgHudPageState extends State<ProgHudPage> {
  ProgressHUD _progressHUD;
  @override
  void initState() {
    _progressHUD = new ProgressHUD(
      backgroundColor: Colors.black12,
      color: Colors.white,
      containerColor: Colors.blue,
      borderRadius: 5.0,
      loading: false,
      text: 'Loading...',
    );
    super.initState();
  }

  @override
  Widget build(BuildContext context) {
    return new Scaffold(
        appBar: new AppBar(
          title: new Text('ProgressHUD Demo'),
        ),
        body: new Stack(
          children: <Widget>[
            _progressHUD,
            new Positioned(
                child: RaisedButton(
                  color: Colors.blueAccent,
                  child: Text('Login'),
                  onPressed: () async{
                    _progressHUD.state.show();
                    await loginAction();
                    _progressHUD.state.dismiss();
                  },
                ),
                bottom: 30.0,
                right: 10.0)
          ],
        ));
  }

  Future<bool> loginAction()async{
    //replace the below line of code with your login request
    await new Future.delayed(const Duration(seconds: 2));
    return true;
  }
}
Deherrera answered 21/3, 2018 at 9:40 Comment(17)
Don't vote this down, some people don't want to handle the nitty-gritty details of UI and am one of them so this plugin comes in handyLucaslucca
the progress bar in api is fair enough adding dependency increases build size. already flutter build is excessive.Tychon
Should you really add this as a Dev Dependency?Kalpak
check with the latest example pub.dartlang.org/packages/progress_hud#-example-tab-Deherrera
@Idee what is the issue you are facingDeherrera
This plugin is not the way to show a modal progress indicator over your page as it renders the entire Scaffold widget inside its build method. The only thing you provide is the text to show on the page.Pierette
it works guys. just check the example and make sure you implement correctly in your code.Naomanaomi
I'am using your example, but why future.delayed 2 seconds? how about x seconds? with x determined by the 'action completed', how to get x? as 'action completed' may be fired by network event.Foucquet
@KennethLi I have added the same for demo purpose you can replace that code with your login action such as await loginmethod(). then dismiss the indicatorDeherrera
@KennethLi edited the code. please check to get the clarityDeherrera
@Shyju M Thanks, my login action is something like: AClassInAnotherDart.StaticVarSocket.emit('LoginToServer', logindata] by socket.io, and in the same class of that dart file, there is a function: StaticVarSocket.on('LoginResultFromServer', loginresult) which will be fired when the socket.io server returns the loginresult. (Say after x seconds, depending on the network speed) So I believe that if I call the socket.io server inside your loginAction, the loginAction will return true BEFORE getting the loginresult.Foucquet
@Shyju M, I want to emphasize that sometimes, a 'variable' or 'state' inside our App, is not controlled by user interaction of the same mobile phone, but by some EXTERNAL EVENTS such as user interaction of another mobile phone (e.g. multi-players on-line games) , or by message sent from the socket.io server (e.g. CHAT apps) I'm not saying that your approach is wrong, on the contract, I think you are right, it is just that may be I'm using it in the wrong way, let me explain in my next comment.Foucquet
@Shyju M, In order to let the loginAction return true IF AND ONLY IF the loginresult is returned from the socket.io server, before the statement 'return true;', I added a 'while loop', and inside the while loop, I check whether loginresult contains any data! Ok, I know, this is not a good solution, as the while loop MAY eat up the CPU, as a work around, I added another line inside the while loop: await Thread.sleep(100); now I check loginresult per 1/10 seconds instead of checking it at maximum speed. Can you suggest better implementation of progress_hud for this kind of scenario?Foucquet
@KennethLi could you please share your login action as a gist. I think you can set a loading flag to do the the same. and set the flag to false once you get the result from your login action (as mentioned in the answer https://mcmap.net/q/159541/-how-to-work-with-progress-indicator-in-flutter)Deherrera
@Shyju M, Thanks for your help. I finally did it with modal_progress_hud. I created a template for my future projects. (github.com/lhcdims/fluttertemplate02), I'm not be able to get rid of the while loop inside the loginaction, because I need to check timeout for the login operation. There is a function funLoginPressed inside the lib/PageLogin.dart(line 67) of the project fluttertemplate02, a screen shot (animation gif) is also provided in the readme file of the project.Foucquet
I just tried first solution and it was working but after navigating back to login page, progress indicator still is running!Kurdish
@MohammadMeshkani use Navigator.pop(context); before navigating to the next screenDeherrera
L
13

I took the following approach, which uses a simple modal progress indicator widget that wraps whatever you want to make modal during an async call.

The example in the package also addresses how to handle form validation while making async calls to validate the form (see flutter/issues/9688 for details of this problem). For example, without leaving the form, this async form validation method can be used to validate a new user name against existing names in a database while signing up.

https://pub.dartlang.org/packages/modal_progress_hud

Here is the demo of the example provided with the package (with source code):

async form validation with modal progress indicator

Example could be adapted to other modal progress indicator behaviour (like different animations, additional text in modal, etc..).

Lashaunda answered 12/7, 2018 at 13:59 Comment(0)
K
4

This is my solution with stack

import 'package:flutter/material.dart';
import 'package:shared_preferences/shared_preferences.dart';
import 'dart:async';

final themeColor = new Color(0xfff5a623);
final primaryColor = new Color(0xff203152);
final greyColor = new Color(0xffaeaeae);
final greyColor2 = new Color(0xffE8E8E8);

class LoadindScreen extends StatefulWidget {
  LoadindScreen({Key key, this.title}) : super(key: key);
  final String title;
  @override
  LoginScreenState createState() => new LoginScreenState();
}

class LoginScreenState extends State<LoadindScreen> {
  SharedPreferences prefs;

  bool isLoading = false;

  Future<Null> handleSignIn() async {
    setState(() {
      isLoading = true;
    });
    prefs = await SharedPreferences.getInstance();
    var isLoadingFuture = Future.delayed(const Duration(seconds: 3), () {
      return false;
    });
    isLoadingFuture.then((response) {
      setState(() {
        isLoading = response;
      });
    });
  }

  @override
  Widget build(BuildContext context) {
    return Scaffold(
        appBar: AppBar(
          title: Text(
            widget.title,
            style: TextStyle(color: primaryColor, fontWeight: FontWeight.bold),
          ),
          centerTitle: true,
        ),
        body: Stack(
          children: <Widget>[
            Center(
              child: FlatButton(
                  onPressed: handleSignIn,
                  child: Text(
                    'SIGN IN WITH GOOGLE',
                    style: TextStyle(fontSize: 16.0),
                  ),
                  color: Color(0xffdd4b39),
                  highlightColor: Color(0xffff7f7f),
                  splashColor: Colors.transparent,
                  textColor: Colors.white,
                  padding: EdgeInsets.fromLTRB(30.0, 15.0, 30.0, 15.0)),
            ),

            // Loading
            Positioned(
              child: isLoading
                  ? Container(
                      child: Center(
                        child: CircularProgressIndicator(
                          valueColor: AlwaysStoppedAnimation<Color>(themeColor),
                        ),
                      ),
                      color: Colors.white.withOpacity(0.8),
                    )
                  : Container(),
            ),
          ],
        ));
  }
}
Kauppi answered 27/8, 2018 at 3:56 Comment(0)
A
3

You can do it for center transparent progress indicator

Future<Null> _submitDialog(BuildContext context) async {
  return await showDialog<Null>(
      context: context,
      barrierDismissible: false,
      builder: (BuildContext context) {
        return SimpleDialog(
          elevation: 0.0,
          backgroundColor: Colors.transparent,
          children: <Widget>[
            Center(
              child: CircularProgressIndicator(),
            )
          ],
        );
      });
}
Aggappe answered 8/6, 2019 at 18:17 Comment(0)
M
3
{
isloading? progressIos:Container()

progressIos(int i) {
    return Container(
        color: i == 1
            ? AppColors.liteBlack
            : i == 2 ? AppColors.darkBlack : i == 3 ? AppColors.pinkBtn : '',
        child: Center(child: CupertinoActivityIndicator()));
  }
}
Mid answered 25/9, 2020 at 4:52 Comment(0)
P
1

You can use FutureBuilder widget instead. This takes an argument which must be a Future. Then you can use a snapshot which is the state at the time being of the async call when loging in, once it ends the state of the async function return will be updated and the future builder will rebuild itself so you can then ask for the new state.

FutureBuilder(
  future:  myFutureFunction(),
  builder: (context, AsyncSnapshot<List<item>> snapshot) {
    if (!snapshot.hasData) {
      return Center(
        child: CircularProgressIndicator(),
      );
    } else {
     //Send the user to the next page.
  },
);

Here you have an example on how to build a Future

Future<void> myFutureFunction() async{
 await callToApi();}
Pantaloon answered 26/11, 2018 at 19:46 Comment(0)
G
1

Centered on screen:

Column(
    mainAxisAlignment: MainAxisAlignment.center,
    mainAxisSize: MainAxisSize.max,
    crossAxisAlignment: CrossAxisAlignment.start,
    children: [
        Row(
            mainAxisAlignment: MainAxisAlignment.center,
            mainAxisSize: MainAxisSize.max,
            children: [CircularProgressIndicator()])
      ])
Guggenheim answered 18/2, 2021 at 0:59 Comment(0)
A
0
class Loader extends StatefulWidget {
      @override
      State createState() => LoaderState();
    }

    class LoaderState extends State<Loader> with SingleTickerProviderStateMixin {
      AnimationController controller;
      Animation<double> animation;

      @override
      void initState() {
        super.initState();
        controller = AnimationController(
            duration: Duration(milliseconds: 1200), vsync: this);
        animation = CurvedAnimation(parent: controller, curve: Curves.elasticOut);
        animation.addListener(() {
          this.setState(() {});
        });
        animation.addStatusListener((AnimationStatus status) {});
        controller.repeat();
      }

      @override
      void dispose() {
        controller.dispose();
        super.dispose();
      }

      @override
      Widget build(BuildContext context) {
        return Column(
          mainAxisAlignment: MainAxisAlignment.center,
          children: <Widget>[
            Container(
              color: Colors.blue,
              height: 3.0,
              width: animation.value * 100.0,
            ),
            Padding(
              padding: EdgeInsets.only(bottom: 5.0),
            ),
            Container(
              color: Colors.blue[300],
              height: 3.0,
              width: animation.value * 75.0,
            ),
            Padding(
              padding: EdgeInsets.only(bottom: 5.0),
            ),
            Container(
              color: Colors.blue,
              height: 3.0,
              width: animation.value * 50.0,
            )
          ],
        );
      }
    }


    Expanded(
                        child: Padding(
                          padding:
                              EdgeInsets.only(left: 20.0, right: 5.0, top:20.0),
                          child: GestureDetector(
                            onTap: () {
                              Navigator.push(
                                  context,
                                  MaterialPageRoute(
                                      builder: (context) => FirstScreen()));
                            },
                            child: Container(
                                alignment: Alignment.center,
                                height: 45.0,
                                decoration: BoxDecoration(
                                    color: Color(0xFF1976D2),
                                    borderRadius: BorderRadius.circular(9.0)),
                                child: Text('Login',
                                    style: TextStyle(
                                        fontSize: 20.0, color: Colors.white))),
                          ),
                        ),
                      ),
Asci answered 24/12, 2018 at 21:1 Comment(1)
How can I combine a class that creates a loading indicator with my button, so that when I press it, the indicator turns on and flips to the next page ?Asci
W
0

For your case, maybe it can be done by using showing a modal with a circle indicator. But I recommend using a simple plugin https://pub.dev/packages/flutter_easyloading.

  • The installation supper easy. Just run this flutter pub add flutter_easyloading in your terminal
  • Put this in you main.dart app
import 'package:flutter/material.dart';
import 'package:kunjungi_dokter/pages/welcome.dart';
import 'package:flutter_easyloading/flutter_easyloading.dart';  // <- add this

void main() {
  runApp(const MyApp());
}

class MyApp extends StatelessWidget {
  const MyApp({Key? key}) : super(key: key);

  @override
  Widget build(BuildContext context) {
    return MaterialApp(
      debugShowCheckedModeBanner: false,
      home: const Welcome(),
      builder: EasyLoading.init(), // <- add this
    );
  }
}
  • To show the modal or the loading widget, in my case I show it in mya _login function in Login Screen:
import 'package:flutter_easyloading/flutter_easyloading.dart';

// ... other code

_login() async {
    EasyLoading.show(status: 'loading...', maskType: EasyLoadingMaskType.black); // code to show modal with masking
    var data = await LoginAPI.connectToAPI(
        emailController.text, passwordController.text);
    if (data.isError) {
      EasyLoading.showError('Login Error: ' + data.message); // code to show modal without masking and auto close
    } else {
      await storage.write(key: 'token', value: data.token);
      await storage.write(key: 'email', value: emailController.text);
      EasyLoading.showSuccess('Login Success!'); // code to show modal without masking and auto close
      Navigator.of(context)
          .push(MaterialPageRoute(builder: ((context) => const Home())));
    }
  }
// ... other code
  • Tips, you can use this to close the modal:
EasyLoading.dismiss();
Whitebeam answered 25/6, 2022 at 21:46 Comment(0)
C
0
 //Start loadding
    Future<void> loader() async {
            return await showDialog<void>(
              context: context,
              barrierDismissible: false,
              builder: (BuildContext context) {
                return const SimpleDialog(
                  elevation: 0.0,
                  backgroundColor: Colors.transparent,
                  // can change this to your prefered color
                  children: <Widget>[
                    Center(
                      child: CircularProgressIndicator(),
                    )
                  ],
                );
              },
            );
          }

    //Stop loadding
    Navigator.of(context).pop();
Creuse answered 9/6, 2023 at 9:19 Comment(0)
Q
-1

You will need a library for it

void onLoading() {
     showDialog(
      context: context,
       barrierDismissible: false,
       builder: (BuildContext context) {
          return GFLoader(
          type: GFLoaderType.android,        
         );
        },
    );
  }

and then use this function where you need in code

onLoading;
Quintuplet answered 16/8, 2022 at 13:34 Comment(0)

© 2022 - 2024 — McMap. All rights reserved.