TextField is hidden behind keyboard - Jetpack Compose
Asked Answered
A

5

7

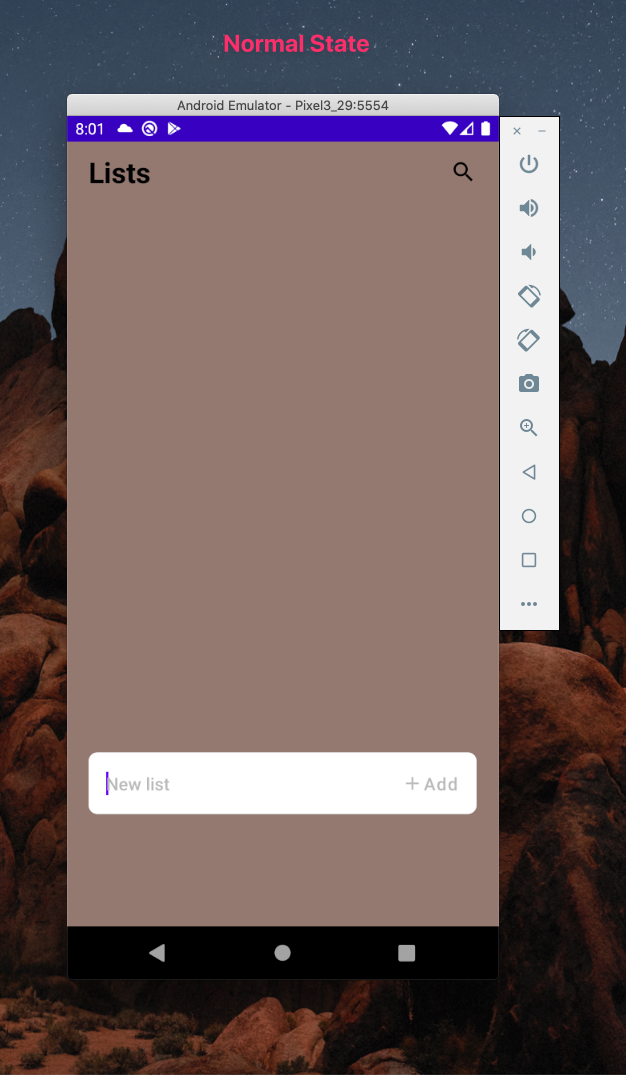
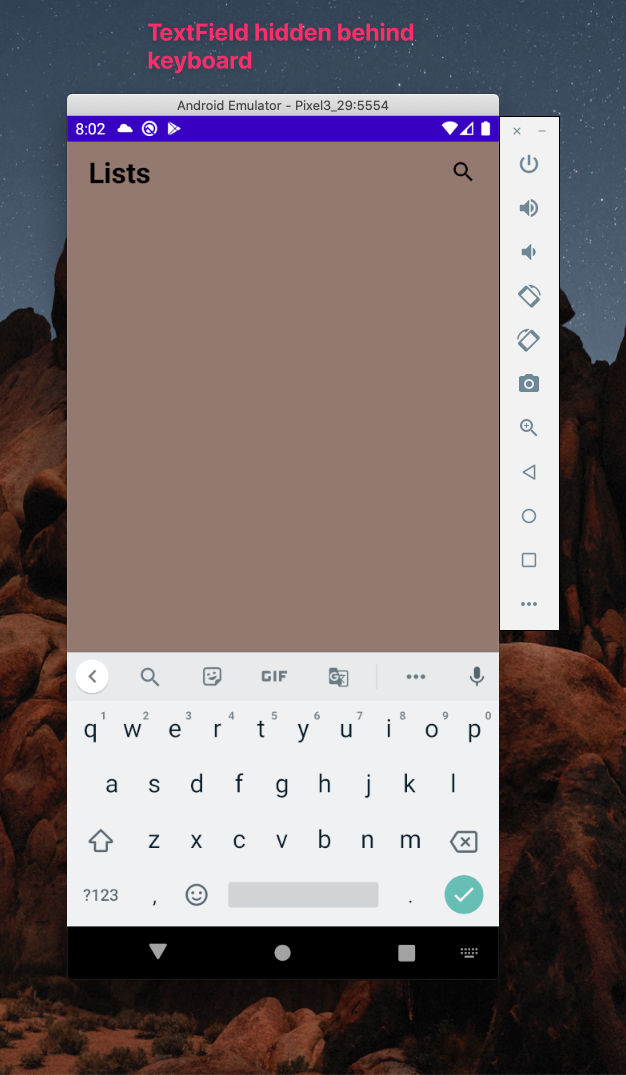
I was playing around with Jetpack Compose TextField and I found one strange behaviour with Keyboard.

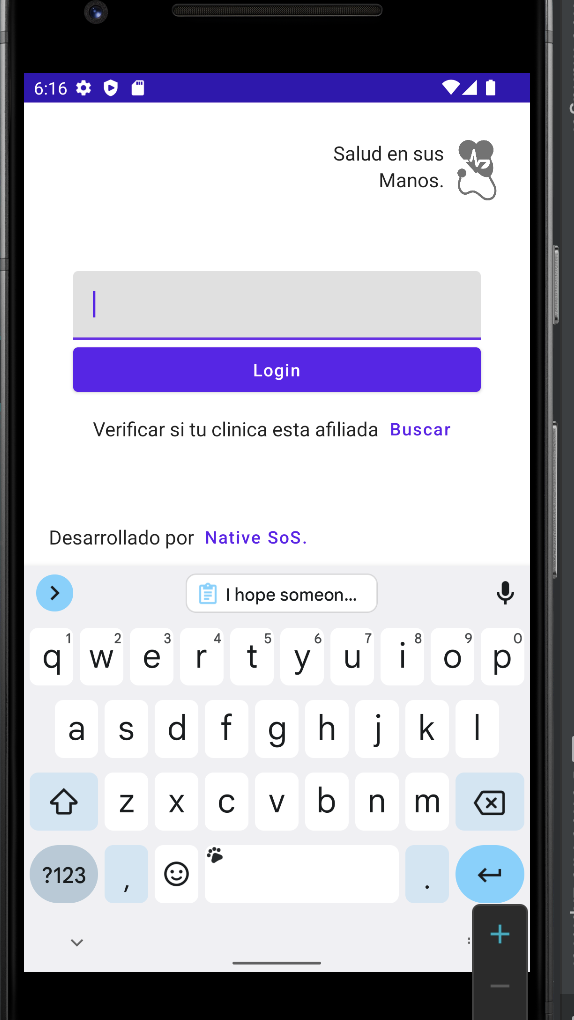
If my TextField is around bottom of the screen and I open keyboard, the TextField is remain hidden behind the keyboard.

I tried some solutions as well.

  1. Modifying android:windowSoftInputMode="adjustPan" and android:windowSoftInputMode="adjustResize"

  2. If I use adjustPan, sometimes TextField is lifted up with the Keyboard but sometimes it does not.


Here is the code and images of what is happening.

enter image description here

enter image description here

Astor answered 23/9, 2021 at 14:43 Comment(3)
If you're using inside scroll view, like with scrollable modifier or LazyColumn, there's no way to do that for now. It's a known issue, please star it. If you're using it without scroll view, check out this answerLvov
@PhilipDukhov Thank you for pointing that out. So is there any workaround if TextField is inside the scrollable?Astor
You can check the topic of the problem I pointed out, some people give some workarounds, I haven't checked them all but I don't believe they can work reliably enough. This is a really complicated issue, which is why it still hasn't been solved. I believe that this has to be one of the most starred Compose issues at the moment, and that the maintainers are working hard on it.Lvov
C
4

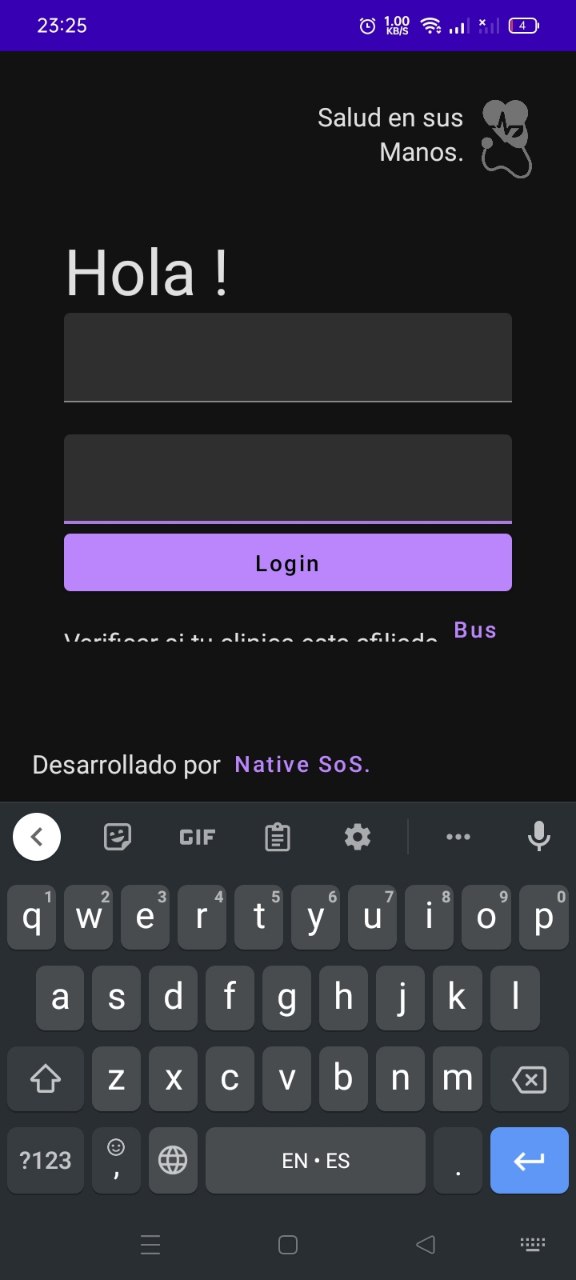
Ok I did something that worked for me, I clarify that I have only been learning compose for a few weeks so don't expect much from me, I simply did something that may not be the right way but it is functional for me and may be useful to anyone.

What I did was create a main class that inherits the ComponentActivity() with all the toys.

    class Login : ComponentActivity() {
    
        override fun onCreate(savedInstanceState: Bundle?) {
    
            super.onCreate(savedInstanceState)
            setContent {
    
                HealthAtHansClientTheme {

                    Surface(
                        modifier = Modifier.fillMaxSize(),
                        color = MaterialTheme.colors.background
                    ) {
                        LoginLayout()
                    }
                }
            }
        }
    }

After that I imported my @Composable function which contained my layout with the LoginLayout, but the important part is this:

    val scrollState = rememberScrollState()
    Column(
        modifier = Modifier
            .fillMaxWidth()
            .fillMaxHeight()
            .padding(bottom = 100.dp, end = 40.dp, start = 40.dp)
            .verticalScroll(scrollState),
        verticalArrangement = Arrangement.SpaceAround,

    ) {

        Row(
            modifier = Modifier
                .fillMaxWidth()
                .padding(top = 30.dp)
        ) {
            Text(text = "Hola !", style = TextStyle(fontSize = 40.sp))
        }

        Row(horizontalArrangement = Arrangement.Center) {
            Column(
                verticalArrangement = Arrangement.Center,
                horizontalAlignment = Alignment.CenterHorizontally
            ) {


                TextField(
                    maxLines = 1,
                    modifier = Modifier.fillMaxWidth(),
                    value = documentNumber,
                    onValueChange = { documentNumber = it })

                Spacer(modifier = Modifier.height(100.dp))

                TextField(
                    maxLines = 1,
                    modifier = Modifier.fillMaxWidth(),
                    value = privateCode,
                    onValueChange = { privateCode = it })


            }

        }
    }

Note that the space between the Textfields is 100 this was just to test that it is functional.

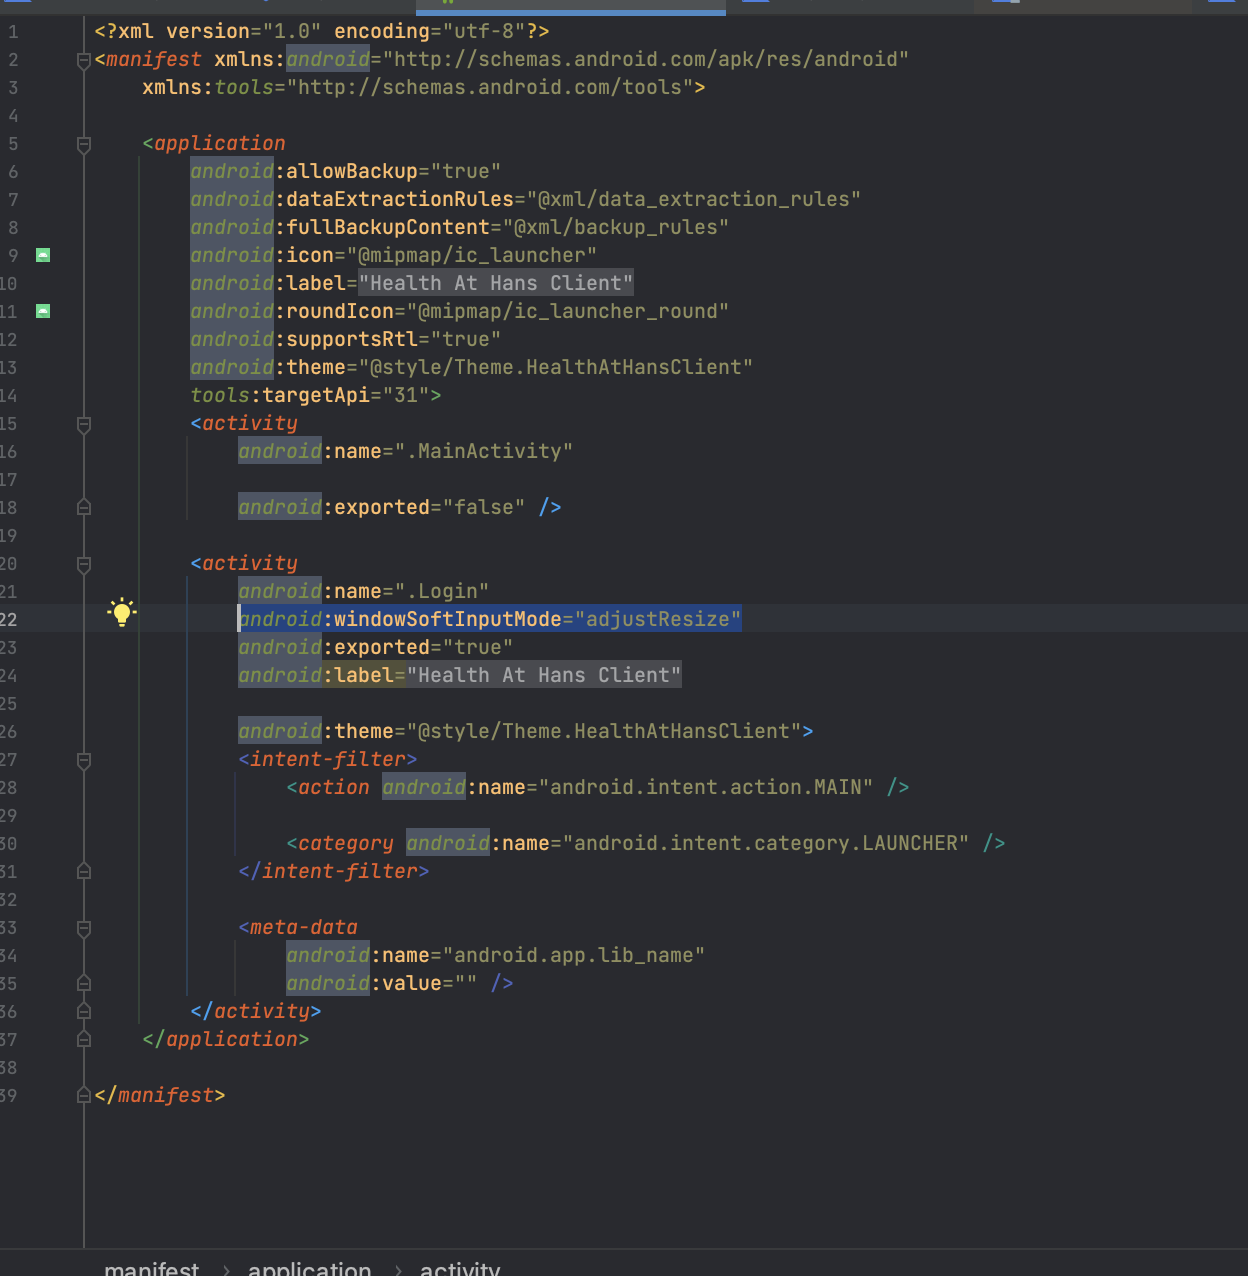
and finally declare the Login class in my main activity in the following way, since the Mainactivity came by default but it was only for this test, the idea is only that they realize the line that I added

enter image description here

enter image description here

And voilà that was all now my TextField is not hidden, I think it would be very feasible if you have extensive forms you create your "activity" in the manifest and add the line android:windowSoftInputMode="adjustResize" that way the problem is over.

I hope someone with more skill and knowledge can do something more efficient, for now it works for me.

enter image description here

If there is already a more efficient solution for that, the comment is appreciated, if my solution is stupid, I would appreciate feedback to learn.

One other thing that happens is that if you run the emulator with 'DefaultPreview', none of the ways I try to do it work.

enter image description here

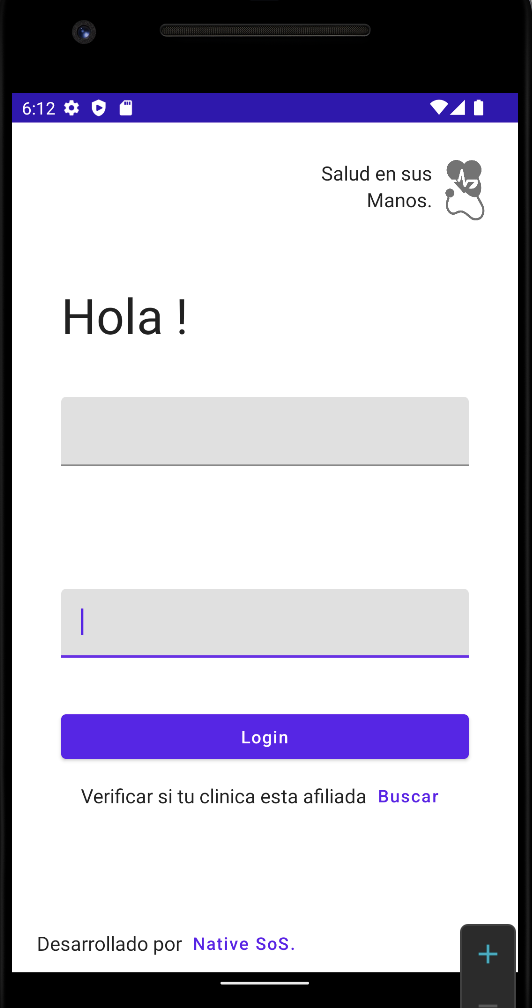
If you run the emulation of your application in App, it works without problem.

But I wanted to go further, so I compiled this example in a release apk version where it is supposed to look like it should and it works perfectly as you can see in the image.

enter image description here

Cornie answered 20/9, 2022 at 10:18 Comment(0)
B
2

After adding android:windowSoftInputMode="adjustResize" in your Manifest only add Modifier.imePadding() to your parent widget like LazyColumn

Babism answered 17/10, 2023 at 8:17 Comment(0)
U
0

Update at October 2022: The following code does the trick:

class SampleActivity : ComponentActivity() {
    override fun onCreate(savedInstanceState: Bundle?) {
        WindowCompat.setDecorFitsSystemWindows(window, false)
        super.onCreate(savedInstanceState)
        setContent {
            LazyColumn(
                contentPadding = WindowInsets.navigationBars.asPaddingValues()
            ) {
                // items
            }
        }
    }
}

Setting Activity to fit system windows and also using contentPadding is key here.

Unit answered 4/10, 2022 at 7:47 Comment(0)
C
0

Found the magic solution

in manifest activity – android:windowSoftInputMode="adjustResize"

// in activity
override fun onCreate(savedInstanceState: Bundle?) {
    super.onCreate(savedInstanceState)
    WindowCompat.setDecorFitsSystemWindows(window, true) <-- add this
    activityNavigator.onCreate(this)
    setContent {
        MainScreen()
    }
}

// in Composable (MainScreen)
Column(
    modifier = Modifier
        .verticalScroll(rememberScrollState(), reverseScrolling = true)<-- add this 
        .fillMaxSize()
        .padding(0.dp, navigationBarSize, 0.dp, 0.dp)

) {          
    TextField(
        modifier = Modifier
            .fillMaxWidth()
            .padding(8.dp),
        shape = RoundedCornerShape(defaultTextRound),
        colors = TextFieldDefaults.textFieldColors(
            backgroundColor = Purple200,
            focusedIndicatorColor = Color.Transparent,
            unfocusedIndicatorColor = Color.Transparent
        ),
        textStyle = DefaultTextStyle.h1,
        value = noteTitle.value,
        onValueChange = {
            noteTitle.value = it
            normalNoteViewModel?.noteUpdated()
        },
        label = { Text(stringResource(R.string.title)) }
    )
}
Carlisle answered 8/7, 2023 at 21:21 Comment(0)
O
0

To Fix this problem, just draw your Surface in the SafeDrawingPadding area

    Surface(
            modifier = Modifier
                .background(Color.Red)
                .safeDrawingPadding(), <---- THIS
   ) {
      // Your Screen content
   }
Othaothe answered 15/7, 2024 at 16:18 Comment(0)

© 2022 - 2025 — McMap. All rights reserved.