How can I make the composite of two images in OpenCV with Python?
Asked Answered
W

3

7

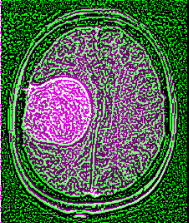
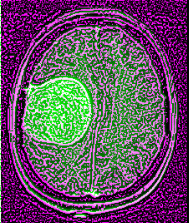
I have one image that remains unchanged and another image which is the first one, but with a filter applied on it. I want to create the third image which should be the composite of these first two images.

I know that in MATLAB there is a function called as imfuse() with the default color channel green-magenta. I want to do the same thing in Python, with exactly the same color channel. How can I do this ?

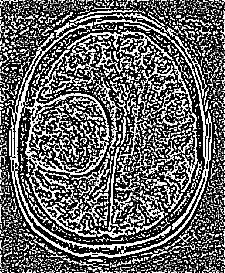
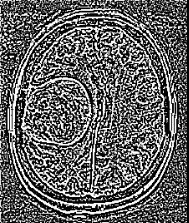
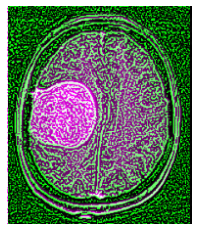
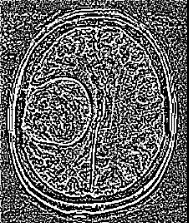
Here are the images (first is the original picture, second is the first picture with the filter applied, third is the MATLAB result):

image filter result

Thanks for your help !

Wallah answered 13/7, 2014 at 17:23 Comment(3)
Just use merge (docs.opencv.org/modules/core/doc/…), use one image as one color channel, and the other image as the other two color channels.Scrotum
Hello ! First, thank you for your answer. I tried to use the merge function, but unfortunately I get the following error : OpenCV Error: Assertion failed(mv[i].size == mv[0].size && mv[i].depth() == depth) in merge. (error -215). What can I do in this case ?Wallah
Your result does not seem to be consistent with your edge image. There is no effect of the edges in the magenta area. Why is that?Hyla
S
8

By default, imfuse simply overlays the pair of images in different color bands (Default being Method=falsecolor and ColorChannels=green-magenta).

Here is an example in MATLAB to illustrate (it should should be easy to write this in Python/OpenCV):

% a pair of grayscale images
A = imread('cameraman.tif');
B = imrotate(A,5,'bicubic','crop');    % image "A" rotated a bit

% use IMFUSE
C = imfuse(A,B);
imshow(C)

% use our version where: Red=B, Green=A, Blue=B
C = cat(3, B, A, B);
imshow(C)

Both should give you the same thing:

fused_images


EDIT:

Here is the Python/OpenCV version:

import numpy as np
import cv2

A = cv2.imread(r"C:\path\to\a.png", 0)
B = cv2.imread(r"C:\path\to\b.png", 0)

#C = cv2.merge((B,A,B))
C = np.dstack((B,A,B))
cv2.imshow("imfuse",C)
cv2.waitKey(0)

opencv_python_imfuse

Sophronia answered 13/7, 2014 at 18:8 Comment(7)
I have an idea about the way imfuse() works, my question was basically how to implement this function in OpenCV, because the classical methods of 'adding' images, such as cv2.addWeighted or cv2.add do not work.Wallah
like I explained with the MATLAB code (cat(3,B,A,B)), just stack them in the third dimension in the correct order. Translated to Python/NumPy, this is as simple as: numpy.dstack((B,A,B)) where A and B are the grayscale image matrices.Sophronia
I'm not sure if I do something wrong, but after I use dstack I get an assertion failed error in matrix.cpp file. The code is as following : 'mrg = np.dstack((filteredImg, img, filteredImg))'Wallah
why the downvote? I clearly explained how imfuse works by default and showed an example in MATLAB code... The Python-bindings of OpenCV uses NumPy nd-arrays to represent images/matrices, so the solution is as easy as stacking the two images in the third dimension as showed (whether you do it using numpy functions or OpenCV cv2.merge doesn't really matter!)Sophronia
@drgs: you need to show us your code to reproduce this error. It worked fine on my end..Sophronia
Thanks for your help, I found my mistakes. Your post was useful for me, so I don't know who downvoted !Wallah
Voted you up too. FWIW, I got down voted when I suggested repmat as an answer for MATLAB when the OP wanted to replicate rows a finite number of times. The post was marked as duplicate but the duplicate specifically requested techniques without using repmat. As my answer didn't require this constraint, I suggested a repmat method.... Still got down voted though. The logic of some people escapes meOverleap
D
1

With SimpleITK, given the following MR input images:

enter image description here enter image description here

import SimpleITK as sitk
fixed_image = sitk.ReadImage("images/mr1.png", sitk.sitkFloat32)
moving_image = sitk.ReadImage("images/mr2.png", sitk.sitkFloat32)
out_image = sitk.GetArrayFromImage(sitk.Compose(fixed_image, moving_image, fixed_image))
plt.imshow(out_image / out_image.max()), plt.axis('off')

enter image description here

Deign answered 26/6, 2023 at 9:18 Comment(0)
H
0

Here is how you could do that in Python/OpenCV/Numpy.

  • Read the image
  • Read the edge image as grayscale
  • Make a copy of the image as the result
  • Put the edge image in the green channel
  • (The red and blue channels of the first image make magenta)
  • Save the results

Image:

enter image description here

Edges:

enter image description here

import cv2
import numpy as np

# read the image
image = cv2.imread('image.png')

# read the edge image as grayscale
edges = cv2.imread('edges.png', cv2.IMREAD_GRAYSCALE)

# set the image to the red and blue channels and edges to the green channels
result = image.copy()
result[:,:,1] = edges

# save the results
cv2.imwrite('image_and_edges.png', result)

# show the results
cv2.imshow('result', result)
cv2.waitKey(0)

Result:

enter image description here

ALTERNATE

Use

result = image.copy()
result[:,:,0] = edges
result[:,:,2] = edges

Result:

enter image description here

Hyla answered 26/6, 2023 at 20:42 Comment(0)

© 2022 - 2024 — McMap. All rights reserved.