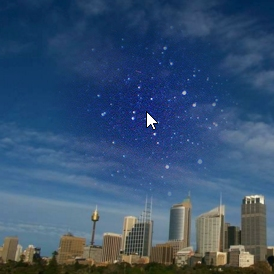
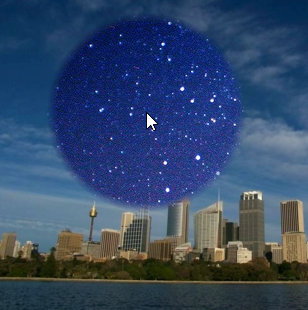
This can be solved with a RadialGradientPaint and the appropriate AlphaComposite.
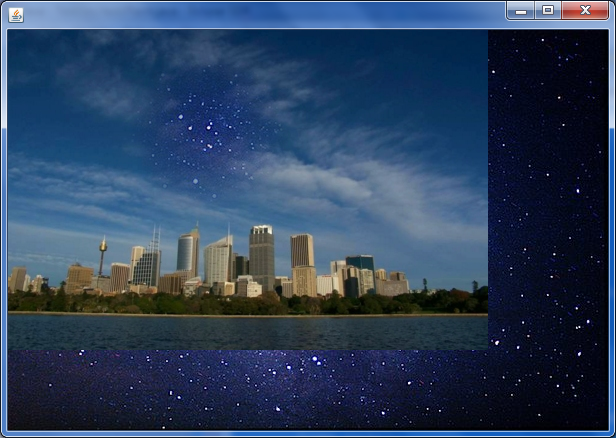
The following is a MCVE that shows how this can be done. It uses the same images as user1803551 used in his answer, so a screenshot would look (nearly) the same. But this one adds a MouseMotionListener that allows you to move the hole around, by passing the current mouse position to the updateGradientAt method, where the actual creation of the desired image takes place:
- It first fills the image with the original image
- Then it creates a
RadialGradientPaint, which has a fully opaque color in the center, and a completely transparent color at the border (!). This may seen counterintuitive, but the intention is to "cut out" the hole out of an existing image, which is done with the next step:
An AlphaComposite.DstOut is assigned to the Graphics2D. This one causes an "inversion" of the alpha values, as in the formula
Ar = Ad*(1-As)
Cr = Cd*(1-As)
where r stands for "result", s stands for "source", and d stands for "destination"
The result is an image that has the radial gradient transparency at the desired location, being fully transparent at the center and fully opaque at the border (!). This combination of Paint and Composite is then used for filling an oval with the size and coordinates of the hole. (One could also do a fillRect call, filling the whole image - it would not change the outcome).
import java.awt.AlphaComposite;
import java.awt.Color;
import java.awt.Graphics;
import java.awt.Graphics2D;
import java.awt.Point;
import java.awt.RadialGradientPaint;
import java.awt.event.MouseAdapter;
import java.awt.event.MouseEvent;
import java.awt.image.BufferedImage;
import java.io.File;
import java.io.IOException;

import javax.imageio.ImageIO;
import javax.swing.JFrame;
import javax.swing.JPanel;
import javax.swing.SwingUtilities;

public class TransparentGradientInImage
{
    public static void main(String[] args)
    {
        SwingUtilities.invokeLater(new Runnable()
        {
            @Override
            public void run()
            {
                createAndShowGUI();
            }
        });
    }

    private static void createAndShowGUI()
    {
        JFrame f = new JFrame();
        f.setDefaultCloseOperation(JFrame.EXIT_ON_CLOSE);

        TransparentGradientInImagePanel p =
            new TransparentGradientInImagePanel();
        f.getContentPane().add(p);
        f.setSize(800, 600);
        f.setLocationRelativeTo(null);
        f.setVisible(true);
    }

}

class TransparentGradientInImagePanel extends JPanel
{
    private BufferedImage background;
    private BufferedImage originalImage;
    private BufferedImage imageWithGradient;

    TransparentGradientInImagePanel()
    {
        try
        {
            background = ImageIO.read(
                new File("night-sky-astrophotography-1.jpg"));
            originalImage = convertToARGB(ImageIO.read(new File("7bI1Y.jpg")));
            imageWithGradient = convertToARGB(originalImage);
        }
        catch (IOException e)
        {
            e.printStackTrace();
        }

        addMouseMotionListener(new MouseAdapter()
        {
            @Override
            public void mouseMoved(MouseEvent e)
            {
                updateGradientAt(e.getPoint());
            }
        });
    }


    private void updateGradientAt(Point point)
    {
        Graphics2D g = imageWithGradient.createGraphics();
        g.drawImage(originalImage, 0, 0, null);

        int radius = 100;
        float fractions[] = { 0.0f, 1.0f };
        Color colors[] = { new Color(0,0,0,255), new Color(0,0,0,0) };
        RadialGradientPaint paint =
            new RadialGradientPaint(point, radius, fractions, colors);
        g.setPaint(paint);

        g.setComposite(AlphaComposite.DstOut);
        g.fillOval(point.x - radius, point.y - radius, radius * 2, radius * 2);
        g.dispose();
        repaint();
    }

    private static BufferedImage convertToARGB(BufferedImage image)
    {
        BufferedImage newImage =
            new BufferedImage(image.getWidth(), image.getHeight(),
                BufferedImage.TYPE_INT_ARGB);
        Graphics2D g = newImage.createGraphics();
        g.drawImage(image, 0, 0, null);
        g.dispose();
        return newImage;
    }

    @Override
    protected void paintComponent(Graphics g)
    {
        super.paintComponent(g);
        g.drawImage(background, 0, 0, null);
        g.drawImage(imageWithGradient, 0, 0, null);
    }
}
You may play with the fractions and colors of the RadialGradientPaint to achieve different effects. For example, these values...
float fractions[] = { 0.0f, 0.1f, 1.0f };
Color colors[] = {
    new Color(0,0,0,255),
    new Color(0,0,0,255),
    new Color(0,0,0,0)
};
cause a small, transparent hole, with a large, soft "corona":
![TransparentGradientInImage02.png]()
whereas these values
float fractions[] = { 0.0f, 0.9f, 1.0f };
Color colors[] = {
    new Color(0,0,0,255),
    new Color(0,0,0,255),
    new Color(0,0,0,0)
};
cause a large, sharply transparent center, with a small "corona":
![TransparentGradientInImage01.png]()
The RadialGradientPaint JavaDocs have some examples that may help to find the desired values.
Some related questions where I posted (similar) answers:
EDIT In response to the question about the performance that was asked in the comments
The question of how the performance of the Paint/Composite approach compares to the getRGB/setRGB approach is indeed interesting. From my previous experience, my gut feeling would have been that the first one is much faster than the second, because, in general, getRGB/setRGB tends to be slow, and the built-in mechanisms are highly optimized (and, in some cases, may even be hardware accelerated).
In fact, the Paint/Composite approach is faster than the getRGB/setRGB approach, but not as much as I expected. The following is of course not a really profound "benchmark" (I didn't employ Caliper or JMH for this), but should give a good estimation about the actual performance:
// NOTE: This is not really a sophisticated "Benchmark",
// but gives a rough estimate about the performance

import java.awt.AlphaComposite;
import java.awt.Color;
import java.awt.Graphics2D;
import java.awt.Point;
import java.awt.RadialGradientPaint;
import java.awt.image.BufferedImage;

public class TransparentGradientInImagePerformance
{
    public static void main(String[] args)
    {
        int w = 1000;
        int h = 1000;
        BufferedImage image0 = new BufferedImage(w, h,
            BufferedImage.TYPE_INT_ARGB);
        BufferedImage image1 = new BufferedImage(w, h,
            BufferedImage.TYPE_INT_ARGB);

        long before = 0;
        long after = 0;
        int runs = 100;
        for (int radius = 100; radius <=400; radius += 10)
        {
            before = System.nanoTime();
            for (int i=0; i<runs; i++)
            {
                transparitize(image0, w/2, h/2, radius);
            }
            after = System.nanoTime();
            System.out.println(
                "Radius "+radius+" with getRGB/setRGB: "+(after-before)/1e6);

            before = System.nanoTime();
            for (int i=0; i<runs; i++)
            {
                updateGradientAt(image0, image1, new Point(w/2, h/2), radius);
            }
            after = System.nanoTime();
            System.out.println(
                "Radius "+radius+" with paint          "+(after-before)/1e6);
        }
    }

    private static void transparitize(
        BufferedImage imgA, int centerX, int centerY, int r)
    {

        for (int x = centerX - r; x < centerX + r; x++)
        {
            for (int y = centerY - r; y < centerY + r; y++)
            {
                double distance = Math.sqrt(
                    Math.pow(Math.abs(centerX - x), 2) +
                    Math.pow(Math.abs(centerY - y), 2));
                if (distance > r)
                    continue;
                int argb = imgA.getRGB(x, y);
                int a = (argb >> 24) & 255;
                double factor = distance / r;
                argb = (argb - (a << 24) + ((int) (a * factor) << 24));
                imgA.setRGB(x, y, argb);
            }
        }
    }

    private static void updateGradientAt(BufferedImage originalImage,
        BufferedImage imageWithGradient, Point point, int radius)
    {
        Graphics2D g = imageWithGradient.createGraphics();
        g.drawImage(originalImage, 0, 0, null);

        float fractions[] = { 0.0f, 1.0f };
        Color colors[] = { new Color(0, 0, 0, 255), new Color(0, 0, 0, 0) };
        RadialGradientPaint paint = new RadialGradientPaint(point, radius,
            fractions, colors);
        g.setPaint(paint);

        g.setComposite(AlphaComposite.DstOut);
        g.fillOval(point.x - radius, point.y - radius, radius * 2, radius * 2);
        g.dispose();
    }
}
The timings on my PC are along the lines of
...
Radius 390 with getRGB/setRGB: 1518.224404
Radius 390 with paint          764.11017
Radius 400 with getRGB/setRGB: 1612.854049
Radius 400 with paint          794.695199
showing that the Paint/Composite method is roughly twice as fast as the getRGB/setRGB method. Apart from the performance, the Paint/Composite has some other advantages, mainly the possible parametrizations of the RadialGradientPaint that are described above, which are reasons why I would prefer this solution.


