I'm writing a Flutter app, and I'd like to use/implement the "frosted glass" effect that's common on iOS. How do I do this?
How do I do the "frosted glass" effect in Flutter?
Asked Answered
I write an article to show how to make blur effect on Flutter by using BackdropFilter & ImageFilter - read it on Medium –
Ml
You can use the blurrycontainer package. –
Dehydrogenate
You can use the BackdropFilter widget to achieve this effect.
import 'dart:ui';
import 'package:flutter/material.dart';

void main() {
  runApp(new MaterialApp(home: new FrostedDemo()));
}

class FrostedDemo extends StatelessWidget {
  @override
  Widget build(BuildContext context) {
    return new Scaffold(
      body: new Stack(
        children: <Widget>[
          new ConstrainedBox(
            constraints: const BoxConstraints.expand(),
            child: new FlutterLogo()
          ),
          new Center(
            child: new ClipRect(
              child: new BackdropFilter(
                filter: new ImageFilter.blur(sigmaX: 10.0, sigmaY: 10.0),
                child: new Container(
                  width: 200.0,
                  height: 200.0,
                  decoration: new BoxDecoration(
                    color: Colors.grey.shade200.withOpacity(0.5)
                  ),
                  child: new Center(
                    child: new Text(
                      'Frosted',
                      style: Theme.of(context).textTheme.display3
                    ),
                  ),
                ),
              ),
            ),
          ),
        ],
      ),
    );
  }
}
How would I make the frosted effect cover the entire width/height of the app? –
Intercalate
you could use a Stack gist.github.com/collinjackson/321ee23b25e409d8747b623c97afa1d5 pasteboard.co/4ln6HDHWb.png –
Aurist
or, if you're trying to use the frosted glass effect as a modal barrier for dialogs, you could modify your copy of ModalBarrier to include a BackdropFilter. github.com/flutter/flutter/blob/master/packages/flutter/lib/src/… –
Aurist
Unfortunately the blur effect doesn't work on iOS devices: github.com/flutter/flutter/issues/10284 –
Ludwig
iirc, the above issue has been solved and the blur effect works on iOS devices now :) –
Karate
Is it possible to add a Feather effect to the blurred box corners? So the transition between the blurred area and the rest of the screen is progressive and not abrupt? –
Girovard
how about disabling the background widget (e.g. all buttons etc, under the backdrop)? –
Nathanaelnathanial
@MichelFeinstein ClipRRect might be helpful for making the corners softer –
Aurist
It is worth mentioning that you must wrap the BackdropFilter with a ClipRRect or else it will blur the entire app. –
Puffball
I think I don't know the exact meaning of 'Frosted'(If my example didnot work here),
import 'package:flutter/material.dart';
import 'dart:ui' as ui;

void main() => runApp(
    MaterialApp(
        title: "Frosted glass",
        home: new HomePage()
    )
);

class HomePage extends StatelessWidget {
  @override
  Widget build(BuildContext context) {
    return new Scaffold(
      body: new Stack(
        fit: StackFit.expand,
        children: <Widget>[
          generateBluredImage(),
          new Column(
            mainAxisAlignment: MainAxisAlignment.center,
            children: <Widget>[
              rectShapeContainer(),
            ],
          ),
        ],
      ),
    );
  }

  Widget generateBluredImage() {
    return new Container(
      decoration: new BoxDecoration(
        image: new DecorationImage(
          image: new AssetImage('assets/images/huxley-lsd.png'),
          fit: BoxFit.cover,
        ),
      ),
      //I blured the parent container to blur background image, you can get rid of this part
      child: new BackdropFilter(
        filter: new ui.ImageFilter.blur(sigmaX: 3.0, sigmaY: 3.0),
        child: new Container(
          //you can change opacity with color here(I used black) for background.
          decoration: new BoxDecoration(color: Colors.black.withOpacity(0.2)),
        ),
      ),
    );
  }

  Widget rectShapeContainer() {
    return Container(
      margin: const EdgeInsets.symmetric(horizontal: 40.0, vertical: 10.0),
      padding: const EdgeInsets.all(15.0),
      decoration: new BoxDecoration(
        //you can get rid of below line also
        borderRadius: new BorderRadius.circular(10.0),
        //below line is for rectangular shape
        shape: BoxShape.rectangle,
        //you can change opacity with color here(I used black) for rect
        color: Colors.black.withOpacity(0.5),
        //I added some shadow, but you can remove boxShadow also.
        boxShadow: <BoxShadow>[
          new BoxShadow(
            color: Colors.black26,
            blurRadius: 5.0,
            offset: new Offset(5.0, 5.0),
          ),
        ],
      ),
      child: new Column(
        children: <Widget>[
          new Text(
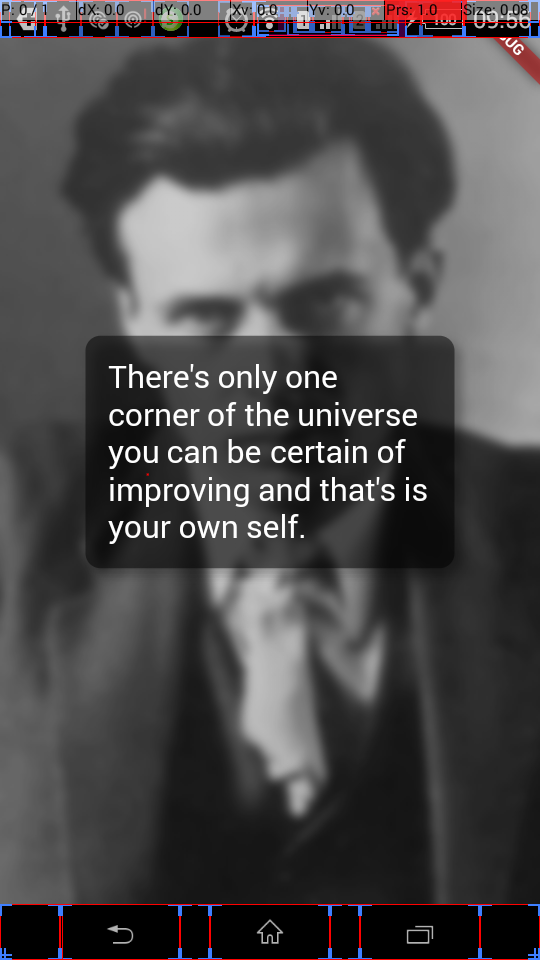
            'There\'s only one corner of the universe you can be certain of improving and that\'s your own self.',
            style: new TextStyle(
              color: Colors.white,
              fontSize: 20.0,
            ),
          ),
        ],
      ),
    );
  }
}
Outcome:
I hope this will help someone.
totally helped. Completely forgot about 'Stack' option...big thanks. –
Carmichael
how can you make the frosting follow a parent container's shape ? it still show rectangular when added inside a circular shape container –
Unceasing
@KakiMasterOfTime I think I didnt get your question properly. But if you make rectShape container shape to circle by removing borderRadius it will work. –
Gemma
I like the quote :-) –
Obola
BackdropFilter(
  filter: ImageFilter.blur(sigmaX: _sigmaX, sigmaY: _sigmaY),
  child: Container(
    color: Colors.black.withOpacity(_opacity),
  ),
),
BackdropFilter constructor:
BackdropFilter({
  Key? key,
  required ImageFilter filter,
  Widget? child,
  BlendMode blendMode = BlendMode.srcOver
})
ImageFilter.blur constructor:
ImageFilter.blur({
  double sigmaX = 0.0,
  double sigmaY = 0.0,
  TileMode tileMode = TileMode.clamp
})
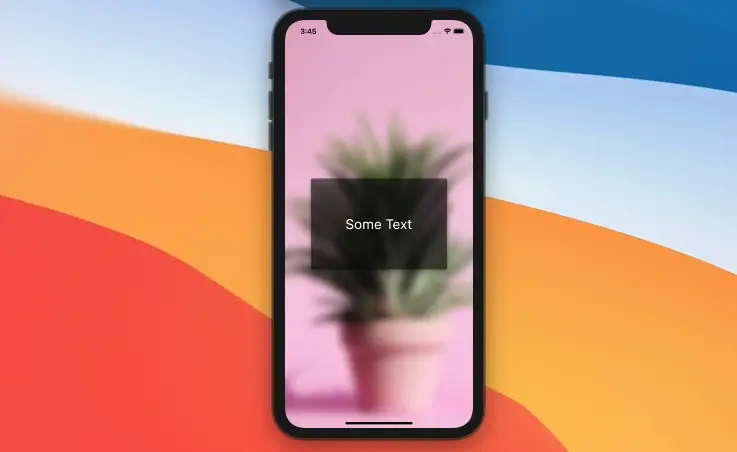
Example 1: Blurred Background Image
Preview:

// main.dart
import 'package:flutter/material.dart';
import 'dart:ui';

void main() {
  runApp(const MyApp());
}

class MyApp extends StatelessWidget {
  const MyApp({Key? key}) : super(key: key);

  @override
  Widget build(BuildContext context) {
    return const MaterialApp(
      // Remove the debug banner
      debugShowCheckedModeBanner: false,
      title: 'Kindacode.com',
      home: HomePage(),
    );
  }
}

class HomePage extends StatefulWidget {
  const HomePage({Key? key}) : super(key: key);

  @override
  State<HomePage> createState() => _HomePageState();
}

class _HomePageState extends State<HomePage> {
  @override
  Widget build(BuildContext context) {
    return Scaffold(
      body: Container(
        decoration: const BoxDecoration(
            image: DecorationImage(
                image: NetworkImage(
                    'https://www.kindacode.com/wp-content/uploads/2021/04/background.jpeg'),
                fit: BoxFit.cover)),
        child: BackdropFilter(
          filter: ImageFilter.blur(sigmaX: 10.0, sigmaY: 10.0),
          child: Center(
            child: Card(
              elevation: 10,
              color: Colors.black.withOpacity(0.5),
              child: const SizedBox(
                width: 300,
                height: 200,
                child: Center(
                  child: Text(
                    'Some Text',
                    style: TextStyle(fontSize: 30, color: Colors.white),
                  ),
                ),
              ),
            ),
          ),
        ),
      ),
    );
  }
}
© 2022 - 2024 — McMap. All rights reserved.


