Once you follow these steps, you will be able to add test classes with test functionality to your build. To run your app using the test functionality, you should select the Testing scheme that is configured below.
Xcode Project Configuration (using Xcode 7.0.1)
To allow conditional imports and functionality to be effective for testing, you will need the following ingredients:
- Testing Configuration
- Testing Target
- Testing Scheme
Short Explanation of Schemes, Targets and Build Configurations
- Schemes point to targets and configurations.
- Targets can be configured with different build settings.
- Configurations can be added, to branch out target build settings.
Here are the steps:
1. Duplicate a Configuration for testing
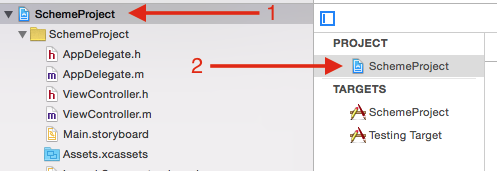
With the project file selected in the Project Navigator, follow these steps:
- Select the project target
- Select Info
- Select + to add a configuration
![Duplicate a project configuration]()
Select Duplicate "Debug" Configuration
![Duplicate "Debug" Configuration]()
Rename the new configuration, and drag it to re-order
![Rename project configuration and drag to re-order]()
2. Duplicate a Target for testing
Now that you have a testing configuration, add a testing target. With the project file select in the project navigator, follow these steps:
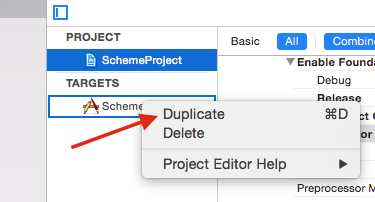
Right-click or Option-click an existing target, and select Duplicate.
![Duplicate an existing target]()
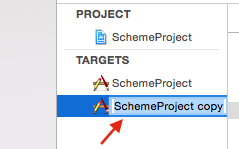
Tap on the new target to rename it, then drag it to reorder your targets.
![Rename and drag new target]()
3. Manage Schemes
Now that you have a testing target and configuration, you are ready to add a scheme that points to the new target and configuration.
Tap on the schemes (next to the stop button), and select Manage Schemes...
![Select Manage Schemes...]()
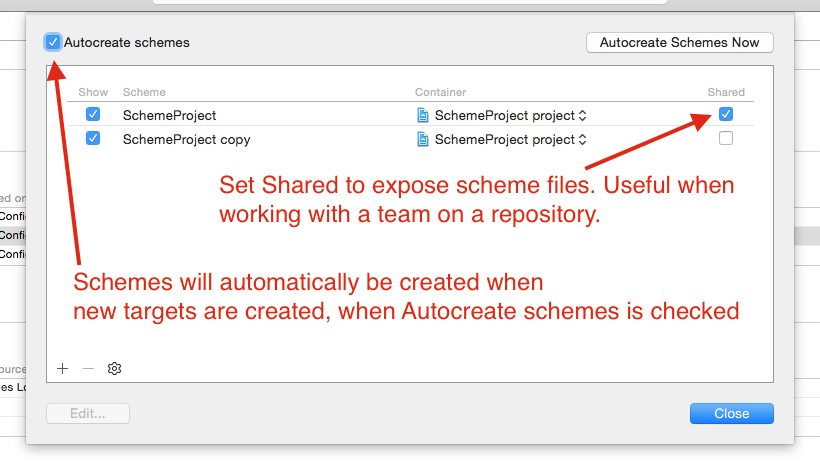
In the Schemes manager popup, if you have elected to autocreate schemes, the new scheme will already be listed. Otherwise, you can tap + in the popup to add a scheme. Each scheme can be shared, as shown here:
![Configure new scheme]()
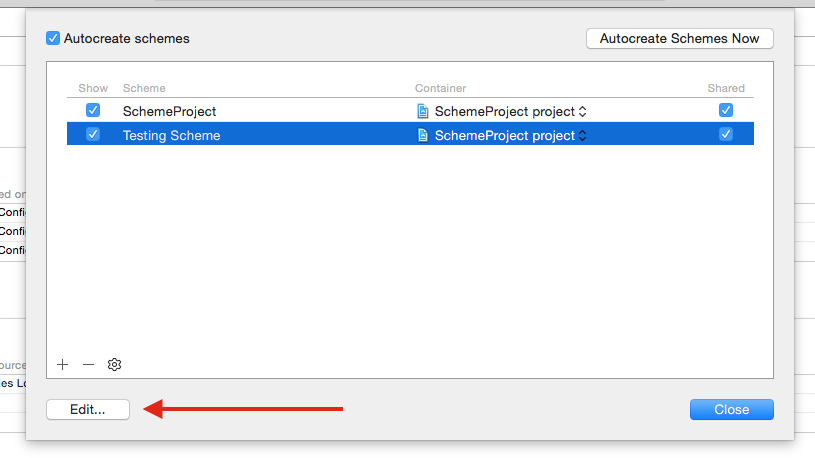
Tap on the new scheme to rename it, and drag it to reorder:
![Rename and reorder schemes]()
To edit the new scheme, ensure that it is selected, and tap Edit...
![Edit scheme]()
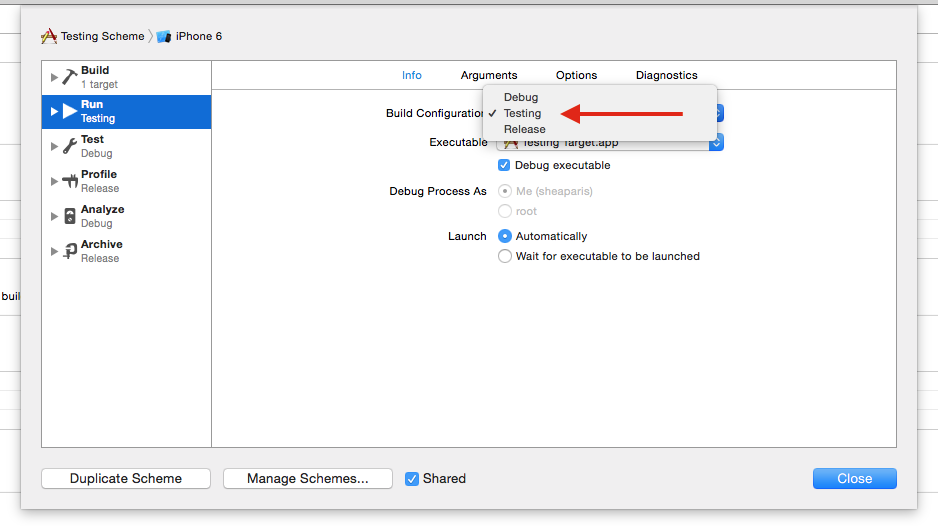
In the edit panel, select the Testing build configuration
![Select Testing build configuration]()
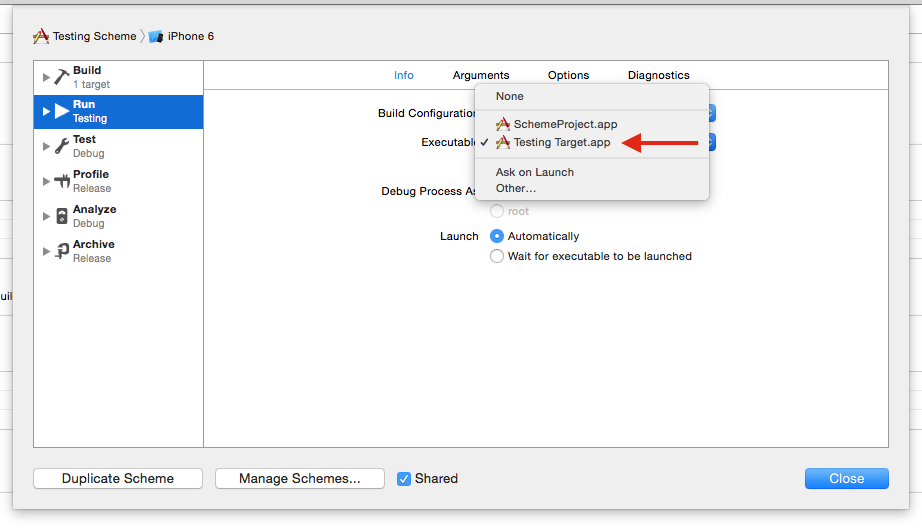
Ensure that the scheme points to the Testing Target, by tapping on the Executable drop-down:
![Point to Testing Target for Run action]()
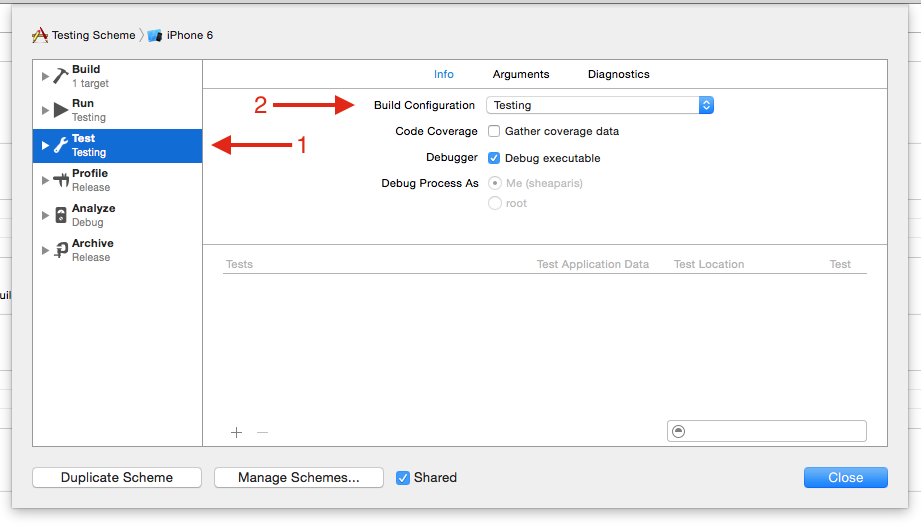
Ensure the scheme is pointing to the correct build configuration, for other actions, such as Automated Testing:
![Point to Testing Target for Test action]()
4. Configure the build settings for your targets
Now that you have your testing scheme set up to point to the Testing configuration, it will behave exactly like the Debug configuration, until you modify the build settings. Follow these steps, to change build settings for your Testing configuration:
For most build settings, there is an option for each configuration. When choosing which configuration to use in your settings, ensure the main target is selected:
![Select main target]()
The Preprocessor Macros are under the section titled 'Apple LLVM 7.0 - Preprocessing':
![Preprocessor Macros]()
Tap on a row, to select it, tap the enter key to edit and commit your changes, use the arrow keys to move up or down. It is a good practice to define all your preprocessor macros for all configurations, like this:
![Define preprocessor macros]()
5. Add a class to your Testing target
Now, the Testing Scheme points to a configuration that behaves differently from your Debug configuration. You should now be able to select the Testing scheme from the schemes dropdown menu, and run your Testing configuration.
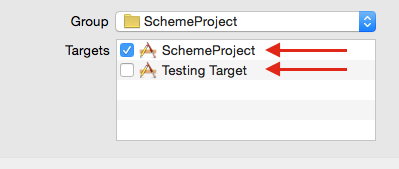
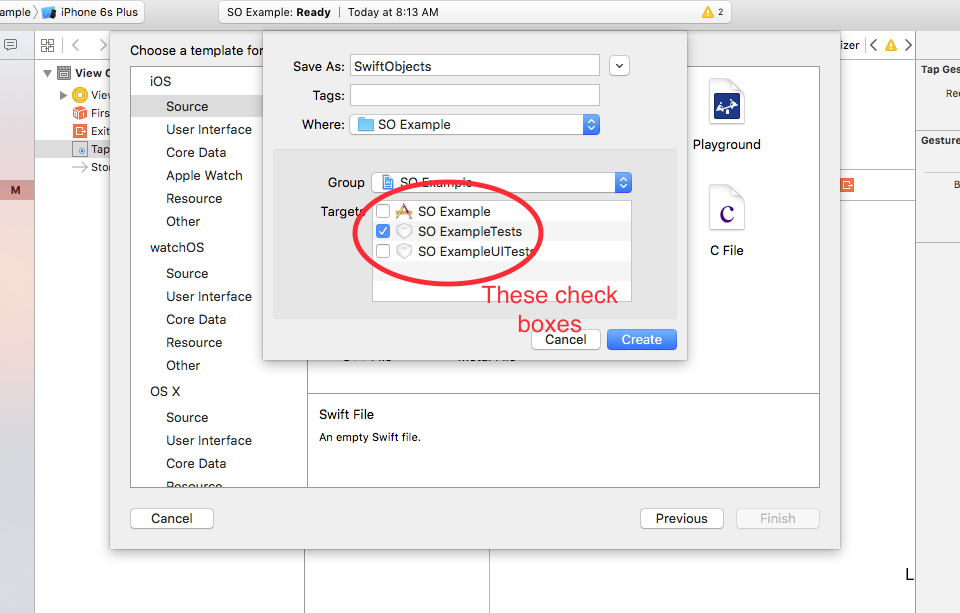
You can modify the target membership of a class in one of two ways.
- When you create a new file, the third panel where you can choose the location, has options at the bottom, for each target:
![Choose target membership]()
- When you select a file in your Project Navigator, the File Inspector has a Target Membership panel where you can make modifications:
![Modify target membership]()
Schemes
Schemes are usually paired to build configurations. One good practice is to have a scheme/configuration for each audience that needs a different version of your build. Here are some basic audiences that typically need separate configurations:
- Developer > DEBUG
- Developer > TESTING
- Internal Testing > DEVELOPMENT
- Beta Testers / Production > APP STORE
Subclassing
If you want to modify any functionality in testing mode, you could use a subclass, and only add the subclass to your testing target.


