I haven't dived into storyboards but here is how it works:
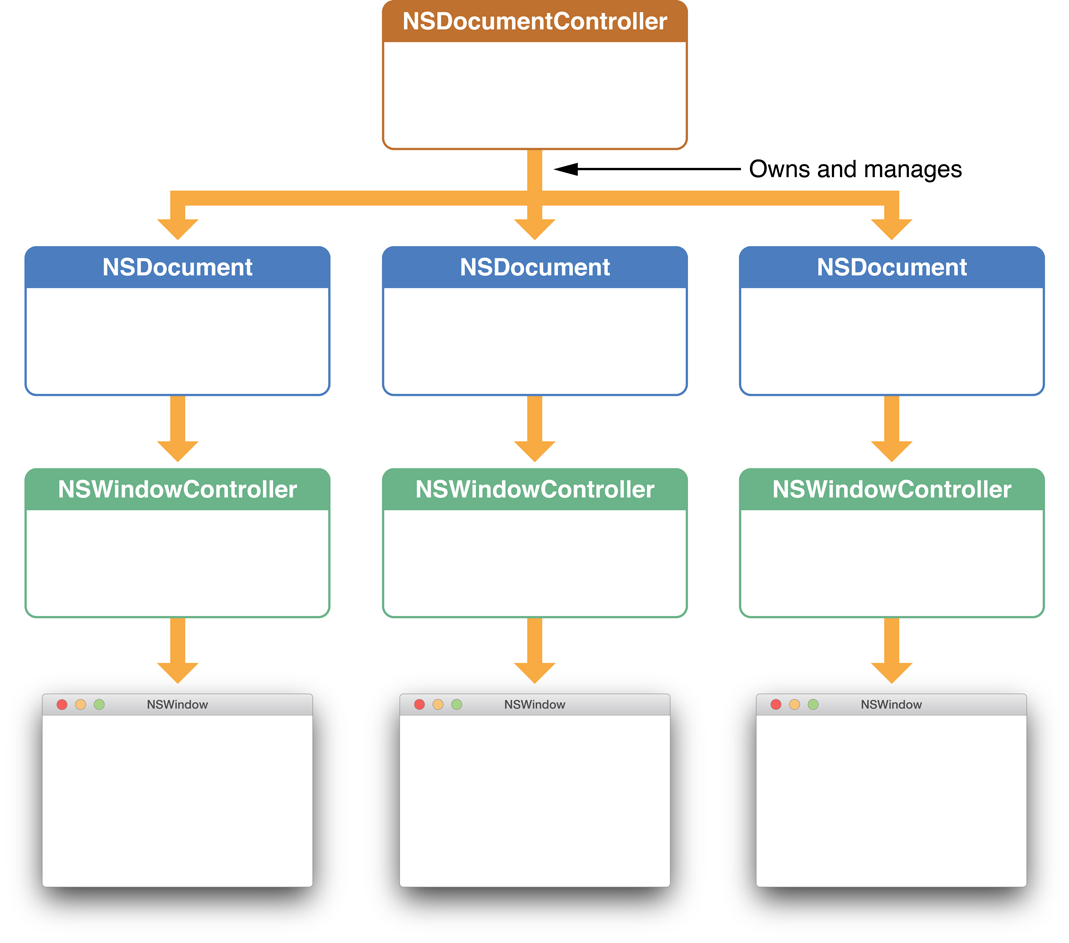
If your app has to support 10.9 and lower create custom of subclass NSWindowController
![Document based app]()
Put code like this into NSDocument subclass
- (void)makeWindowControllers
{
  CustomWindowController *controller = [[CustomWindowController alloc] init];
  [self addWindowController:controller];
}
If your app has multiple windows than add them here or somewhere else (loaded on demand) but do not forget to add it to array of document windowscontroller (addWindowController:)
If you create them but you don't want to show all the windows then override
- (void)showWindows
{
  [controller showWindow:nil]
}
You can anytime access you model in your window controller
- (CustomDocument *)document
{
  return [self document];
}
Use bindings in your window controller (windowcontroller subclass + document in the keypath which is a property of window controller)
[self.textView bind:@"editable"
                  toObject:self withKeyPath:@"document.readOnly"
                   options:@{NSValueTransformerNameBindingOption : NSNegateBooleanTransformerName}];
In contrast to iOS most of the views are on screen so you have to rely on patterns: Delegation, Notification, Events (responder chain) and of course MVC.
10.10 Yosemite Changes:
NSViewController starting from 10.10 is automatically added to responder chain (generally target of the action is unknown | NSApp sendAction:to:from:)
and all the delegates such as viewDidLoad... familiar from iOS are finally implemented. This means that I don't see big benefit of subclassing NSWindowCotroller anymore.
NSDocument subclass is mandatory and NSViewController is sufficient.
You can anytime access you data in your view controller
- (CustomDocument *)document
{
  return (CustomDocument *)[[NSDocumentController sharedDocumentController] documentForWindow:[[self view] window]];
  //doesn't work if you do template approach
  //NSWindowController *controller = [[[self view] window] windowController];
  //CustomDocument *document = [controller document];
}
If you do like this (conforming to KVC/KVO) you can do binding as written above.
Tips:
Correctly implement UNDO for your model objects in Document e.g. or shamefully call updateChangeCount:
[[self.undoManager prepareWithInvocationTarget:self] deleteRowsAtIndexes:insertedIndexes];
Do not put code related to views/windows into your Document
Split your app into multiple NSViewControllers e.g.
- (void)prepareForSegue:(NSStoryboardSegue *)segue sender:(id)sender {
    if ([segue.identifier isEqualToString:AAPLListWindowControllerShowAddItemViewControllerSegueIdentifier]) {
        AAPLListViewController *listViewController = (AAPLListViewController *)self.window.contentViewController;

        AAPLAddItemViewController *addItemViewController = segue.destinationController;

        addItemViewController.delegate = listViewController;
    }
}
Previous code is called on windowcontroller with viewcontroller as delegate (again possible only after 10.10)
I always prefer to use multiple XIBs rather than one giant storyboard/XIB. Use following subclass of NSViewController and always inherit from it:
#import <Cocoa/Cocoa.h>

@interface MyViewController : NSViewController

@property(strong) IBOutlet NSView *viewToSubstitute;

@end

#import "MyViewController.h"

@interface MyViewController ()

@end

@implementation MyViewController

- (void)awakeFromNib
{
  NSView *view = [self viewToSubstitute];
  if (view) {
    [self setViewToSubstitute:nil];
    [[self view] setFrame:[view frame]];
    [[self view] setAutoresizingMask:[view autoresizingMask]];
    [[view superview] replaceSubview:view with:[self view]];

  }
}

@end
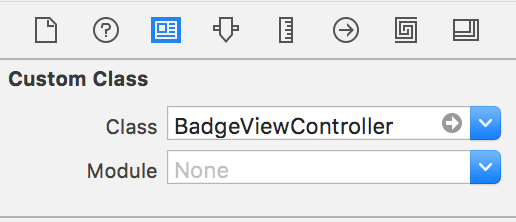
- Add a subclass of MyViewController to the project with XIB. Rename the XIB
- Add NSViewController Object to the XIB and change its subclass name
![Howto2]()
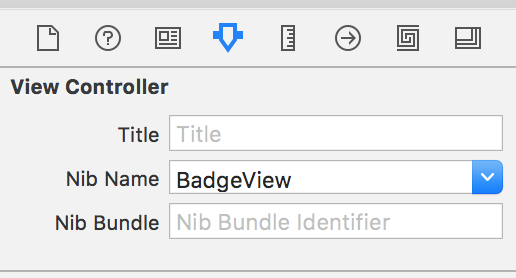
- Change the loading XIB name to name from step 1
![Howto3]()
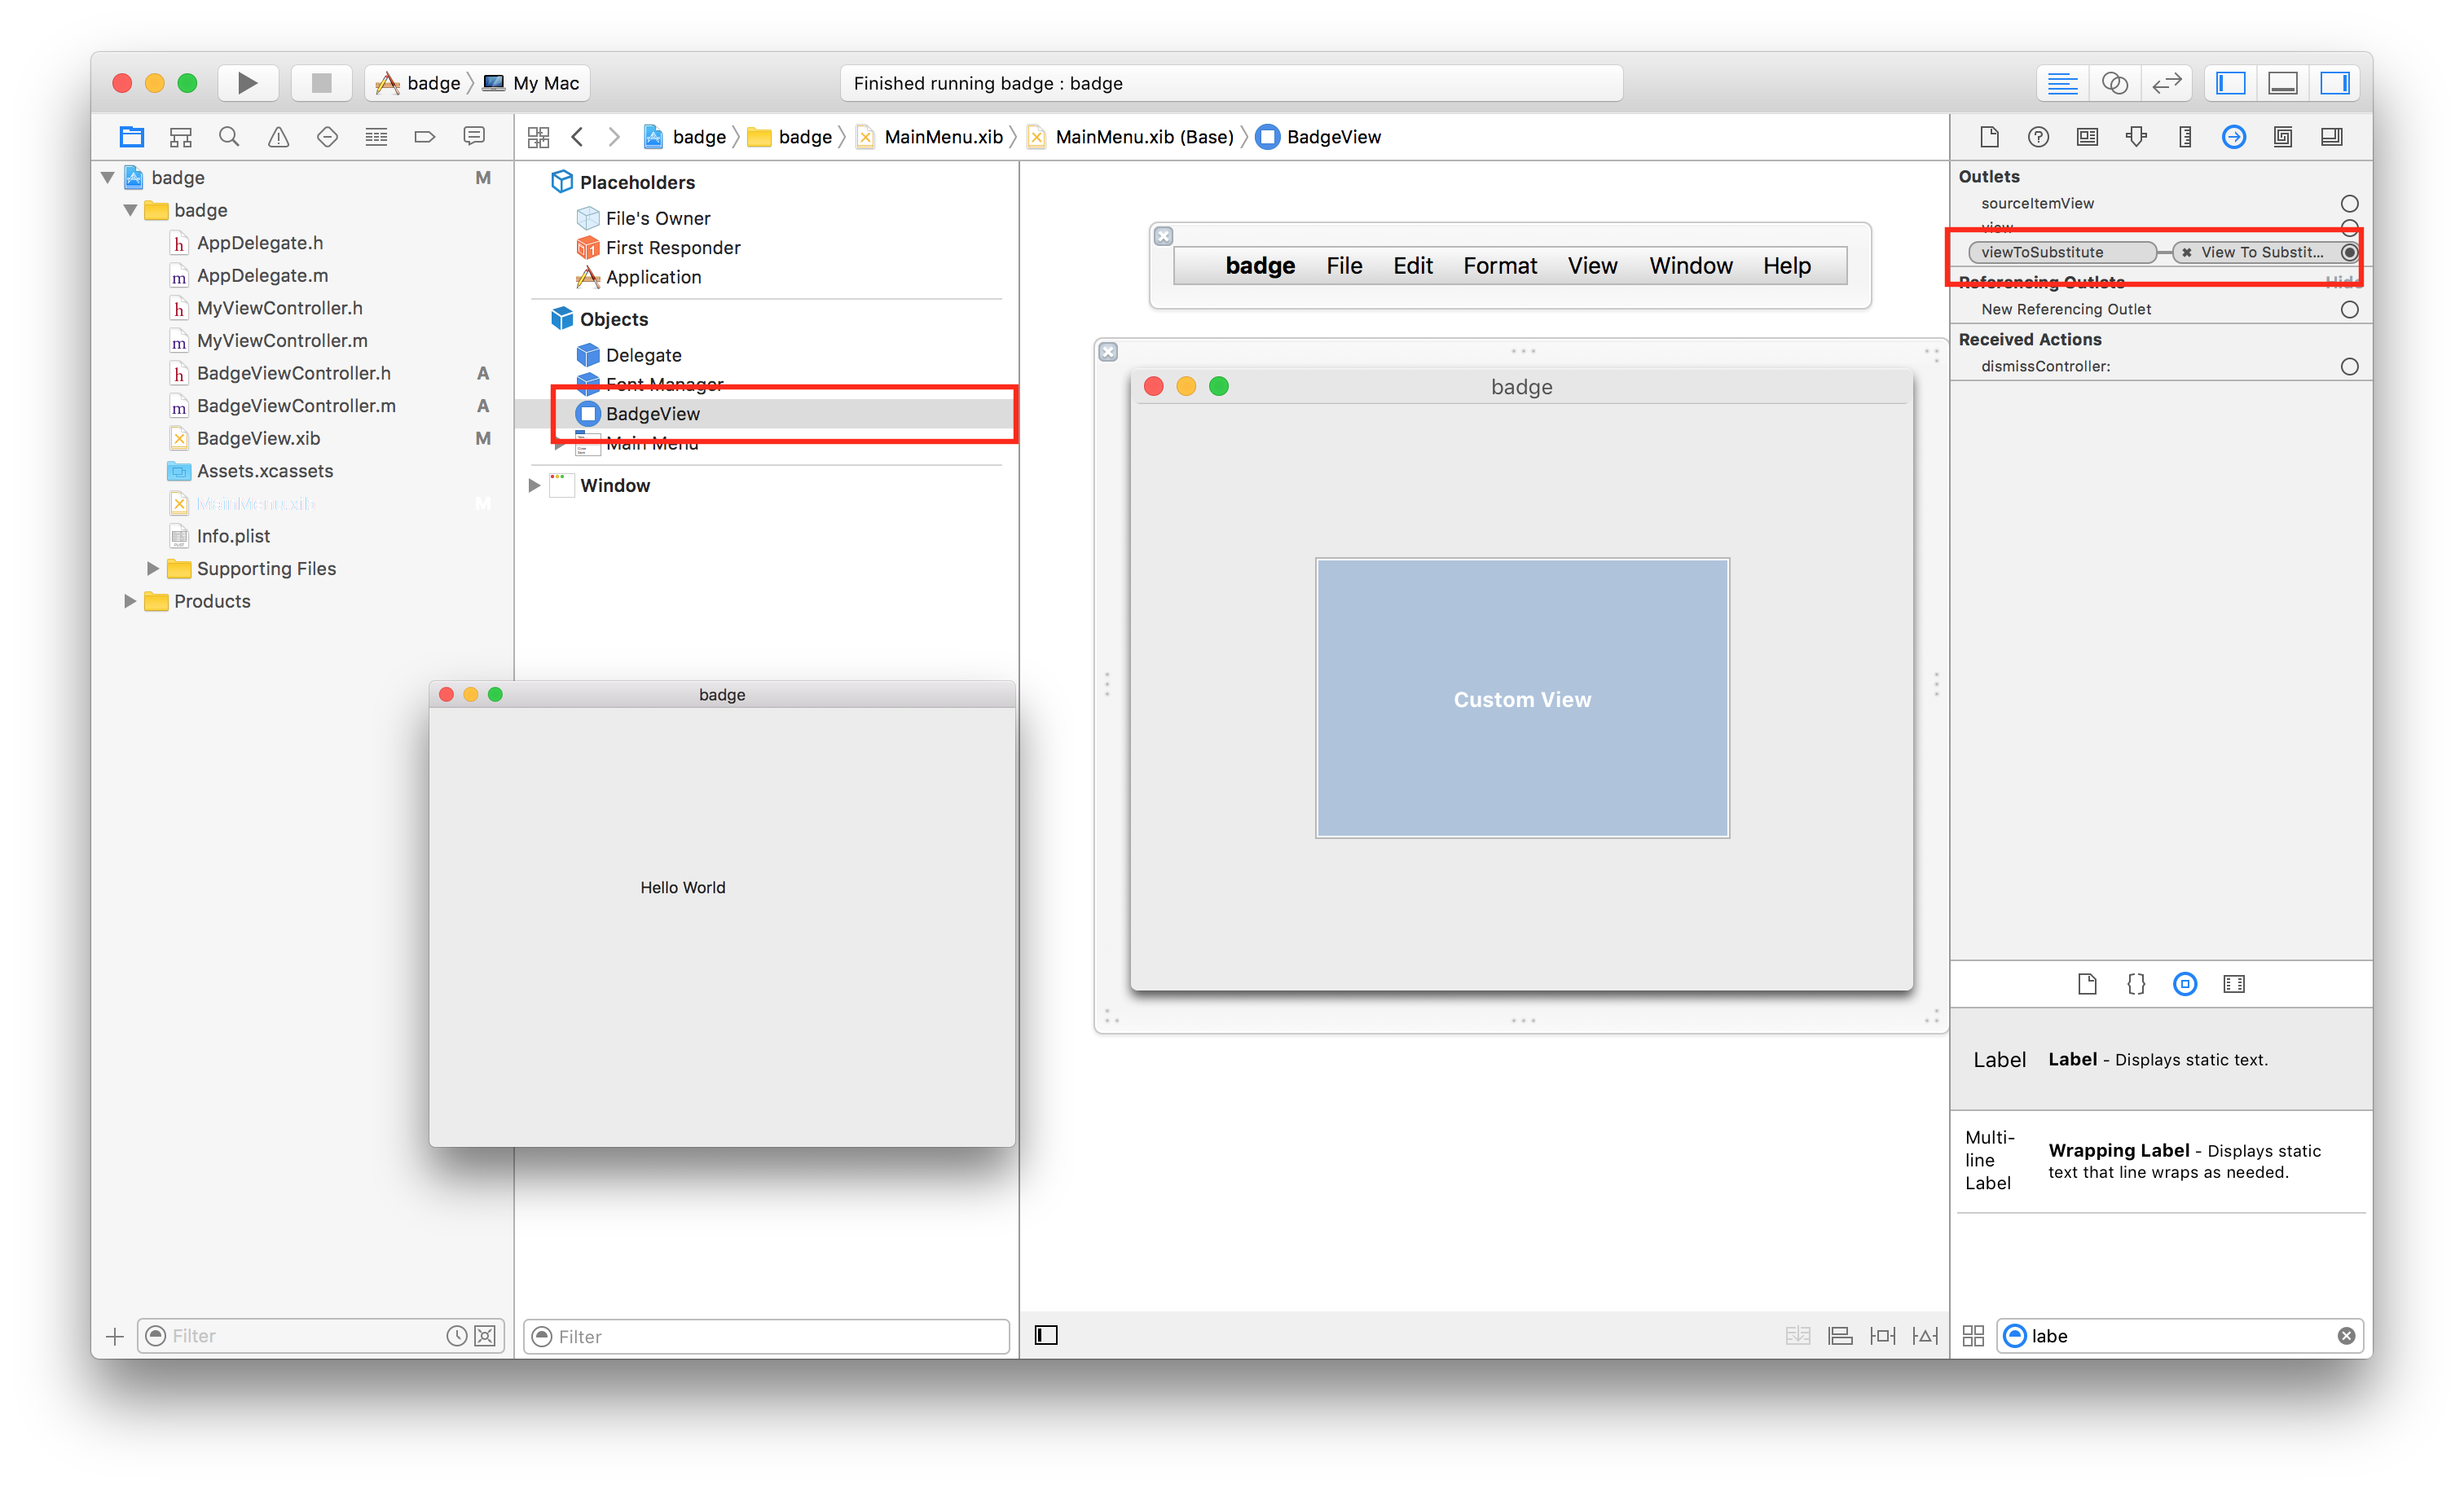
- Link view to substitute to the view you want to replace
![Howto1]() Check example project Example Multi XIB project
Check example project Example Multi XIB project
Inspire yourself by shapeart or lister or TextEdit
And a real guide is to use Hopper and see how other apps are done.
PS: You can add your views/viewcontroller into responder chain manually.
PS2: If you are beginner don't over-architect. Be happy with the fact that your app works.


(CustomDocument *)[[NSDocumentController sharedController] documentForWindow:[[self view] window]];this line is missing both areturnstatement, andsharedControllershould besharedDocumentController. – Backandforth