Bitly API- Steps to get oAuth2 Access token and using the shorten request to retrieve a Tiny Url using Postman:
After spending the better half of a day trying to figure this out I figured I would post this so it could help someone trying to integrate with Bitly API V4.
Note: Bitly API V3 will be deactivated on March 1st, 2020 so be sure to migrate to V4 as soon as possible. All the guids and other private fields in the responses have been altered for privacy.
Click this link to refer to the Bitly API Documentation
1.) Generate Access Token:
Log into bitly.com with your credentials and click on the Hamburger menu in the top right. Click on your Username and then click on the Generic Access Token. This Generic Access token is needed to retrieve your Group Guid. You will need this Group Guid to make the shorten URL Request along with your access token.
2.) Retrieve Group Guid:
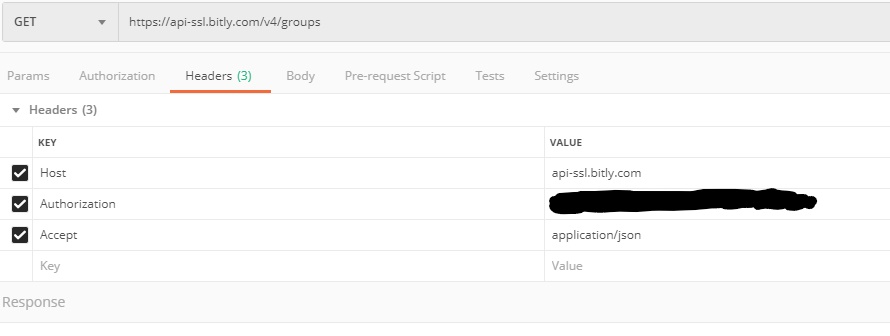
Make a GET Request to https://api-ssl.bitly.com/v4/groups to get your group_guid. You will use your Generic Access Token in the Authorization Field.
Below is a picture how the Headers should look:
![Group Guid Headers]()
You should get a JSON Response back that looks similar to the JSON below:
JSON Response of the Retrieve Group Guid GET Response:
{
    "groups": [
        {
            "created": "2019-12-18T13:45:21+0000",
            "modified": "2019-12-18T13:45:21+0000",
            "bsds": [],
            "guid": "XZXUYSJAJ43",
            "organization_guid": "JsjFtE841883",
            "name": "username",
            "is_active": true,
            "role": "org-admin",
            "references": {
                "organization": "https://api-ssl.bitly.com/v4/organizations/JsjFtE841883"
            }
        }
    ]
}
Your guid value is your group_guid used in your shorten, and other requests.
3.) Retrieve your client_id and client_secret
Register your application by logging into bitly.com with your user credentials and your application will be assigned a client_id and a client_secret. You can accomplish this by clicking on the Hamburger menu on the right side of the page, click on your username, Registered OAuth Apps, and at the bottom their should be a button that says REGISTER NEW APP.
4.) Generate OAuth2 Access Token
Refer to the Bitly Documentation and under the Authentication tab navigate to "Exchanging a Username and Password for an Access Token".
• Open Postman
• Create a new POST request to https://api-ssl.bitly.com/oauth/access_token.
• Copy the Curl Command but replace username with Bitly Login Username and password with your Bitly Login Password.
• Click on the Import tab and select Past Raw Text and paste over curl command
• In the Authorization tab paste your client_id into the Username field and client_secret into the Password field. This will do the base64encoding for you.
• Your Headers only need the Host and Content-Type key and Value. Your Authorization will be be a temporary header field and will be automatically generated for you.
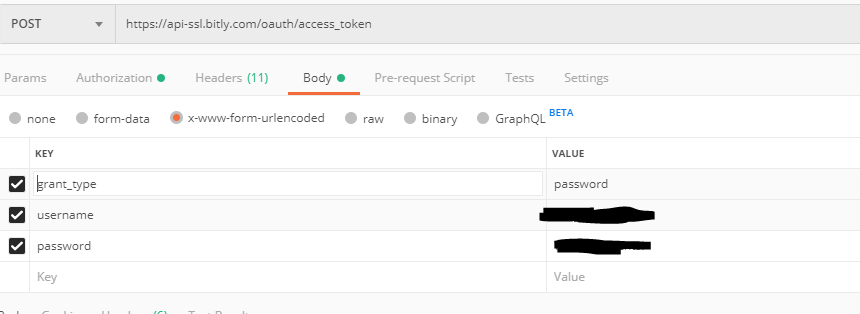
• Your Body needs:
grant_type: password (the actual word password)
username: your username for bitly.com
password: your password for for bitly.com
Below is a picture of what your Body should look like:
![enter image description here]()
• Click Send and you will receive your access token.
5.) Shorten URL
• Open new tab in Postman and make a Post request to https://api-ssl.bitly.com/v4/shorten
• Headers should include:
• Host: api-ssl.bitly.com
• Authorization: Bearer (your accesstoken from step 4)
• Content-Type: application/json
• Your Body should include this JSON:
{
  "long_url": "http://twitter.com",
  "group_guid": "guid field from Group Guid Response in Step 2"
}
• Click Send and you should see get a JSON Response like this:
{
    "created_at": "2019-12-18T21:50:47+0000",
    "id": "yhoo/2PYRS",
    "link": "http://yhoo/2PYRS",
    "custom_bitlinks": [],
    "long_url": "http://yahoo.com/",
    "archived": false,
    "tags": [],
    "deeplinks": [],
    "references": {
        "group": "https://api-ssl.bitly.com/v4/groups/yourgroupguid"
    }
}
The link value in the JSON Response will be your new Tiny URL Link.


