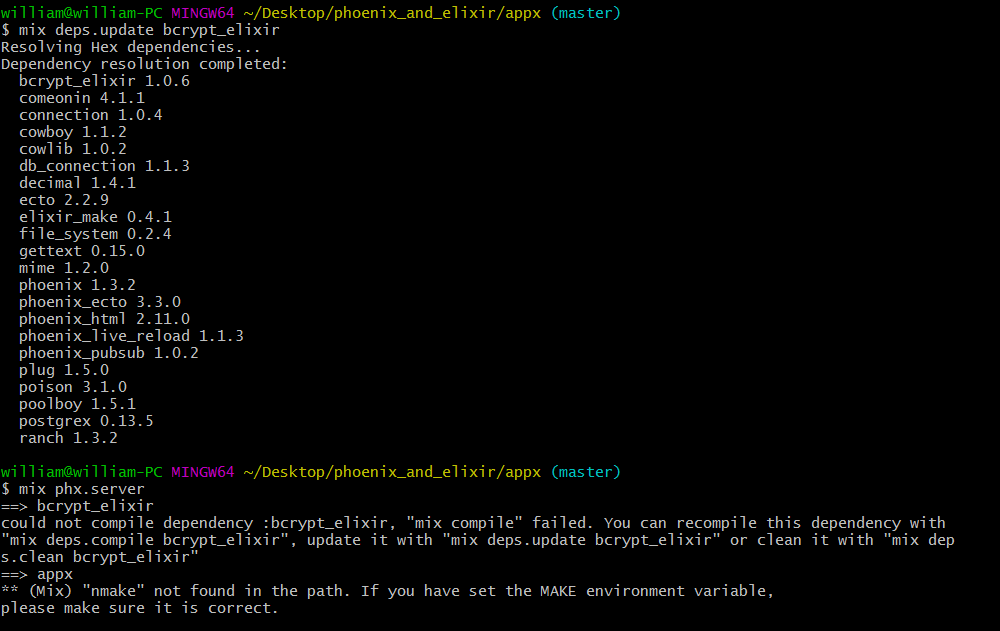
Windows uses "nmake" in place of Linux's "make" to compile "bcrypt_elixir".
You would need to install "nmake"; and you can only get it by installing "Visual Studio".
Follow these steps:
Go to this link https://visualstudio.microsoft.com/ and download Visual Studio (I downloaded the Community version)
Install the downloaded file. I have both 2019 and 2022. Use 2022 version for everything onwards.
At this stage, you must have already gotten the nmake (skip to step 4, if you have). If you haven't yet, proceed through the next steps
Click on "modify". It takes you to a pop-up where you click on and download the "Desktop development with C++" (this is the Microsoft C++ Build Tools). It appears first on the list (it shows about 9gb as expected device memory space to be used, but the file is actually not up to 2gb. You would see when you start to download). Install it as well.
Open your folder directory using the File Explorer and go to your Phoenix/Elixir project. Copy the link of the directory. Mine is:
C:\Users\maxim\Desktop\Projects\Sample-Projects\real_deal_api
Open your cmd terminal and cd into it like so:
cd C:\Users\maxim\Desktop\Projects\Sample-Projects\real_deal_api
Open a fresh cmd terminal and type in the following command to see all nmake files on your device. And change directory to the main root of your device. (If you type the nexty command elsewhere, you won't find the nmake file):
cd ../..
(Add as many "../" as you need to get to the main root. For me, my main root is C drive (C:>)). So, I used the cd ../.. above.
then, type in the following command to list out all the nmake files.
dir /s nmake.exe
- Select the path to the particular nmake file that matches your device.
Mine is like so:
C:\Program Files (x86)\Microsoft Visual Studio\2019\BuildTools\VC\Tools\MSVC\14.29.30133\bin\Hostx64\x64
I am running a 64-bit Windows laptop. Find out yours.
(To find out how many bits yours is, go to the Windows search on the left-bottom of your screen and type in "system information" or better yet, type "Control Panel" and click on "System". It shows you your system information. This will inform our choice of path.)
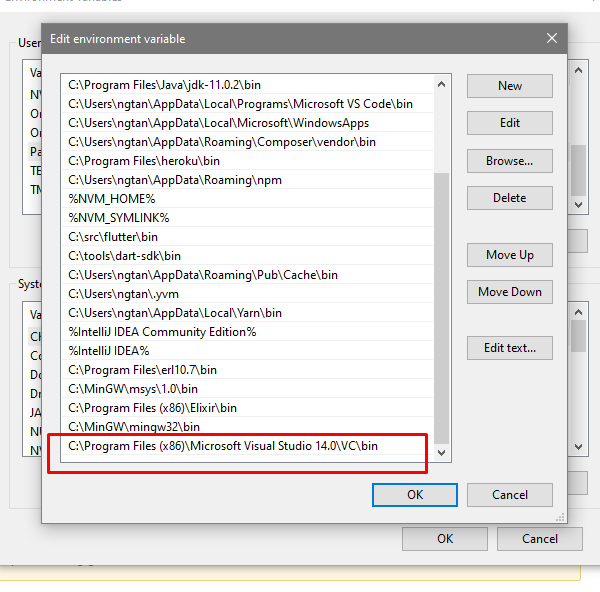
- Go to your Windows search again and type in "environment variables". click on "Edit the system environment variables". A pop-up comes up. Click on "Environment Variables..." button.
Within "System variables", which is the second window, double-click on "Path" (or click on it and click on "Edit button").
Add the exact generated directory link of the nmake file to the list of paths you see. By clicking on "New" and make sure you save with "OK' at the end of it all.
Click "OK" button again at the "Environment Variables" dialog box screen.
Run:
mix deps.compile
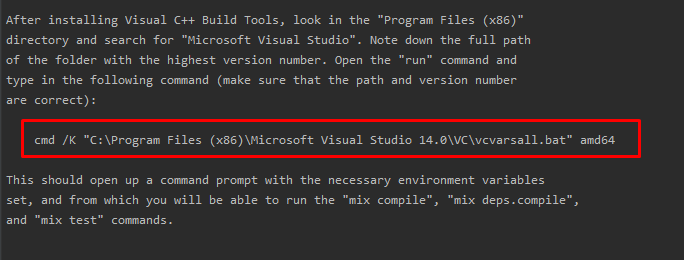
on the elixir/phoenix project directory and copy the command it spits out for you to run. Mine is:
cmd /K "C:\Program Files (x86)\Microsoft Visual Studio\2022\BuildTools\VC\Auxiliary\Build\vcvarsall.bat" amd64
Take note of the "vcvarsall.bat" file. That file is what enables us to run the next commands.
Change directory (cd) into the root directory again as we did in step 5 above and run the command given on this step 8 as given by your application when you ran the "mix deps.compile" command.
- The last command has activated the "vcvarsall.bat" file under the hood to enable you compile your elixir/erlang file that isn't compiling ordinarily. Do not close this instance of the cmd prompt. Else, you would lose the power (from the "vcvarsall.bat" file) to compile the stubborn elixir/erlang files.
If you close it, you would have to start again from step 8 in order to be able to compile your stubborn file.
Go to your already open and running cmd prompt and change directory (cd) into the elixir/phoenix project you are working on.
Mine (directory) is:
C:\Users\maxim\Desktop\Projects\Sample-Projects\real_deal_api
Finally, re-run your command "mix deps.compile". It should compile at this point.
You can go back to your VS Code and continue to run your regular commands from the terminal as you wish or any other terminal you might be using.
If this isn't clear enough and you would like images, comment below, so I can add them. But I believe this explanation should be pretty straightforward as I took time to explain in details.


