Remove border of tkinter button created with an image
Asked Answered
W

11

8

I've created a couple of buttons using my program and I've made them include images. However, I wish to now remove the border that remains (see https://i.sstatic.net/K128c.png for screenshot).

The code for the "back" button as an example:

backbutton = ttk.Button(mainframe, command=homereturn)
backbuttonimage = PhotoImage(file="back.gif")
backbutton.config(image=backbuttonimage)
backbutton.pack()
backbutton.grid(column=0, row=1)

Any help would be greatly appreciated.

Widespread answered 17/8, 2015 at 22:39 Comment(1)
Having a similar problem, but only on a Raspberry Pi. Works great on Windows. I'm using tk.Button with borderwidth=0 and still getting outlines. I see similar outlines around my sliders in this example: user-images.githubusercontent.com/13696193/…Kreitman
K
17
backbutton = tk.Button(...,  highlightthickness = 0, bd = 0)

This works for Python 3.x, I tried...

enter image description here

 icon = PhotoImage(file="lock.png")
 self.company_lock_button = Button(self.control_lock_frame, image = icon, highlightthickness = 0, bd = 0)
 self.day_lock_button = Button(self.control_lock_frame, image = icon)
 self.hour_lock_button = Button(self.control_lock_frame, image = icon)
Kenlay answered 15/3, 2016 at 15:46 Comment(0)
M
8

If you are using images to define a custom button, use the standard button class rather than the ttk button class. This will allow you to set the borderwidth attribute to zero:

import tkinter as tk
...
backbutton = tk.Button(..., borderwidth=0)

(unrelated: there's no point in calling backbutton.pack() and immediately follow it with backbutton.grid(...) - you can only use one for a particular widget, and the last one you call is the one that has any effect. In this case the call to pack is completely useless)

Mika answered 17/8, 2015 at 23:15 Comment(0)
L
2

I had the same issue with imaged buttons. Neither bd=0 nor highlichtthickness=0 alone helped. I even suspected the relief-option to play it's part.

What finally helped me: pady=0, padx=0

So, for the question asked:

backbutton.config(image=backbuttonimage, highlightthickness=0, pady=0, padx=0)

could work.

Lilybel answered 1/2, 2021 at 15:9 Comment(1)
This is the correct answer, as it mentions padding.Metalanguage
N
2

Using a new Mac I had the same issue and none of the other answers fully removed the border surrounding the button. I found that setting highlightbackground to the canvas's background color did the trick.

Neoterism answered 12/6, 2022 at 13:42 Comment(0)
P
1

You can use highlightthickness=0 and bd=0

Penalize answered 19/2, 2021 at 4:50 Comment(0)
S
1

None of the solutions provided so far worked in my case.

(I can only suspect that this is related to the new MacOS GUI style policy of recent versions (I'm using Big Sur). Also other style options don't work on MacOS, e.g. the relief option doesn't have any effect on the appearance of a button.)

Here is my solution: when you put an image to a button, the options width and height take pixels as unit. When you chose small values, i.e. 10x10, the border seems to be covered by the image. Voilá!

Steamship answered 21/4, 2021 at 12:26 Comment(0)
E
1

On a Mac, none of these seemed to work. In photo editing software (Photoshop): Create the button image with the same color background as you intend to set your tkinter window to. Also make sure your button image background is at least a few pixels larger than the image.

In your code: Reduce the size of the button by a few pixels. Test by clicking on your button. If you notice the outline reappearing, reduce it some more. Here the original file "button.png" was 100x40 pixels.

# Set the background color to whatever you want
# This is the color value for "Dark" windows on a Mac.
root.configure(bg="#323232")
my_image = tk.PhotoImage(file="button.png")
button = tk.Button(root, image=my_image, width=96, height=36)
button.pack()
Effectuate answered 12/11, 2023 at 1:10 Comment(0)
L
0

Here's one way you could do it..

Use ttk.Style() to set the button's background color to the color of mainframe.

root_color = "red" #Just an example, can't remember the default tk window color

mainframe = tk.Tk() #or whatever mainframe is
mainframe.configure(bg = root_color)
style = ttk.Style()
style.configure('TButton', background = root_color)
backbutton = ttk.Button(mainframe, command=homereturn)
backbuttonimage=PhotoImage(file="back.gif")
backbutton.config(image=backbuttonimage)
backbutton.pack()
backbutton.grid(column=0, row=1)

As a side note, you don't have to specify style = .. in your ttk button here because you are configuring the default TButton style ttk uses. If you defined a custom style for this button you would have to specify this in the keyword arguements for the button.

An example would be giving your button rounded edges instead of using images to achieve the desired effect.

Lacuna answered 17/8, 2015 at 22:53 Comment(2)
Cheers, that's cool - but what if I plan to give the mainframe a background image?Widespread
Using pack() and then grid() is pointless since they can't be combined. It'll only use grid() in this case since that's what you called last.Bulbar
M
0

If you are using the import function as:

from tkinter import *

Button(main_scr, text = "OK", bg = "yellow", bd = 0, command = delete1).pack()

The bd = 0 would not show the border.

Magallanes answered 17/8, 2020 at 16:0 Comment(1)
While helpful, that's not how they're creating the button in the Q and the answer would be more helpful if it considered that context.Grot
P
0

Not all themes support changing borderwidth. Try using tkinter.tk instead of using ttk.Button.

Use keyword borderwidth=0 for Button's parameter.

You cannot use both backbutton.pack() and backbutton.grid(). You can select one of them.

Snippet:

from tkinter import ttk
import tkinter as tk
 

mainframe = tk.Tk()
              
def homereturn():
    print('hello')

backbutton = tk.Button(mainframe, command=homereturn, borderwidth=0)
backbuttonimage = tk.PhotoImage(file="p1.png")
backbutton.config(image=backbuttonimage)
backbutton.pack()
 
mainframe.mainloop()

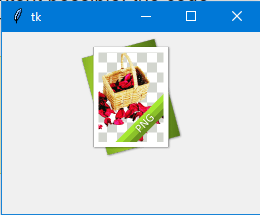
Screenshot w/out border:

enter image description here

Proparoxytone answered 14/2, 2023 at 14:19 Comment(0)
G
0

I think what you are looking for is this:

padding='0,0,0,0'

CODE:

ttk.Button( frame, text='B', image='myimg.png', padding='0,0,0,0', command=my_cmd)

Sorry, that it comes how many years later.

Gorrian answered 24/2, 2023 at 18:15 Comment(0)

© 2022 - 2024 — McMap. All rights reserved.