I am new to Android Studio.This is my project screenshot.My project builds successfully but when i run it only Build Successful is shown.
By what I understand I think where build is written in the toolbar there should be my project name.When I go to Edit Configuration inside Module there is only one option that is No Module while I think my project name should be there.When I right click on my project and click on Make Module 'Copy of IBL2 eclipse' nothing happens.This project was running fine in eclipse.
Try first in Android Studio:
File -> Sync Project with Gradle Files
In the "project" page on the top left corner in android studio.
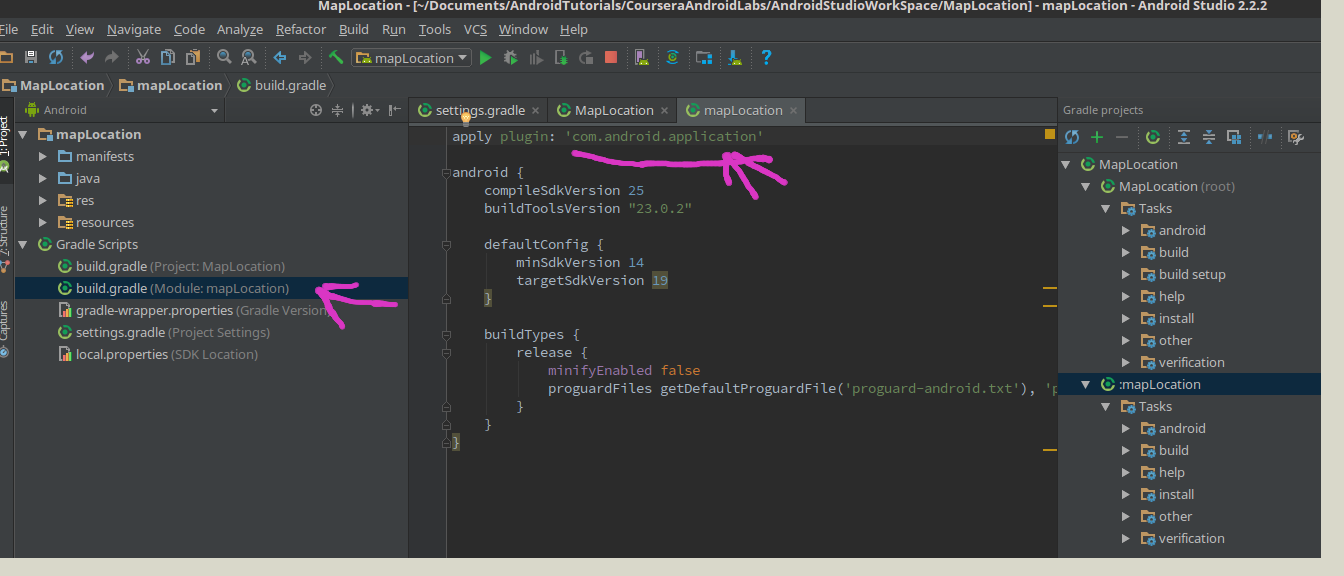
From dropdown goto Android >> Gradle Scripts >> Build Gradle(Module :app)
make sure the first line of this file is like this.
apply plugin: 'com.android.application'
not like this
apply plugin: 'com.android.library'
CHECK if the project setting is like this,if the module that you want is show in here

IF the module that you want or "Module SDK" is not show or not correct.
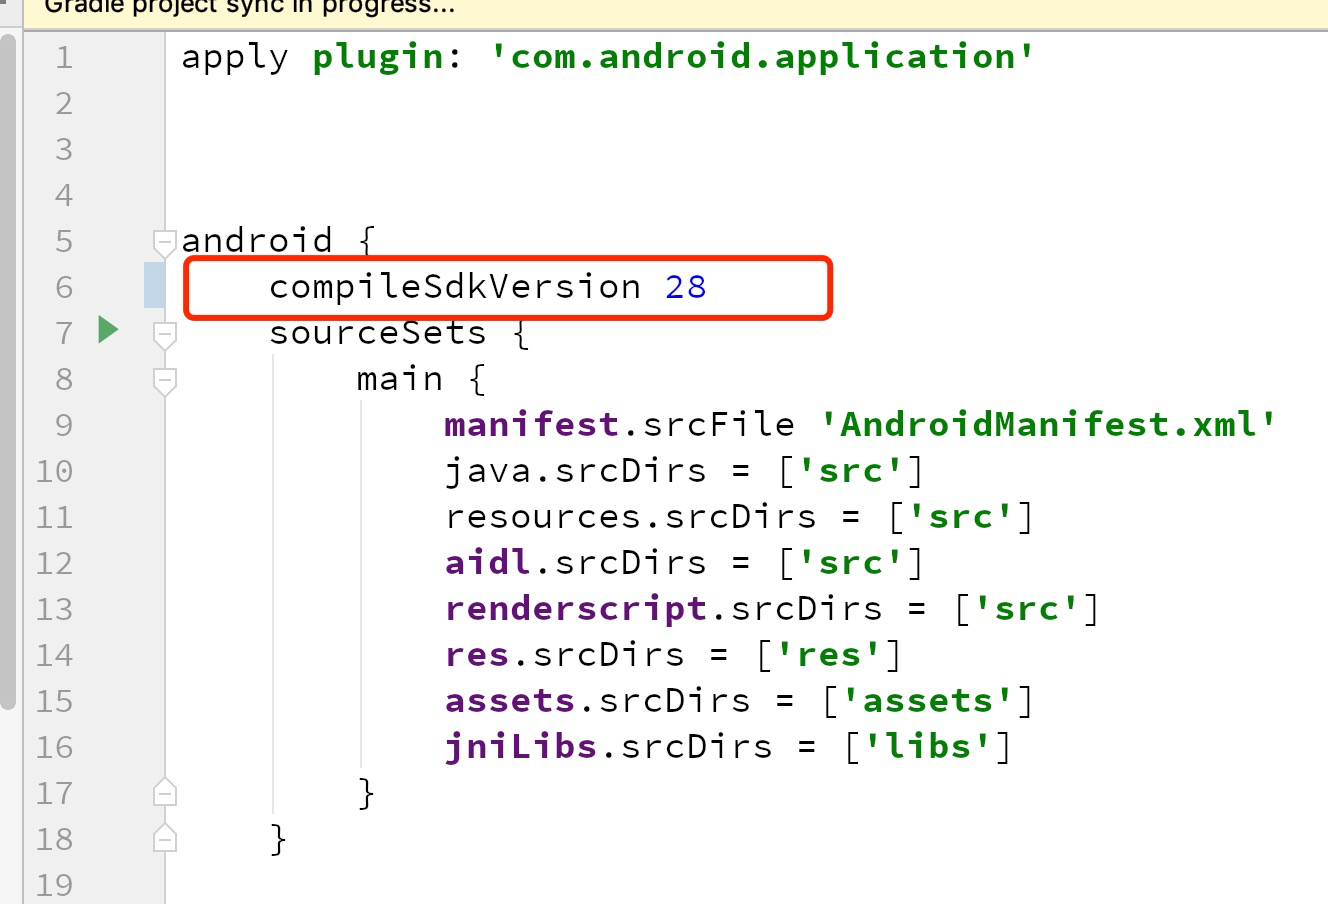
then go to the module's build.gradle file to check if the CompileSdkVersion has installed in your computer.
or modifier the CompileSdkVersion to the version that has been installed in your computer.
In my case:I just installed sdk version 29 in my computer but in the module build.gradle file ,I'm setting the CompilerSdkVersion 28
Both are not matched.
Modifier the build.gradle file CompilerSdkVersion 29 which I installed in my computer
It's working!!!
If you have imported the project, you may have to re-import it the proper way.
Steps :
- Close Android Studio. Take backup of the project from C:\Users\UserName\AndroidStudioProjects\YourProject to some other folder . Now delete the project.
- Launch Android Studio and click "Import Non-AndroidStudio Project (even if the project to be imported is an AndroidStudio project).
- Select only the root folder of the project to be imported. Set the destination directory. Keep all the options checked. AndroidStudio will prompt to make some changes, click Ok for all prompts.
- Now you can see the Module pre-defined at the top and you can launch the app to the emulator.
Tested on AndroidStudio version 1.0.1
For some reason, I was missing the settings.gradle file.
- Create
settings.gradleunder your root directory, and inside it:
include ':app'
(assuming your app is indeed inside /app directory).
- Hit
File->Sync Project with Gradle Files.
After that everything worked out for me.
Other path is " tool menu-->android-->sync proyect with gradle File"
I was able to resolve this issue by performing a Gradle sync
To do this:
In project view, right click the root (in my example below, "JamsMusicPlayer"
Click "Synchronize {ProjectName}"
Once this completes, you should see a module in your "Run" dialog

For those of you who are visual learners here is another place to look for the fix. I did indeed find that the underlined tag was pointing to "library" and a change to "application" and then updating gradle got my project running on the emulator.
In my case, my compileSdkVersion and buildToolsVersion was 28 in build.gradle (app module)
  android {
        .
        .
        compileSdkVersion 28
        buildToolsVersion 28
        .
        .
  }
But SDK was not installed. So then I installed it first and it worked for me !!!
Sometimes the following fix will work. Go to your build.gradle of your project and add google() into the repositories element and google() should be the at the top of all the repository.
This is the sample of the repositories block. What you need to do is to add google() or if that exists already, take that to the top of all the line inside repositories
    repositories {
    google()
    jcenter()
    maven { url 'https://maven.fabric.io/public' }
    maven { url "https://jitpack.io" }
    maven { url 'https://maven.google.com' }
}
Check for the file gradle.properties in your project root folder. If not there, create a new file with the name / copy the file from other project.
Open and check both the build.gradle file and confirm you have have any error in those files.
Then, Click on the File menu -> Sync project with Gradle Files.
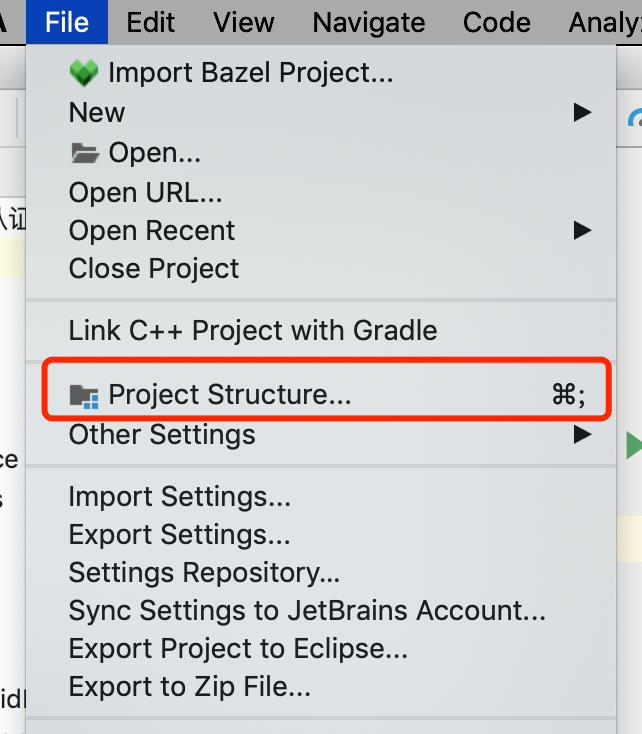
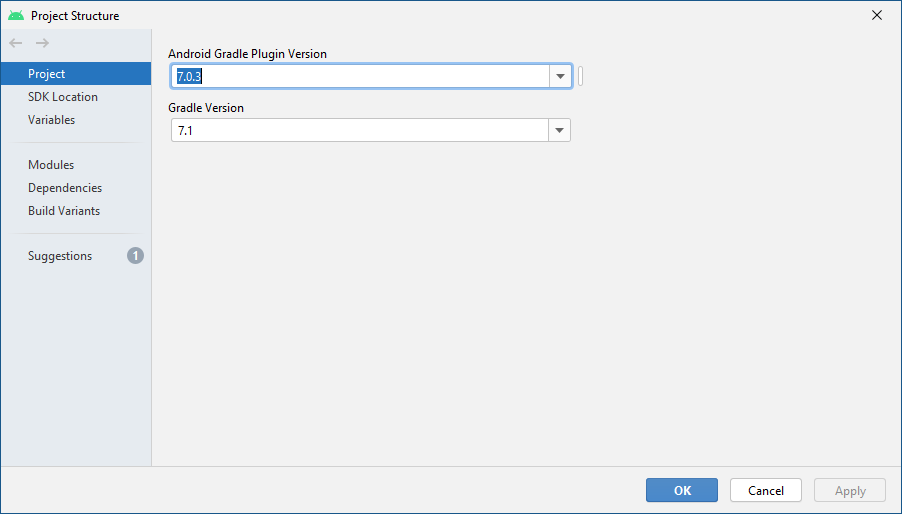
I had this problem, and was able to resolve it by updating the Android Gradle Plugin and Gradle version in my installation. I updated by going to File > Project Structure > Project menu and using the dropdown boxes. I've included a picture of this menu below. For more information, see the android developer website gradle plugin page.
Once the plugin and gradle version were updated, a gradle sync was able to complete successfully, and the app module appeared under build configurations.
For me the sdk version mentioned in build.gradle wasn't installed. Used SDK Manager to install the right SDK version and it worked
In my case, the project use older version of Gradle (3.3) and in new version of Android Studio that not work as usual
So i add google repo in the build.gradle, then everything goes right
repositories {
   google() // if google() not work, use below instead
   // maven { url 'https://dl.google.com/dl/android/maven2/' }
   jcenter()
}
Got this error in a refactor when I forgot to change the folder structure during a package name change.
com.appname.app
had forgotten to add an app folder and move the main files
Open project in Android Studio and go to File> New> Import Module... and browse to your project's gradle directory. It works for me when created React-Native project and have a missing module in configuration.
I had a similar issue of my app module disappearing, this was after a large merge (from hell). I found app.iml was missing <component name="FacetManager"> when compared with other projects and before the merge. So I copy and pasted the below under the root <module > element.
Manually editing the .iml files maybe ill advised so proceed at your own risk.
File: project root folder > app > app.iml
Add the following...
  <component name="FacetManager">
    <facet type="android-gradle" name="Android-Gradle">
      <configuration>
        <option name="GRADLE_PROJECT_PATH" value=":app" />
      </configuration>
    </facet>
    <facet type="android" name="Android">
      <configuration>
        <option name="SELECTED_BUILD_VARIANT" value="debug" />
        <option name="SELECTED_TEST_ARTIFACT" value="_android_test_" />
        <option name="ASSEMBLE_TASK_NAME" value="assembleDebug" />
        <option name="COMPILE_JAVA_TASK_NAME" value="compileDebugSources" />
        <afterSyncTasks>
          <task>generateDebugSources</task>
        </afterSyncTasks>
        <option name="ALLOW_USER_CONFIGURATION" value="false" />
        <option name="MANIFEST_FILE_RELATIVE_PATH" value="/src/main/AndroidManifest.xml" />
        <option name="RES_FOLDER_RELATIVE_PATH" value="/src/main/res" />
        <option name="RES_FOLDERS_RELATIVE_PATH" value="file://$MODULE_DIR$/src/main/res;file://$MODULE_DIR$/src/debug/res" />
        <option name="ASSETS_FOLDER_RELATIVE_PATH" value="/src/main/assets" />
      </configuration>
    </facet>
  </component>
I had the same issue since I changed my app ID in config.xml file.
I used to open my Android project by choosing among recent projects of Android Studio.
I just File > Open > My project to get it working again.
I had the same issue when using Kotlin DSL. The project level build.gradle.kts file seemed to be causing problems in that Android Studio could not detect it. What solved this for me was:
Rename build.gradle.kts -> build.gradle
File -> Sync Project with Gradle Files
Rename build.gradle -> build.gradle.kts
Hope it helps.
© 2022 - 2024 — McMap. All rights reserved.


include ':app'toinclude ':myappname'– Husk