Trying to reload view controller to update the current theme
Asked Answered
V

3

4

What I am looking for

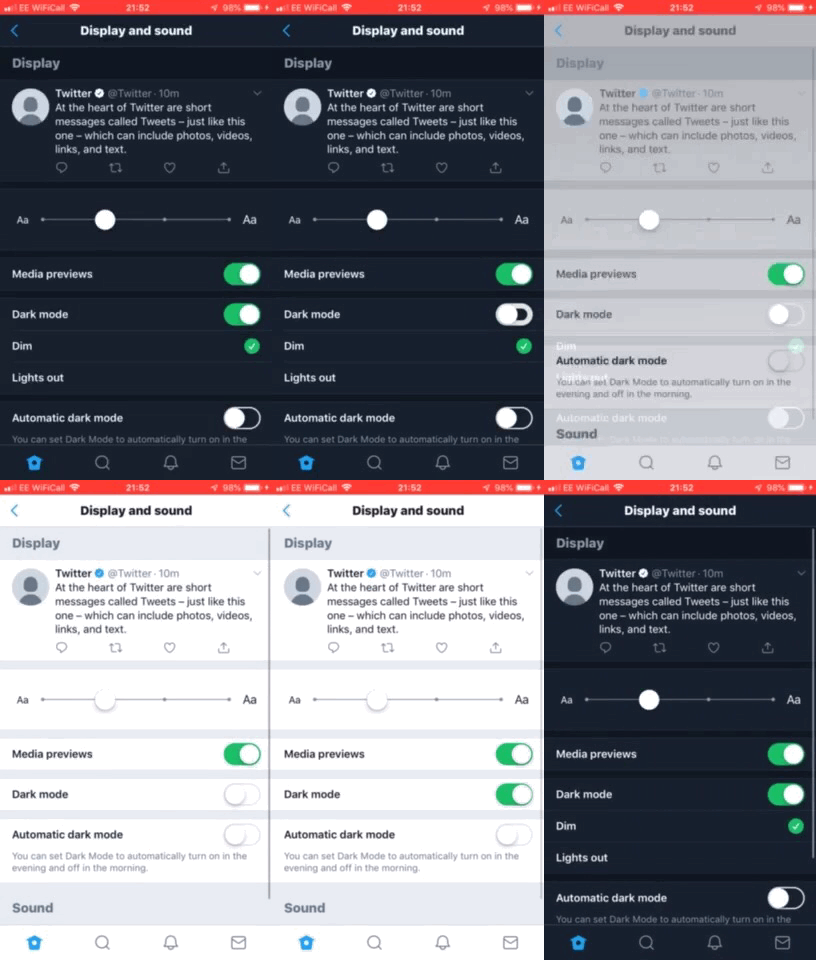
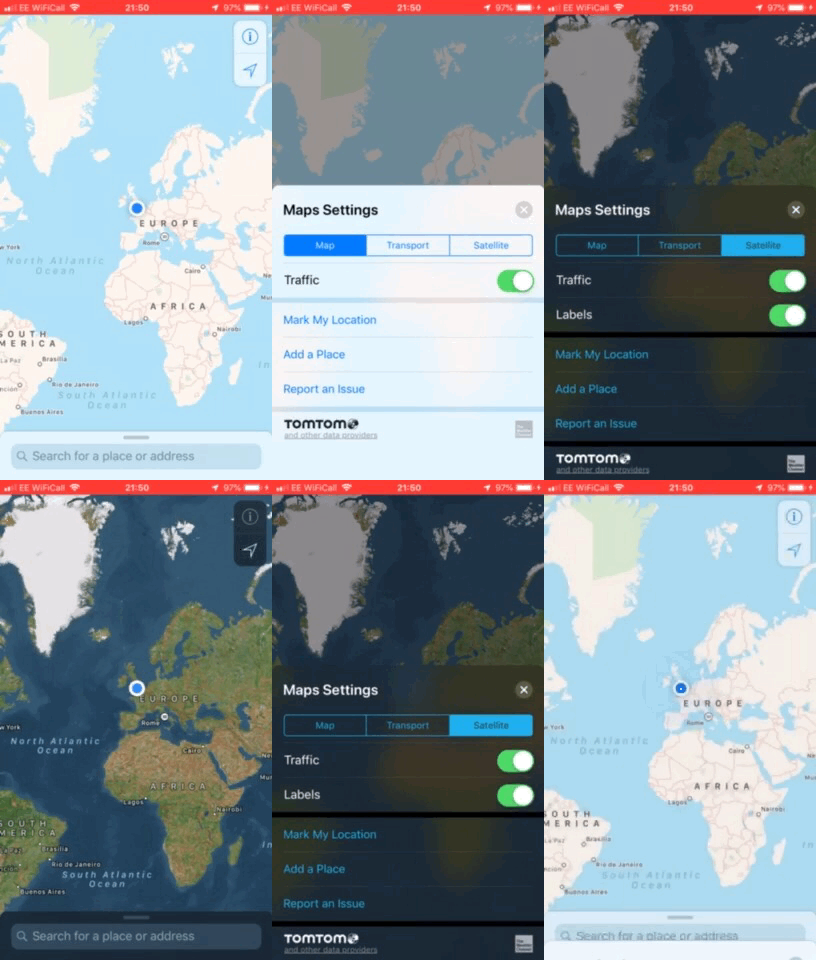
I am trying to reload all the views in my view controller, to change between themes (similar to what Twitter or Apple Maps does).

Twitter Apple Maps


How I have setup my different themes

I have themed views setup like so:

@IBDesignable
extension UIView {

    @IBInspectable
    var lightBackgroundColor: UIColor? {
        set {
            switch GEUserSettings.theme {
            case .light:    backgroundColor = newValue
            case .dark:     break
            }
        }
        get {
            return self.lightBackgroundColor
        }
    }

    @IBInspectable
    var darkBackgroundColor: UIColor? {
        set {
            switch GEUserSettings.theme {
            case .light:    break
            case .dark:     backgroundColor = newValue
            }
        }
        get {
            return self.darkBackgroundColor
        }
    }
}

This allows me in my Main.storyboard to set a light and dark theme background colour, depending on the current theme. My background blur effect is excluded from this, as I couldn't find a way to update the style in code, so it is created in viewDidLoad.


Triggering the theme from shaking the device

However, when I want to change the theme, I'm not sure how to do it. I want to trigger it from shaking the device, like so:

override func motionBegan(_ motion: UIEvent.EventSubtype, with event: UIEvent?) {
    print("Shaken!")
    let oppositeTheme: GEUserSettings.Theme = {
        switch GEUserSettings.theme {
        case .light:    return .dark
        case .dark:     return .light
        }
    }()

    GEUserSettings.theme = oppositeTheme

    // My attempt to update the view controller to
    // update the theme, which doesn't do anything.
    dismiss(animated: true) {
        UIApplication.shared.keyWindow?.rootViewController?.present(self, animated: true, completion: nil)
        // Yes, the presenting is working, but the views don't change.
    }
}

What are the possible solutions?

The settings take effect if the app is quit and relaunched. I could either force the app to quit (not using exit(0) or anything that counts as a crash), or reload it whilst using the app.

I tried to dismiss and then reload the view controller, as shown in the code above. The one I am reloading is presented on top of the base view controller.

How can I make this work, as I am using storyboards?

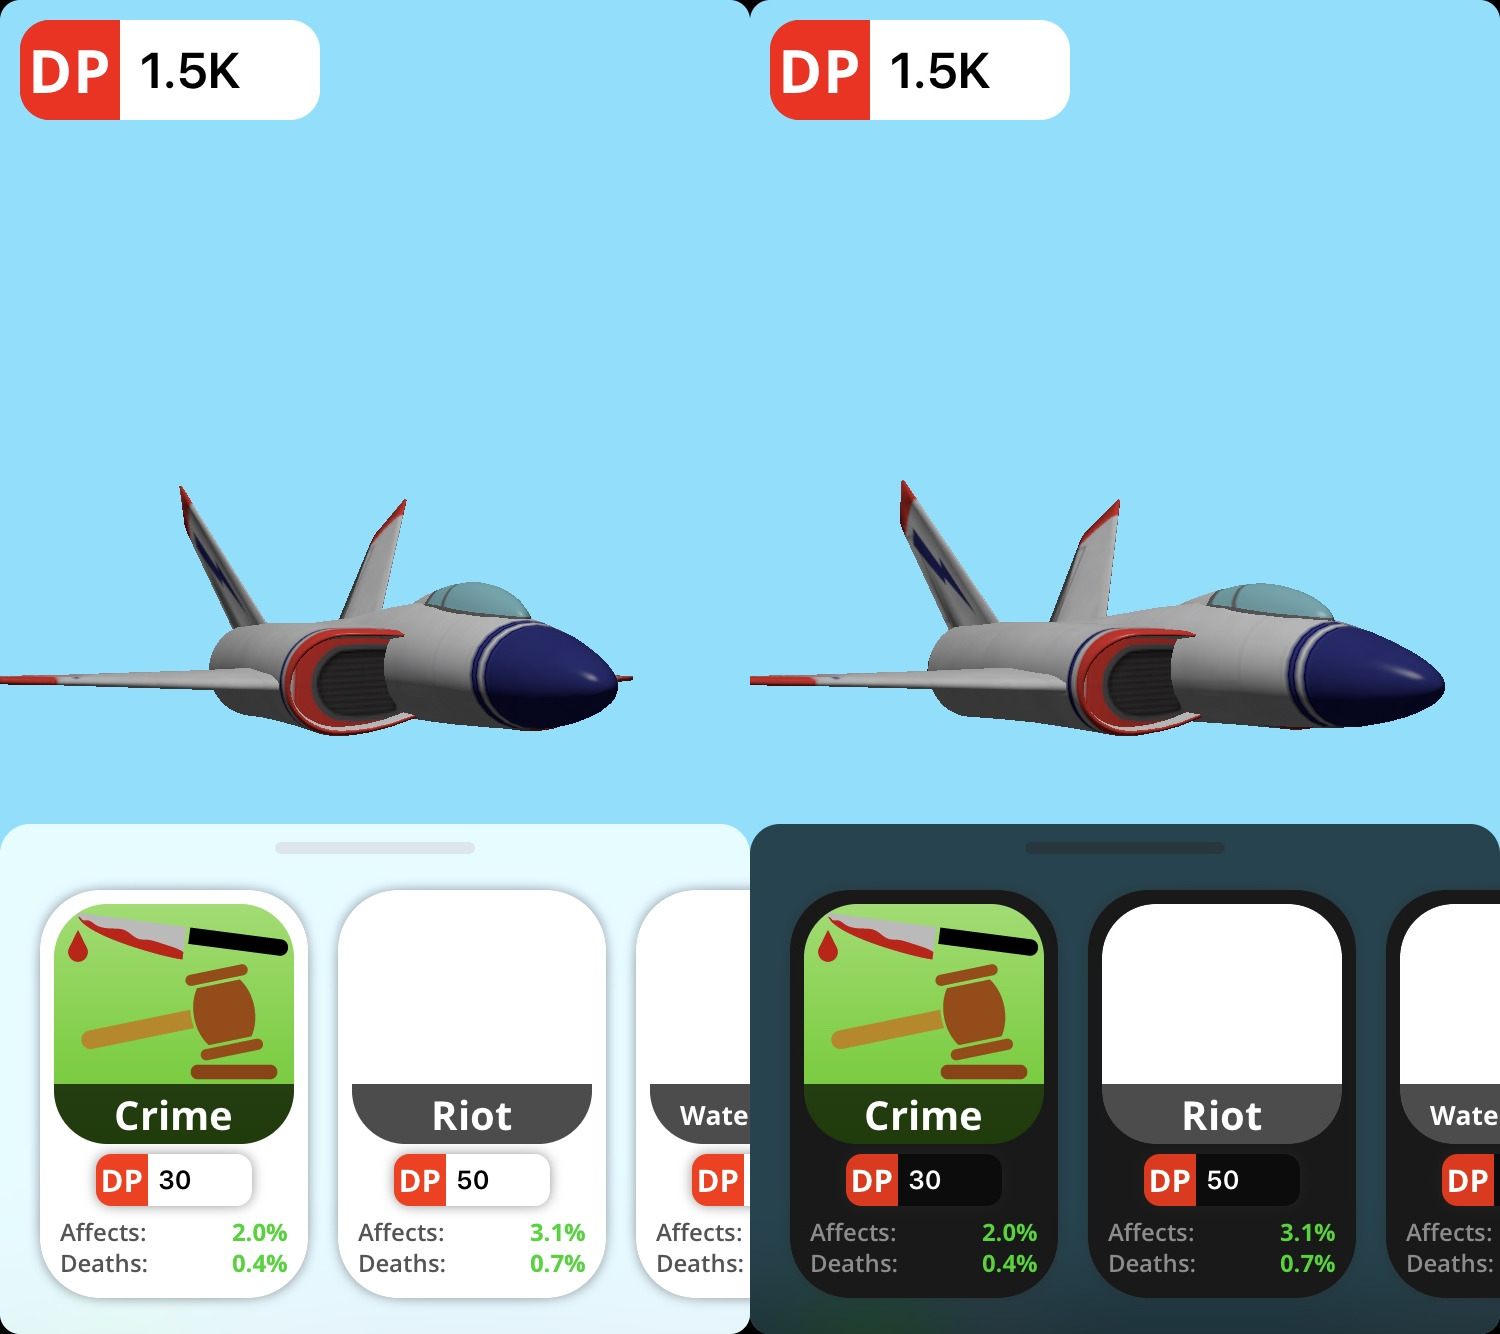
Edit - Added an image of my light/dark modes to make my question clearer:

Light/dark modes

Venezuela answered 15/4, 2019 at 21:1 Comment(3)
Create function of theme update in your baseController and override that method in everyoController Put UI Updating logic in that function and when device shaked call the overrided method ... i have done it like sameMartlet
as Abu UI Hassan said Create method in base controller override in every controller , Put logic there for your theme update. You have to use NotificationCenter to broadcast the message to every controller that controller has to change the theme.Senegal
Here is a good example of how to use composite design pattern to apply a theme to any hierarchy of views. It can be extended to view controllers too refactoring.guru/design-patterns/composite/swift/…Aeolian
V
1

I finally figured it out, using NotificationCenter!

GEUserSettings

GEUserSettings now looks like the following:

enum GEUserSettings {

    enum Theme: String {
        case light
        case dark
    }
    /// The current theme for the user.
    static var theme: Theme = .dark
    #warning("Store theme in UserDefaults")

    /// Toggles the theme.
    static func toggleTheme() {
        switch GEUserSettings.theme {
        case .light:    theme = .dark
        case .dark:     theme = .light
        }

        NotificationCenter.default.post(name: Notification.Name("UpdateThemeNotification"), object: nil)
    }
}

GEView

GEView is my custom subclass of UIView. This is a replacement instead of my extension to UIView. It now looks similar to this:

/// UIView subclass to allow creating corners, shadows, and borders in storyboards.
@IBDesignable
final class GEView: UIView {

    // MARK: - Initializers
    override init(frame: CGRect) {
        super.init(frame: frame)
    }
    required init?(coder aDecoder: NSCoder) {
        super.init(coder: aDecoder)

        // Triggers when the theme is changed
        NotificationCenter.default.addObserver(self, selector: #selector(updateBackgroundColorNotification), name: Notification.Name("UpdateThemeNotification"), object: nil)
    }
    @objc
    private func updateBackgroundColorNotification() {
        updateBackgroundColor()
    }


    /* ... */


    // MARK: - Background
    @IBInspectable
    var lightBackgroundColor: UIColor? {
        didSet {
            updateBackgroundColor()
        }
    }
    @IBInspectable
    var darkBackgroundColor: UIColor? {
        didSet {
            updateBackgroundColor()
        }
    }

    /// Updates the background color depending on the theme.
    private func updateBackgroundColor() {
        switch GEUserSettings.theme {
        case .light:    backgroundColor = self.lightBackgroundColor
        case .dark:     backgroundColor = self.darkBackgroundColor
        }
    }
}

Updating through motionBegan(_:with:)

override func motionBegan(_ motion: UIEvent.EventSubtype, with event: UIEvent?) {
    super.motionBegan(motion, with: event)

    // Toggles the theme and update the views
    GEUserSettings.toggleTheme()
    drawerViewModel.updateBlurEffect(drawerView: drawerView)
}

And the blur is removed and recreated, as such:

/// Creates the blur effect behind the collection view.
func updateBlurEffect(drawerView: GEView) {
    if let blurView = drawerView.subviews[0] as? UIVisualEffectView {
        blurView.removeFromSuperview()
    }

    let blurEffect: UIBlurEffect = {
        switch GEUserSettings.theme {
        case .light:    return UIBlurEffect(style: .light)
        case .dark:     return UIBlurEffect(style: .dark)
        }
    }()
    let blurView = UIVisualEffectView(effect: blurEffect)

    drawerView.addSubview(blurView)
    drawerView.sendSubviewToBack(blurView)
    GEConstraints.fillView(with: blurView, for: drawerView)
}

This doesn't even require quitting the app or reloading the view controller, it happens instantly!

Extra (animations)

If you wish, you can also animate the color change by changing the updateBackgroundColor() function:

/// Updates the background color depending on the theme.
private func updateBackgroundColor() {
    UIView.animate(withDuration: 0.25) {
        switch GEUserSettings.theme {
        case .light:    self.backgroundColor = self.lightBackgroundColor
        case .dark:     self.backgroundColor = self.darkBackgroundColor
        }
    }
}

You can also animate the blur as well:

/// Creates the blur effect behind the collection view.
func updateBlurEffect(drawerView: GEView) {
    if let blurView = drawerView.subviews[0] as? UIVisualEffectView {
        UIView.animate(withDuration: 0.25, animations: {
            blurView.alpha = 0
        }, completion: { _ in
            blurView.removeFromSuperview()
        })
    }

    let blurEffect: UIBlurEffect = {
        switch GEUserSettings.theme {
        case .light:    return UIBlurEffect(style: .light)
        case .dark:     return UIBlurEffect(style: .dark)
        }
    }()
    let blurView = UIVisualEffectView(effect: blurEffect)
    blurView.alpha = 0

    drawerView.addSubview(blurView)
    drawerView.sendSubviewToBack(blurView)
    GEConstraints.fillView(with: blurView, for: drawerView)

    UIView.animate(withDuration: 0.25, animations: {
        blurView.alpha = 1
    })
}
Venezuela answered 16/4, 2019 at 12:8 Comment(0)
L
1

If you are going to use themes in your app Apple offers the UIApperance protocol that helps you change controls properties of a certain kind at the same time, using this you'll have an uniform appearance for your UI. The way to use is really simple, to change all UILabel background color is like this:

UILabel.apperance().backgroundColor = .lightGray

If you want to manage everything in a single place like in your sample code you can create a struct the contains the characteristics for your UI, check this struct (I used the same name you did):

import UIKit

struct GEUserSettings {
    enum Theme { case light, dark }

    static public var theme: Theme = .light {
        didSet {
            guard theme != oldValue else { return }
            apply()
        }
    }
    static weak var window: UIWindow?

    static public func toggleTheme() {
        self.theme = theme == .light ? .dark : .light
    }

    static private func apply() {
        setColors()
        if let window = window {
            window.subviews.forEach({ (view: UIView) in
                view.removeFromSuperview()
                window.addSubview(view)
            })
        }
    }

    static public func setColors() {
        switch theme {
        case .light:
            UILabel.appearance().textColor = .black
            UISegmentedControl.appearance().tintColor = .blue
            UILabel.appearance(whenContainedInInstancesOf:    [UISegmentedControl.self]).backgroundColor = .clear
            UITableViewHeaderFooterView.appearance().backgroundColor = .lightGray
            UITableView.appearance().backgroundColor = .white
        case .dark:
            UILabel.appearance().textColor = .red
            UISegmentedControl.appearance().tintColor = .purple
            UILabel.appearance(whenContainedInInstancesOf: [UISegmentedControl.self]).backgroundColor = .clear
            UITableViewHeaderFooterView.appearance().backgroundColor = .black        
            UITableView.appearance().backgroundColor = .darkGray
        }
    }
}

In the AppDelegate, or as soon as possible, you should pass the UIWindow reference to the theme manager struct. I did it in the AppDelegate didFinishLaunchingWithOptions. This is necessary in order to make the color changes immediately.

With this struct defined you can customize any UI control as you wish. For example, you may define a certain background color for UILabel and have a different one if it is contain in a UISegmentedControl.

The shake event you define can toggle between themes like this:

override func motionBegan(_ motion: UIEvent.EventSubtype, with event: UIEvent?) {
    GEUserSettings.toggleTheme()
}

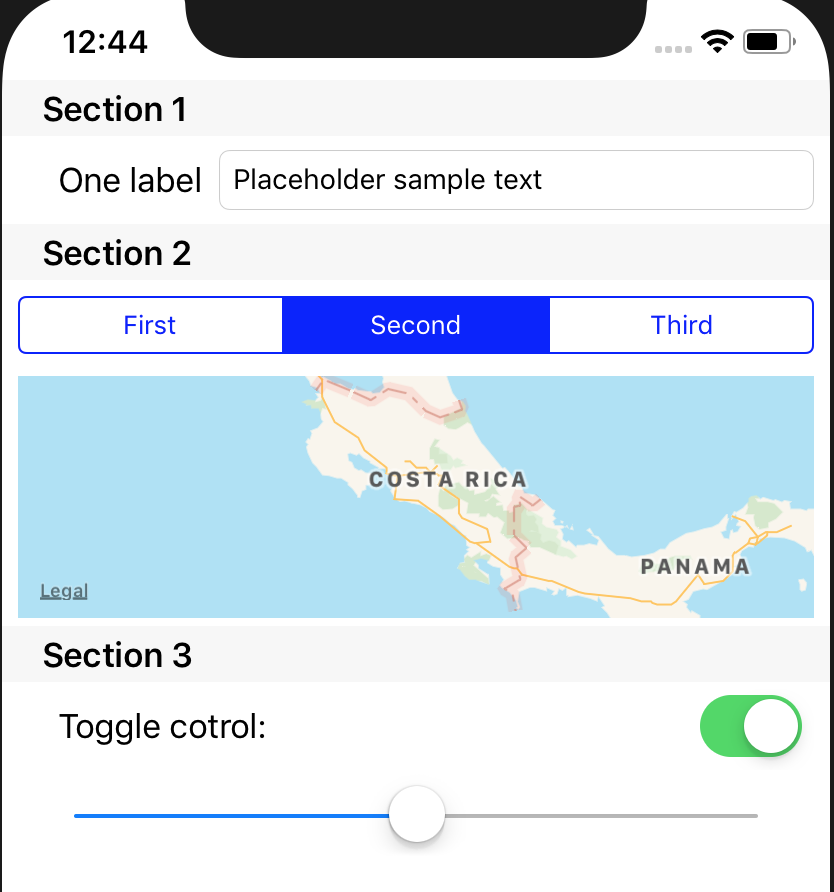
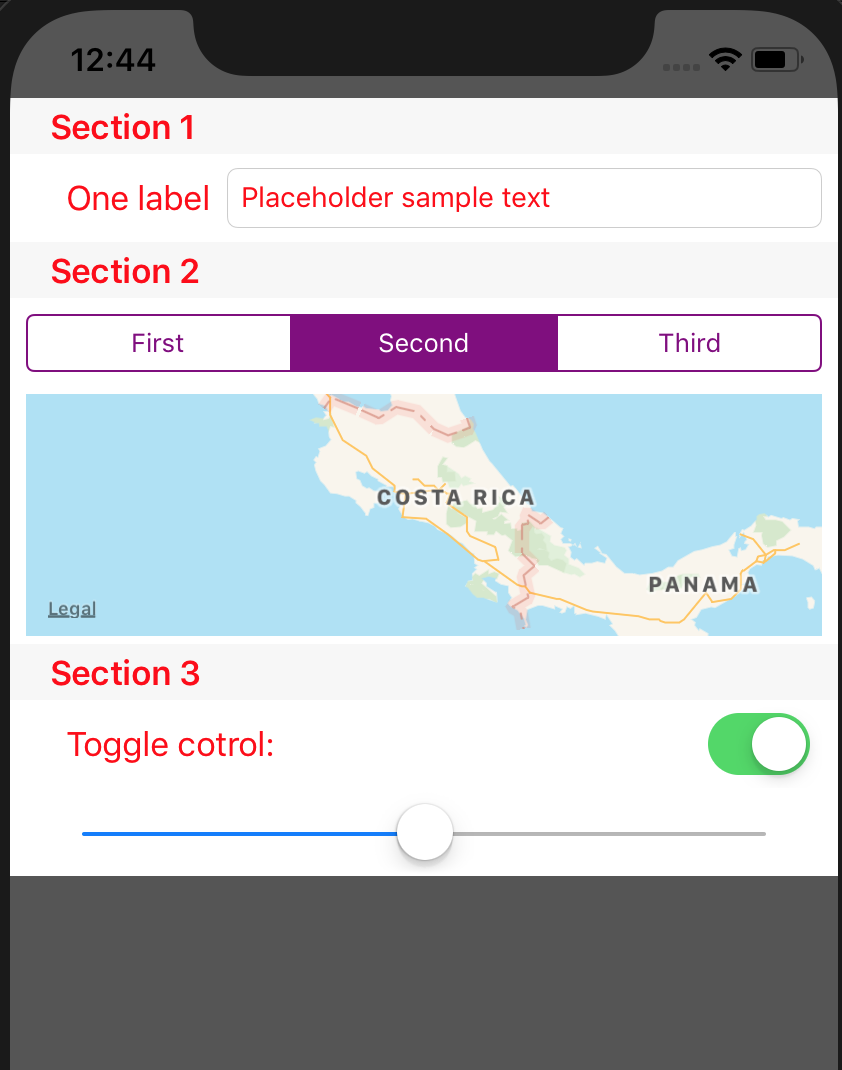
If you shake the device the screens will toggle between this two (I only changed a few properties):

Light mode

Dark mode

If you want to play with the sample project is available at Github

Hope I helps!

Loafer answered 16/4, 2019 at 6:49 Comment(3)
What about when I only want certain views to change colour? Can I do that? For example, I have multiple UIViews. They are different colours in light mode, and also different colours in dark mode. How do achieve this?Venezuela
In that case is not that easy but you could either put those views inside a container of certain class or specialized those views in a new empty class that inherits from a base class. For example: you have three different UILabels. Create some empty classes that inherit from UILabel like UIRedLabel, UIGreenLabel and UIBlueLabel. Then in your theme manager you set different properties to those classes, something like: UIRedLabel.apperance().textColor = .red, UIGreenLabel.apperance().textColor = .green, etc.Loafer
I added my last comment from my phone and didn't see your solution. Nice one! I'll try that blur effect when I get home tonight.Loafer
V
1

I finally figured it out, using NotificationCenter!

GEUserSettings

GEUserSettings now looks like the following:

enum GEUserSettings {

    enum Theme: String {
        case light
        case dark
    }
    /// The current theme for the user.
    static var theme: Theme = .dark
    #warning("Store theme in UserDefaults")

    /// Toggles the theme.
    static func toggleTheme() {
        switch GEUserSettings.theme {
        case .light:    theme = .dark
        case .dark:     theme = .light
        }

        NotificationCenter.default.post(name: Notification.Name("UpdateThemeNotification"), object: nil)
    }
}

GEView

GEView is my custom subclass of UIView. This is a replacement instead of my extension to UIView. It now looks similar to this:

/// UIView subclass to allow creating corners, shadows, and borders in storyboards.
@IBDesignable
final class GEView: UIView {

    // MARK: - Initializers
    override init(frame: CGRect) {
        super.init(frame: frame)
    }
    required init?(coder aDecoder: NSCoder) {
        super.init(coder: aDecoder)

        // Triggers when the theme is changed
        NotificationCenter.default.addObserver(self, selector: #selector(updateBackgroundColorNotification), name: Notification.Name("UpdateThemeNotification"), object: nil)
    }
    @objc
    private func updateBackgroundColorNotification() {
        updateBackgroundColor()
    }


    /* ... */


    // MARK: - Background
    @IBInspectable
    var lightBackgroundColor: UIColor? {
        didSet {
            updateBackgroundColor()
        }
    }
    @IBInspectable
    var darkBackgroundColor: UIColor? {
        didSet {
            updateBackgroundColor()
        }
    }

    /// Updates the background color depending on the theme.
    private func updateBackgroundColor() {
        switch GEUserSettings.theme {
        case .light:    backgroundColor = self.lightBackgroundColor
        case .dark:     backgroundColor = self.darkBackgroundColor
        }
    }
}

Updating through motionBegan(_:with:)

override func motionBegan(_ motion: UIEvent.EventSubtype, with event: UIEvent?) {
    super.motionBegan(motion, with: event)

    // Toggles the theme and update the views
    GEUserSettings.toggleTheme()
    drawerViewModel.updateBlurEffect(drawerView: drawerView)
}

And the blur is removed and recreated, as such:

/// Creates the blur effect behind the collection view.
func updateBlurEffect(drawerView: GEView) {
    if let blurView = drawerView.subviews[0] as? UIVisualEffectView {
        blurView.removeFromSuperview()
    }

    let blurEffect: UIBlurEffect = {
        switch GEUserSettings.theme {
        case .light:    return UIBlurEffect(style: .light)
        case .dark:     return UIBlurEffect(style: .dark)
        }
    }()
    let blurView = UIVisualEffectView(effect: blurEffect)

    drawerView.addSubview(blurView)
    drawerView.sendSubviewToBack(blurView)
    GEConstraints.fillView(with: blurView, for: drawerView)
}

This doesn't even require quitting the app or reloading the view controller, it happens instantly!

Extra (animations)

If you wish, you can also animate the color change by changing the updateBackgroundColor() function:

/// Updates the background color depending on the theme.
private func updateBackgroundColor() {
    UIView.animate(withDuration: 0.25) {
        switch GEUserSettings.theme {
        case .light:    self.backgroundColor = self.lightBackgroundColor
        case .dark:     self.backgroundColor = self.darkBackgroundColor
        }
    }
}

You can also animate the blur as well:

/// Creates the blur effect behind the collection view.
func updateBlurEffect(drawerView: GEView) {
    if let blurView = drawerView.subviews[0] as? UIVisualEffectView {
        UIView.animate(withDuration: 0.25, animations: {
            blurView.alpha = 0
        }, completion: { _ in
            blurView.removeFromSuperview()
        })
    }

    let blurEffect: UIBlurEffect = {
        switch GEUserSettings.theme {
        case .light:    return UIBlurEffect(style: .light)
        case .dark:     return UIBlurEffect(style: .dark)
        }
    }()
    let blurView = UIVisualEffectView(effect: blurEffect)
    blurView.alpha = 0

    drawerView.addSubview(blurView)
    drawerView.sendSubviewToBack(blurView)
    GEConstraints.fillView(with: blurView, for: drawerView)

    UIView.animate(withDuration: 0.25, animations: {
        blurView.alpha = 1
    })
}
Venezuela answered 16/4, 2019 at 12:8 Comment(0)
M
0
    typealias Style = StyleManager
//MARK: - Style
final class StyleManager {
    static func selectedThem()->Int?
    {
        return AppUtility?.getObject(forKey: "selectedTheme") as? Int       // 1 for dark Theme ...... 2 for light Theme
    }
    static func BoldFont()->UIFont {
        return UIFont(name: FontType.bold.fontName, size: FontType.bold.fontSize)!
    }
    // MARK: - Style
    static func setUpTheme() {
        Chameleon.setGlobalThemeUsingPrimaryColor(primaryTheme(), withSecondaryColor: theme(), usingFontName: font(), andContentStyle: content())
    }
    // MARK: - Theme
    static func SetPagerViewsColor()->UIColor
    {
       return secondarythemeColor
    }
    static func primaryTheme() -> UIColor {
        setCheckMarkBackground()
        if selectedThem() == 1
        {
            return UIColor.white
        }
        else
        {
            return OddRowColorlight
        }
    }
    static func theme() -> UIColor {
        if selectedThem() == 1
        {
            EvenRowColor = EvenRowColordark
            OddRowColor = OddRowColorlight
            primaryThemeColor=EvenRowColor
            secondarythemeColor=OddRowColor
            return darkGrayThemeColor
        }
        else
        {
            EvenRowColor = lightWhiteThemeColor!
            OddRowColor = UIColor.white
            primaryThemeColor=EvenRowColor
            secondarythemeColor=OddRowColor
            return lightWhiteThemeColor!
        }
        // return FlatWhite()
    }
    static func toolBarTheme() -> UIColor {
        if selectedThem() == 1
        {
            return UIColor.white
        }
        else
        {
            return FlatBlack()
        }
    }
    static func tintTheme() -> UIColor {
        if selectedThem() == 1
        {
            return UIColor.white
        }
        else
        {
            return FlatBlack()
        }
    }
    static func titleTextTheme() -> UIColor {
        if selectedThem() == 1
        {
            return UIColor.white
        }
        else
        {
            return UIColor.white
        }
    }
    static func titleTheme() -> UIColor {
        if selectedThem() == 1
        {
            return darkGrayThemeColor
        }
        else
        {
            return FlatWhite()
        }
    }
    static func textTheme() -> UIColor {
        if selectedThem() == 1
        {
            return UIColor.white
        }
        else
        {
            return FlatBlack()
        }
        //return FlatMint()
    }
    static func backgroudTheme() -> UIColor {
        if selectedThem() == 1
        {

            return .darkGray
        }
        else
        { 
            return .white
        }
    }
}

Now Create Some variables at Global scope

var primaryThemeColor:UIColor!
var secondarythemeColor:UIColor!
var themeColor:UIColor!
var toolBarThemeColor:UIColor!
var tintThemeColor:UIColor!
var titleTextThemeColor:UIColor!
var titleThemeColor:UIColor!
var textThemeColor:UIColor!
var backgroundThemeColor:UIColor!
var positiveThemeColor:UIColor!
var negativeThemeColor:UIColor!
var clearThemeColor:UIColor!
var setCheckMarkBackgroundColor:UIColor!
var menuSectioColor:UIColor!
var menuCellColor:UIColor!
var menuBackgroundColor:UIColor!
var menuTextTHeme:UIColor!
var themeName:String!
var btnIconColor:UIColor!

Now in AppDelegate create below function and call this function in didFinish Launch

func setCurrentThemeColors()
{
    themeColor = Style.theme()
    toolBarThemeColor = Style.toolBarTheme()
    tintThemeColor = Style.tintTheme()
    titleTextThemeColor = Style.titleTextTheme()
    titleThemeColor = Style.titleTheme()
    textThemeColor = Style.textTheme()
    backgroundThemeColor = Style.backgroudTheme()
}
 func application(_ application: UIApplication, didFinishLaunchingWithOptions launchOptions: [UIApplicationLaunchOptionsKey: Any]?) -> Bool {
    self.setCurrentThemeColors()
    return true
}

Now you have all set with your theme you just need Create function of theme update in your baseController and override that method in every ViewController Put UI Updating logic in that function and when device shaked call the overrided method like below

override func motionBegan(_ motion: UIEvent.EventSubtype, with event: UIEvent?) {
print("Shaken!")
updateTheme()
appDelegate.setCurrentThemeColors()
}

  func setLightTheme(){
    AppUtility?.saveObject(obj: 0 as AnyObject, forKey: "selectedTheme")
}
func setDarkTheme(){
    AppUtility?.saveObject(obj: 1 as AnyObject, forKey: "selectedTheme")
}
func updateTheme()
{
    let theme = AppUtility?.getObject(forKey: "selectedTheme") as? Int
    if theme != nil
    {
        _ = theme == 1 ? setLightTheme() : setDarkTheme()
    }
    else
    {
        setDarkTheme()
    }
    appDelegate.setCurrentThemeColors()
    ConfigureView()

}
 func ConfigureView(){
    btnDownLoadPdf.backgroundColor = .clear
    btnRightSide.backgroundColor = .clear
    btnRefreshPage.backgroundColor = .clear
    self.View.backgroundColor = secondarythemeColor
    PeriodicePastDatesPickerView.backgroundColor = secondarythemeColor
    customDatePicker.backgroundColor = secondarythemeColor
    UnitPicker.backgroundColor = secondarythemeColor
    currencyPicker.backgroundColor = secondarythemeColor
}

Note: You have to Update Colors according to your need it contains some of color that will not be available in your case

Martlet answered 16/4, 2019 at 4:46 Comment(0)

© 2022 - 2024 — McMap. All rights reserved.