How to create custom Document Icon in iOS 14+ apps
Asked Answered
P

2

10

I am trying to create a custom document icon for my multi-platform (iOS 14 - macOS Big Sur) app.

So, for macOS, it's pretty easy, I can either attach a legacy icon, or better, supply a combination of background, image and text, to composite a document icon, as described in macOS Document Icon Human Interface Guidelines.

So, in Info.plist, the UTExportedTypeDeclarations would contain a UTTypeIcons key like the following:

        <key>UTTypeIcons</key>
        <dict>
            <key>UTTypeIconBackgroundName</key>
            <string>Icon Fill</string>
            <key>UTTypeIconBadgeName</key>
            <string>Icon Image</string>
            <key>UTTypeIconText</key>
            <string>Dapka</string>
        </dict>

Now, the real challenge is in the iOS document icon. First, there are no updated documentation. Second, I couldn't do it like I did with macOS. Here, I should only supply one image, so I uploaded it as PNG in Resources folder, and then modified the UTExportedTypeDeclarations in Info.plist as following:

        <key>UTTypeIconFiles</key>
        <array>
            <string>Document Icon</string>
        </array>

But, the icon didn't appear correctly, it appeared as a centered image with white background, and no text.

Any ideas?

Professional answered 30/9, 2021 at 9:29 Comment(2)
I'm unsure if you can add text to an icon thumbnail as macOS does, can't find any documentation references to plist keys that would enable such capability, but regarding image, you can add Thumbnail Extension to your application and draw the thumbnail.Aq
archive HIG link: web.archive.org/web/20210303220216/https://developer.apple.com/…Prickett
D
1

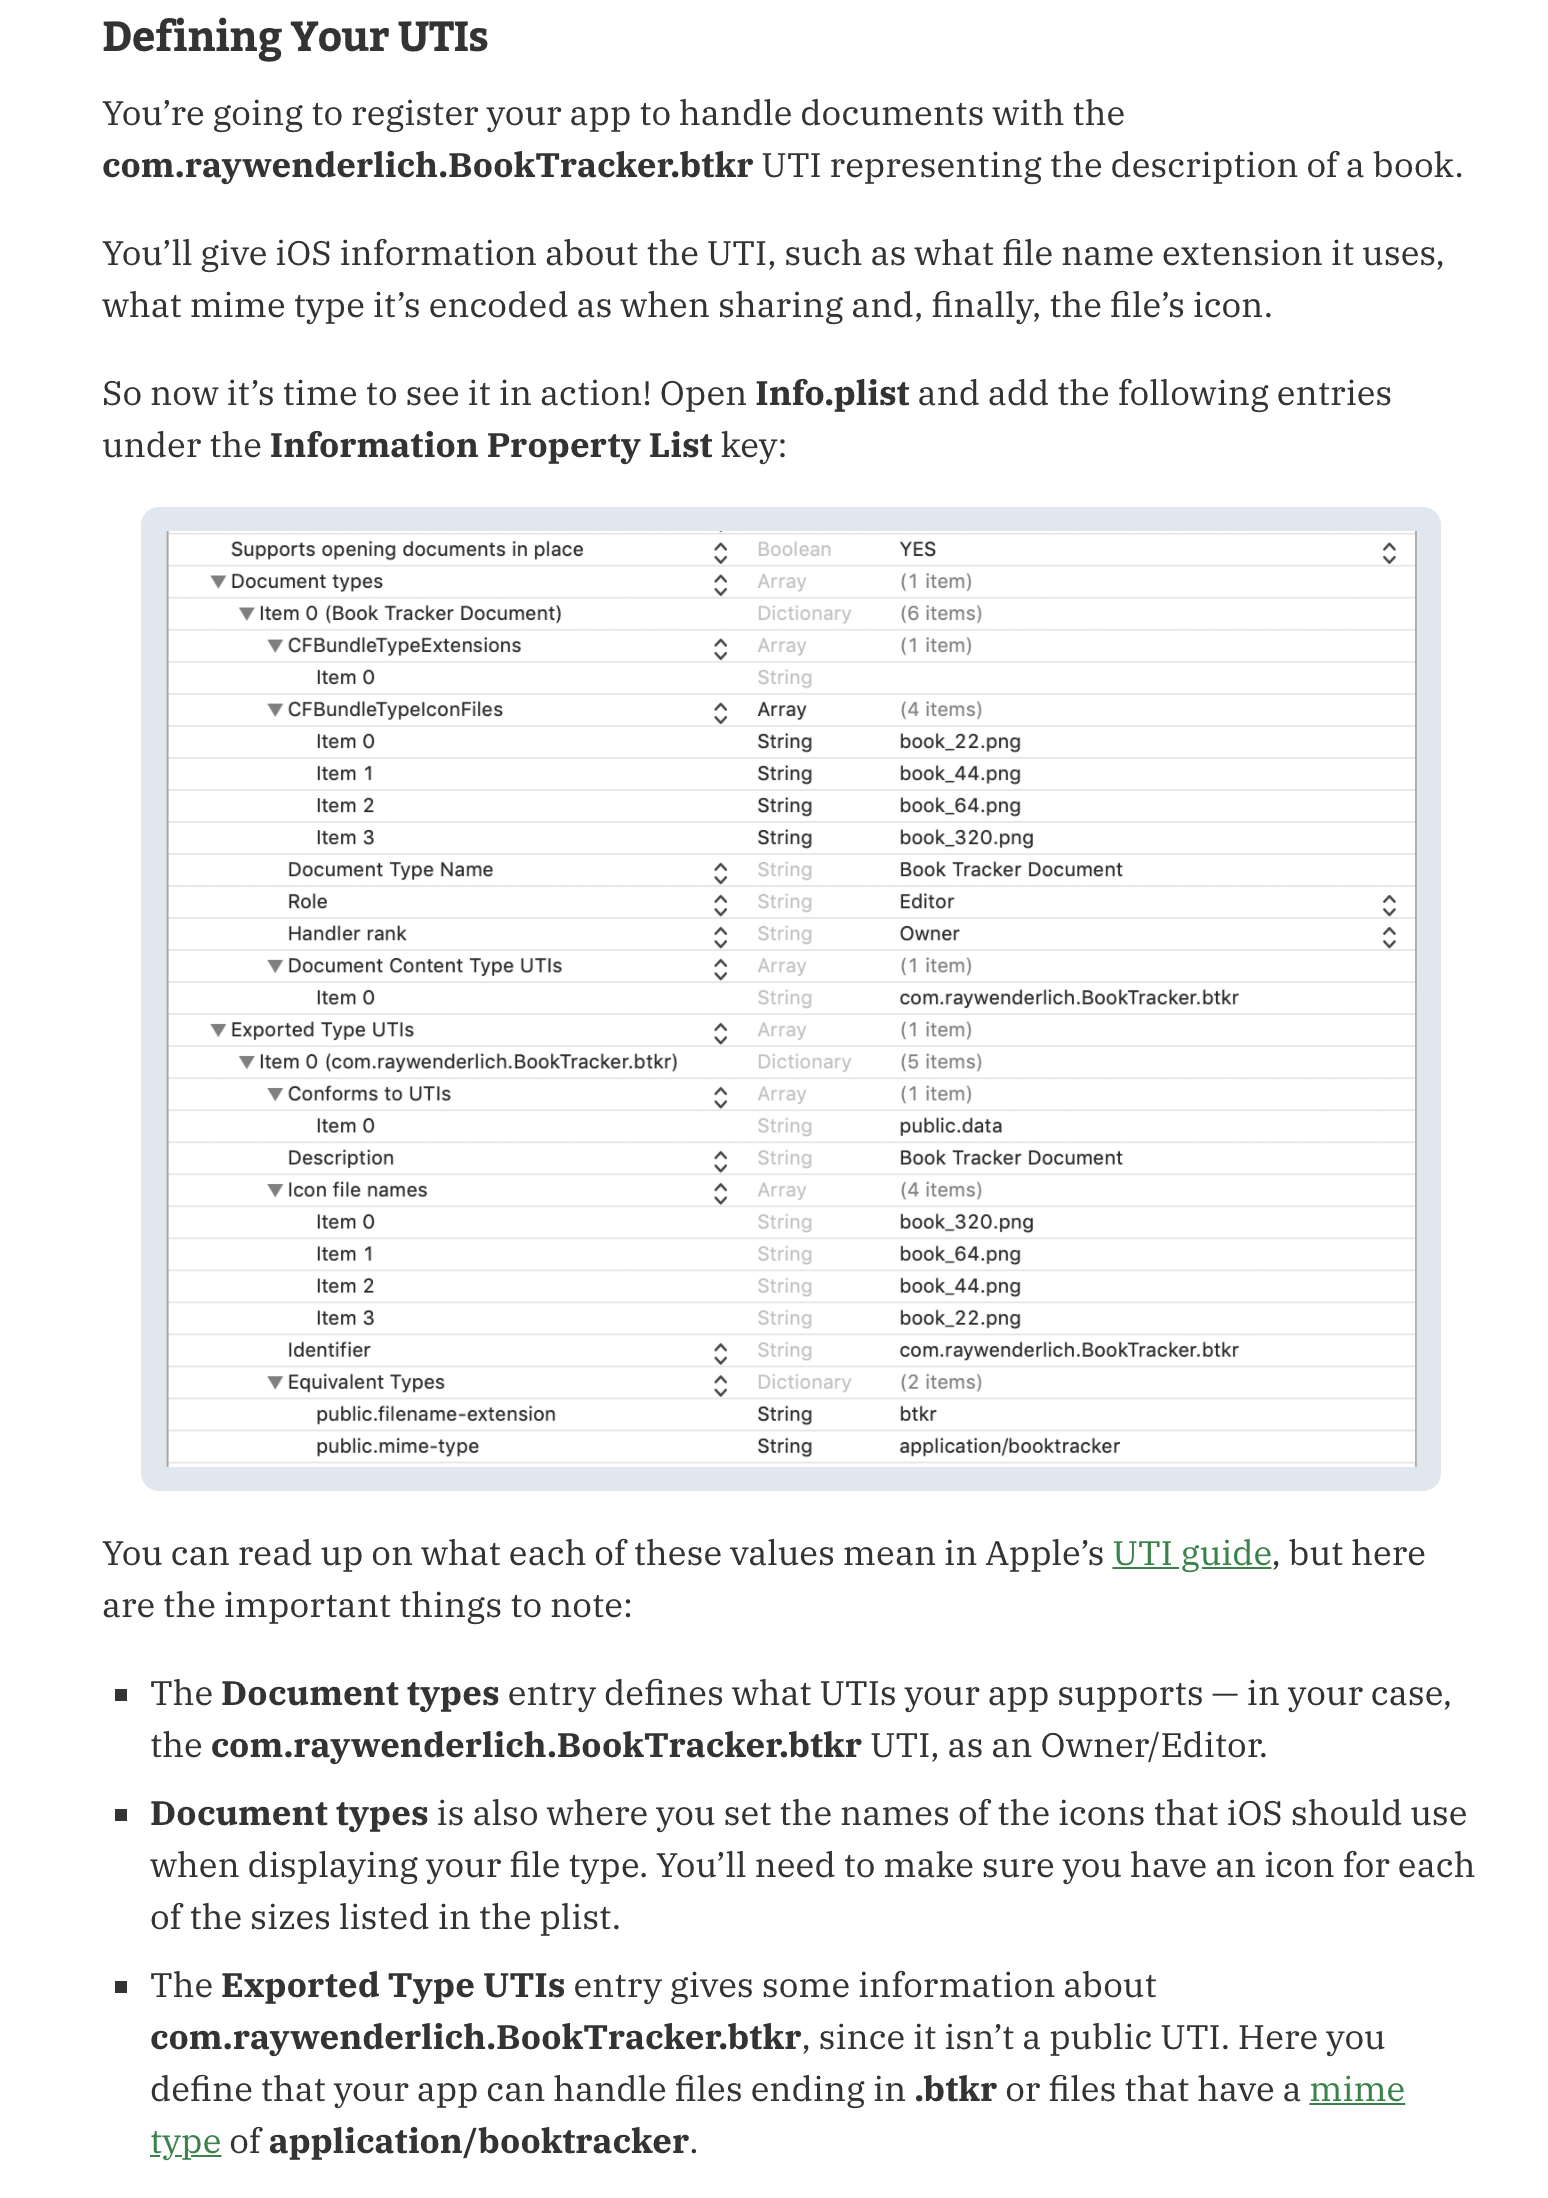
You need to add CFBundleTypeIconsFiles in your Document Type in info.plist

enter image description here

Dogtired answered 12/10, 2021 at 13:11 Comment(0)
T
0

For anyone struggling with this issue in the future:

I've tested this on Xcode 15, and it works on both macOS (14) and iOS (17).

First, make sure you set up both "Document Type" and "Export Type" for macOS and iOS/iPadOS as other tutorials instruct.


To make your icon show up :

  • For macOS, use a ".icns" file. Just copy it into your project ("Copy items if needed") and assign the name of the file to "CFBundleTypeIconFile" (Document Type) in your .plist file.

  • For iOS, use a ".png" file (I used only 1024x1024 size, and it works). Copy it into your project ("Copy items if needed") and assign the name of the file in "UTTypeIconFiles" (Export Type) in your ".plist" file.

You can name the file (both ".icns" / ".png") anything, but don't forget the extension in ".plist" file.

I've tried assigning it (.png file) to "CFBundleTypeIconFiles" for iOS, and it use app icon instead. And I've also tried using ".png" for macOS instead of ".icns", and it won't work.

Sometimes, the icons might not appear instantly. You might need to restart the simulator or factory reset (iOS / iPadOS). On macOS, try archiving the project first or export the app to another Mac. Then, try creating a file on the desktop to see if it works.


Discussion

In my theory, you need "Export Type" in iOS / iPadOS because the OS not fully support file system and it see the "Files" app as just other parties app, not like "Finder" on macOS.

In my understanding, "Document Type" refers to every kind of file app that your app want to open for the OS itself to handle it (such as "Finder" and "Open with..." feature).

But if it's the type that the system won't know before, you need to declare it in "Import Type", so the system will find the information (such as icon, description, etc.) from other parties installed apps that declare "Export Type", so in our app, we declare "Export Type", so other parties app that have declare "Import Type" with our file type will reference our "Export Type", in this case "Files" app reference our "Export Type".

Trunk answered 2/3 at 11:58 Comment(0)

© 2022 - 2024 — McMap. All rights reserved.