I imported an Obj-C file into my swift project and Xcode automatically prompted me to create a bridging header file as expected. However, I deleted both the files (moved to trash) to make some changes, but when i try to import the Obj-C file once again, the prompt doesn't come up anymore. What is the reason? I even tested this same scenario in another project, It seems once I delete Xcode's auto created bridging header, It won't bring the prompt up again another time. Why is this?
The reason of your issue is, the Xcode build settings still holds the path to auto generated Bridging Header file. You cannot get any build errors because of the header file (ProjectName-Bridging-Header.h) still exist in your project directory.
How to resolve:
Click on your project target, Go to Build Settings tab (choose all instead of basic), search for Bridging Header. You can see the Xcode generated path entry. Select it and click on delete button.
Also, make sure to delete the Xcode auto generated bridging header file (ProjectName-Bridging-Header.h) from your Xcode project directory.
Now, try to import the Obj-C file once again. You can see the prompt to create a bridging header file as expected.
File -> New File -> Header File
Save it as a YourApp-Bridging-Header
Than go to Build Settings, find "Objective-C Bridging Header" (as previously guys told) and pass way to your Bridging Header as: YourApp/YourApp-Bridging-Header.h Where 'YourApp/' is a name of app. It could contain white space, for example 'Your App/'.
In my case in xCode 7.3.1 it works
There are different way of creating Bridging Header in xcode as mention/suggested above. Here I would give you the best and easiest way of creating Bridge.
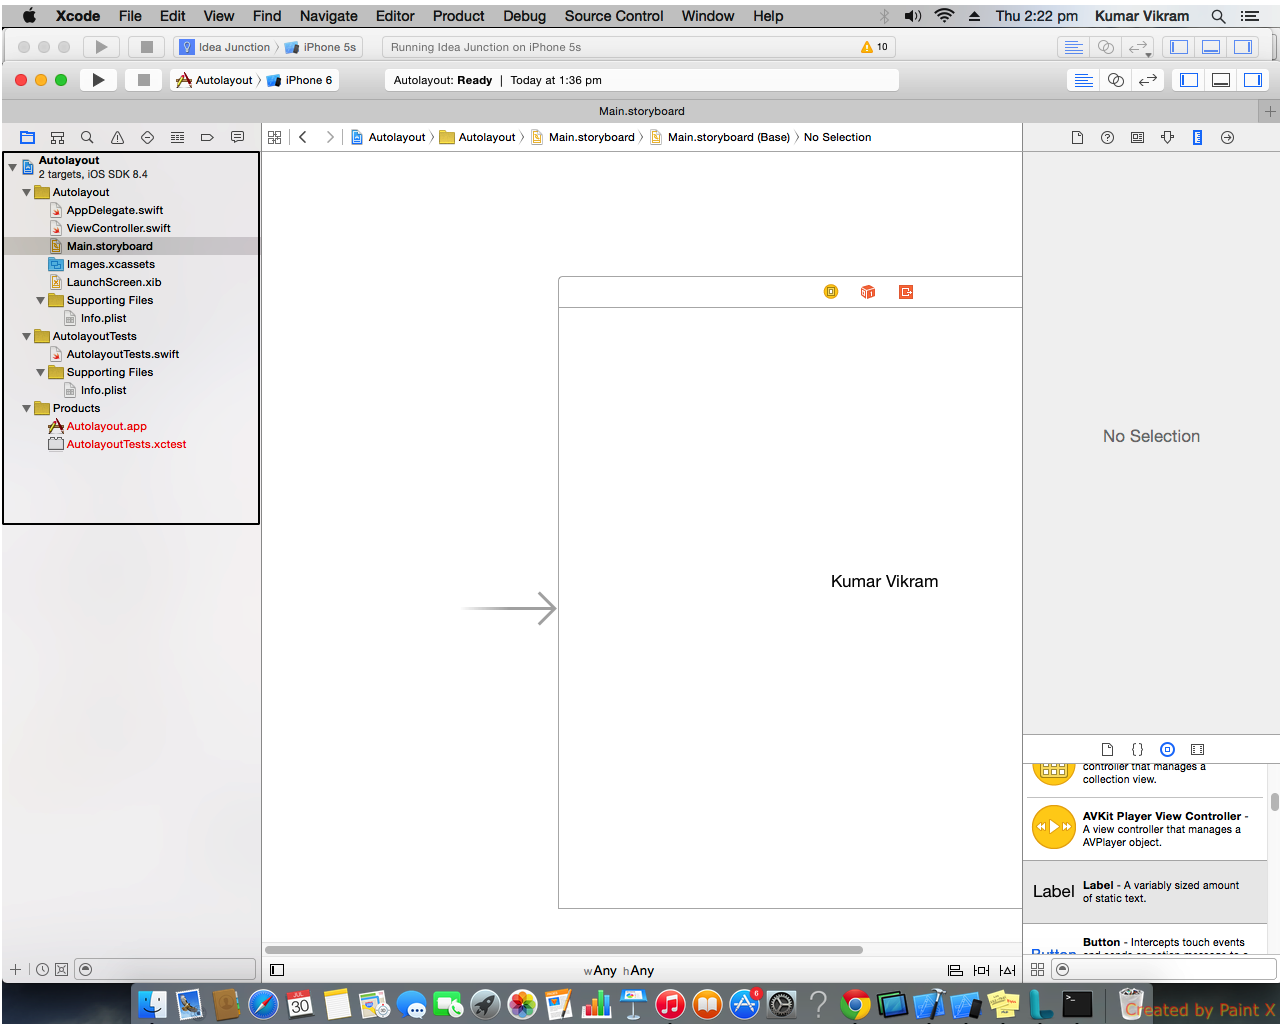
- Image1 shows that there is no bridging present at current point of time.
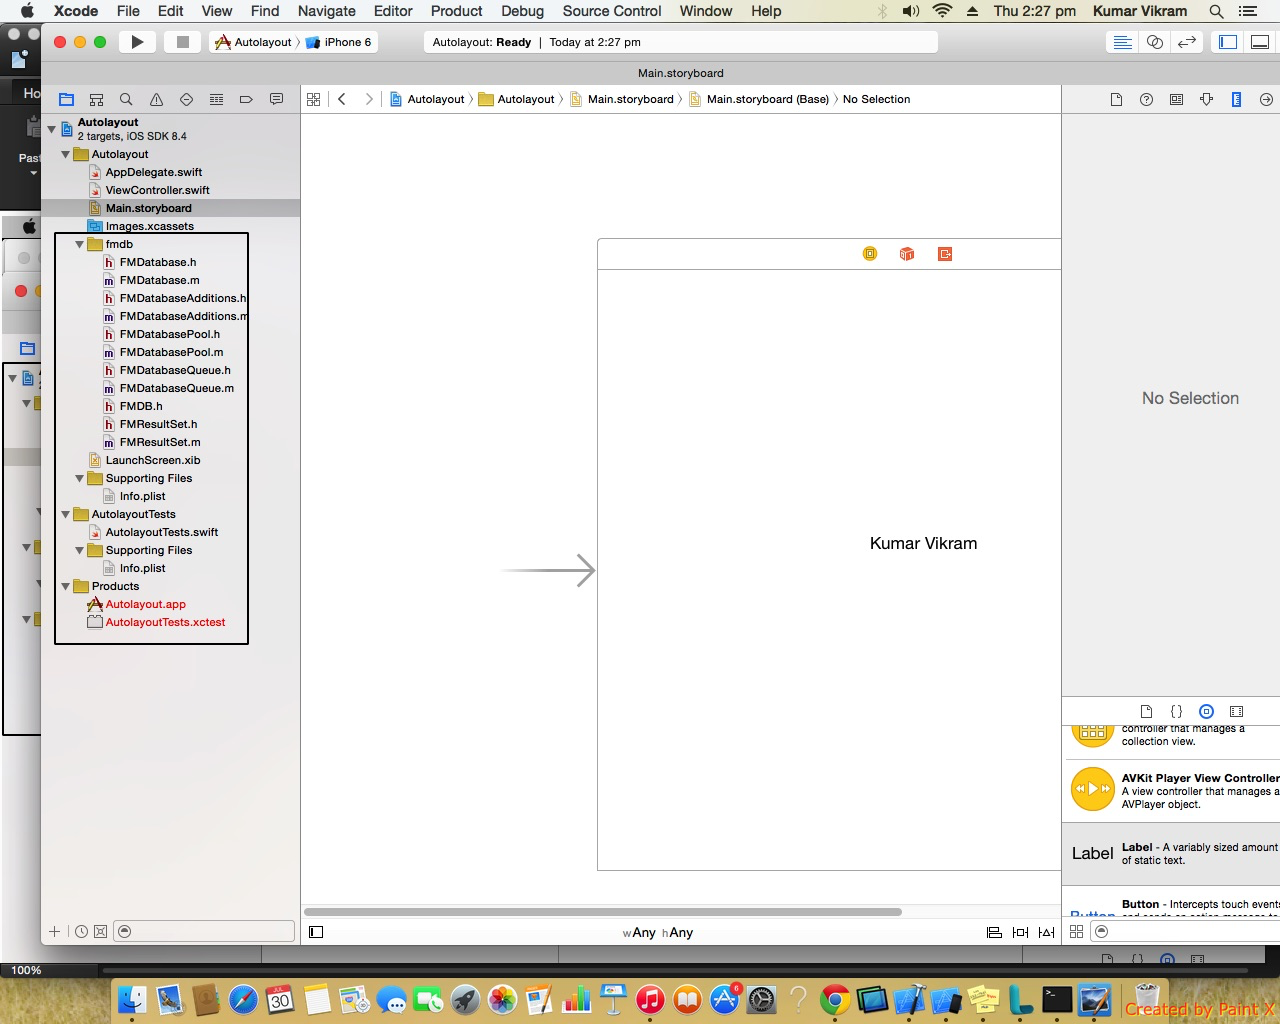
- Image2 show that I have copied a folder containing objective-c header files,after copying a popup will come on screen.
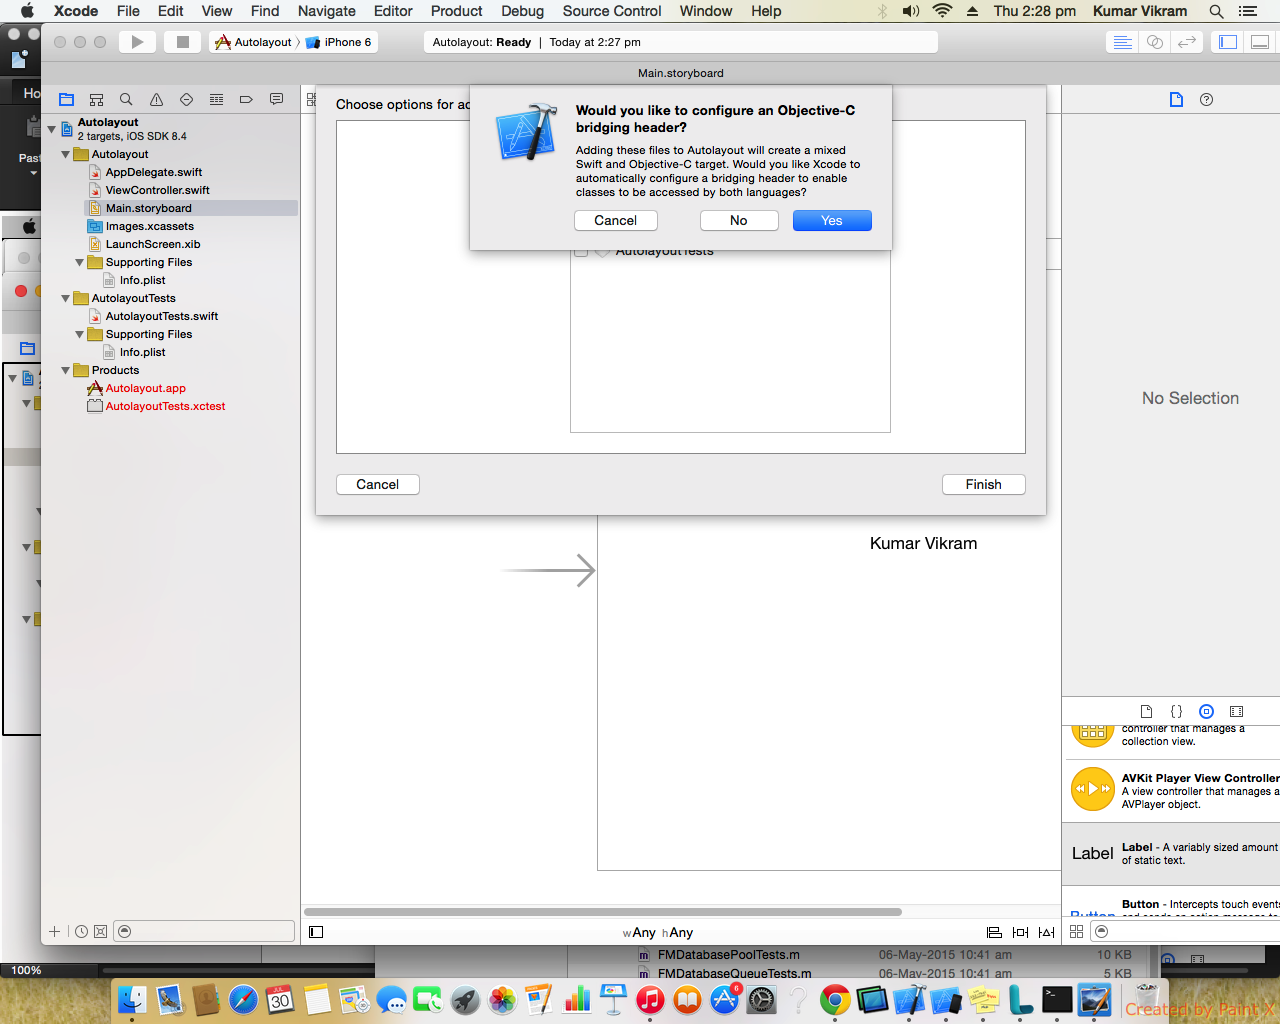
- Image3 is will show the popup message. But after pressing the finish button, you will notice that still there is no bridge present. for reference see image2.
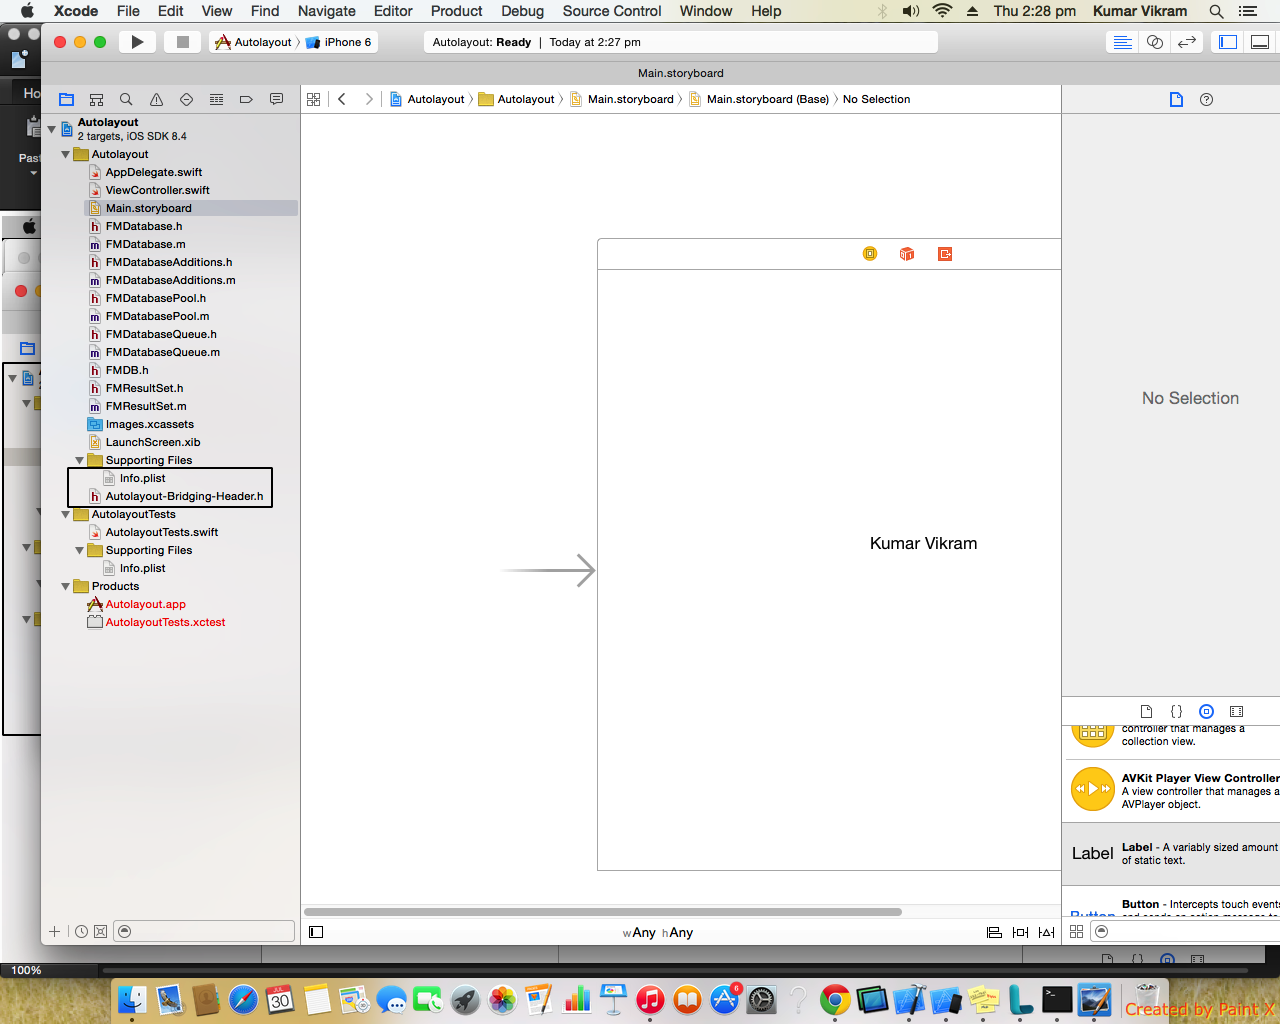
- Now in image5&6 , I just drag and drop the objective-c header file, after doing that you will get popup message.
- After pressing on finish button you get message like Would you like to configure an Objective-C bridging header?. After pressing on Yes Button you get your bridge Header,which you can see in image5.
if you want to keep your header inside one group then use New Group and drag&drop your file in that group.
Never create any folder, or else you will get error due to that.
have a look under your project settings -> build settings, scroll down to the User-Defined section, see if it has a key called SWIFT_OBJC_BRIDGING_HEADER and if it has a value. if its there it probably thinks you have one already, in that case just recreate the file with the same name.
MTL_ENABLE_DEBUG_INFO –
Porism + at the top and add a new entry with that key, then with a value APPNAME-Bridging-Header.h then just create that file in your project as well, hopefully can use it then. –
Deedradeeds Bridge file only prompt once in a project.
If you delete the file by accident, you have to build a new bridge file. It's the same.
Go to
File->New File->Header File, and the name should beYourProjectName-Bridging-Header, or else It can't be recognised.
After dealing with this issue around one hour. I found the real issue was folder!
Never Create/Copy folder.
To solve the issue-
First Create a group of any name you like. Then copy Objective-C files into the group (not folder).
Then definitely you will be prompt for Bridging Header File Creation.
If you want to configure it manually simply go to Build Settings and change the selection to ALL from Basic (Default) or customized.
Because empty fields are hidden to make things easier for the average end user, if you miss the prompt to add the bridging-header you may have difficulty finding it manually. Also the search option will not include hidden fields.
Change to All and the Swift Compiler - General section should appear with a child setting of "Objective-C Bridging Header"
Bridge file only prompt once in a project.
If you delete the file by accident, you have to build a new bridge file. It's the same.
Go to File->New File->Header File, and the name should be YourProjectName-Bridging-Header, or else It can't be recognised.
If you are working with react native finally you need to add these lines:
//
//  Use this file to import your target's public headers that you would like to expose to Swift.
//
#import <React/RCTBridgeModule.h>
#import <React/RCTViewManager.h>
#import <React/RCTLog.h>

#import <Foundation/Foundation.h>
#import <React/RCTEventEmitter.h>
#import <React/RCTConvert.h>

@interface RCT_EXTERN_MODULE(core, NSObject)
@end
- open xcode project
- File -> new -> File -> if you want .swift file then click on Swift File .h file click on Header File .m file objective c file etc
© 2022 - 2024 — McMap. All rights reserved.


